Day 12 [Back to index]
Since I'm pretty much just waiting on parts now, I'm running out of things to do. One thing I hadn't done yet was install the Walbro Fuel Pump.
I've read threads of people who think they can install the SR without upgrading the fuel pump. I'm sure you probably can if you want a shitty install that won't allow any upgrades. If you're doing the swap, fork over the $100 and do it for shits sakes and save yourself some trouble.

Since this was a fairly easy install I decided to take pictures in the process for anyone who needs help. Let's do this.
First thing to do is remove the small gray piece of metal that covers the plug for the fuel pump. A phillips head screw driver does the trick here. After that disconnect the plug that connects to the pump. Should look like this.
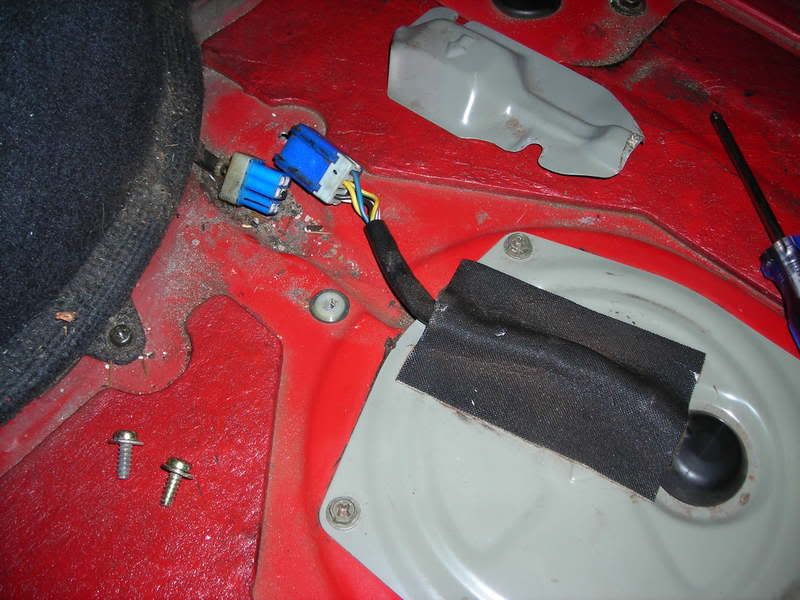
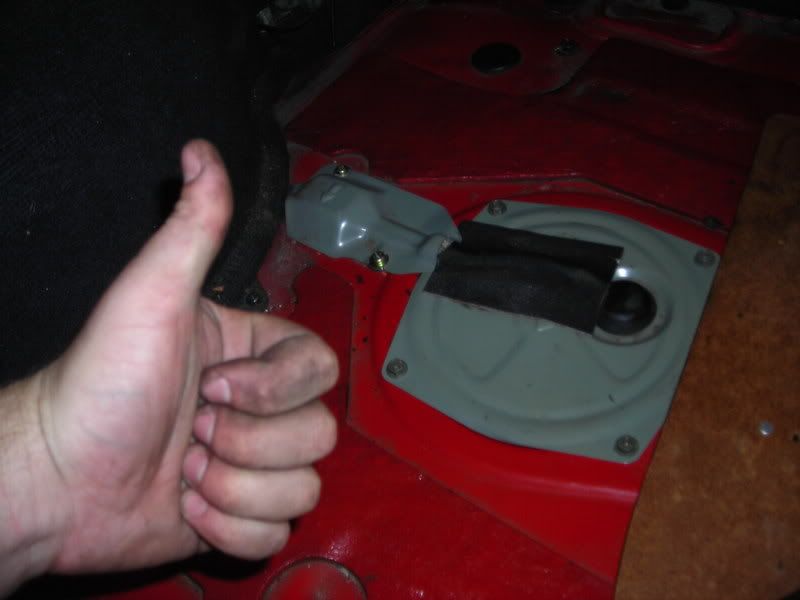
Using a 10mm socket, remove the large gray metal cover that is right next to the one we just took off. This will reveal another metal cover that is directly on top of the fuel tank. Disconnect the two fuel lines that are connected to the cover but REMEMBER HOW THEY ARE CONNECTED! If you don't, you will be reversing the flow of the fuel if you hook them up incorrectly.
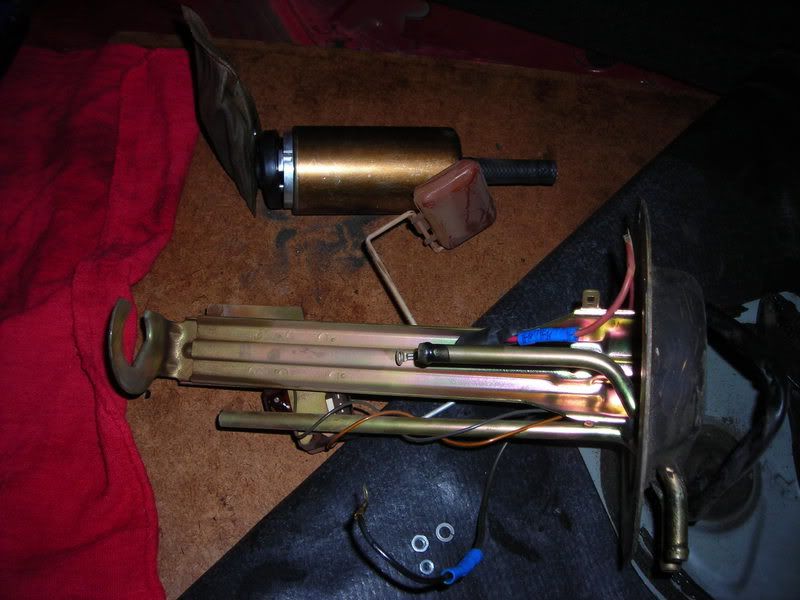
After that is done, using an 8mm socket remove the bolts that hold down that metal plate. This is it after the bolts have been removed.
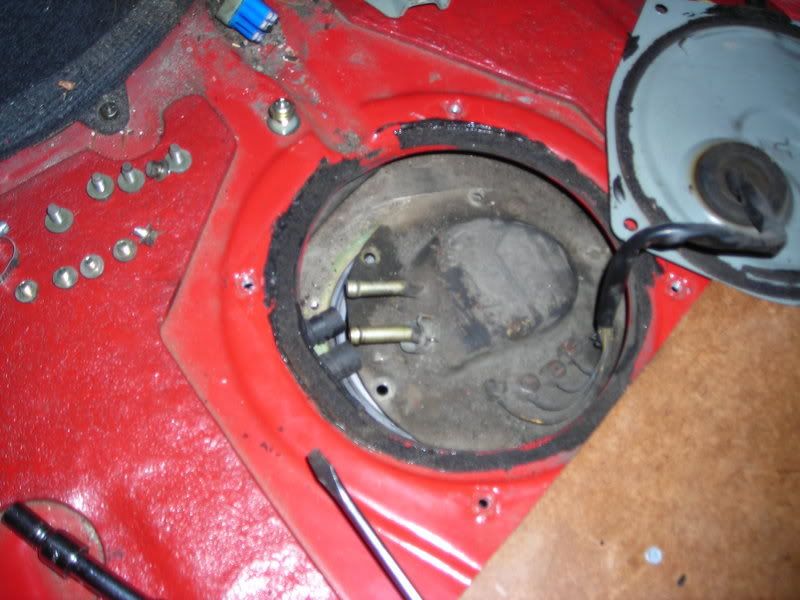
Then pull the plate straight up, do not pull it out at an angle. The fuel level sensor sticks out as well as the sock on the fuel pump and they will get caught if they don't come up straight. Here it is removed from the fuel tank.
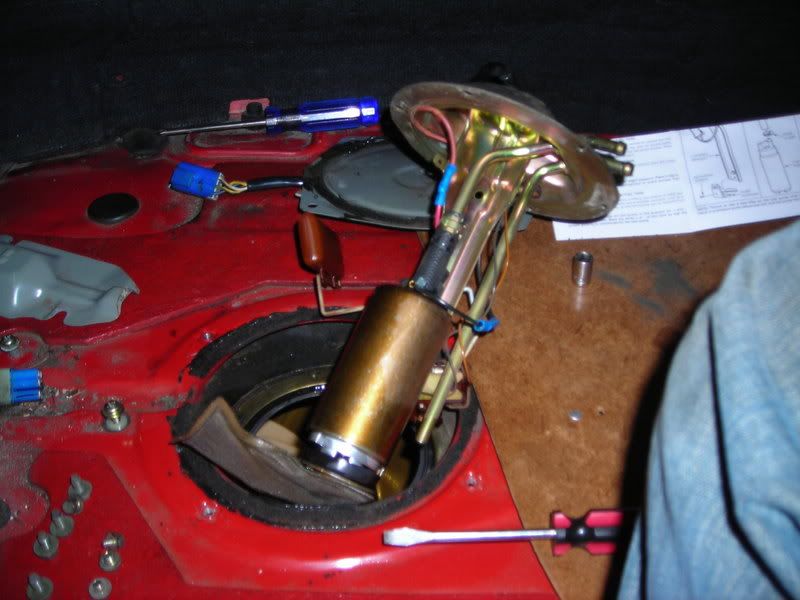
After that I covered up the hole to the fuel tank so that nothing would fall in. Look at how dirty that sock is, wonder when it was last changed?

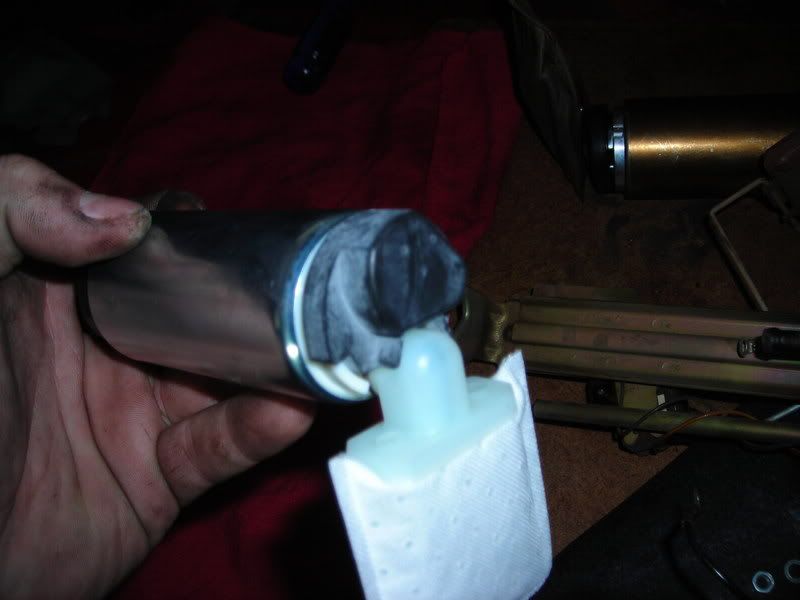
You are now ready to take the fuel pump off of the fixture that hangs into the tank. I twisted the pump and it came right off. Then remove the two wires that are connected to the pump as well as the fuel line that connects to the top of the pump. Here is the fixture with the pump removed.
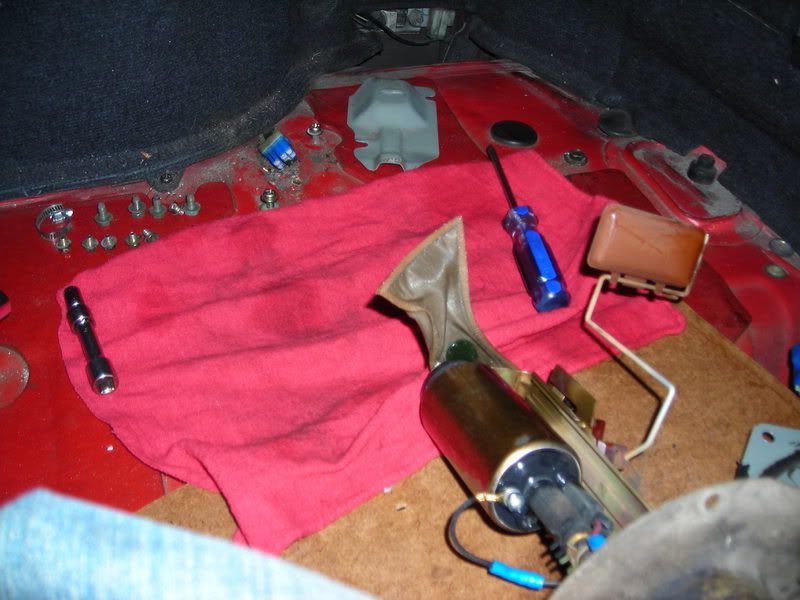
Open that beautiful new pump and install the sock and rubber boot that goes on top of that.
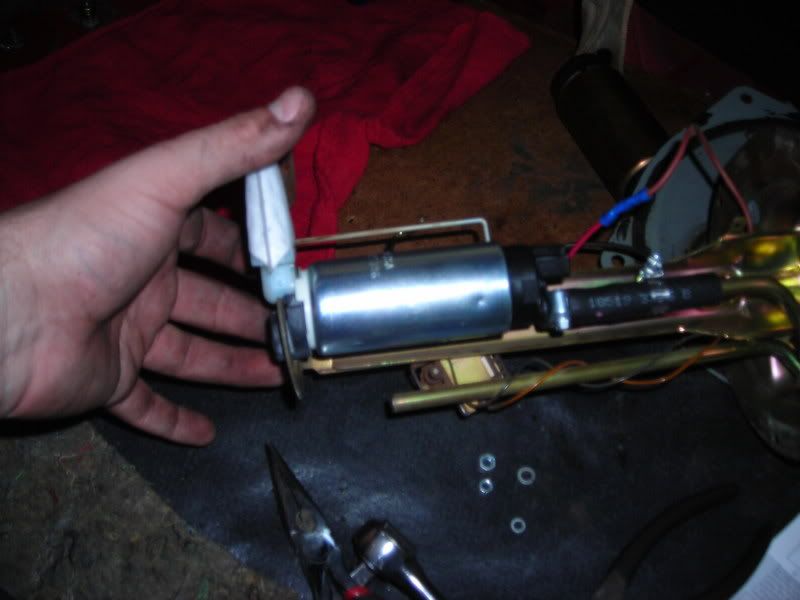
Put the new fuel line onto the pump fixture and slide the new clamps onto it while your at it. The line may need to be cut since it's pretty long. I just pushed it up further so that there was no chance of it coming off, ever. You'll notice that the rubber boot on the bottom of the fuel pump fits perfectly with the pump fixtures bottom. Put the pump on the fixture, it should fit perfectly and attach the fuel line to the top of the pump and tighten down the clamps. Should look like this now:
Next thing to do is take care of the wires. I'm not sure if my situation is the same as everyone else's as I already had crimped connections that could be someone else's work but it should be very similar at least.
I noticed that my wires had a bad section in them where it looked like the shielding was coming off. Luckily, the new pump's wires were nice and long so I trimmed the old wires on the fixture slightly past that bad section. I then trimmed the new pumps wires so that there wouldn't be a bunch of excess wiring hanging in the tank. Here it is with the connections completed.

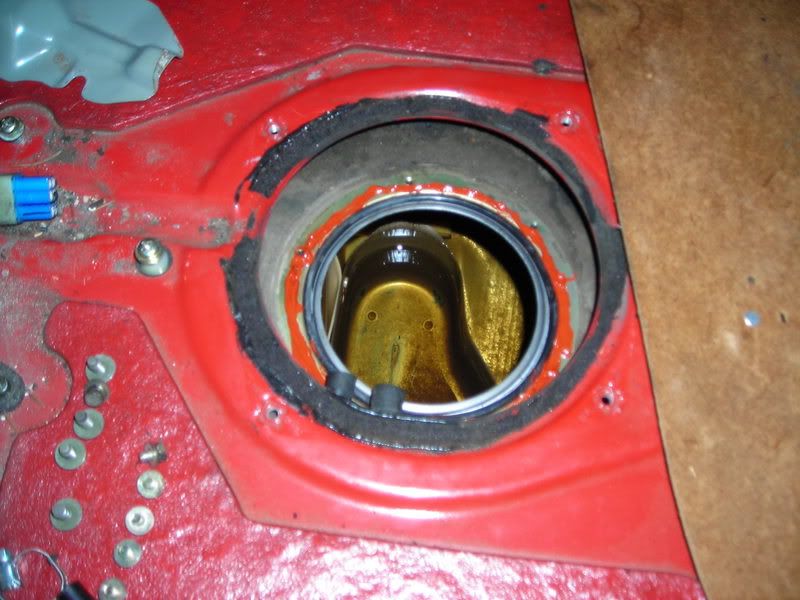
One thing I always noticed about my car was that when I put gas in it the smell of gas would be almost overwhelming. When I was taking the pump out I noticed a rubber gasket that circled the hole to the tank to seal it. Only problem was that the gasket was slightly too big for the groove it was made to fit in. I also noticed that because of that, it had a kink in it where it had been pushed down to try to make itself fit, creating a small gap in the seal. I decided to attempt to fix this with some liquid gasket. I circled the hole to the fuel tank with liquid gasket making sure to go in front of the holes where the bolts go so as to make a perfect seal. Just wanted to mention this in case someone else is having the same problem. We'll see if this actually fixes it when I get the car running.

Next thing to do is put the 8mm bolts back in once the pump is submerged in the tank. Then you can recover it with the metal cover we took off earlier. Use the 10mm bolts to secure it back to the car. Now reconnect the plug and put the cover back over the plug using a phillips head screwed driver to secure the two screws. Done!
Of course you could just read the directions.
-------------------------------------------------------------------------
In other news, I also switched the speedo sensor in the SR Tranny today. The SR speedo was missing the connector on the wire and was badly damaged. Look at how bad it is cracked.
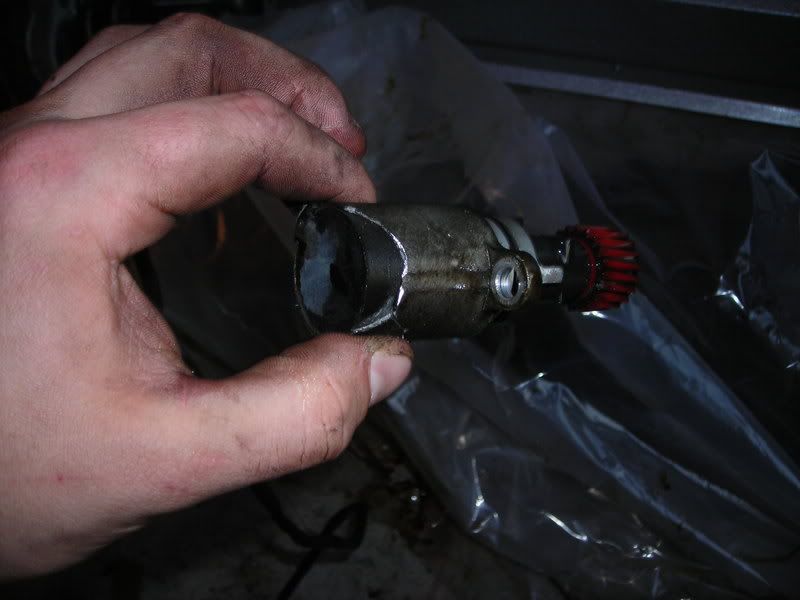
Luckily, we have to use the KA sensor anyways. Here is the KA sensor since I had a hard time finding a picture of it online, hopefully this will help someone.
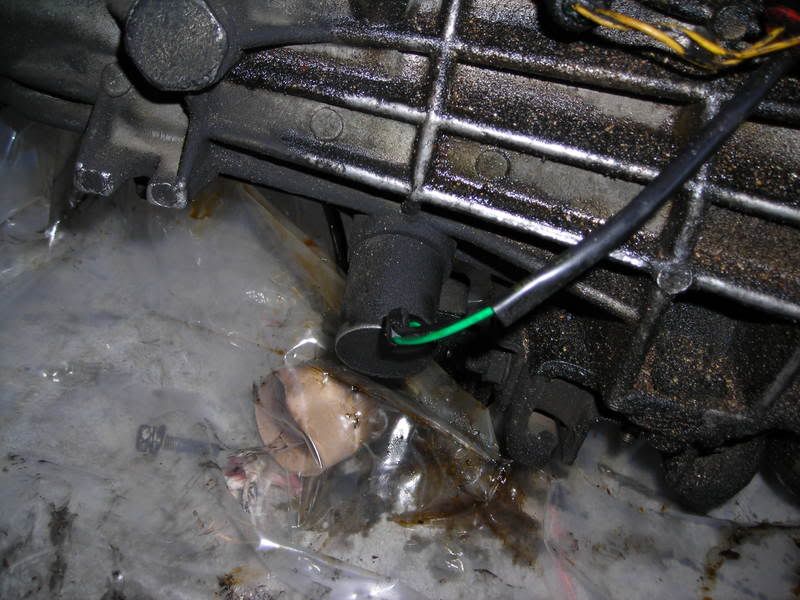
It's a direct swap. Using a 10mm wrench, remove the one bolt and it comes right out. Now the tranny is good to go as soon as I get my new flywheel and clutch.

This may be the last update for a while since I don't have anything else to do in the mean time. From now on the days will be organized as work days so as to keep the days organized.
Hopefully I can get back to work on the harness soon.
