I received a few PM's from people about this retrofit so I decided to tackle the rest of the job and take more pics along the way.
Before I start - PLEASE stay on topic "Need Sugestions: JDM Kouki Hid Retrofit" This is about a retrofit not getting rid of your headlights completely or something completely unrelated.
Anyways...
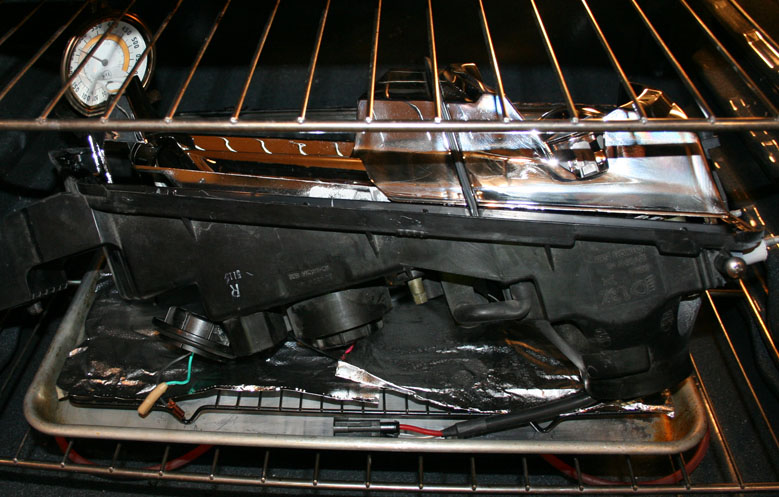
To start you want to preheat your oven to 250-300 or so and remove the metal tabs holding the glass and plastic housing together. Then put everything on a cookie sheet or something close to that and leave it in there for around 7mins or so.
After that take it out of the oven and start to pry it apart. I used a flat head screwdriver and a razor blade to cut the sealant apart.
Be very careful not to put to much pressure on the edges of the glass with a screwdriver because you can easily chip it. Also, if its too hard to pry apart toss it back in the oven for another 5 mins and try again.
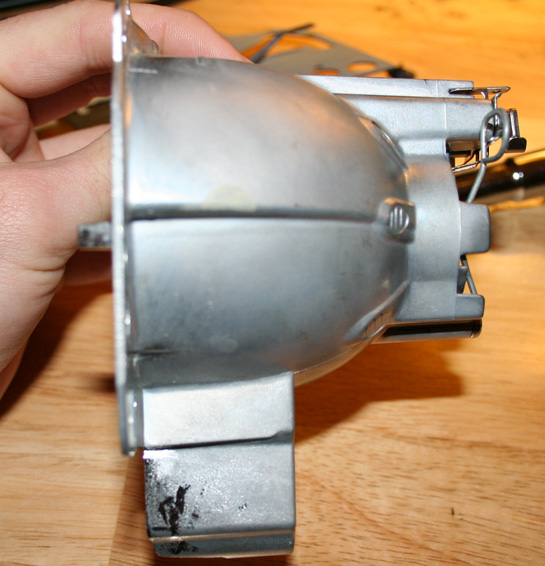
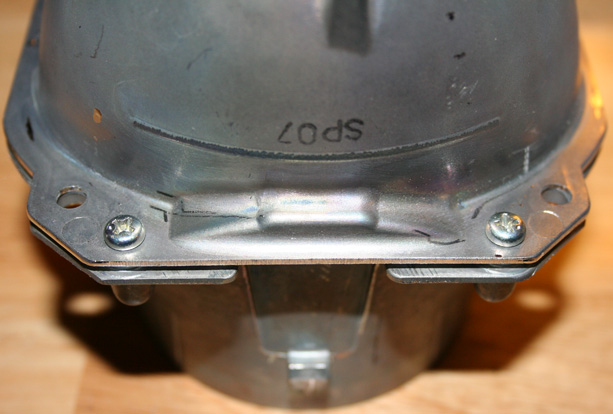
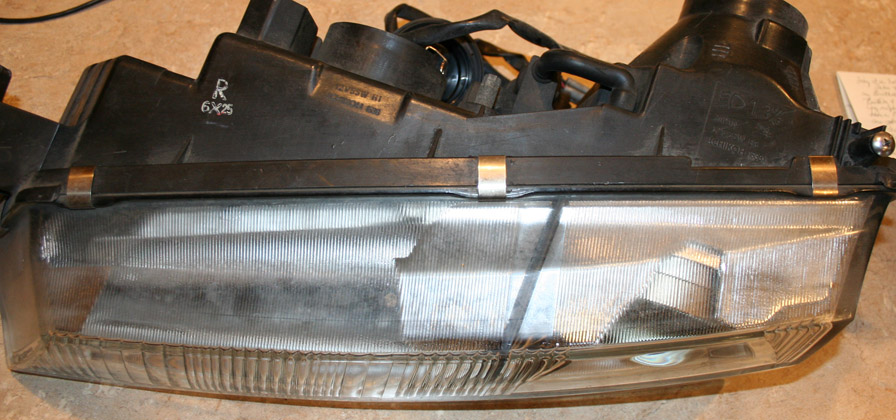
After everything is pried apart it should look like this.
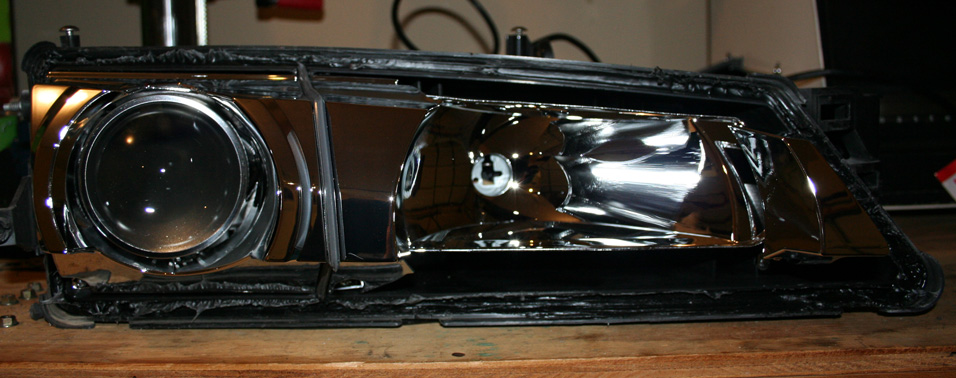
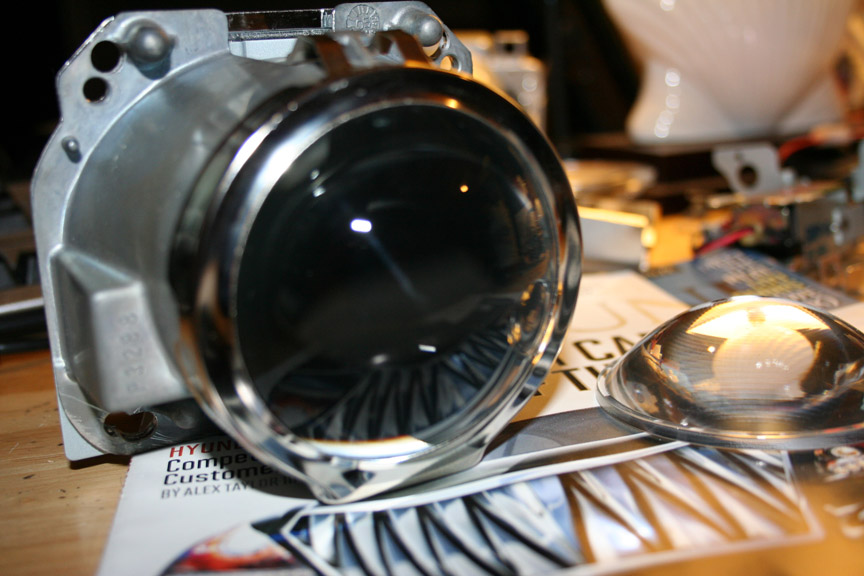
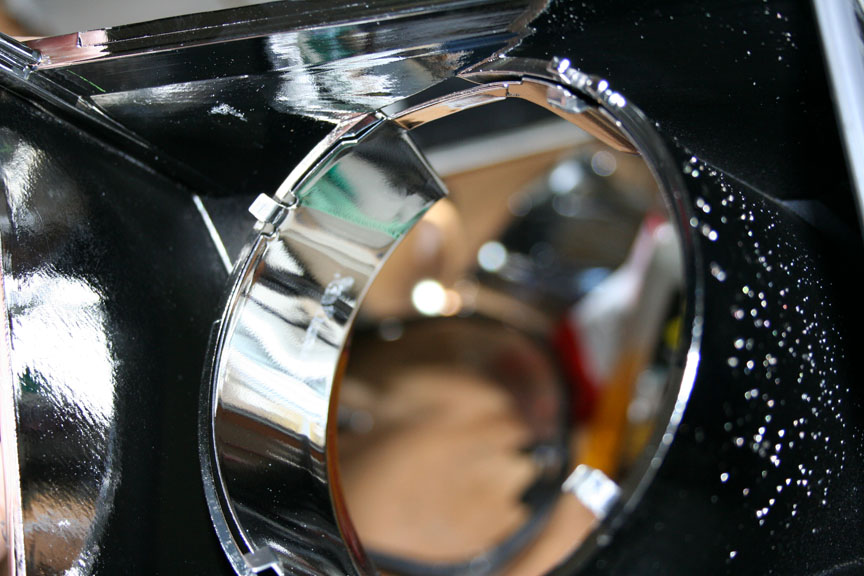
This is the stock JDM Kouki Headlight without the glass.
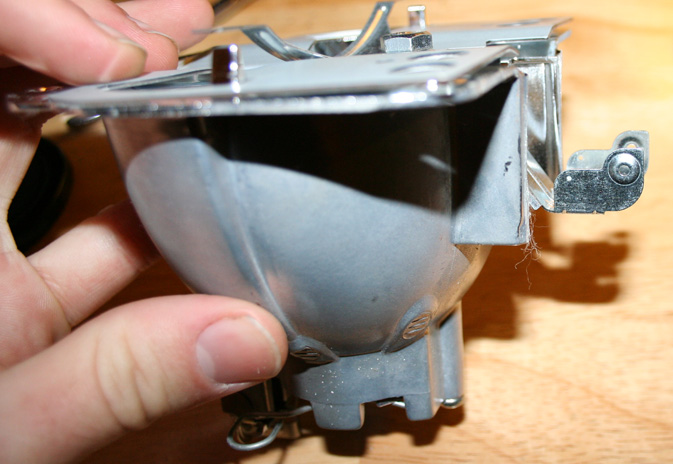
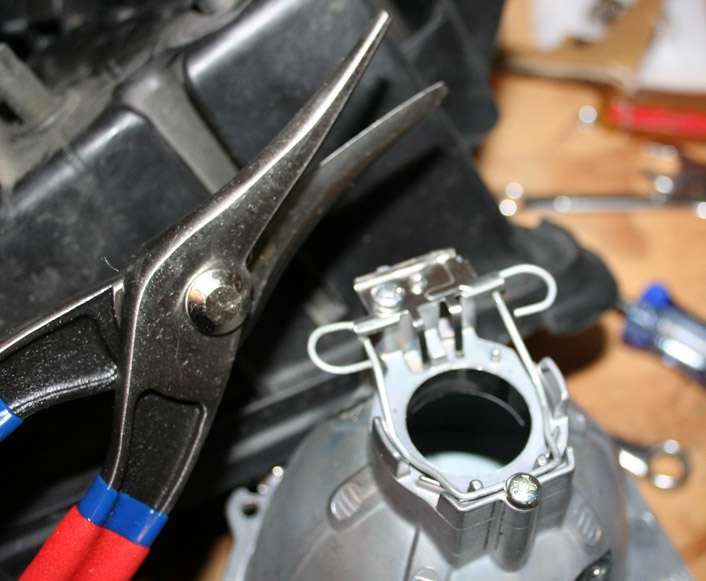
Next you want to take the shroud off of the projector.
This is attached by 2 philips screws at the bottom.
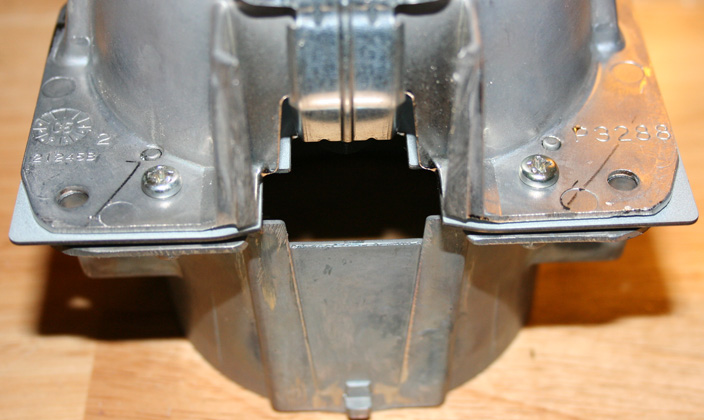
And then BAM - this is what it looks like.
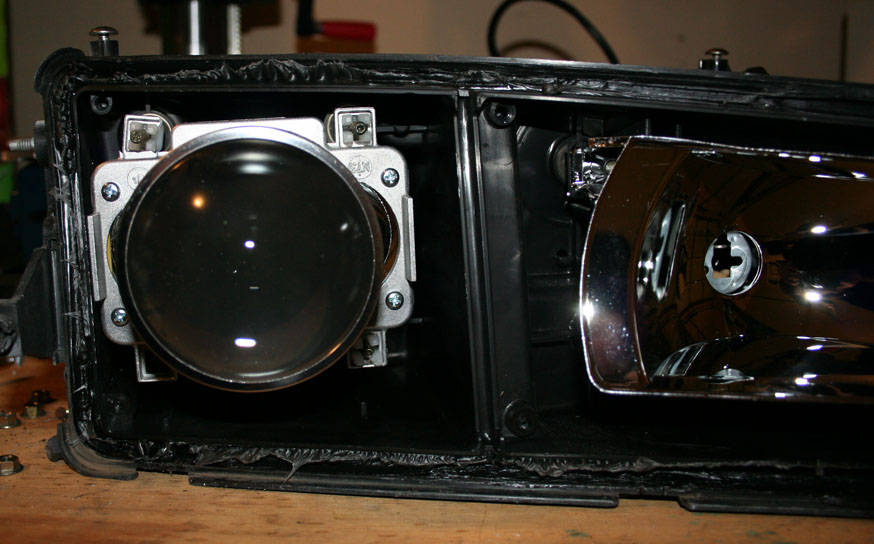
You may notice on mine one of the metal tabs at the top left of the pic has been broken. This is one of the reasons why I chose to retrofit another projector because I could no long adjust mine so it wouldn't blind others.
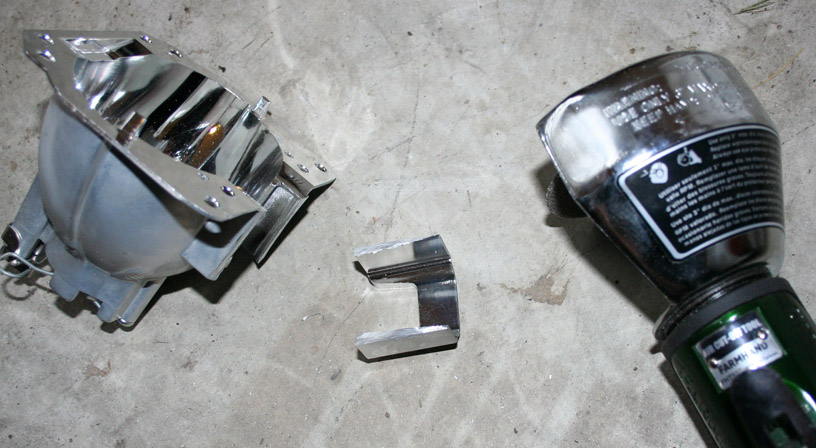
Use the adjusters on the back of the headlight to remove the projector.
This is what it should look like.

Now its time to mess around with the TL projectors. These projectors are bixenon (meaning they can be used for both High and Low beams) Since the solenoid for the bixenon is at the bottom and makes it impossible to fit into the headlight housing it must be removed.
This is what the solenoid looks like.
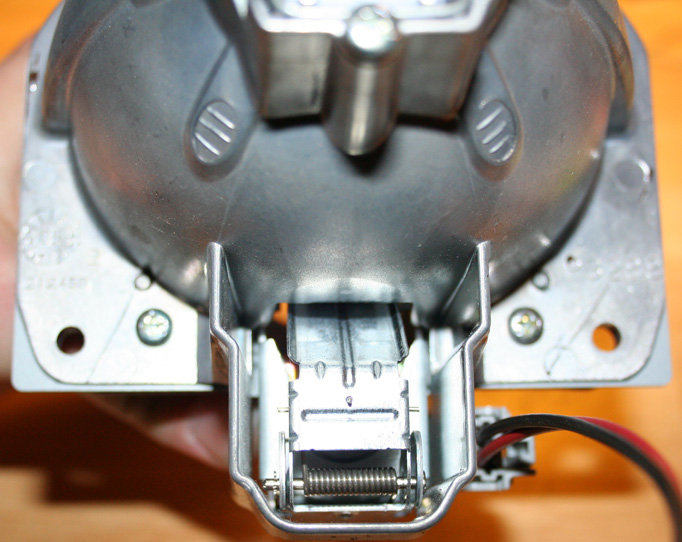
There are 4 philip screws located on the back side that must be removed. Once done it should look like this.
To remove the solenoid itself you must first take the lens out by removing its shroud and then the solenoid will fall out.
Since the cutoff line is attached to the solenoid it must be removed and bolted back into the housing. This is fairly strait forward and only requires a small flat head screwdriver.
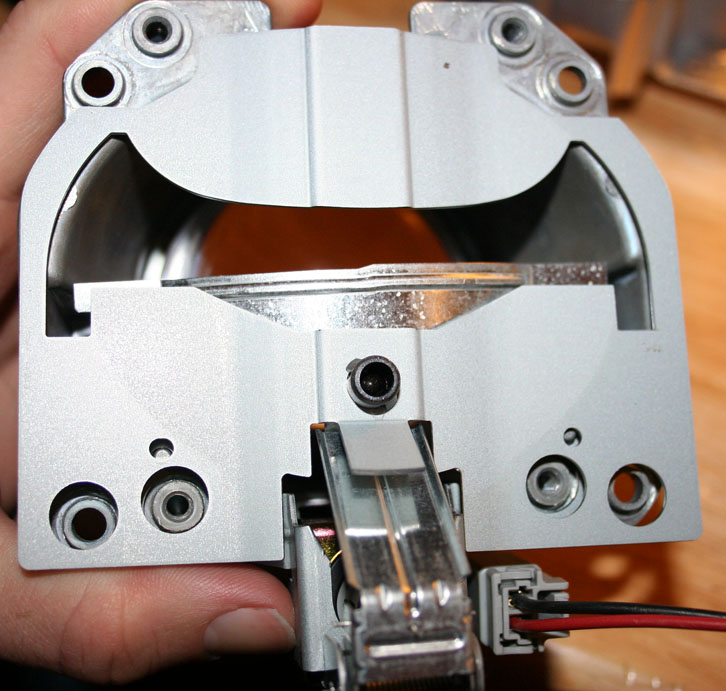
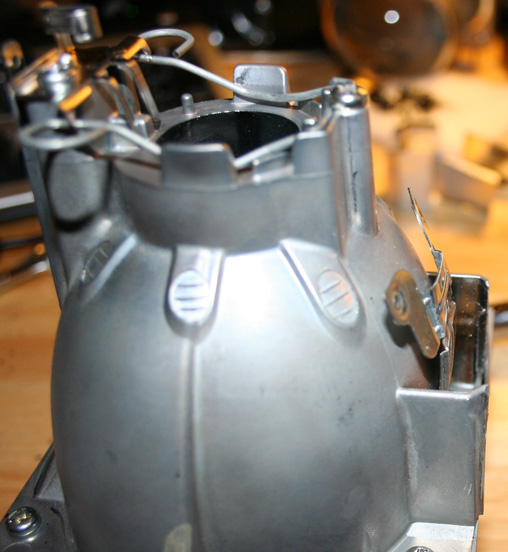
After your done taking it apart this is what you are left with.
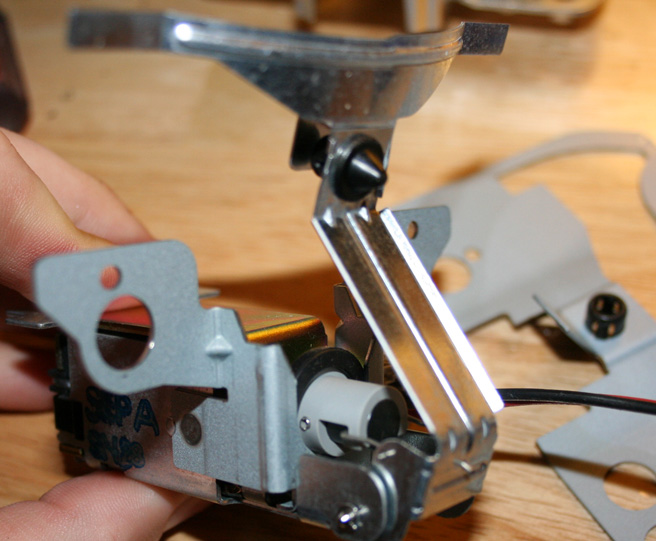
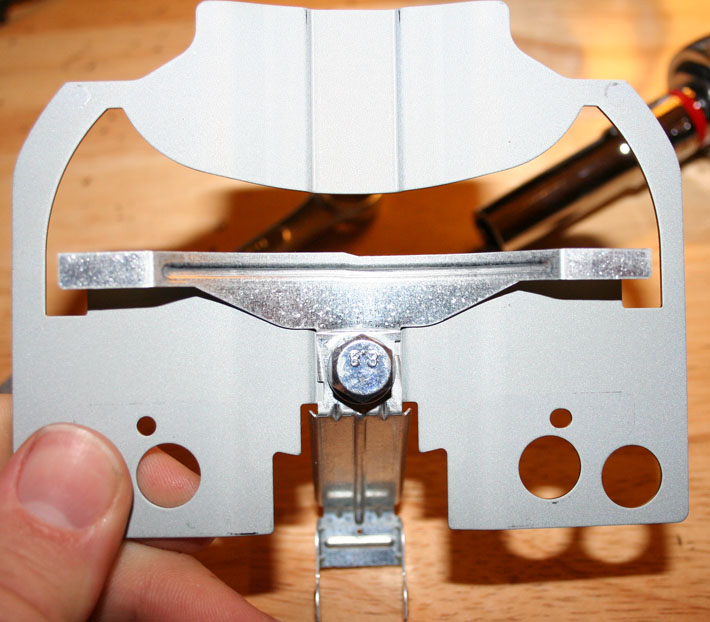
There are black plastic stoppers located on the cutoff line and a bracket inside the projector housing that need to be removed in order to install a bolt. These just pop right out.
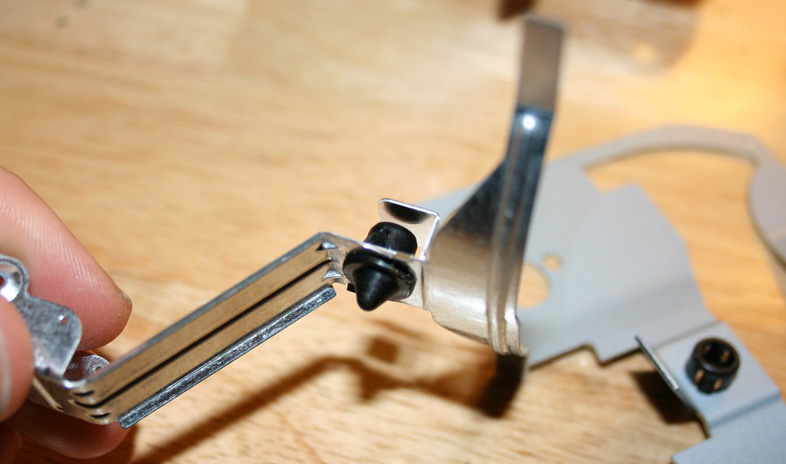
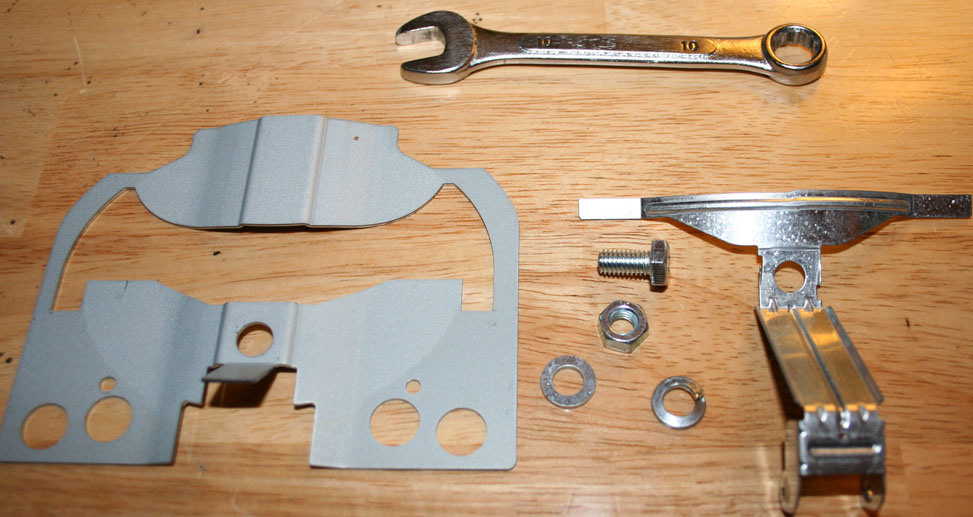
This is everything you need to install the cutoff line to the bracket. A small bolt, mine is a M6x12mm, also need a nut, washer, and lock washer.
This is what it looks like when your done.
Now its time to trim the housing a little. Where the solenoid was located, needs to be removed.
This is when having a air cutoff tool comes in handy, but a Dremil, or even a hacksaw would work if your desperate.
Now that the bracket is removed you can see the end of the cutoff line where it used to be connected to the solenoid needs to be modified.
I chose to just bend it back and this is what mine looked like.
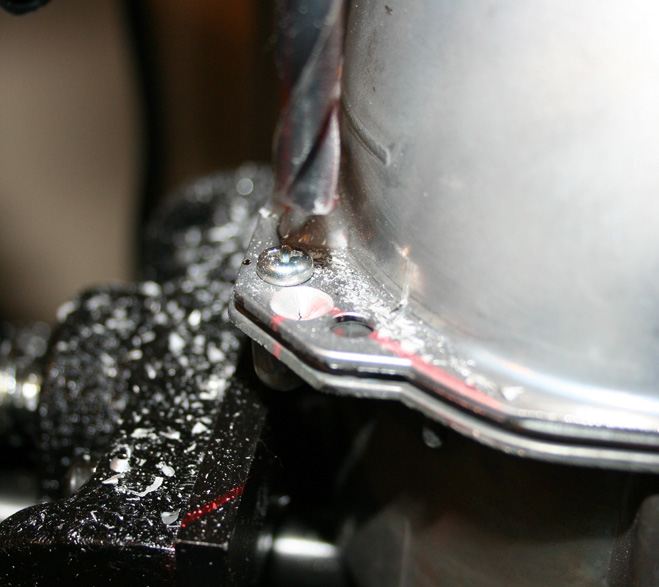
Here the projector is all ready to be drilled.

This is a closeup of the top part of the projector. There needs to be 2 holes drilled on this side and the basically you drill in between the screw and the hole already located there.
This is a closeup of the bottom of the projector. Only 1 hole needs to be drilled here and it depends on if its going to be your left or right projector since TL projectors are exactly the same.
Basically where the laser intersects is where the hole should be for the top mounts.

Here it is with all of my holes drilled.

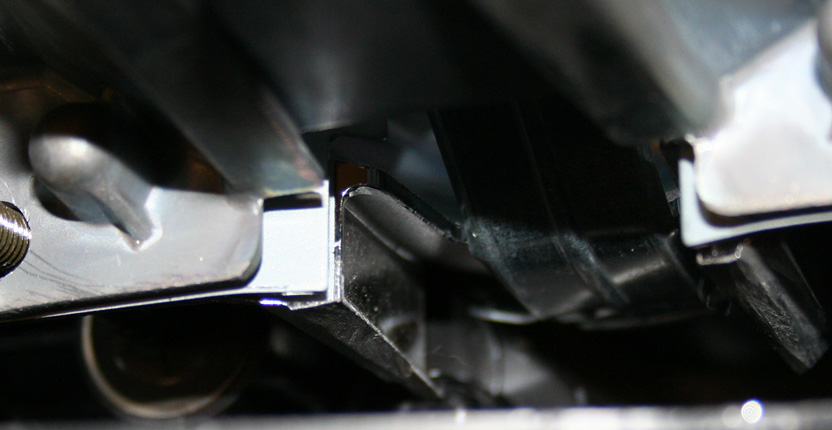
Next I test fitted it into the headlight housing and noticed there was a bracket on the backside preventing it from going all the way in.
Nothing that a pair of metal shears couldn't handle.
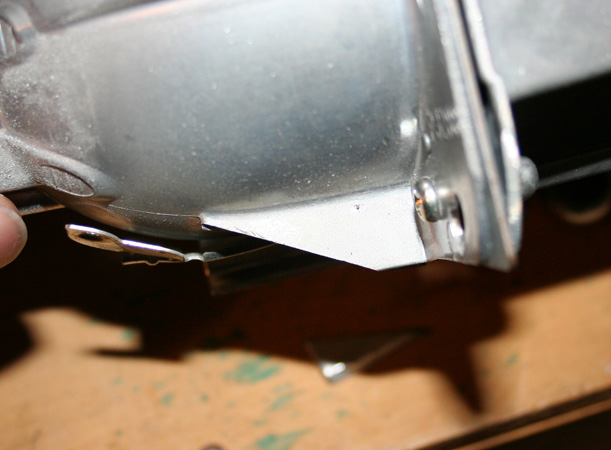
Next I test fitted it again and there was a black tab inside of the housing that was hitting the projector located in this pic.
Again I used the cutoff wheel and this is what it looks like now.
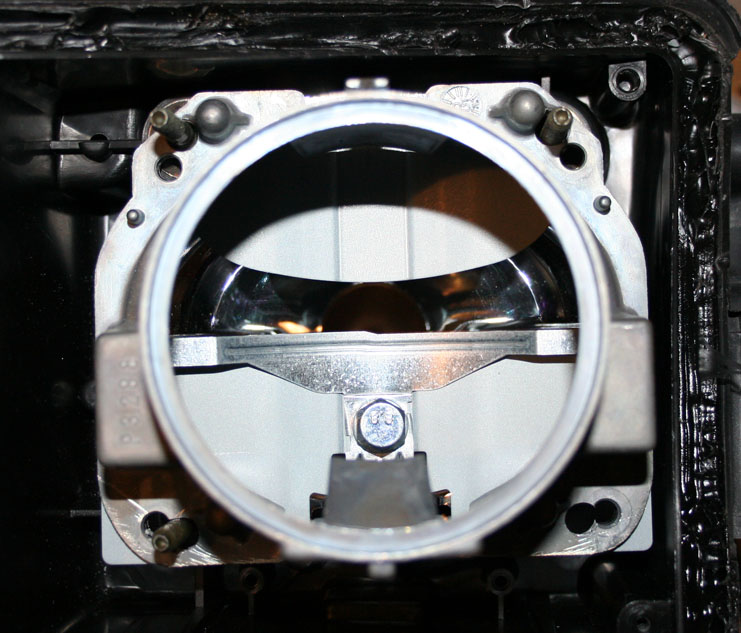
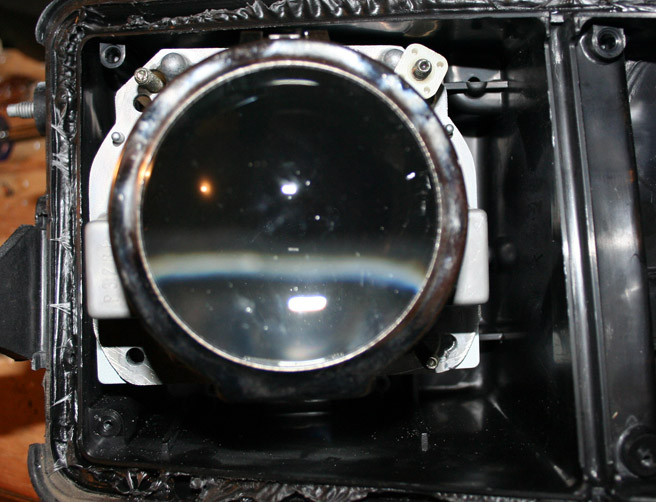
Here is the TL projector mounted inside of the Kouki projector. Notice I made a mistake while drilling my holes on the bottom so there is an extra one of the right side.
Now that it fits in there properly Its time to install the new lenses. Here is a comparison between the TL lenses and the ZKW-R ones. Notice the TL lens on the right is frosted and this would cause a crappier cutoff line.

Here the new lens is at home.
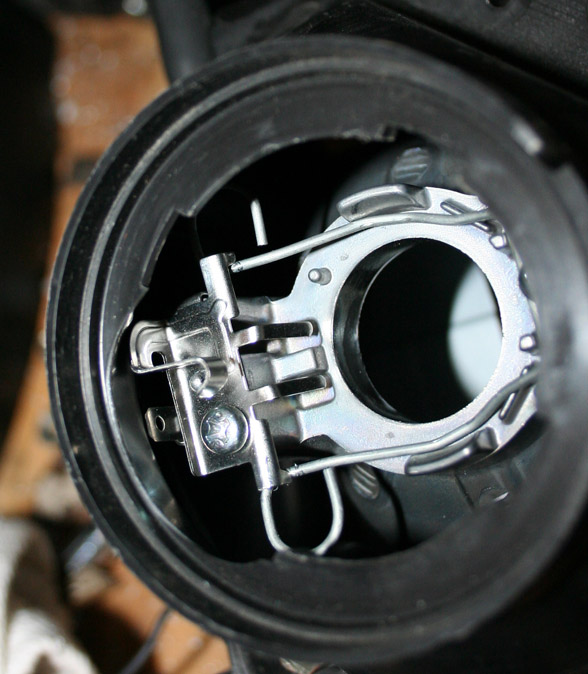
Now to mount the projector inside of the headlight housing.
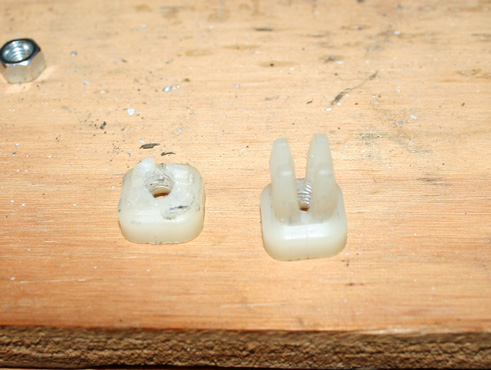
I used the existing plastic adjustment tabs that came with the headlight because I could not find a nut that would fit on the mounting bolts. I tried a standard #10x32 and a metric 5x.08mm... neither would work.
What I did was cut off the little arm parts and here is whats left over.
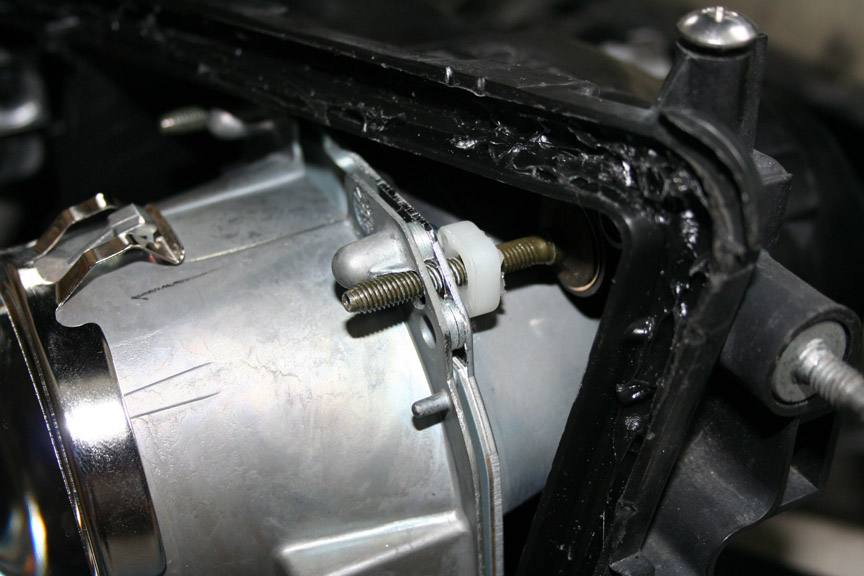
Next I screwed some of the tabs behind the projector and some in front of the projector so that I could adjust it the way I wanted until I thought everything looked right.
The original shroud needs to be slightly modified. As you can see on the inside there are a few tabs. Just pull them out and the whole center piece can be removed.
Now the shroud will fit over the new projectors.
Now its time to test everything. I googled "Proper Headlight adjustment" and eventually found a guide and used it. Make sure your beam for both of your headlights is perfect before you put everything back together because its a real pain in the ass.
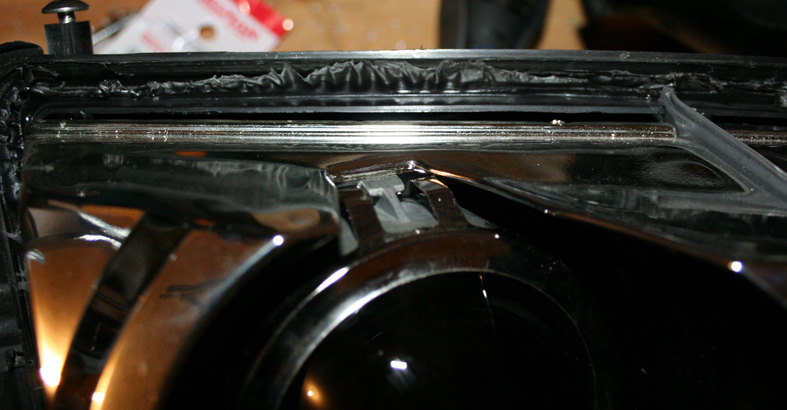
When everything looks good toss your glass and headlight into a 300 degree oven for about 5 mins, just to get the glue nice and soft.
Then put the two pieces back together and dont forget to put the metal tabs back on.
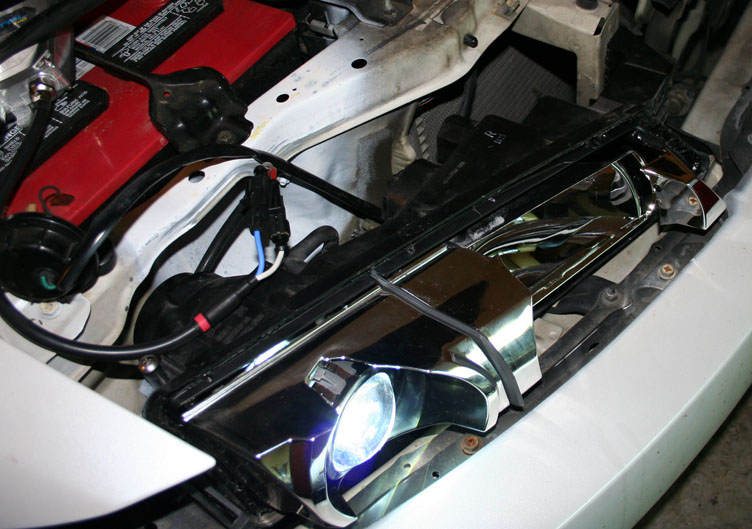
Wiring it up depends on a lot of different things so I'm not going into that but here is the final results.

p.s. I know I need a paint job but its too cold right now to start

I'll try to get some pics of them outside at night when I get a chance.
If anyone has some questions don't hesitate to PM. - Thanks