There have been a handful of these how to's in the past but it never hurts to have another. Like others the following is a step by step that is meant to guide those who have never done an hid projector retrofit through the process, which you will see is rather simple.
The parts used, which I will explain in more detail later:
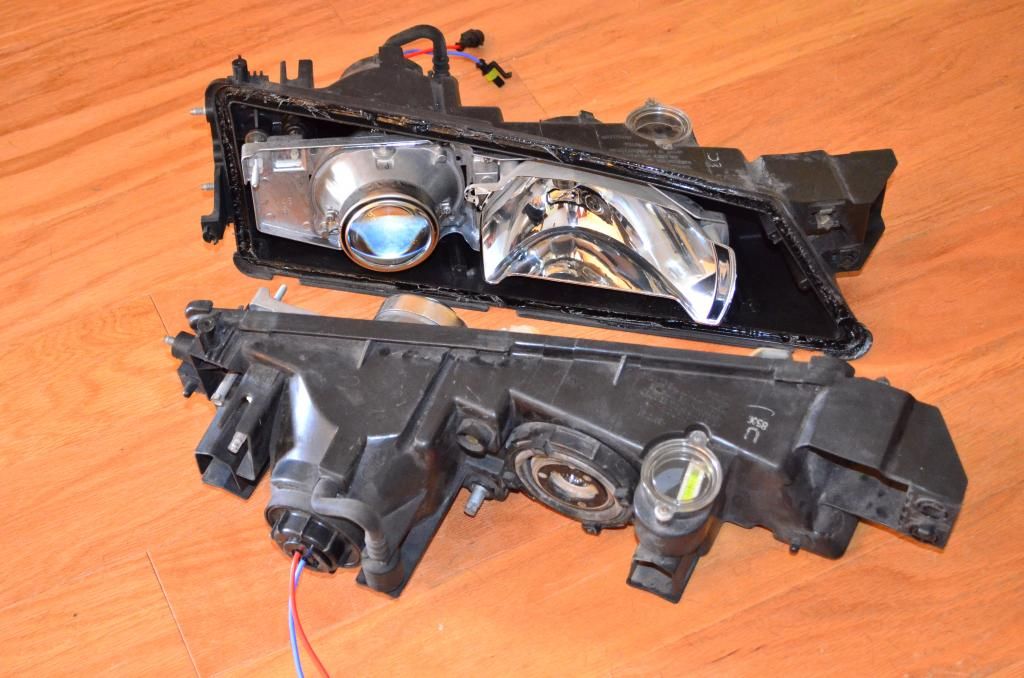
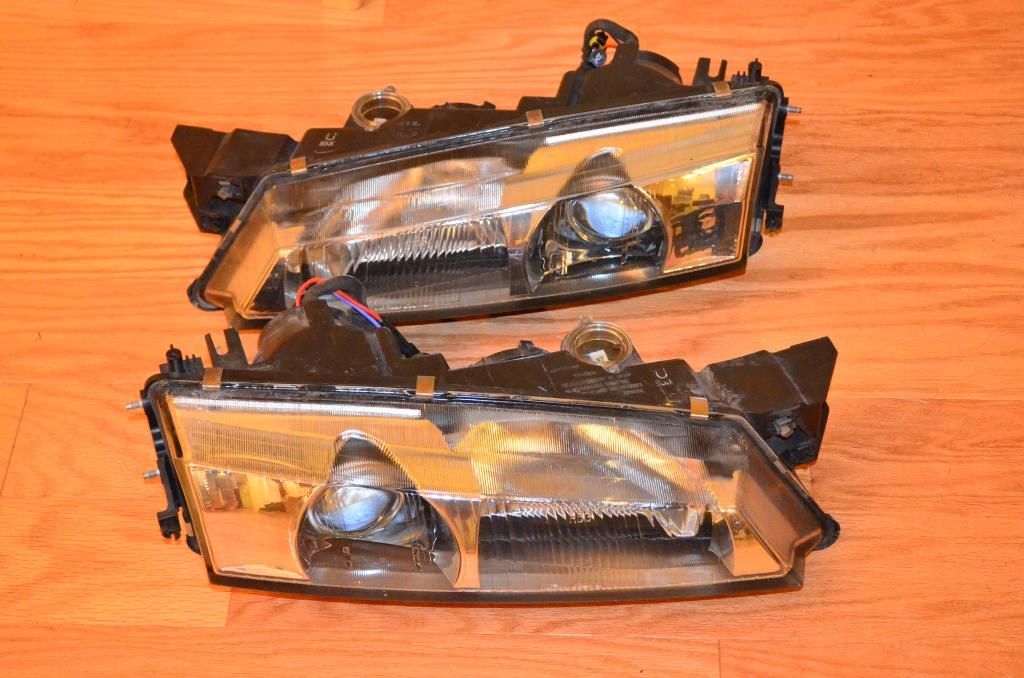
1 pair usdm kouki s14 headlights
1 pair rx330 D2s hid projectors (modded with clear projector lenses)
1 pair aftermarket 4300k "D2h" style bulbs from theretrofitsource
1 pair aftermarket 35w ballasts from theretrofitsource
1 h1 based relay harness from theretrofitsource
misc. hardware

With the headlights removed from your car, preheat your oven to 250* with the oven rack on one of the lower slots. While the oven is preheating, use a flat head screwdriver to gently pry off the lens clips on each headlight (there should be 6-8 on each). You should also unscrew the rear housing caps and remove the low and high beam bulbs.
Place one light in the oven, setting the timer for about 5 minutes.
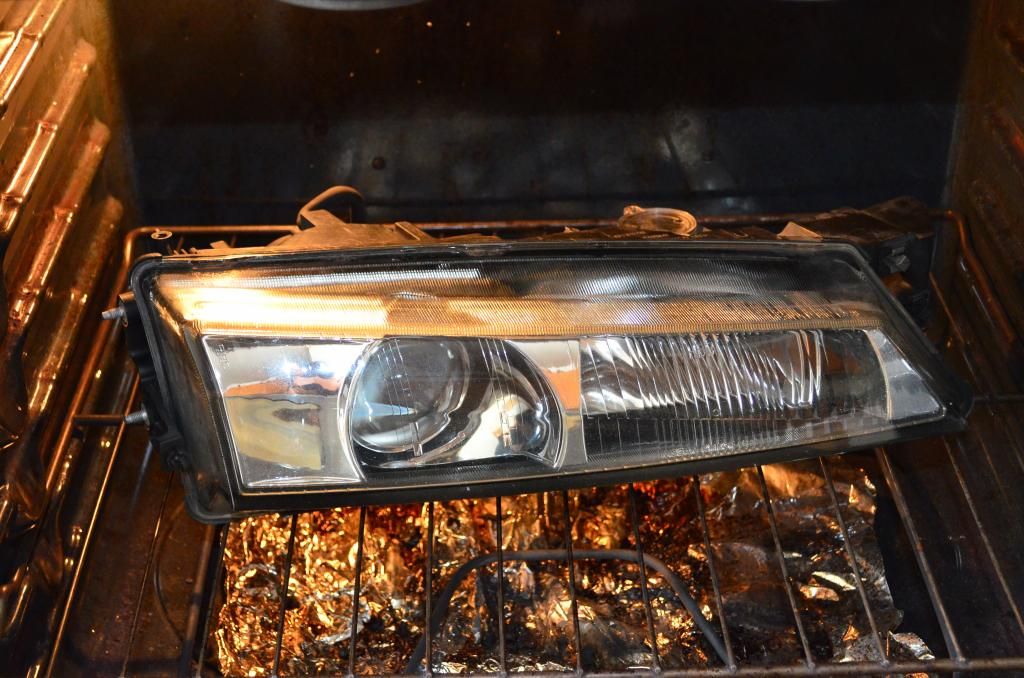
feel the lens next to the back housing to ensure the light is heating evenly and rotate it as necessary heating for several more minutes until hot to the touch.
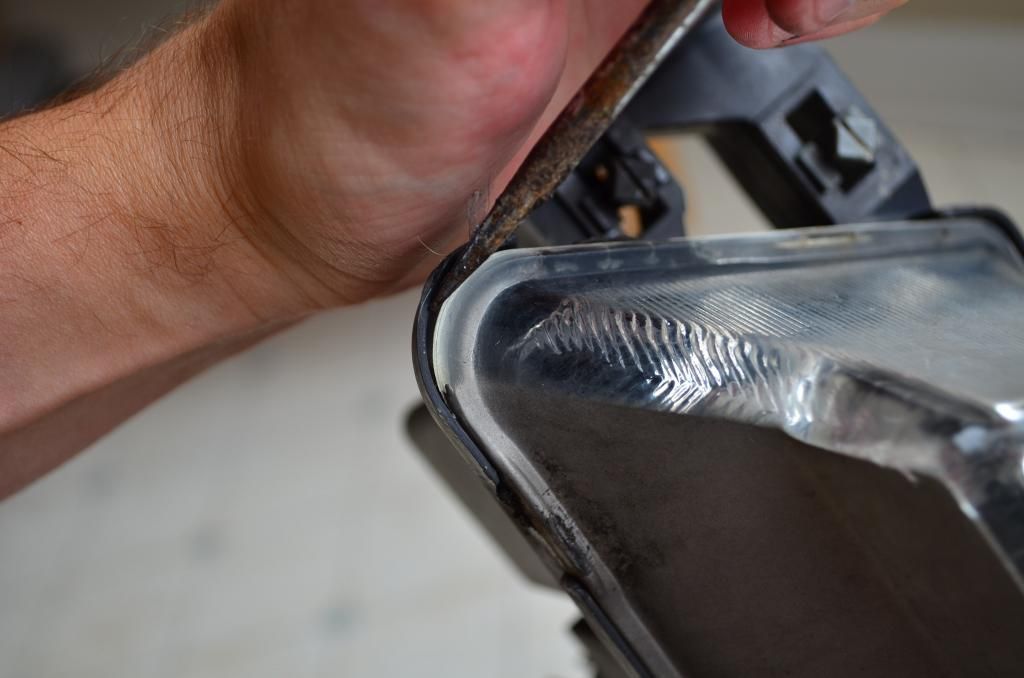
Remove the light with some pot holders and sit down on the floor with it. With a flat head screwdriver or panel tool at the corner of the lens carefully and slowly work the tool into the channel and start to pry the lens off of the housing.
At this point you can grab the lens and pull it off by hand. Push the excess glue back into the channel in the housing.
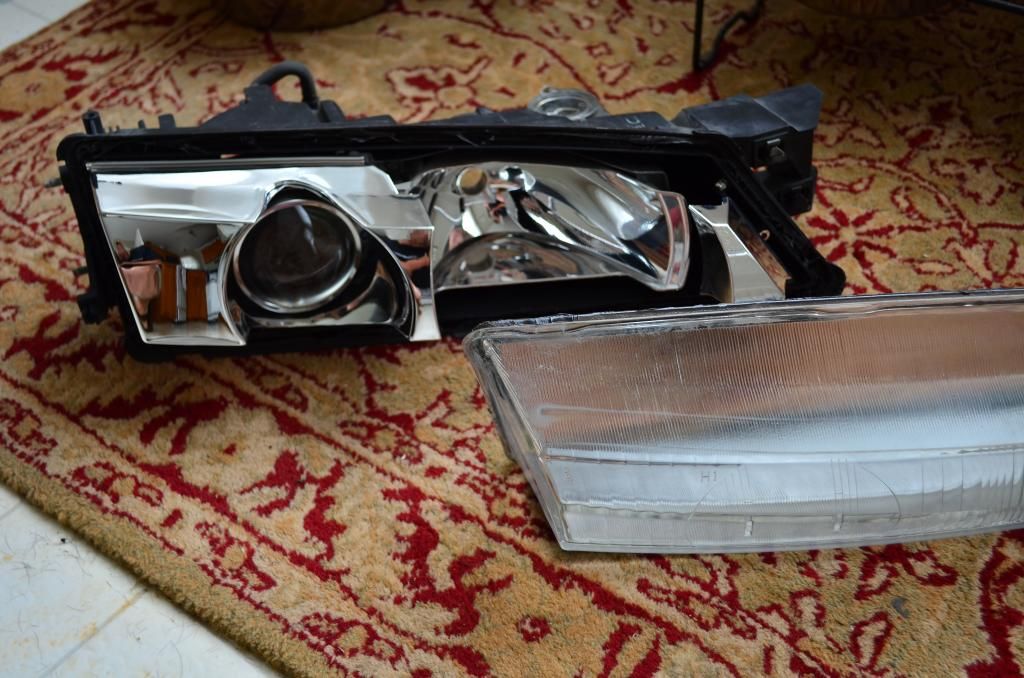
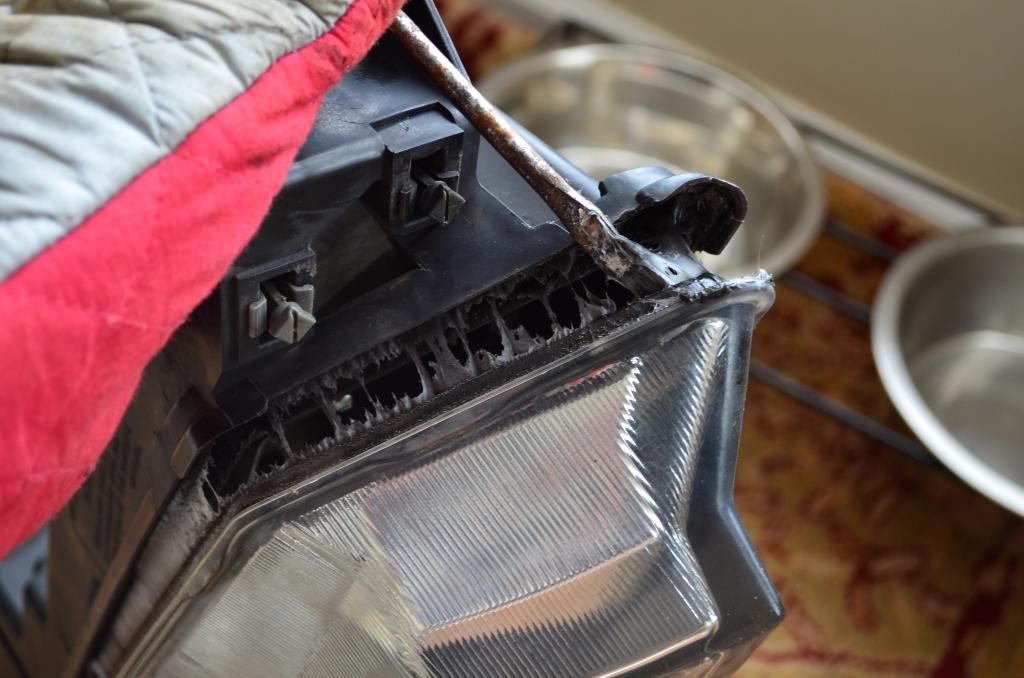
Lens removed, repeat for the other side.
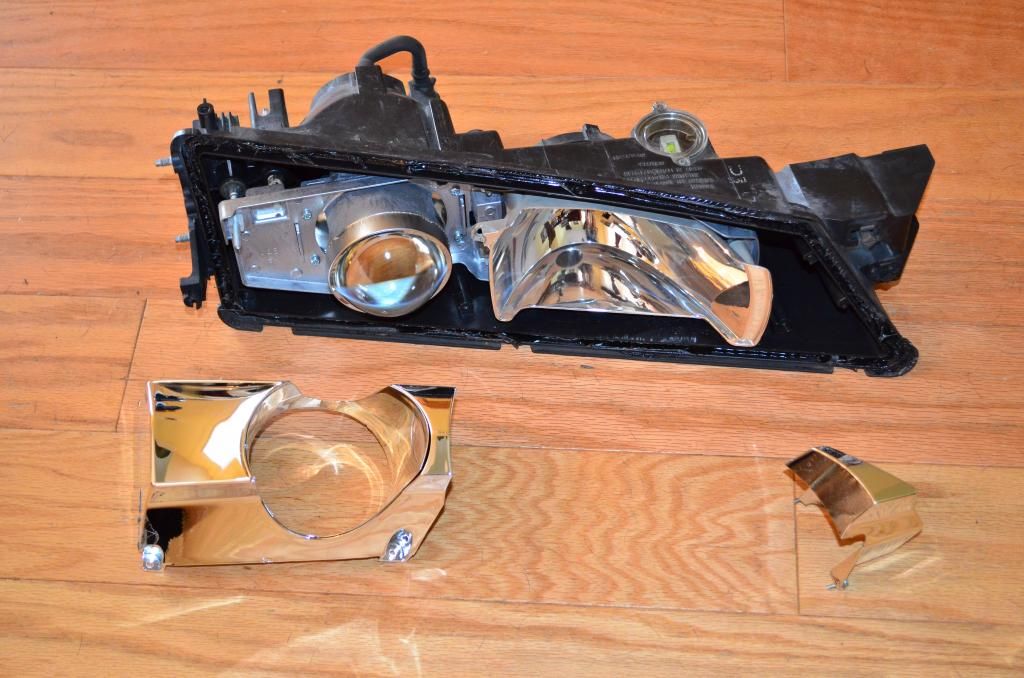
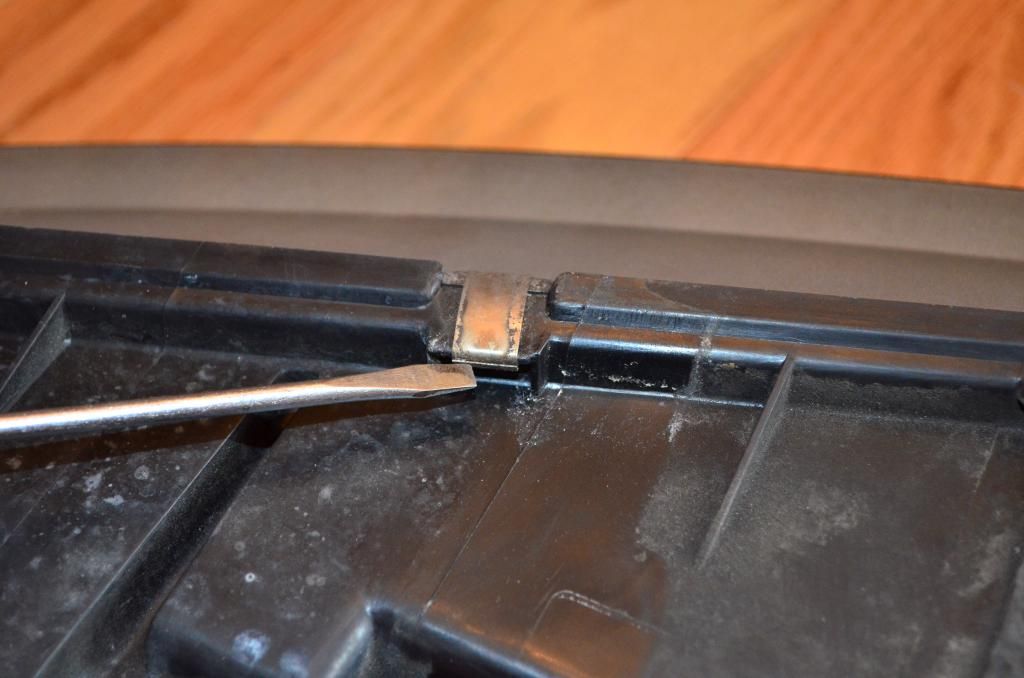
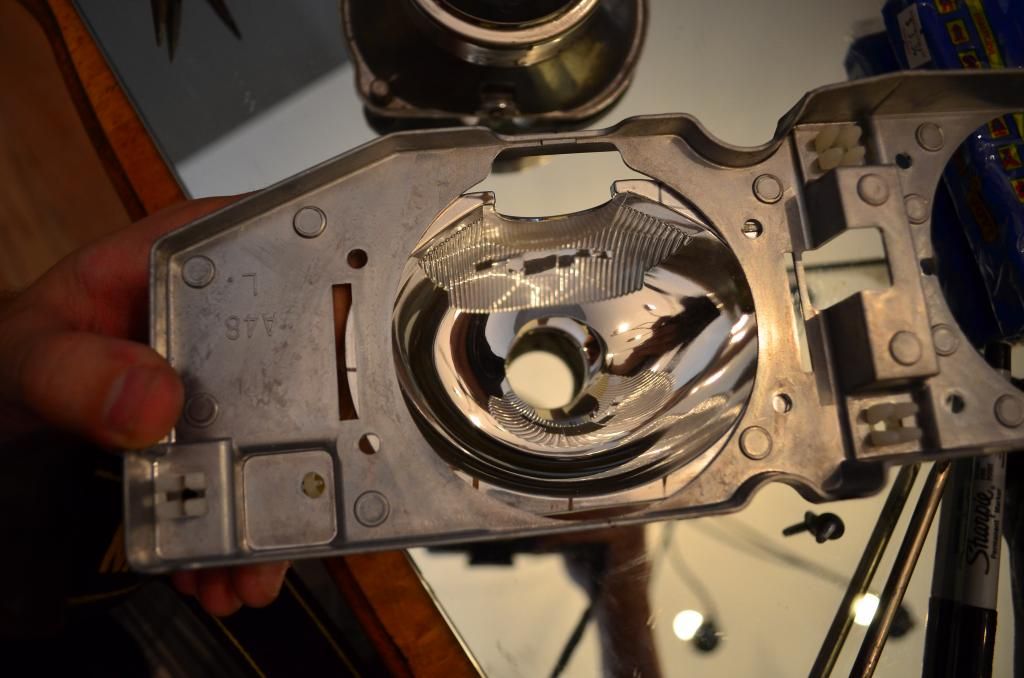
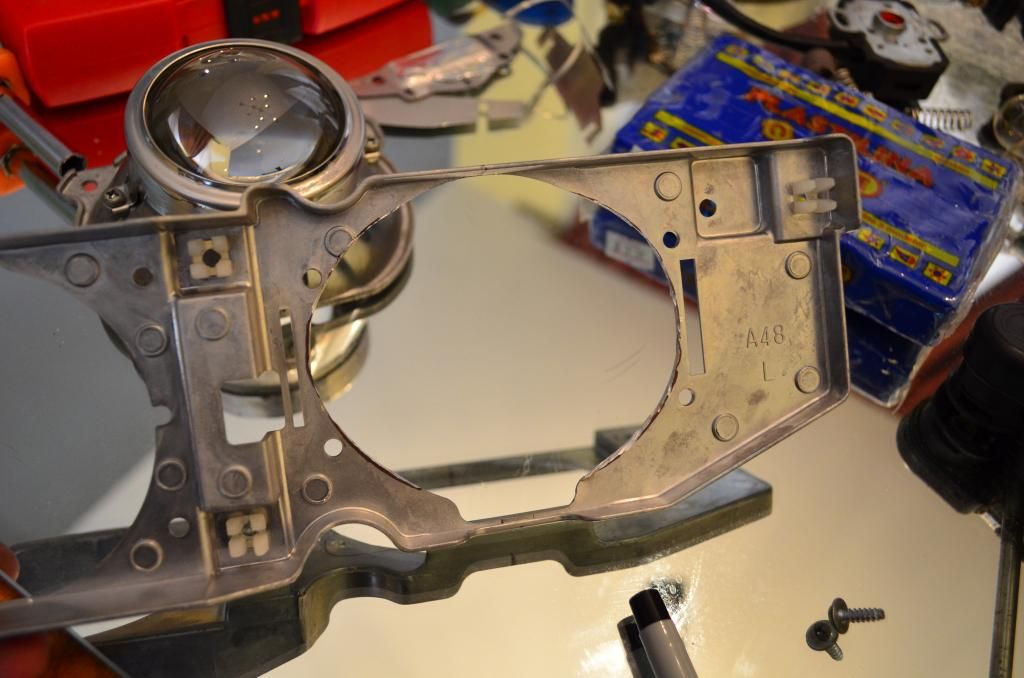
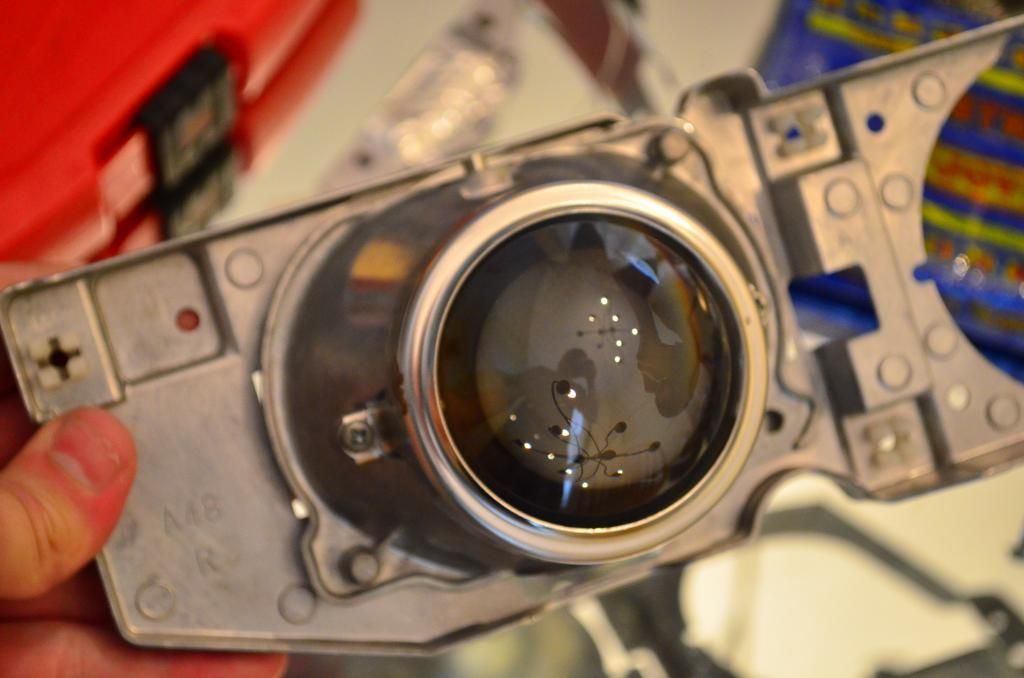
Using a small screwdriver unscrew the 5 screws that hold on the chrome bezels.
now flip the housing back around and loosen the 3 8mm threaded rods that hold the aluminum bracket into the housing
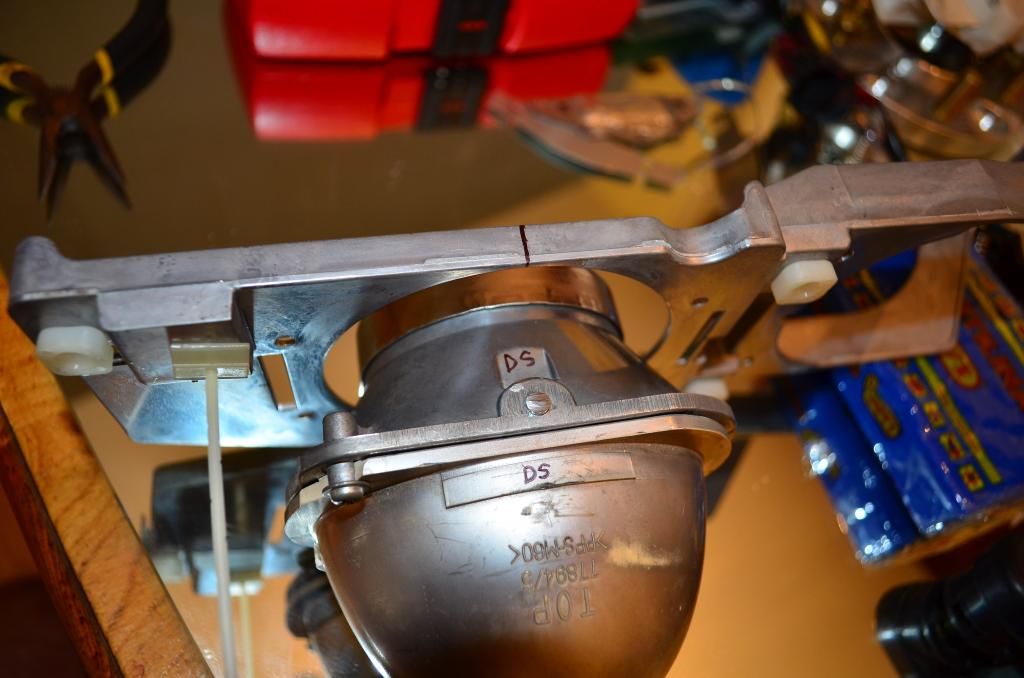
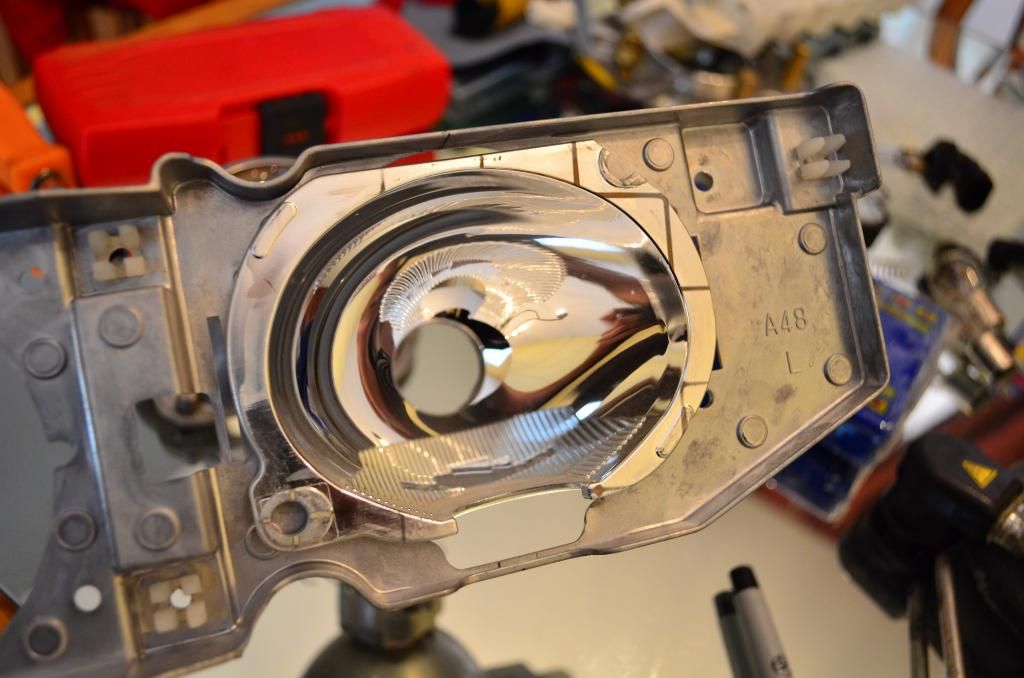
Looking at the back of the projector bracket you may want to make some marks from the center of the projector for alignment purposes in the next few steps. This is not totally necessary but will be an easy way to get the new hid projector fully centered on the bracket.
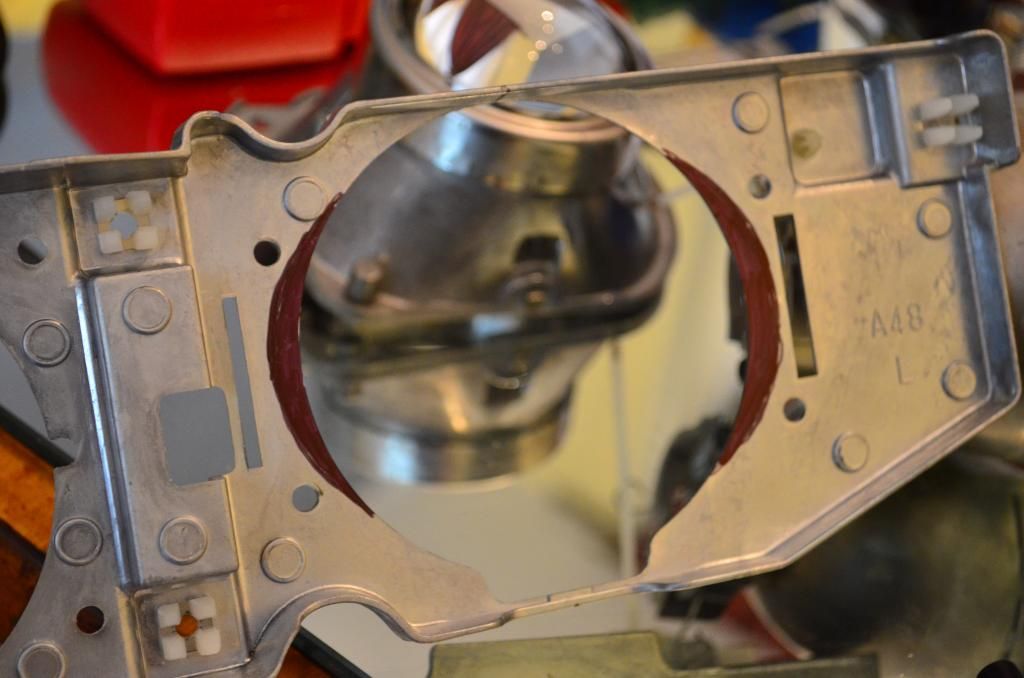
marks made based on the casting lines of the projector bowl...

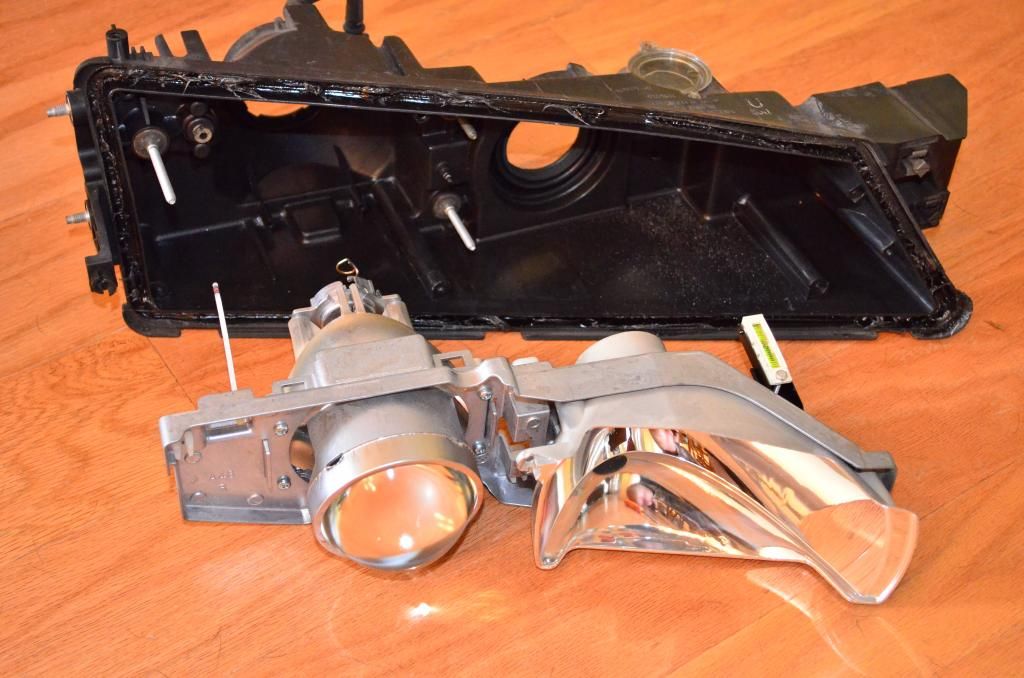
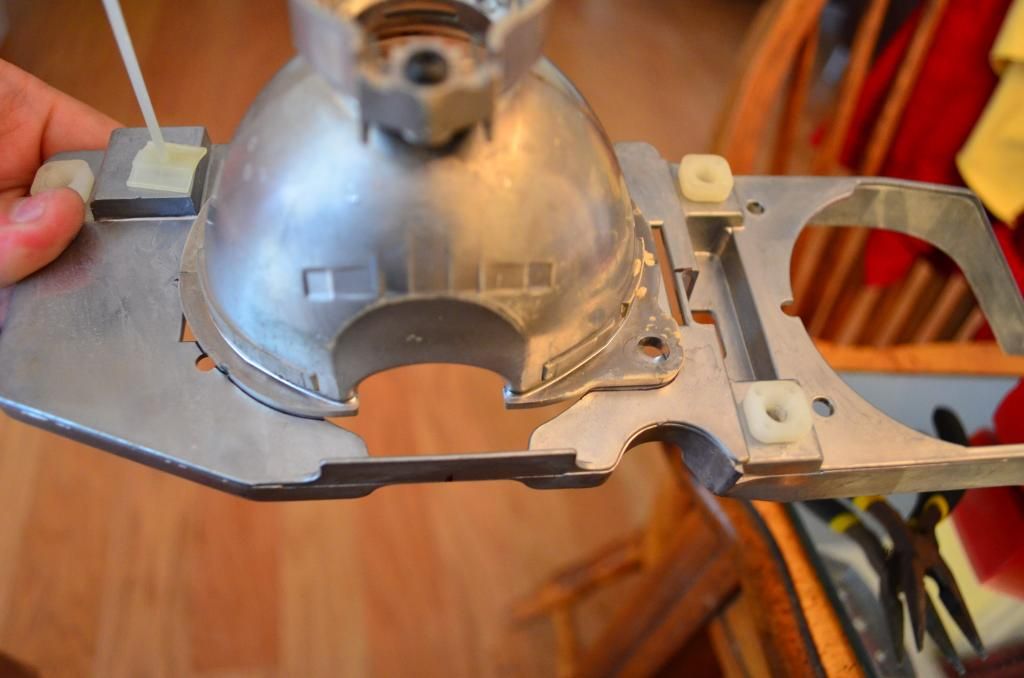
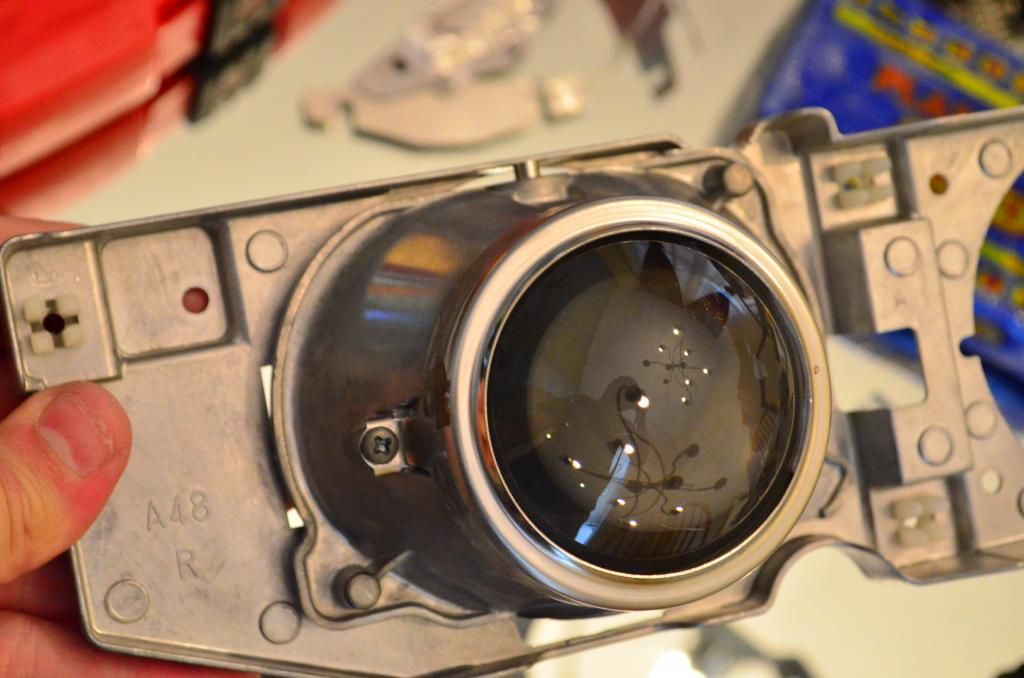
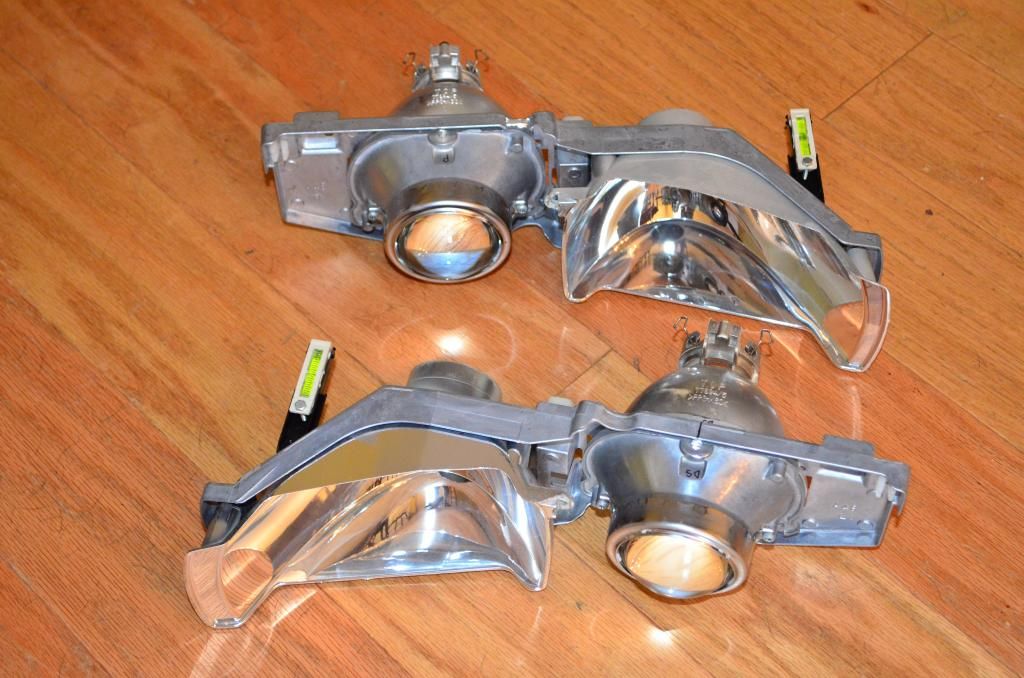
Unscrew the projector and high beam reflector from the aluminum bracket.
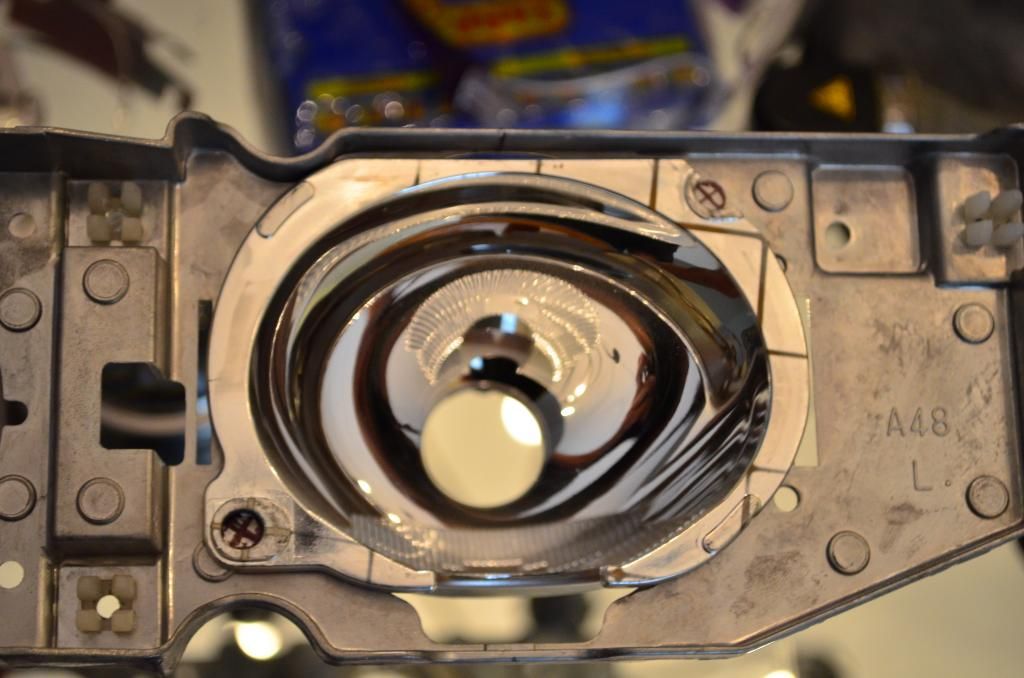
Offer the new hid projector up to the back of the bracket to get an idea of what trimming will have to be done. Make some horizontal reference lines on the edges of the new hid projector if there is a way to do this. You may separate the HID projector into it's two halves and use the edges of the cutoff shield to make these lines on the outside of the projector body.
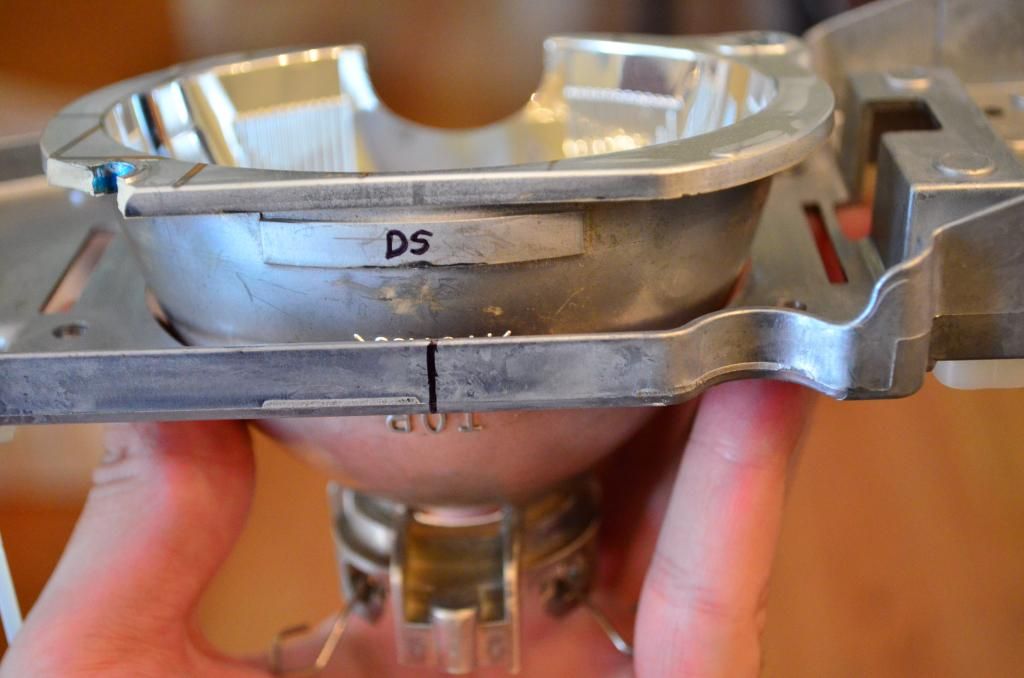
Set the hid projector bowl on the back of the bracket aligning it with the marks you made earlier, and get it close to parallel to the bottom flat surface of the bracket as you can. Trace around the edge of the projector bowl. This will be for trimming purposes only, not rotational alignment.
Take a look at the other side to get an idea of what you need to trim.
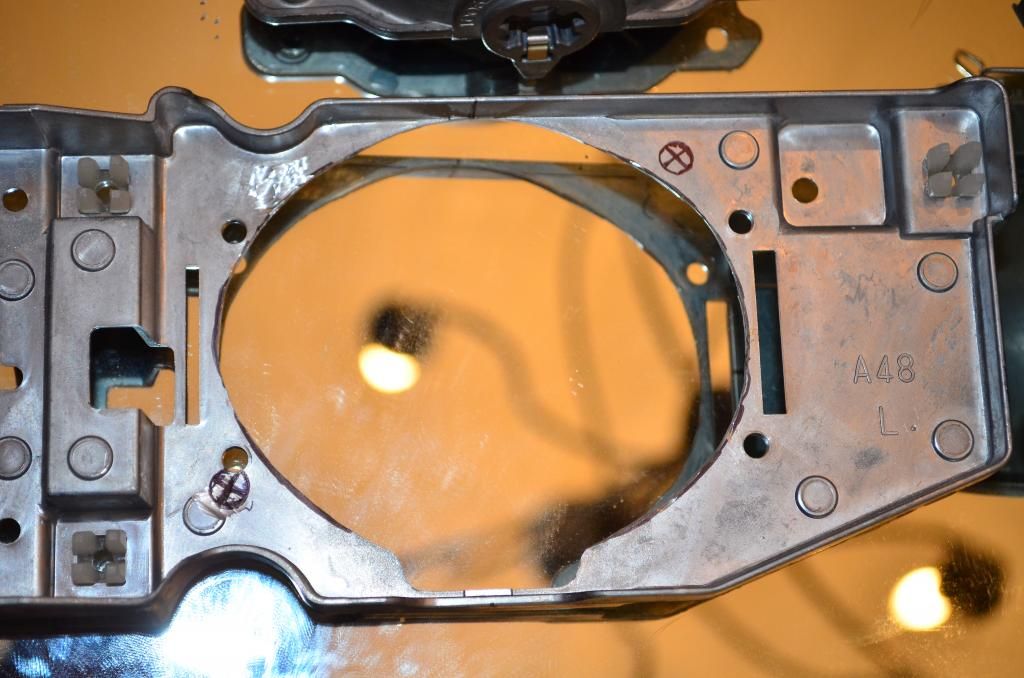
sketch out the area you will need to trim to accomodate the width of the projector bowl.
With a cut off disk remove the material you marked.
Ensure the projector bowl can fit into the area you cut, remembering to allow for a little extra room so it can be rotated until the bowl can be 100% level with the top and bottom of the bracket.
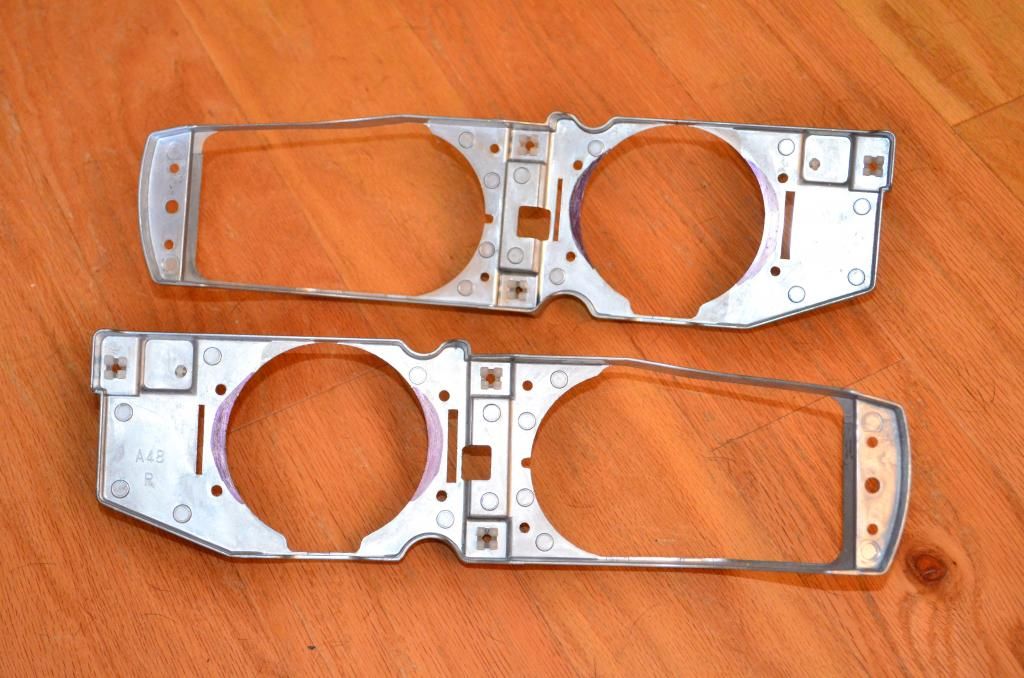
With your marker mark the two opposing mount points on each end on the headlight bracket.
Now drill out the two small holes you just marked on the diagonal with a 1/4" bit
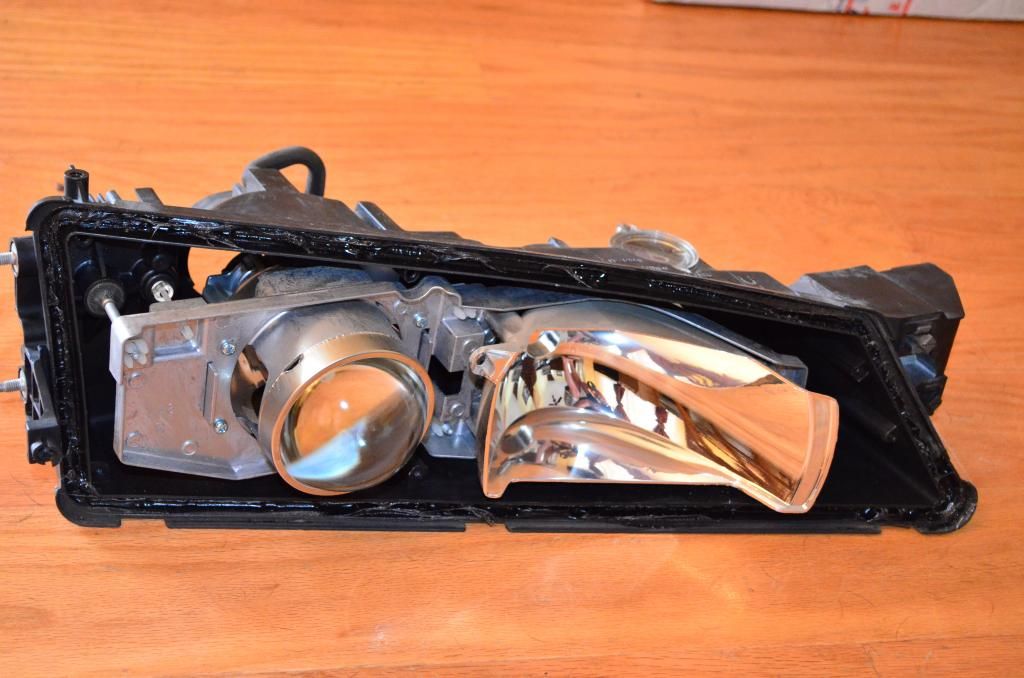
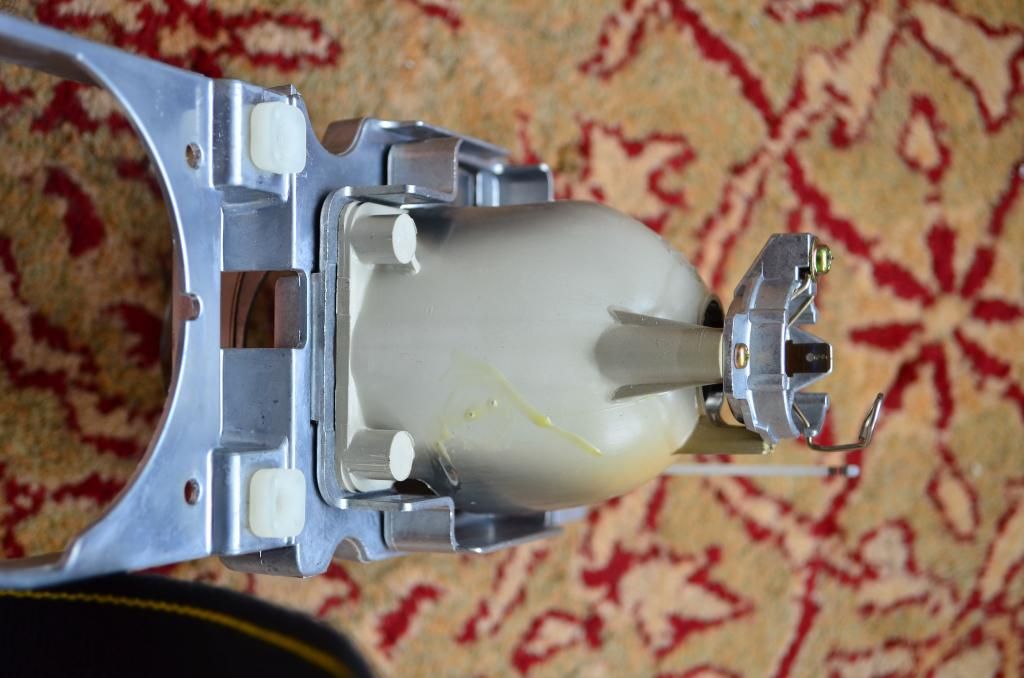
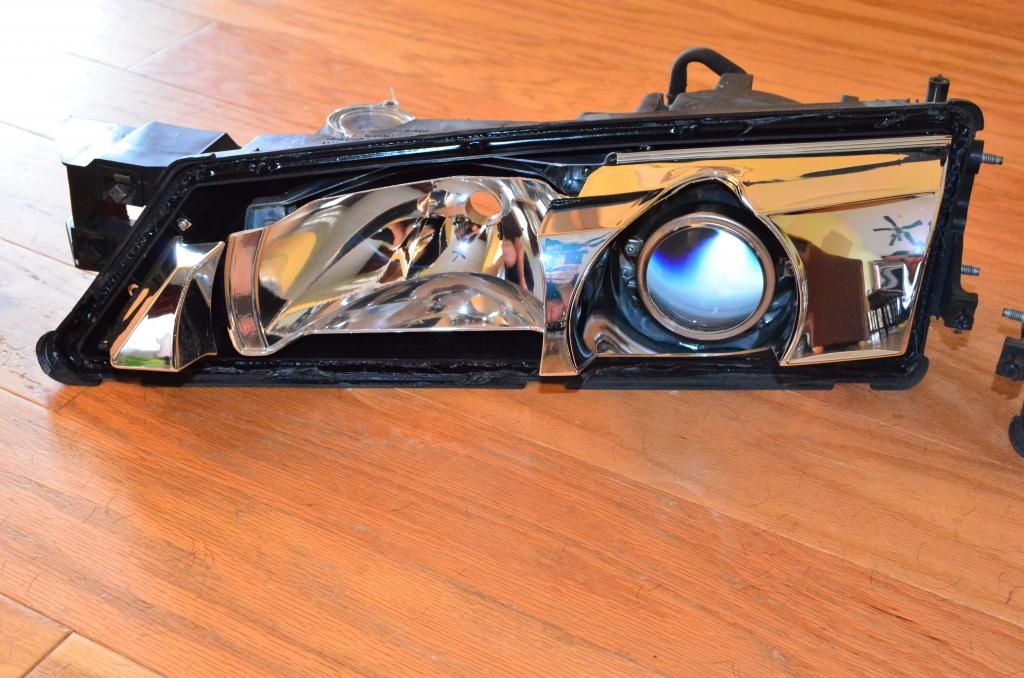
Set the front half of the projector onto the rear projector bowl
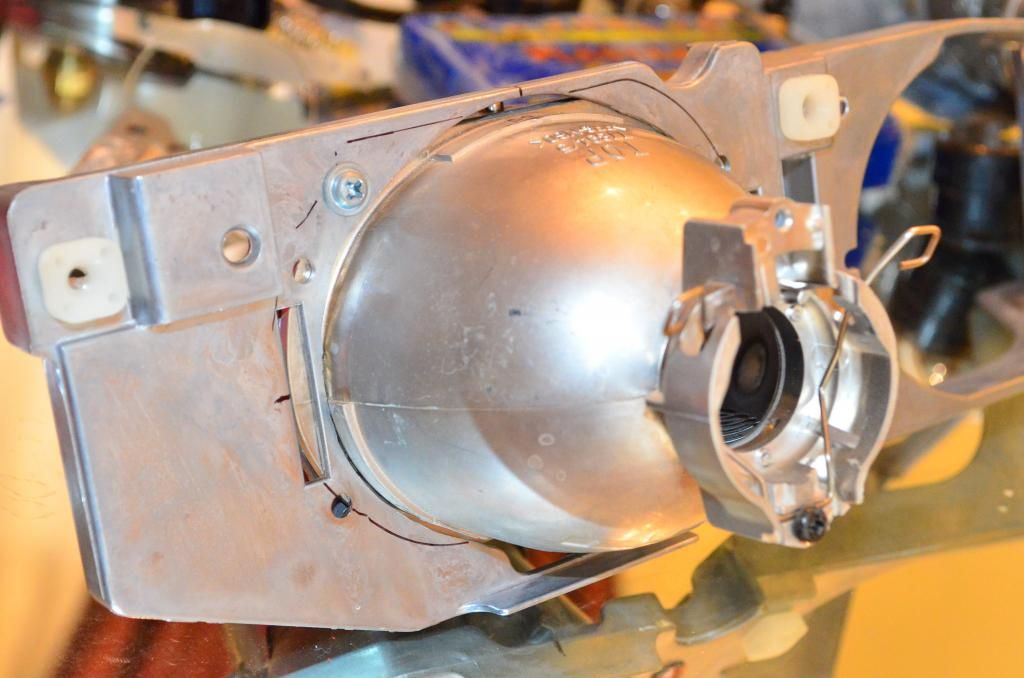
Flip it over and screw it into place on your bracket loosely.
This step is very very important. carfeully rotate the entire projector assembly on the bracket until the top and bottom of the projector are 100% level. This will be your rotational aim and you can not adjust it later so you want it to be correct! Screw the projector tightly onto the bracket using some loctite if you like.
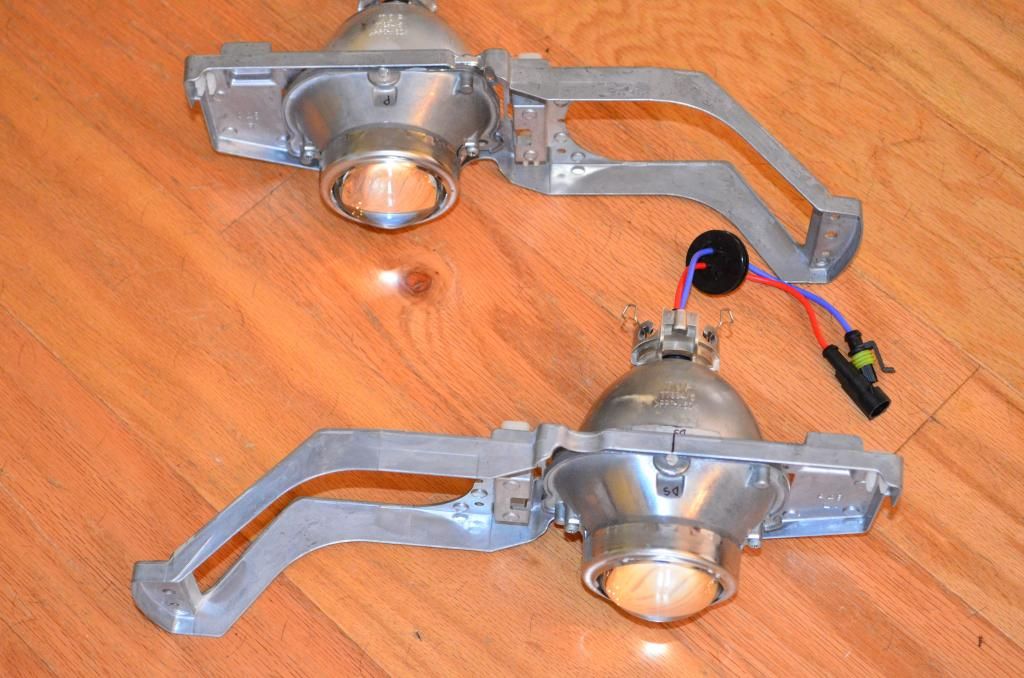
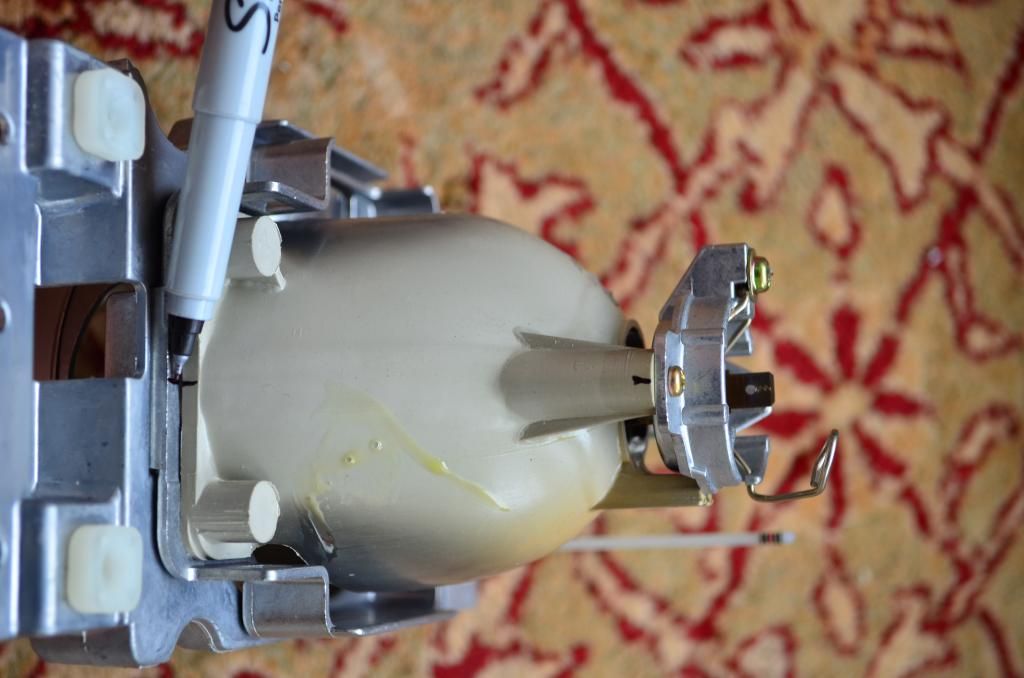
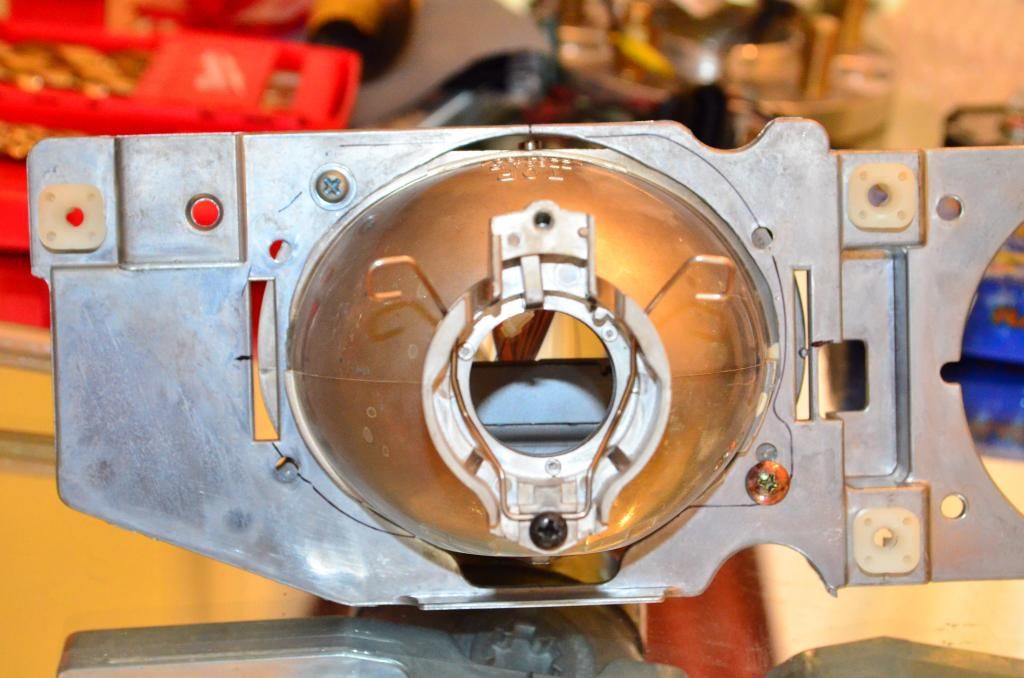
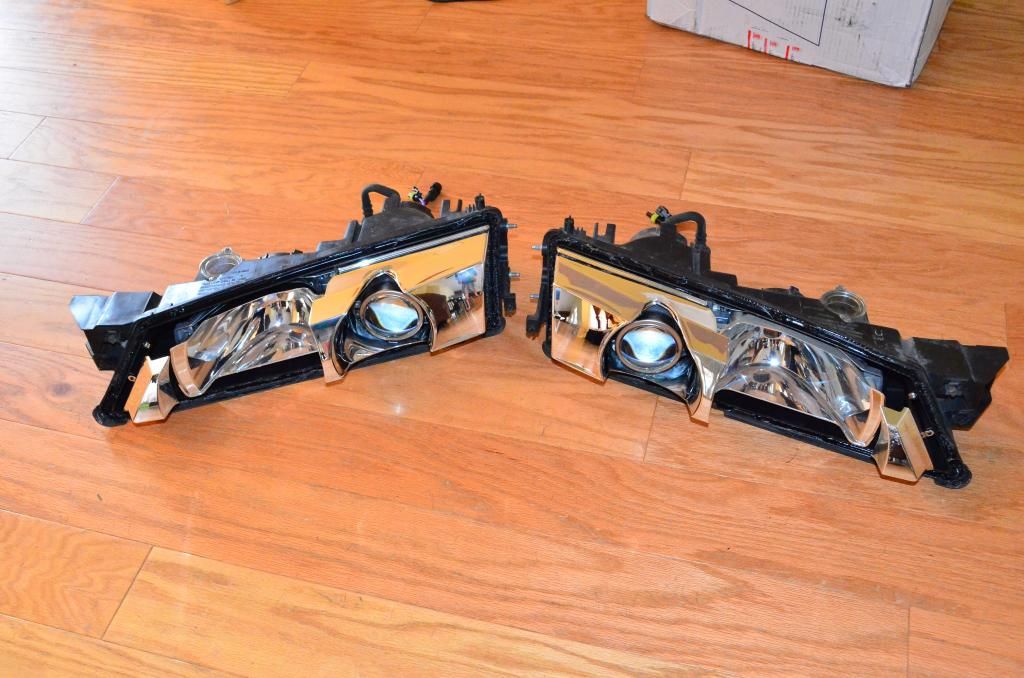
Both projectors mounted. Insert the bulbs into the back of the projectors and clip them in.
Using a car battery or 12v power supply fire up the bulb inside the projector.
re-attach the high beam reflector and insert the 9006 bulb back in, fire it up as well. You want to ensure that the high beam is just above center, and just to the inside of the lower step of the cutoff for each respective headlight. It looks weird now but the high beam will spread out with the lens back on due to the fluting in the lens. If it's a bit off, using washers space the high beam reflector off of the bracket until the alignment is as shown above.
Remove the bulbs. Screw the bracket back into each headlight
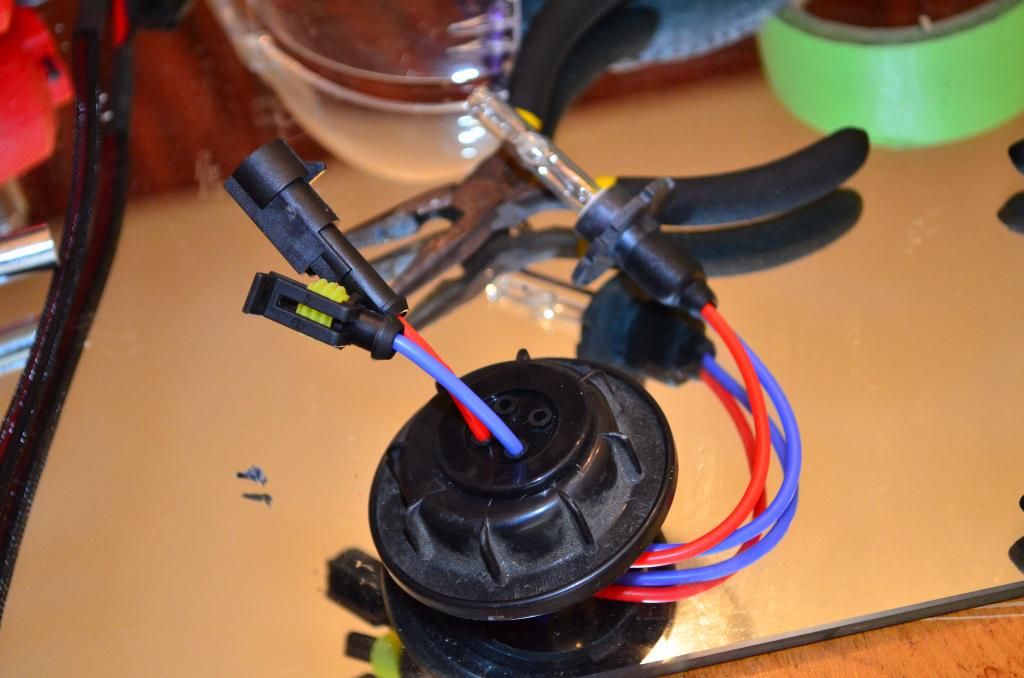
You now need to modify the rear cap to feed the bulb wires and gromet through. I opted to use aftermarket style "D2h" bulbs for this retrofit so the rear housing would not have to be modified. You certainly could use oem phillips or osram D2s bulbs and oem ballasts but this is just a little easier and cleaner of an install obviously.
screw the chrome bezels back into the housing.
Set the lenses back on the housing pressing gently. With the oven pre-heated to 250* again, set the lights back in the oven for several minutes until the glue once again becomes soft. Remove the headlight and press the lens fully into the housing and attach the lens clips back on. Install the low and high beam bulbs along with the modified rear low beam caps.
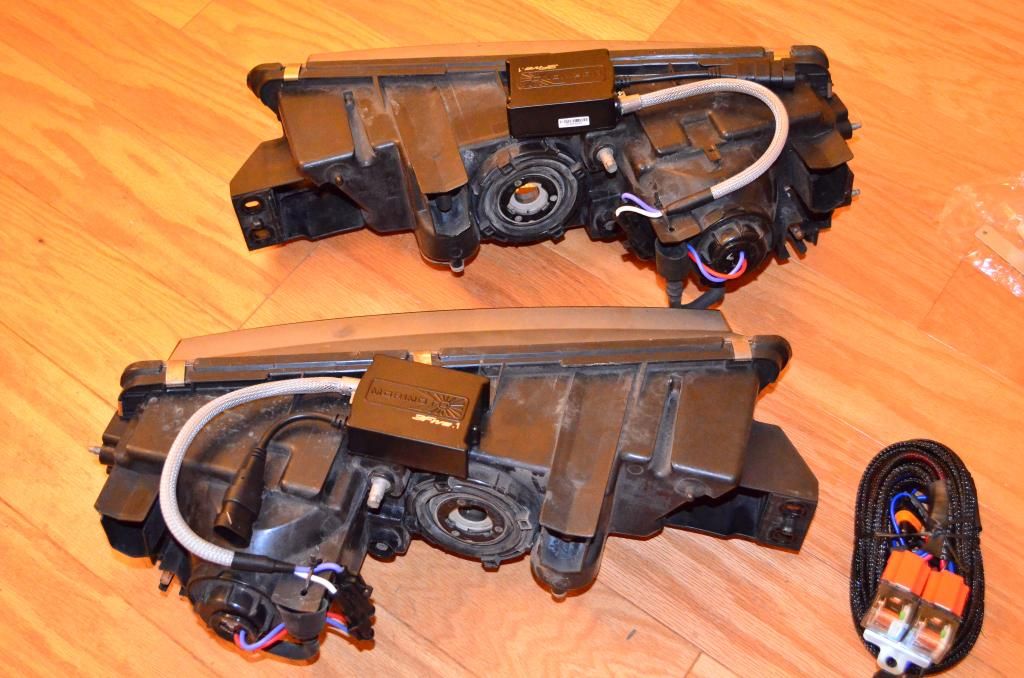
Mount the ballasts on the bottoms of the housings. This is a good spot that will not interfere with mounting back on the car.
*I do not have a good picture for the following, sorry, but it's really straight forward*
With one oem low beam plug you removed from your headlight caps solder it onto the leads of the aftermarket harness where it would attach to an h1 bulb. Attach the harness to your car using some ties and a bolt and nut for the relay, and make connections as necessary. You will need to ground it to the chassis, connect the power lead to your battery, and then plug the oem plug you attached earlier to the harness directly to the body harness. Re-install the headlights and connect the ballast wires to the inputs on the harness and the high beam bulbs to the body harness.

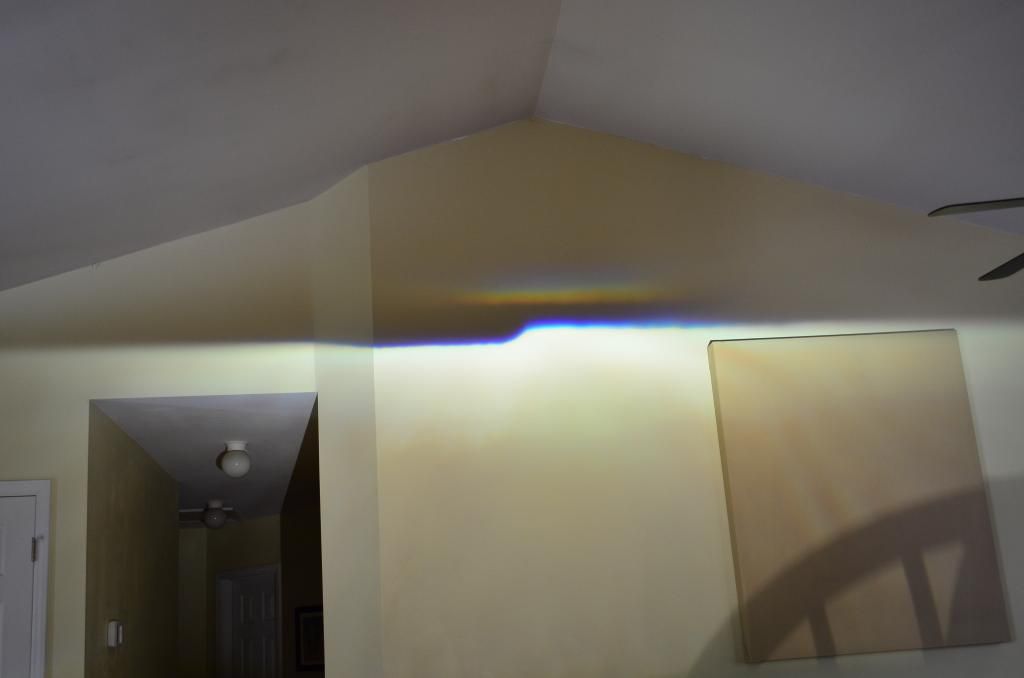
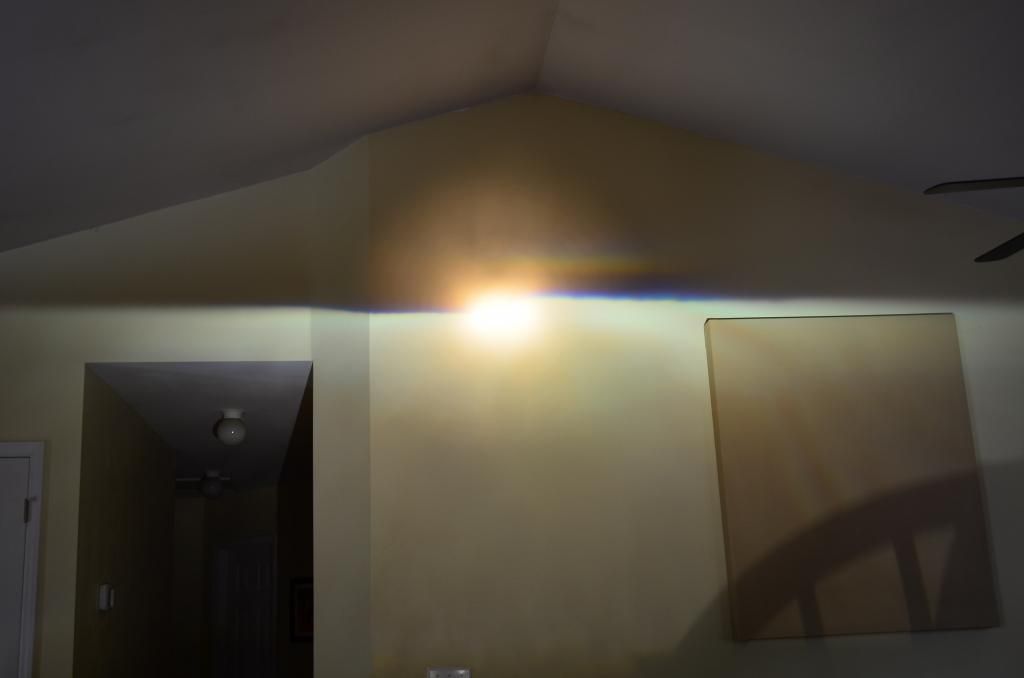
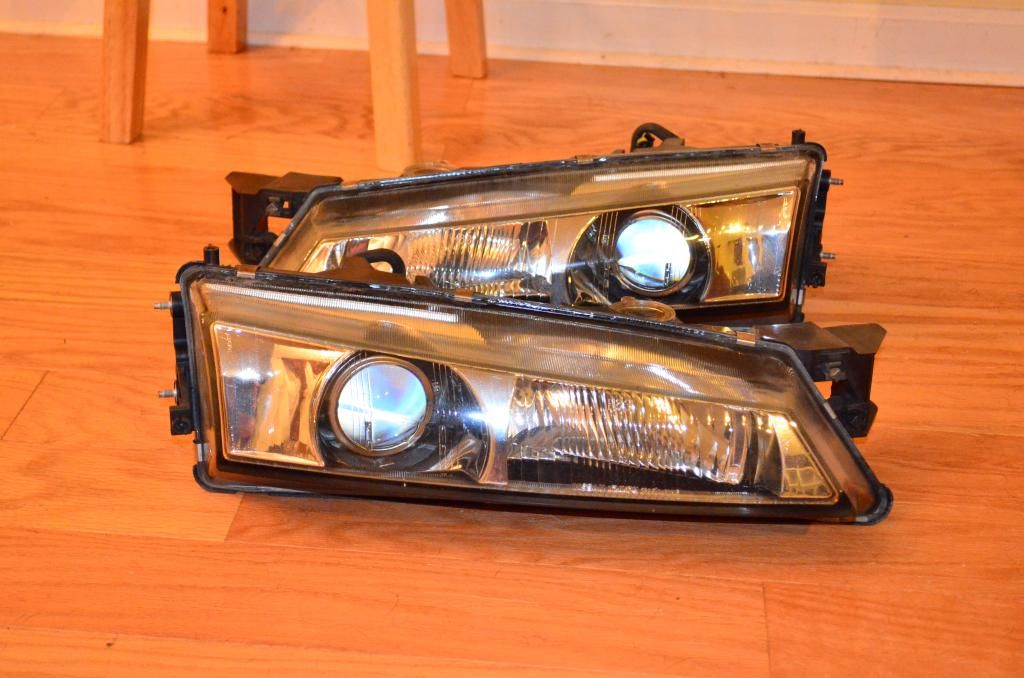
After dark take it out for a little drive and aim your headlights using the 8mm studs on the back against a flat light colored wall. You want the horizontal aim such that each cutoff step is directly infront of each headlamp at all distances. The upper portion of the beam should drop approx. 1-2" at a 25ft distance and the driver's side beam will overlap the passenger's. You will notice the output above is nice but there is some glare. This can be fixed by installing clear aftermarket lenses from the vertex style headlights onto the oem housings. Your down the road light intensity and cutoff sharpness and color will be greatly improved also.
Other projectors that can be used that I recommend: sc430, s2000, tsx, rx8, e46 single xenon, FX-replica bixenon (from
The Retrofit Source online: headlight upgrades for all applications)
Any questions feel free to ask. I've done at least a dozen retrofits for kouki s14 and many for s14 zenki as well.