Zilvia.net Forums | Nissan 240SX (Silvia) and Z (Fairlady) Car Forum

Go Back   Zilvia.net Forums | Nissan 240SX (Silvia) and Z (Fairlady) Car Forum > General > Tech Talk

Tech Talk Technical Discussion About The Nissan 240SX and Nissan Z Cars


Reply
 
Thread Tools Display Modes
Old 10-08-2008, 09:45 PM   #1
timtiminy
Zilvia Addict
 
timtiminy's Avatar
 
Join Date: Feb 2006
Location: Socal
Posts: 624
Trader Rating: (0)
timtiminy is a jewel in the roughtimtiminy is a jewel in the roughtimtiminy is a jewel in the roughtimtiminy is a jewel in the roughtimtiminy is a jewel in the roughtimtiminy is a jewel in the roughtimtiminy is a jewel in the rough
Feedback Score: 0 reviews
Send a message via AIM to timtiminy
coolant reservoir fix

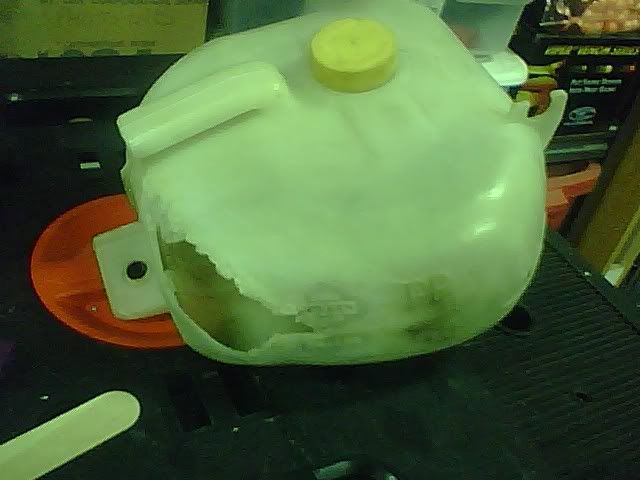
Hey guys i thought i would throw up a little diy write up on fixing a busted coolant reservoir. This will only work with a reservoir that isnt completely disinigrated. My reservoir had a hole in the top corner as you can see in picture 1 (sorry for the not so great quality photos, all i have is my camera phone.)
First things first... pull the reservoir out of the car and clean it up good on the outside.

Sand around the opening of the hole on the outside to prep the plastic to be bonded by the plastic epoxy.
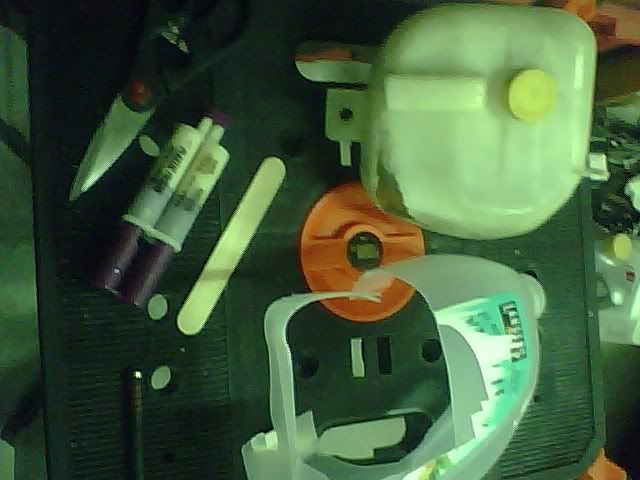
here is all the stuff i used...

find an empty juice container that has a similar bend corner, this is what you will use to cut and cover the hole. I cut one of the bottom corners out of the juice container and trimmed it to fit over the hole with overlap. I also used a heat gun to get it soft to conform it a little better and let it cool down while holding it over the hole to keep that shape. be careful here cause when the plastic gets soft it will be really hot.
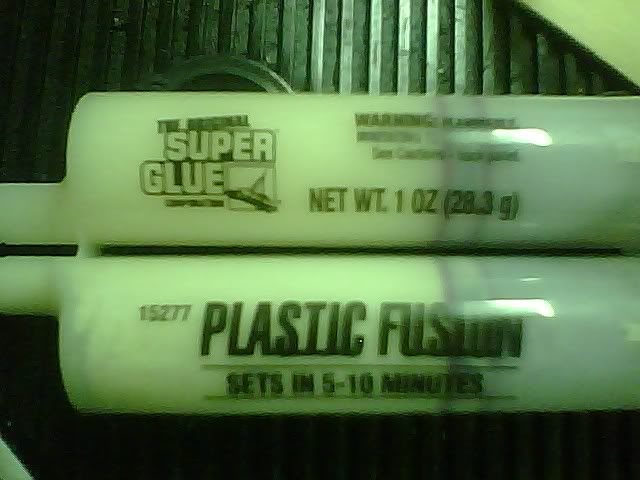
Here is the epoxy i used:

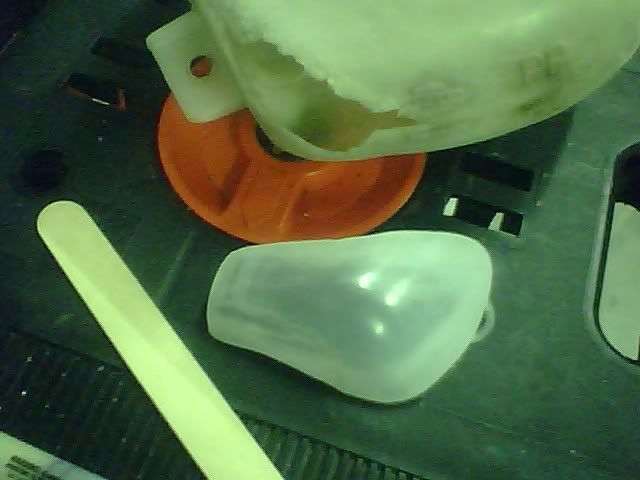
here is the corner of the plastic juice container i cut to fit over the hole:

Sand the inside edges of this piece to promote adhesion of the epoxy. mix the epoxy and put an ample amount around the hole on the reservoir and around the inside edge of the plastic piece you cut. place and hold in place till the epoxy bonds... this should only take a few minutes. I used some extra epoxy around the edges as if it were caulk and also sanded down all the excess once it dried... this didnt cost me anything as i had everything i needed laying around, all you might need is the plastic epoxy which is only $5 at your local hardware store.
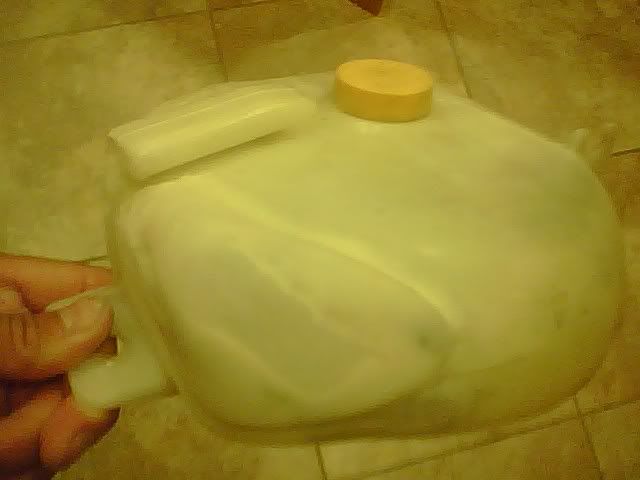
Here is the finished, repaired coolant reservoir :

Last edited by timtiminy; 10-09-2008 at 12:41 AM..
timtiminy is offline   Reply With Quote
Sponsored Links
Old 10-08-2008, 09:54 PM   #2
gotta240
Post Whore!
 
Join Date: Dec 2005
Location: so cal
Posts: 3,496
Trader Rating: (21)
gotta240 is close to perfectiongotta240 is close to perfectiongotta240 is close to perfectiongotta240 is close to perfectiongotta240 is close to perfectiongotta240 is close to perfectiongotta240 is close to perfectiongotta240 is close to perfectiongotta240 is close to perfectiongotta240 is close to perfectiongotta240 is close to perfection
Feedback Score: 21 reviews
awesome enginuity.

thanks!
gotta240 is offline   Reply With Quote
Old 10-08-2008, 09:57 PM   #3
EDacIouSX
Post Whore!
 
EDacIouSX's Avatar
 
Join Date: Nov 2004
Location: Los Angeles
Age: 39
Posts: 4,566
Trader Rating: (53)
EDacIouSX is close to perfectionEDacIouSX is close to perfectionEDacIouSX is close to perfectionEDacIouSX is close to perfectionEDacIouSX is close to perfectionEDacIouSX is close to perfectionEDacIouSX is close to perfectionEDacIouSX is close to perfectionEDacIouSX is close to perfectionEDacIouSX is close to perfectionEDacIouSX is close to perfection
Feedback Score: 53 reviews
Send a message via ICQ to EDacIouSX Send a message via AIM to EDacIouSX Send a message via MSN to EDacIouSX Send a message via Yahoo to EDacIouSX
lol looks all busted up and patched together. but at least it works right? good write up.
EDacIouSX is offline   Reply With Quote
Old 10-08-2008, 10:06 PM   #4
timtiminy
Zilvia Addict
 
timtiminy's Avatar
 
Join Date: Feb 2006
Location: Socal
Posts: 624
Trader Rating: (0)
timtiminy is a jewel in the roughtimtiminy is a jewel in the roughtimtiminy is a jewel in the roughtimtiminy is a jewel in the roughtimtiminy is a jewel in the roughtimtiminy is a jewel in the roughtimtiminy is a jewel in the rough
Feedback Score: 0 reviews
Send a message via AIM to timtiminy
its air tight. literally... i covered up the overflow hole and return line hole and blew into it through the fill hole and no air leaks at all. I did this cause i didnt want to spend any money on a new one when i am probably selling the car soon anyhow.
timtiminy is offline   Reply With Quote
Old 10-08-2008, 10:20 PM   #5
s13dan
Zilvia FREAK!
 
s13dan's Avatar
 
Join Date: Aug 2003
Location: Springfield, Mo
Posts: 1,519
Trader Rating: (2)
s13dan will become famous soon enoughs13dan will become famous soon enoughs13dan will become famous soon enoughs13dan will become famous soon enough
Feedback Score: 2 reviews
lol great fix! looks like something i would do
__________________
89 240sx hatch #933-the hot rod
91 240sx coupe #131,603-the daily
s13dan is offline   Reply With Quote
Old 10-08-2008, 10:23 PM   #6
SammyGreen
Zilvia Member
 
Join Date: Oct 2007
Location: Appleton Wisconsin
Age: 36
Posts: 152
Trader Rating: (9)
SammyGreen has a spectacular aura aboutSammyGreen has a spectacular aura aboutSammyGreen has a spectacular aura aboutSammyGreen has a spectacular aura aboutSammyGreen has a spectacular aura aboutSammyGreen has a spectacular aura about
Feedback Score: 9 reviews
hey I just fixed one for a girl I know, I literally plastic welded it though...

looks great!
SammyGreen is offline   Reply With Quote
Reply

Bookmarks


Thread Tools
Display Modes

Posting Rules
You may not post new threads
You may not post replies
You may not post attachments
You may not edit your posts

BB code is On
Smilies are On
[IMG] code is On
HTML code is Off

Forum Jump


All times are GMT -6. The time now is 09:27 PM.


Powered by vBulletin® Version 3.8.11
Copyright ©2000 - 2025, vBulletin Solutions Inc.
vB.Sponsors
Copyright ? 1998 - 2022, Zilvia.net