|
|||||||
| Tech Talk Technical Discussion About The Nissan 240SX and Nissan Z Cars |
 |
|
|
Thread Tools | Display Modes |
|
|
 05-24-2012, 08:10 PM
|
#1 |
|
Zilvia Member
 Join Date: Sep 2009
Location: Champaign il
Age: 35
Posts: 214
Trader Rating: (1)
 Feedback Score: 1 reviews
 |
my ls6 350z build
been posting on other forums other than this one but a few people asked me to post here so i am going to just post all my progress here.
Im not nearly as detailed as some of the other owners on this forum but here we go Decided a few weeks ago I was fed up with being boosted because i was at a turning point either build the block or swap the motor for a ls series motor. I found a local to buy my turbo kit almost 3 days after being posted forsale. built and tuned the kit for $4400 and sold it for $5000 so I came out on top. first step was remove the turbo kit. 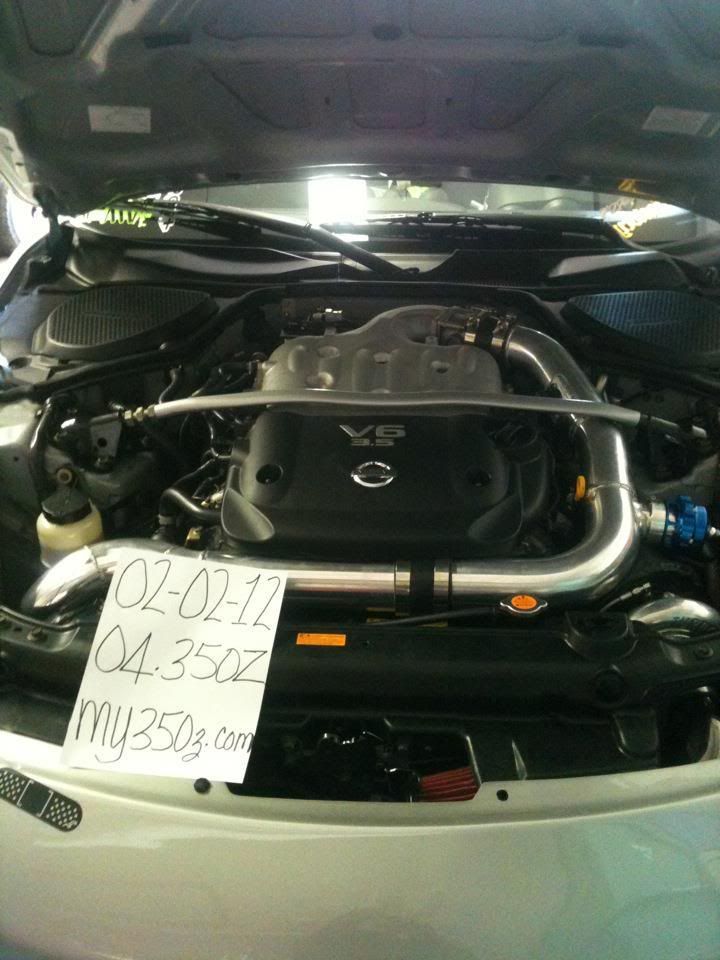 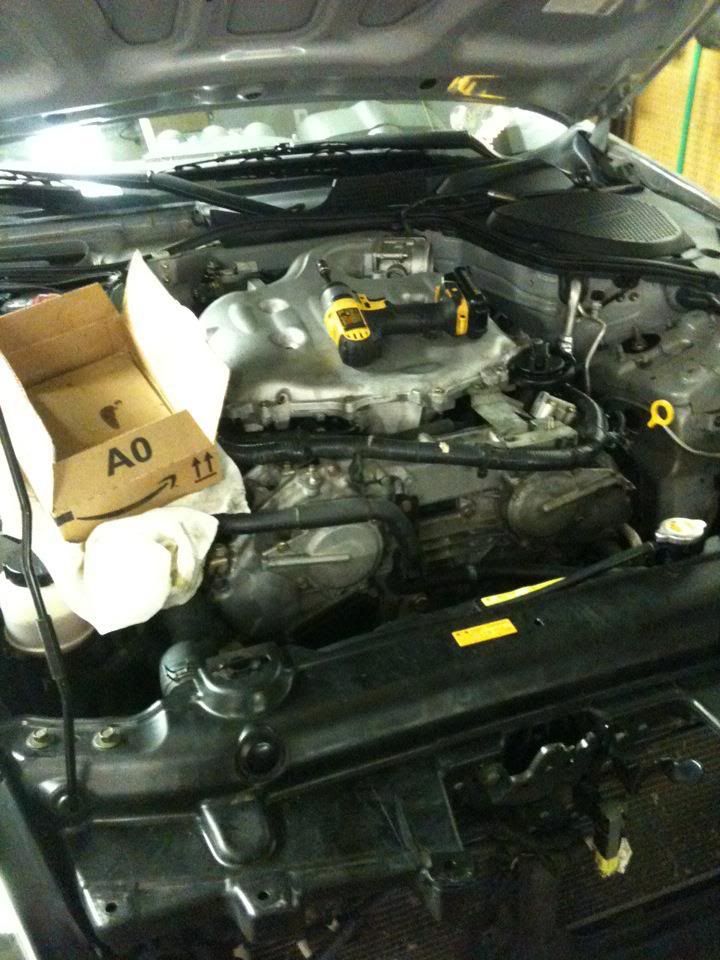 took about 3.5 hours to uninstall. record timing if you ask me. the kid i sold the kit to asked me to install it and i said i would in about a month for a fee. I went searching the forums for a ls series motor and wasnt finding anything that caught my eye. decided to see who my dealership went through to find their remanned motors. they go through a number of different ones only one had what i was looking for neal auto out of peoria had a ls6 with 88k miles complete with: wiring harness ecu clutch and flywheel and all accessories onlyn things not included: transmission and throttle body. I went through and ordered it. It showed up this afternoon. 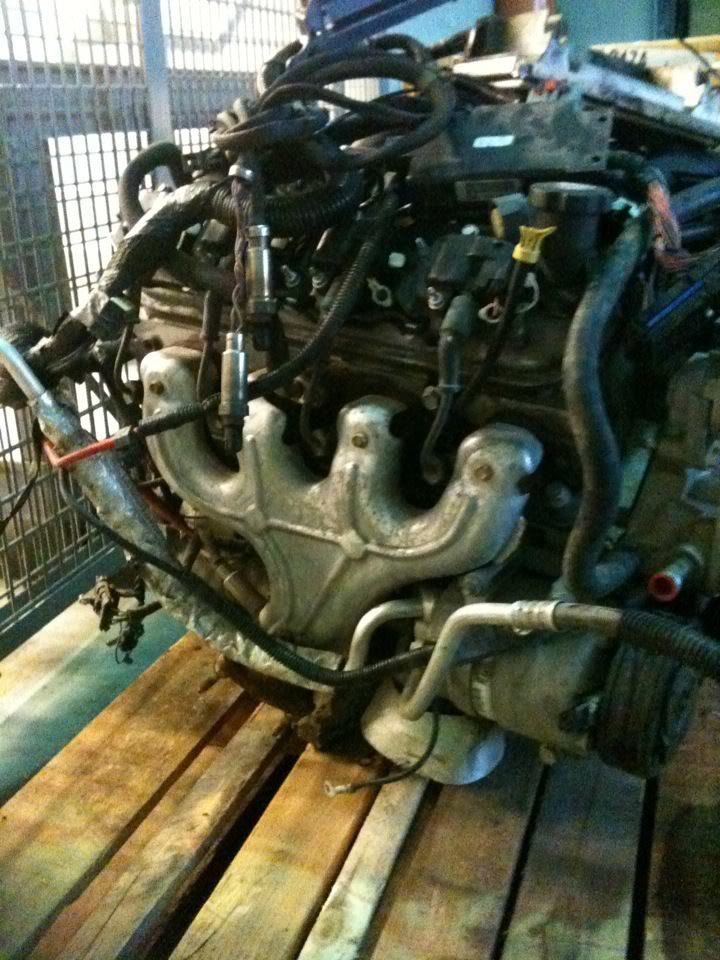 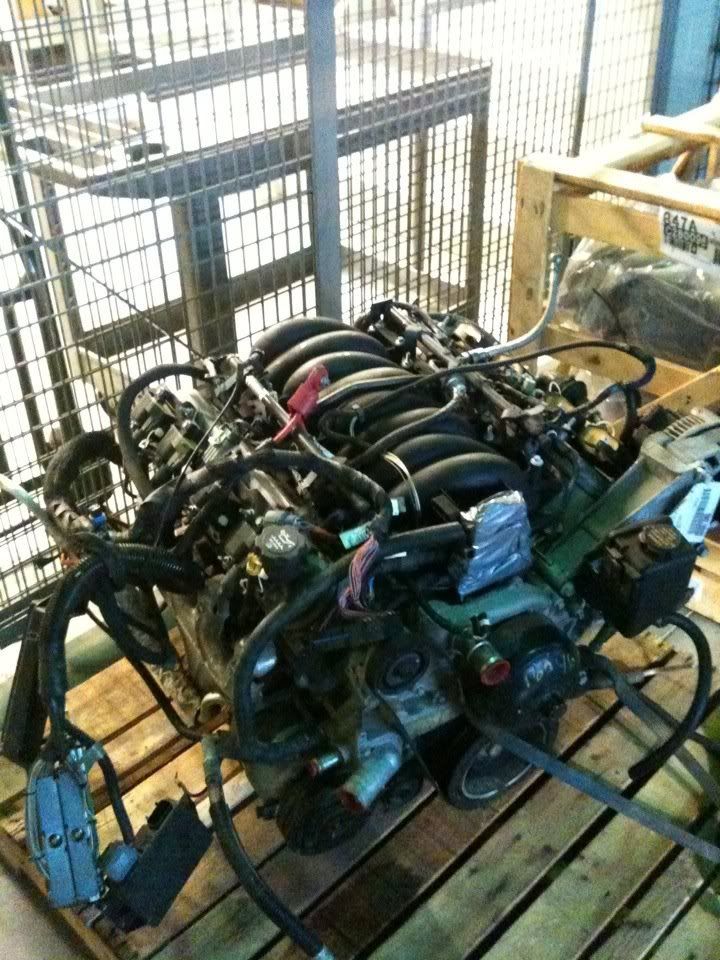 it was in pretty decent shape. in my eyes. the powersteering pulley was snapped off which upset me a tad the AF sensor wire was cut and missing the connector. and two of the wires to the injectors were frayed and i called them and they said they would find a replacement PS pump free of charge. and he refunded me $50 for the wiring issues. seemed like a pretty decent company if you ask me. so now i am waiting to get the motor home and on the engine stand to do some more inspections and decide what will be needed to be replaced/ upgraded before installation. these are the things I already plan on buying/upgrading before the install: fuel rails spark plugs and wires intake gasket set head gaskets water pump all new pulleys t56 transmission cable driven throttlebody sikky 1 7/8 long tube headers sikky ls mount kit sikky power steering line sikky master cylinder I am not familiar with what products are good for the ls motors yet. if you have any suggestions on brands etc let me know. theres definately a long road ahead. I have already found out that I am going to need to re-pin the ecu to run the cable driven throttle body. I did some research on possibly using the drive by wire set up but it just isnt worth the hastle. I will be wiring the LS harness into the Z harness myself. sikky offers the service but i have read too many horror stories and i know i can manage this myself going to have to figure out a way to run the cable into the car and mount it but shouldnt be a problem. I have a few ideas and am searching the forums to see how others did it. this is just the begging and will keep posted. ill post more pics once i get the motor home and on the engine stand. all comments and suggestions are welcome. |

|

|
| Sponsored Links |
|
05-24-2012, 08:10 PM
|
#2 |
|
Zilvia Member
Join Date: Sep 2009
Location: Champaign il
Age: 35
Posts: 214
Trader Rating: (1)
Feedback Score: 1 reviews
|
well tonight i made a tad bit of progress.
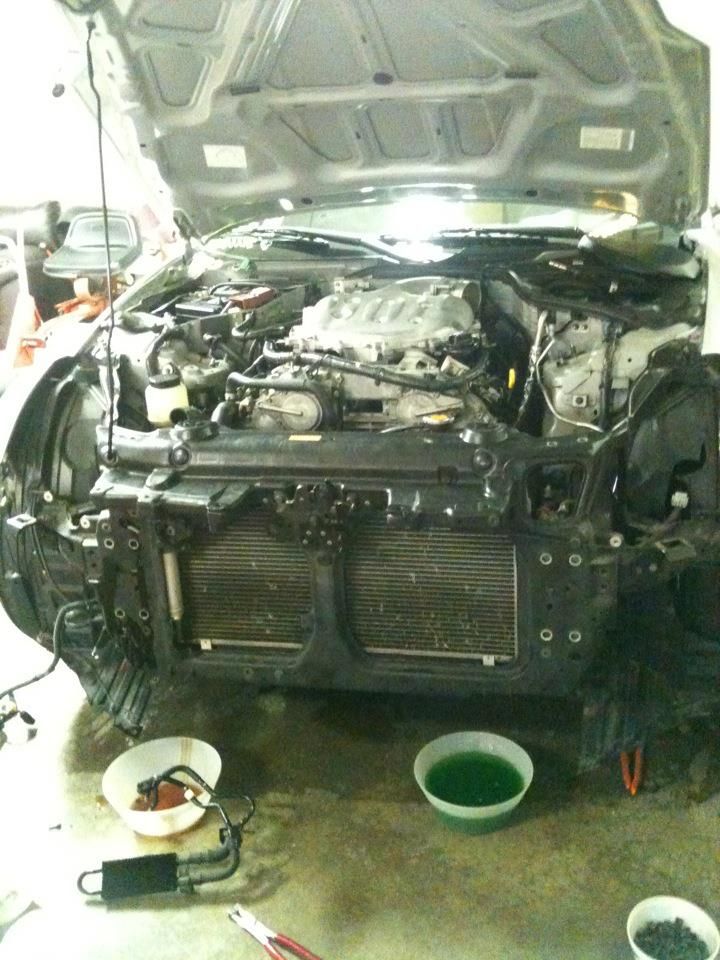 removed the head lights, Power steering cooler, and hood latch. 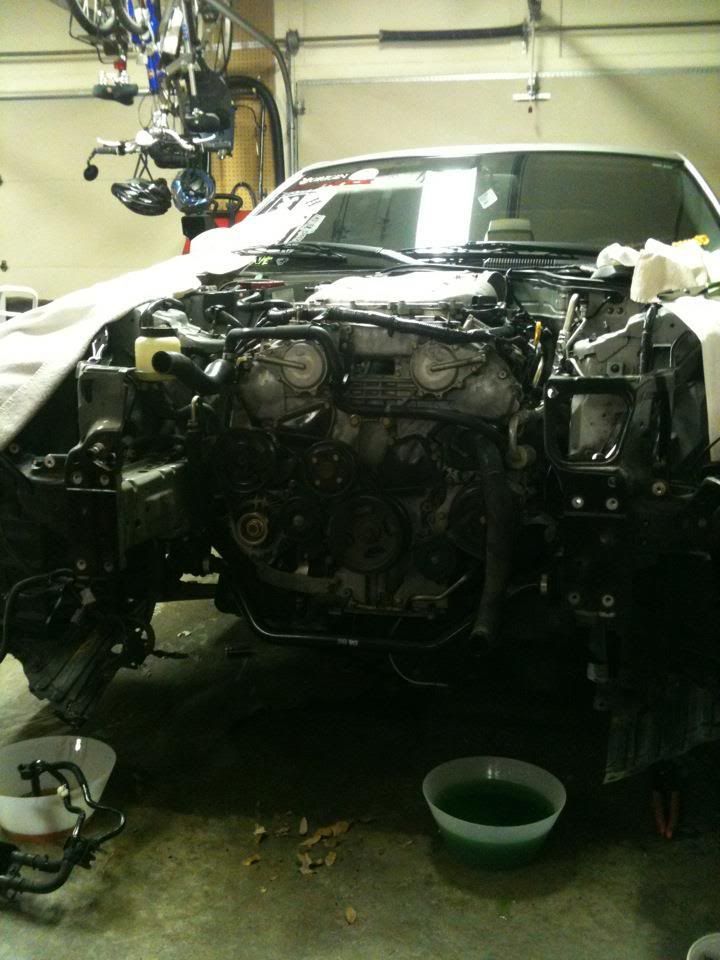 removes the core support, radiator and ac components... unfortunately the support slipped and kinked a AC line which isnt tooo bad atleast where it bent willl just be a line to replace and not more than that.. I ended up borrowing a engine stand but did not have time to get the correct size bolts to hold it in place considering i dont have the T56 tranny yet. Tomarros goal remove engine transmission and driveshaft. and label all connectors because I will have to wire the z harness into the ls6 harness. |
|
|
|
|
05-24-2012, 08:11 PM
|
#3 |
|
Zilvia Member
Join Date: Sep 2009
Location: Champaign il
Age: 35
Posts: 214
Trader Rating: (1)
Feedback Score: 1 reviews
|
made a ton of progress today!
didnt make any purchases for the ls6 the week hopefully next pay period ill have the sikky kit on order or the T56 trans if i can find one..*if you know anyone that has one please let me know* on the the pictures! remove ac lines 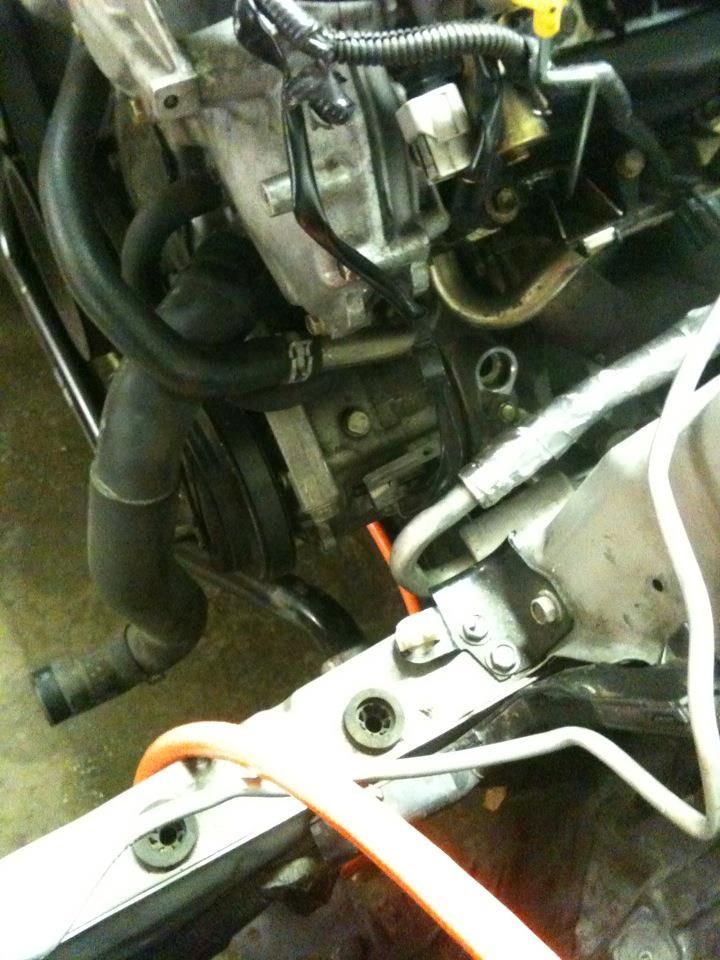 removed ps line 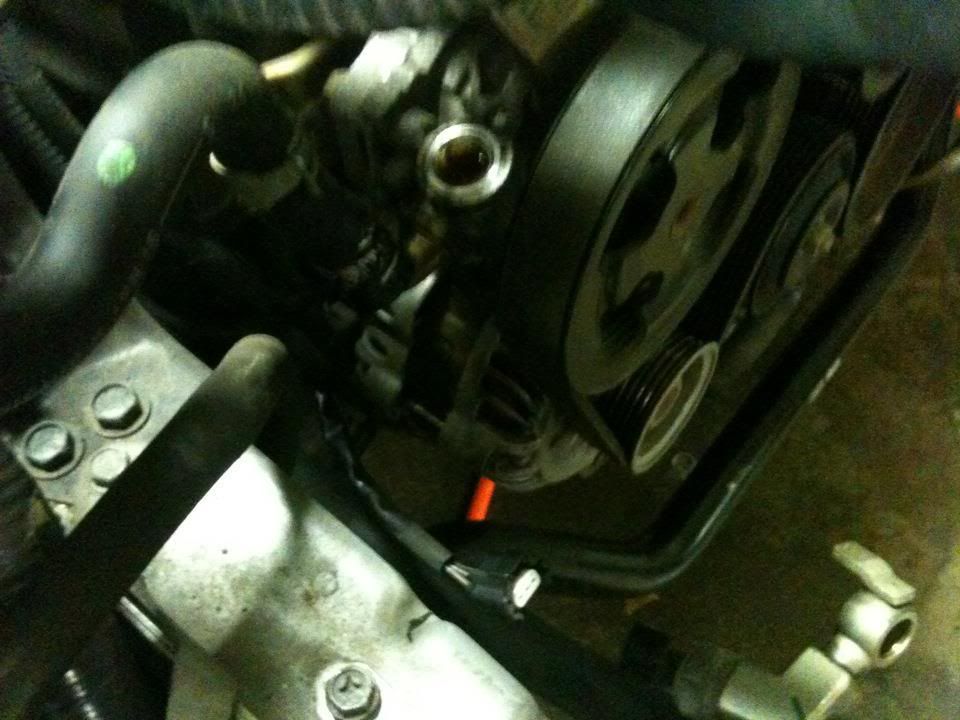 remove shifter and driveshaft 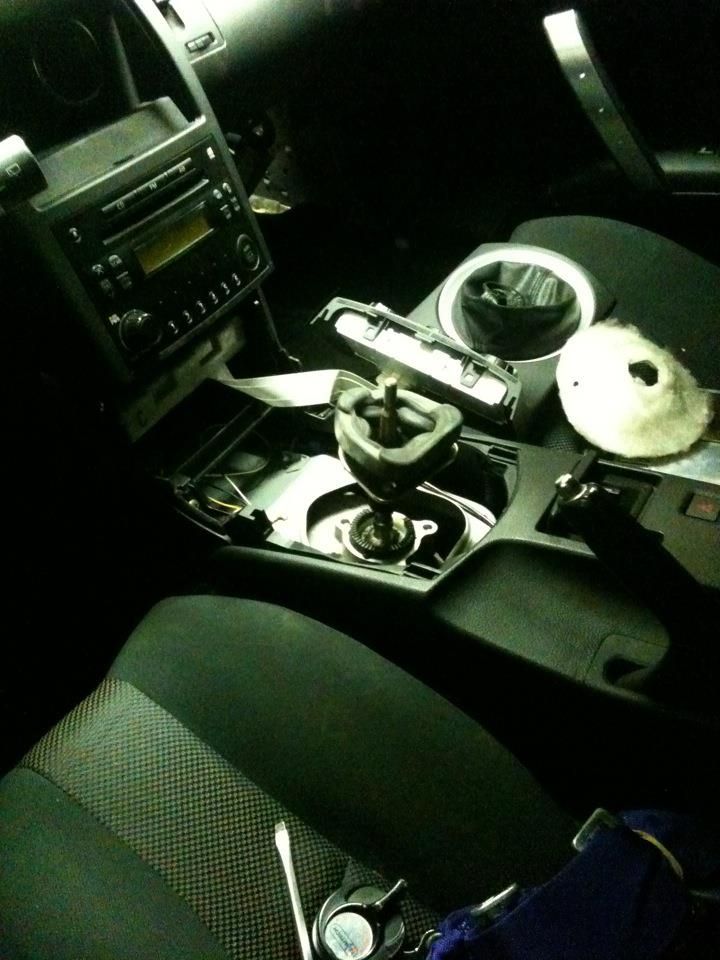 cherry picking time!!! 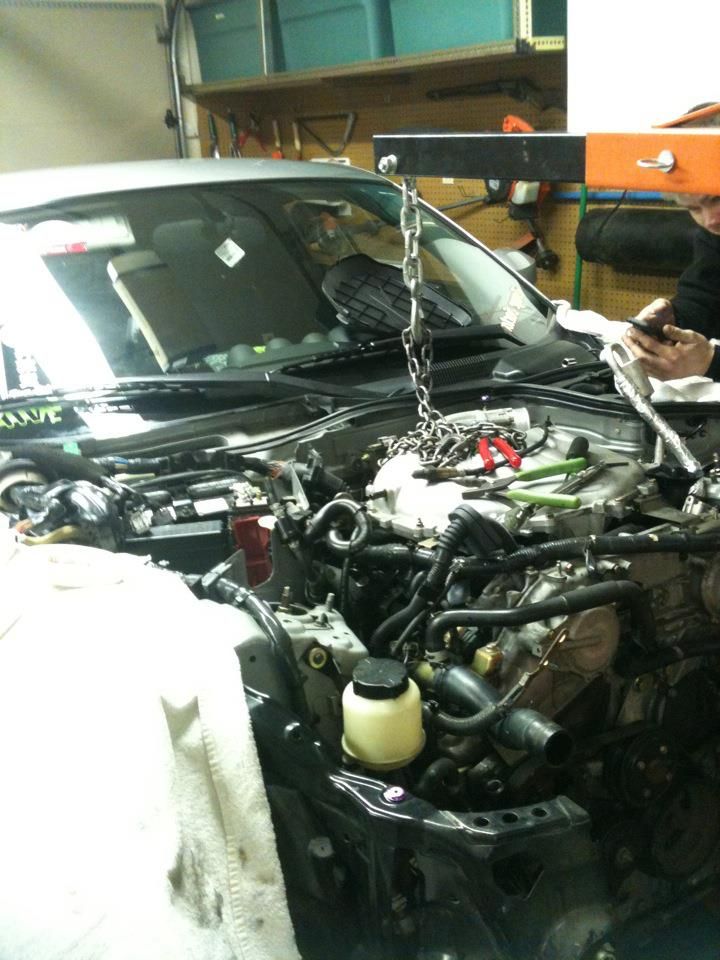 up and out she came in about 3 hours give or take 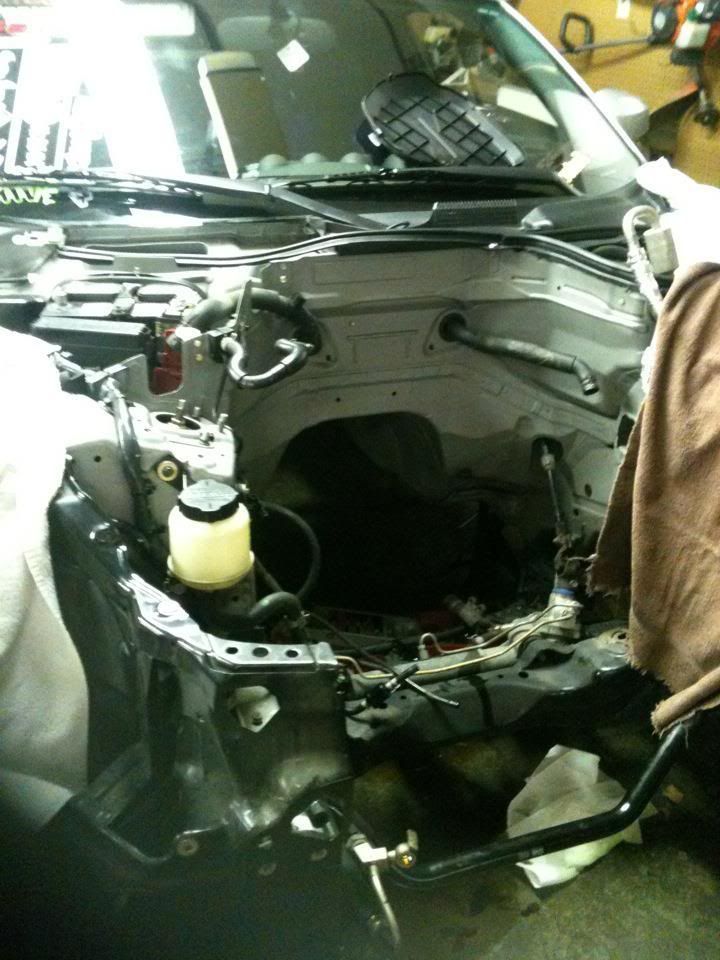 vroom vroom  not me ... another toyota tech ride kyle ride! 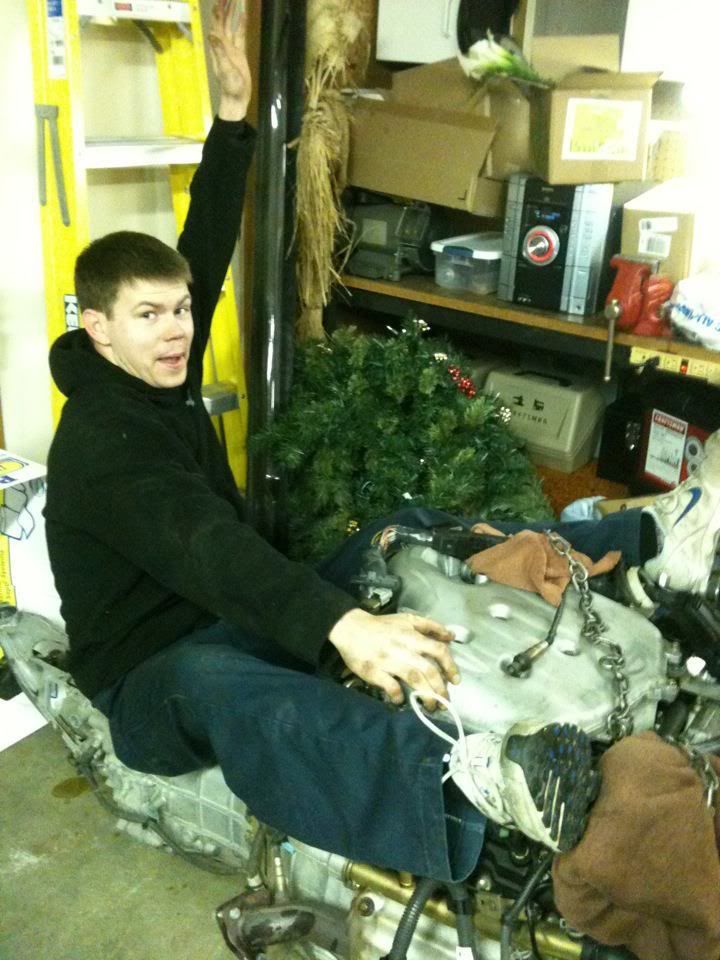 sitting pretty 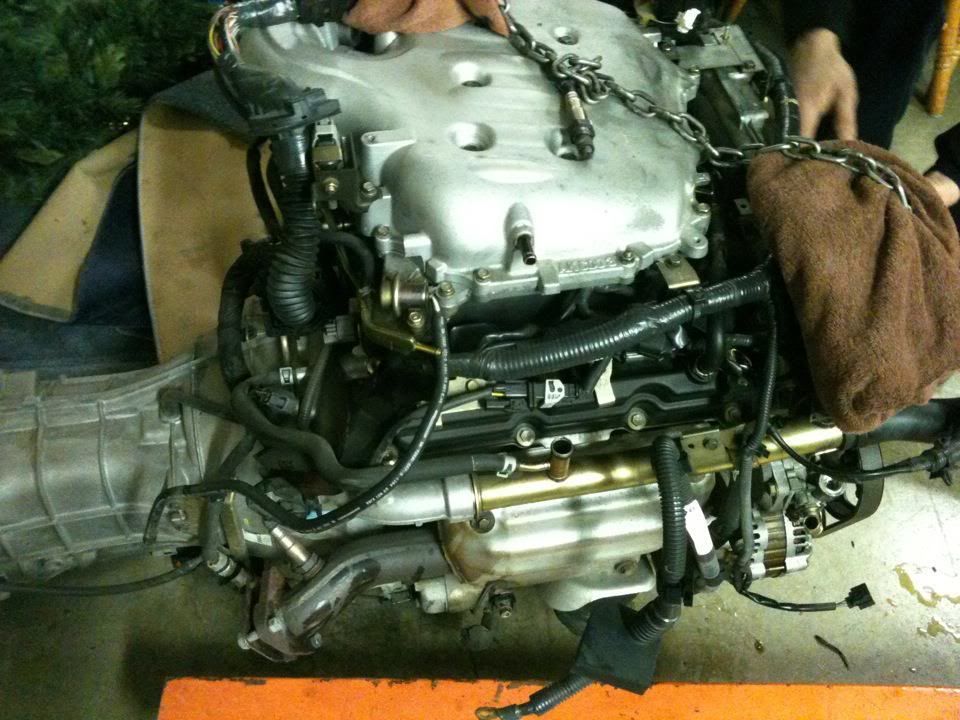 placed the ls6 on the stand and removed the headers and threw away egr 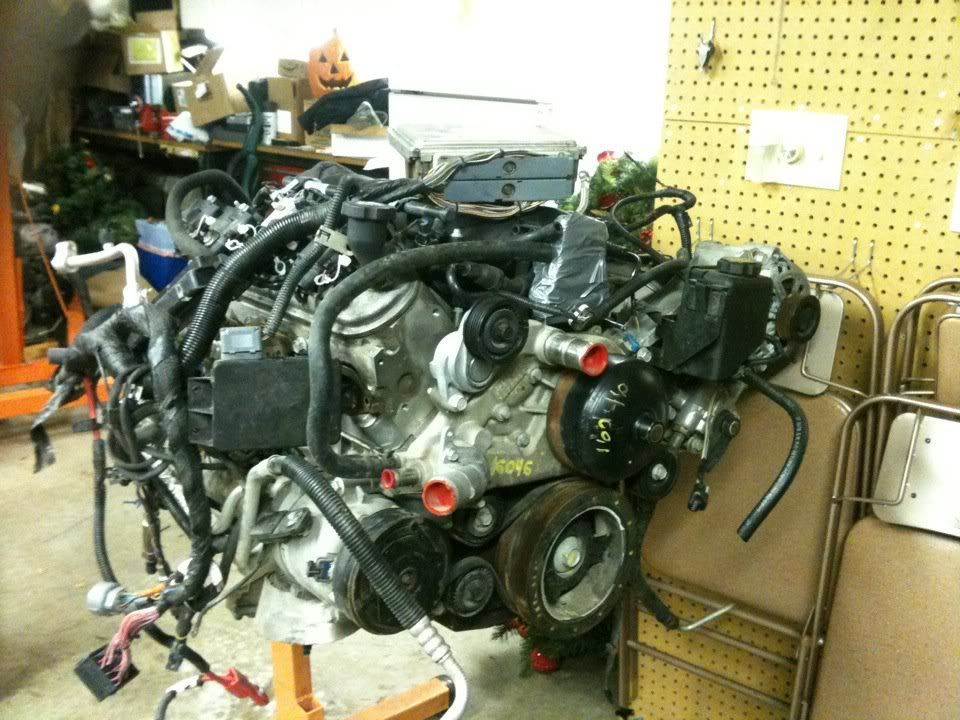 thats pretty well my progress for the day. next weeks goal is remove and label the harnesses from both ls6 and vq35 and prepare them to be wired together.  not looking forward to next week but will post pics. not looking forward to next week but will post pics.enjoy. |
|
|
|
|
05-24-2012, 08:13 PM
|
#4 |
|
Zilvia Member
Join Date: Sep 2009
Location: Champaign il
Age: 35
Posts: 214
Trader Rating: (1)
Feedback Score: 1 reviews
|
yesturdays progress went well only spent about an hour and a half removing the wiring harness from the engine and trans all wires are correctly labeled and ready to be wired into the ls6 harness once it is labeled and removed.
on to the pics. engine stripped of the wiring harness. 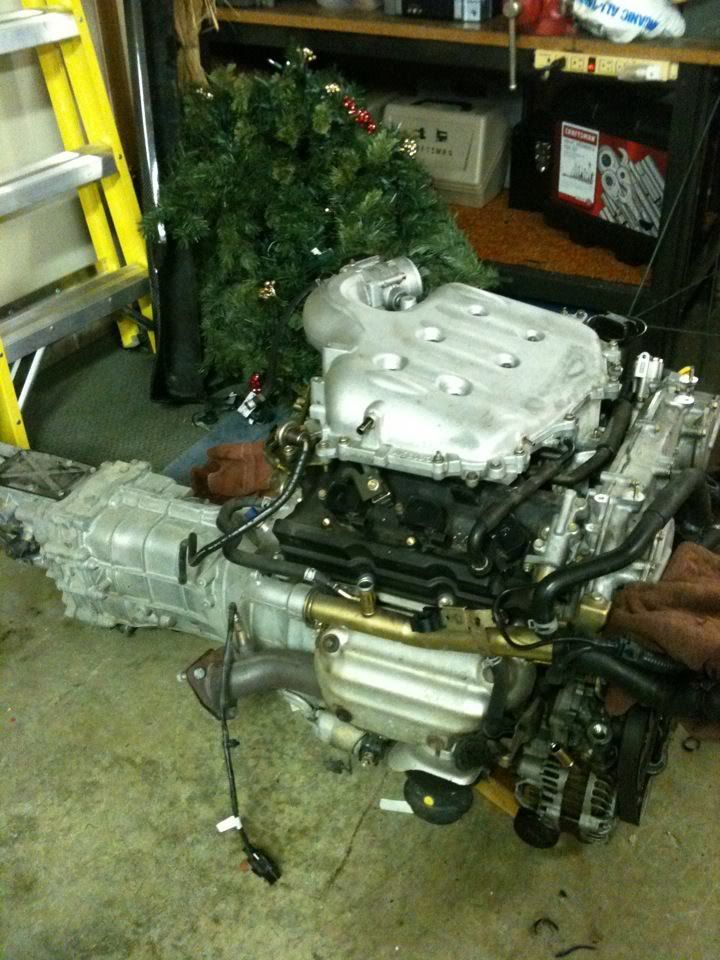 quick pic of the trans. quick pic of the motor 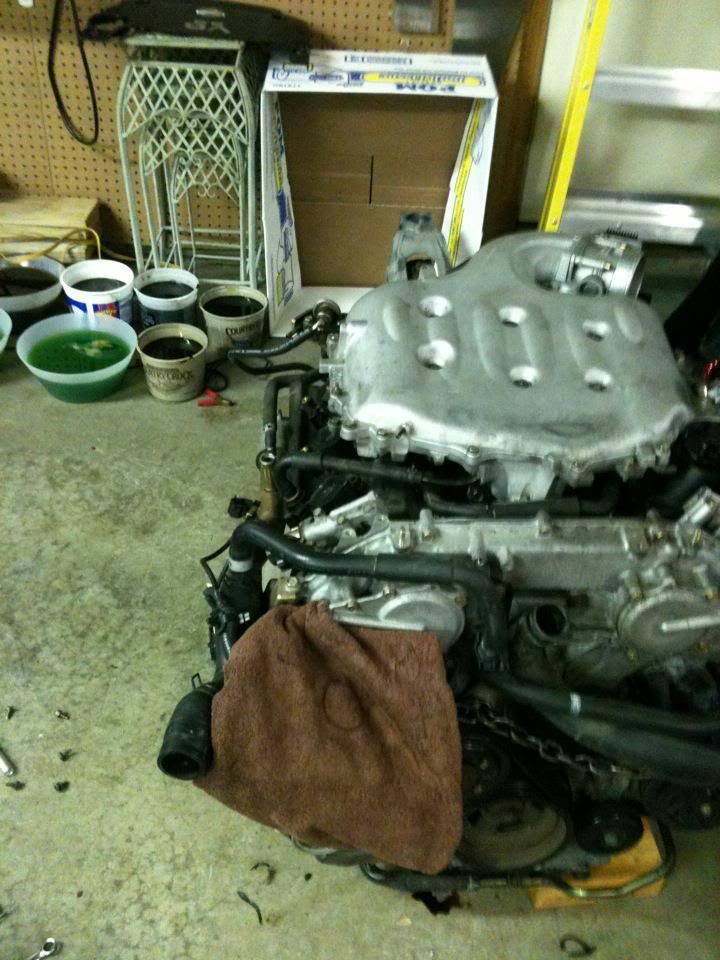 im not sure but i think i toasted the oem clutch  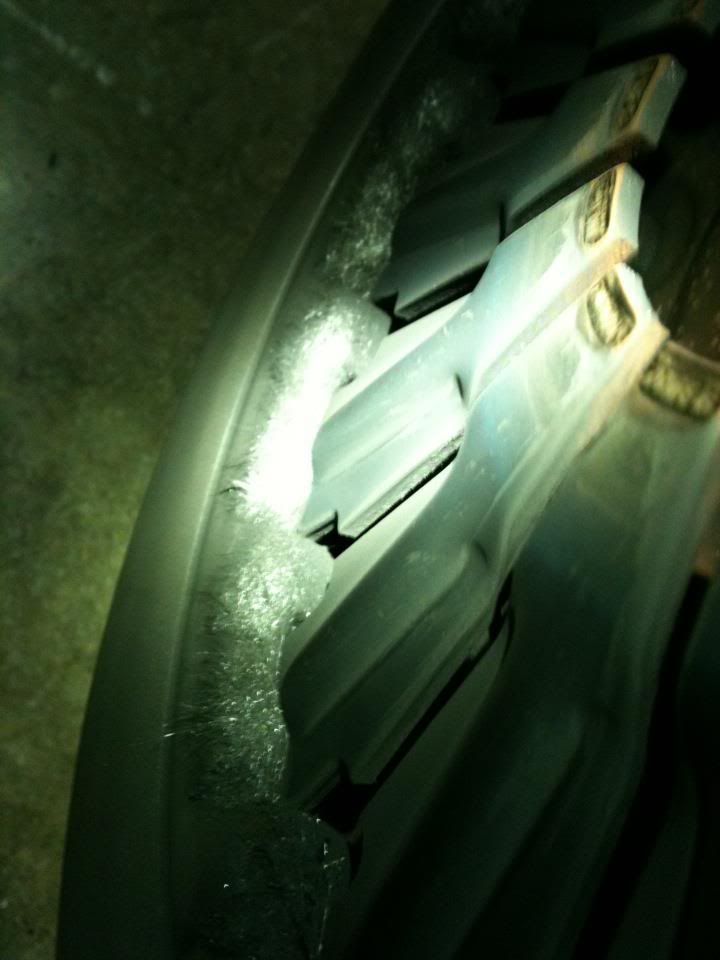 bell housing 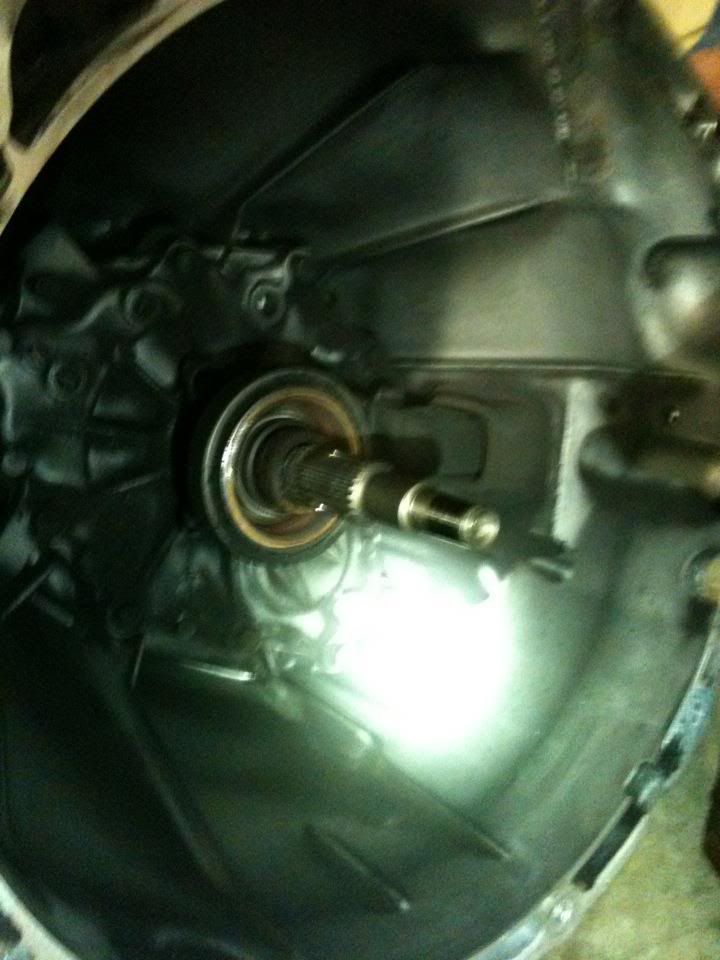 harness laid out and labeled 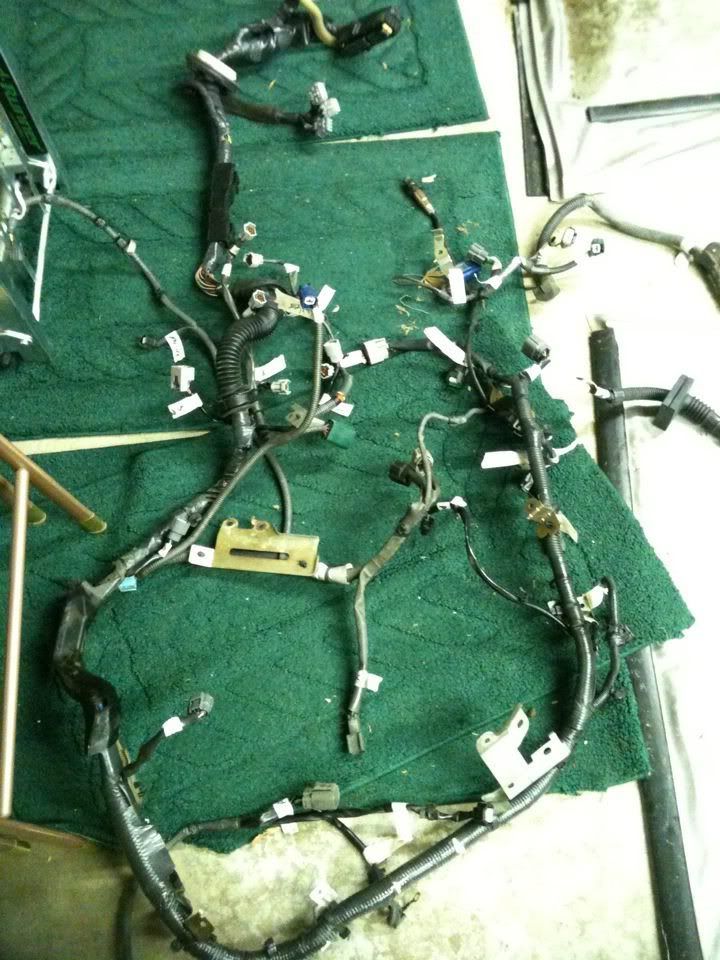 seperation pic 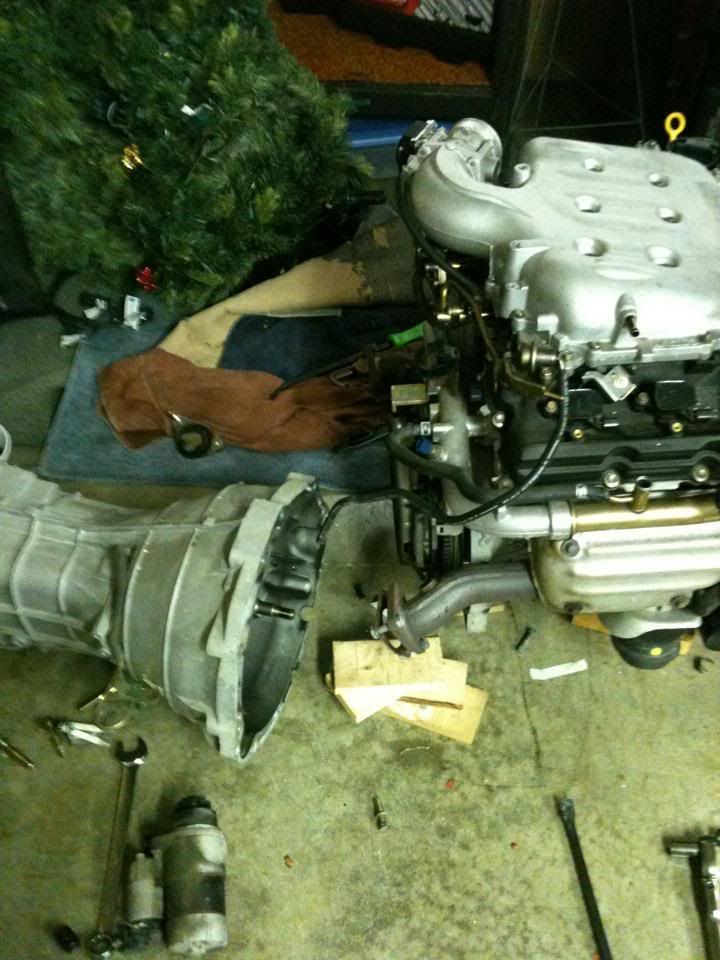 all wrapped up and ready to be shipped. 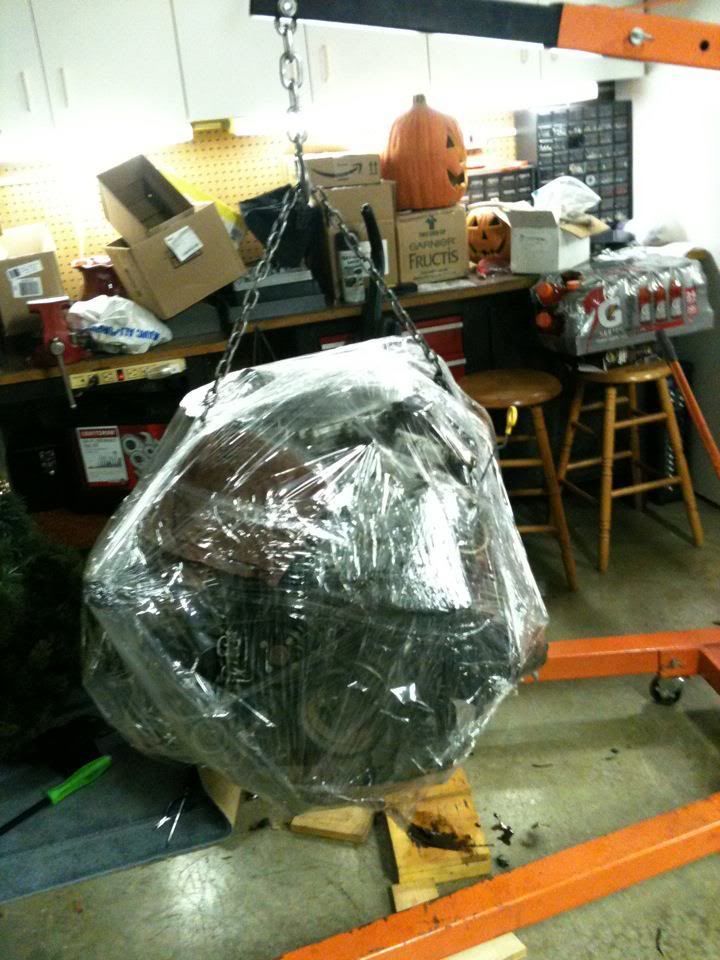 trans wrapped loaded into the truck 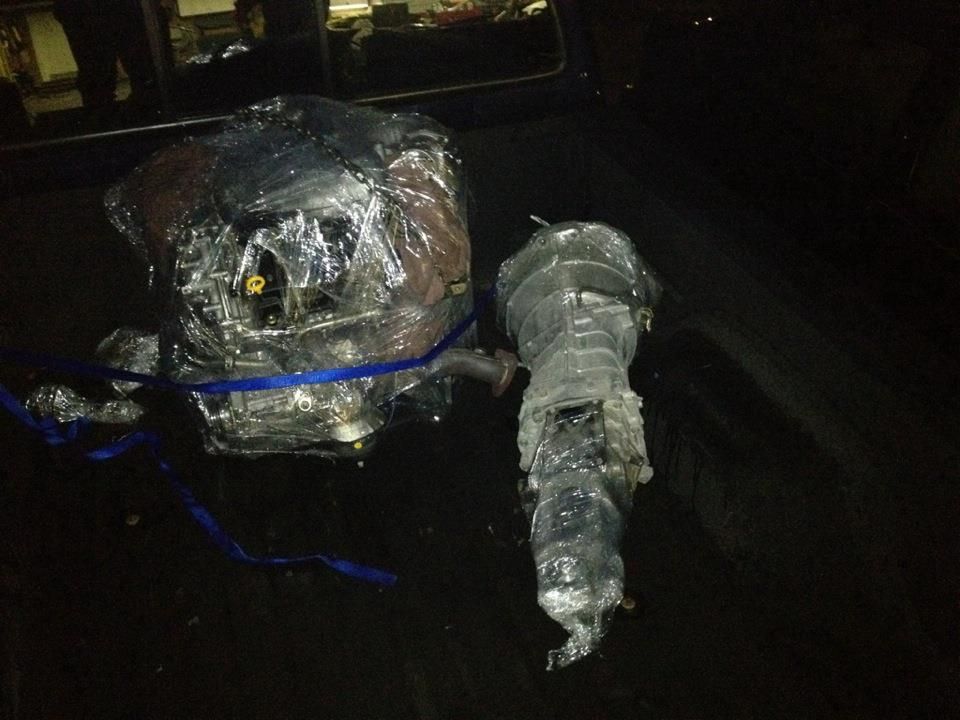 so that was my progress last night. progress planned for sunday is pull and label the ls6 harness. pull the coil pack brackets and valve covers so sand and have them powder coated. im thinking i am going to do gloss black with chrome flake for the valve covers and just gloss back on the coil brackets. while the covers are off i will inspect the valves, springs etc. for damage and possible upgrade. and may perform a leak down test just for my own self satisfaction. also i ordered the lokar 48" stainless steel braided throttle cable. in black. *still looking for a throttle body* hopefully ordering the sikky kit in the morning will keep the forums updated. with pictures and progress |
|
|
|
|
05-24-2012, 08:14 PM
|
#5 |
|
Zilvia Member
Join Date: Sep 2009
Location: Champaign il
Age: 35
Posts: 214
Trader Rating: (1)
Feedback Score: 1 reviews
|
So today is update day.
finally got to work on the ls6 a bit today and get things torn apart so i can figure out what needs to be replaced cleaned etc. todays goal was to get the wiring harness labeled correctly and removed from the engine. a few clips were broken or missing but nothing i cant fix or dont need. second on the list was remove the valve covers and inspect the heads to see what needs to be replaced or cleaned. 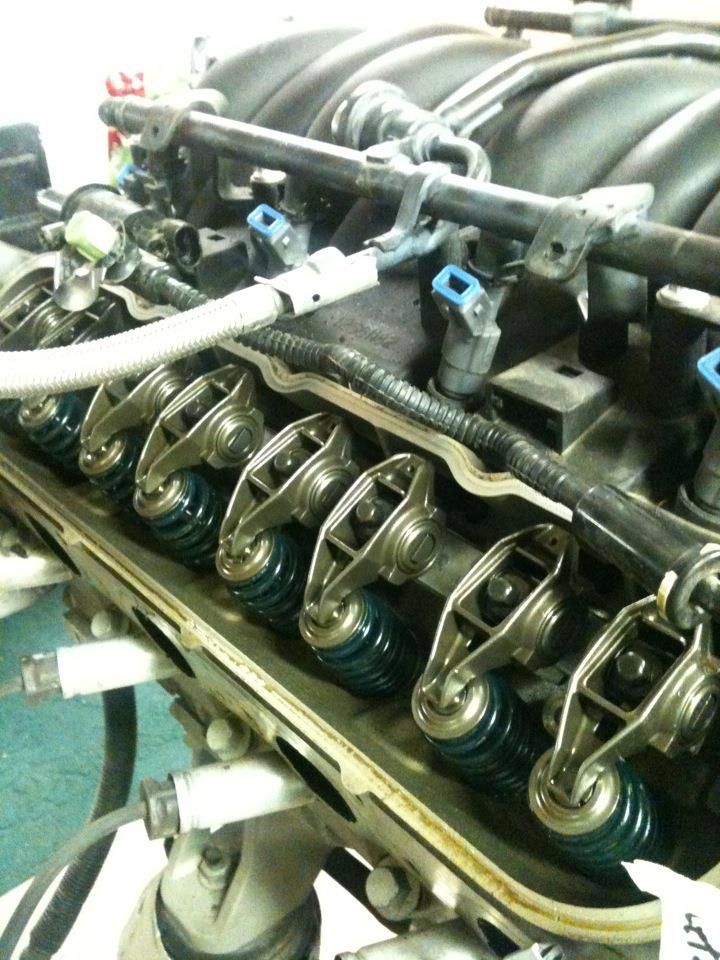  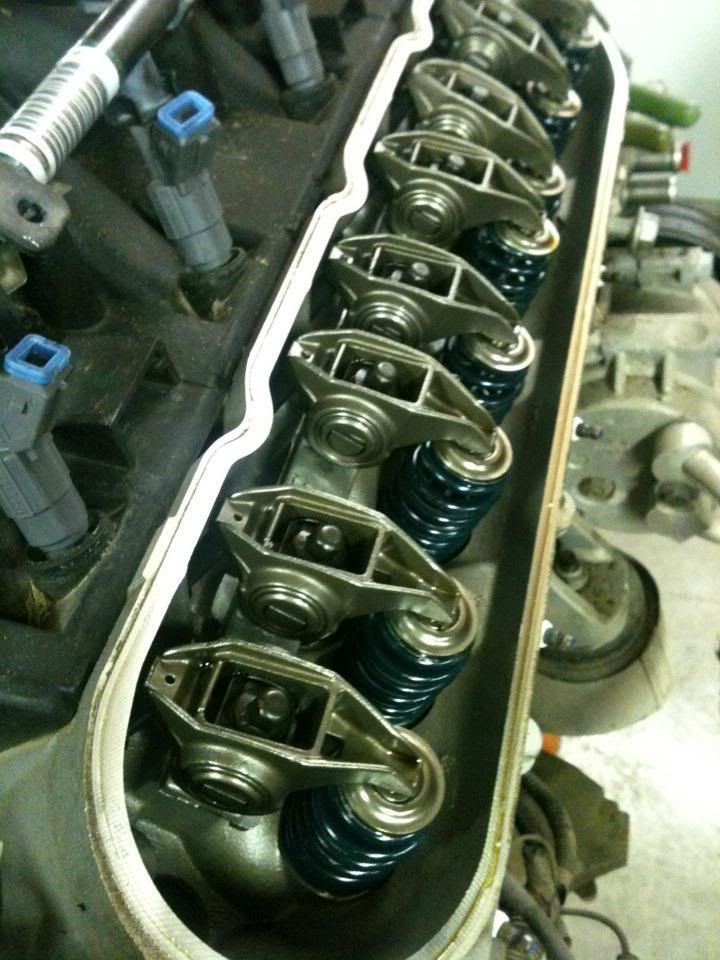 they were much cleaner than i expected so i think i am going to refrain from replacing the valve springs and valves for the time being considering how clean the heads are. but that being said i spoke with Royal_T earlier and after discussing with him what should be done we decided the Texas Speed Torquer V2 was the cam for my particular setup. next i removed the intake manifold to see what was going on down in the valley 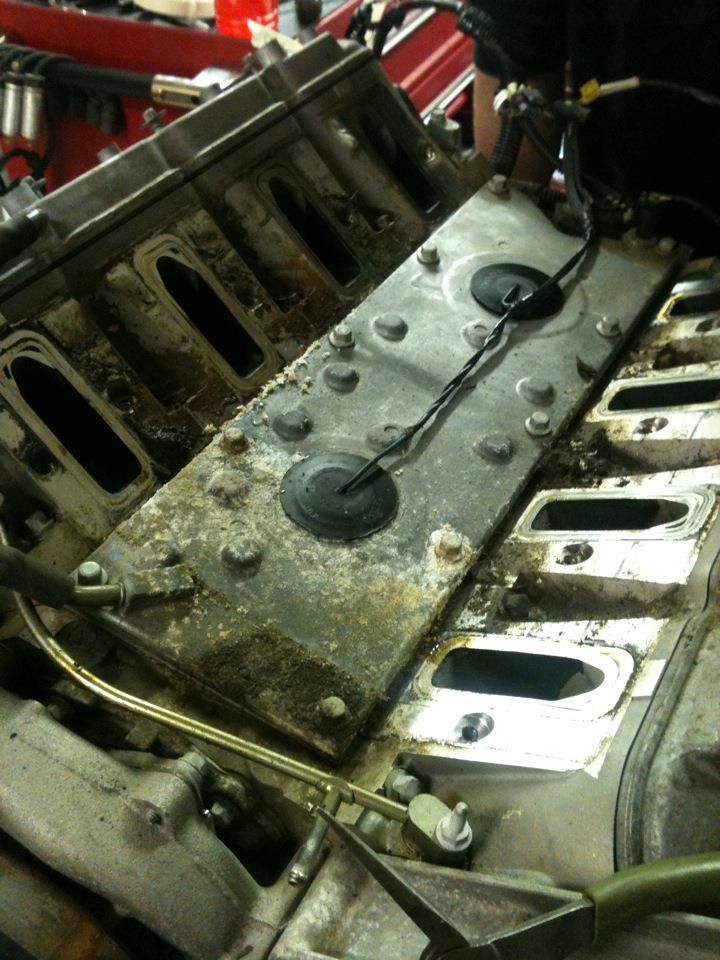 was a bit dirtier than i was hoping looked like most of the dirt was just from being in storage. but what i didnt like was the white crusty residue near the front of the valley looks to me like coolant so there will need to be more investigating next week on what is leaking or what the issue really is. 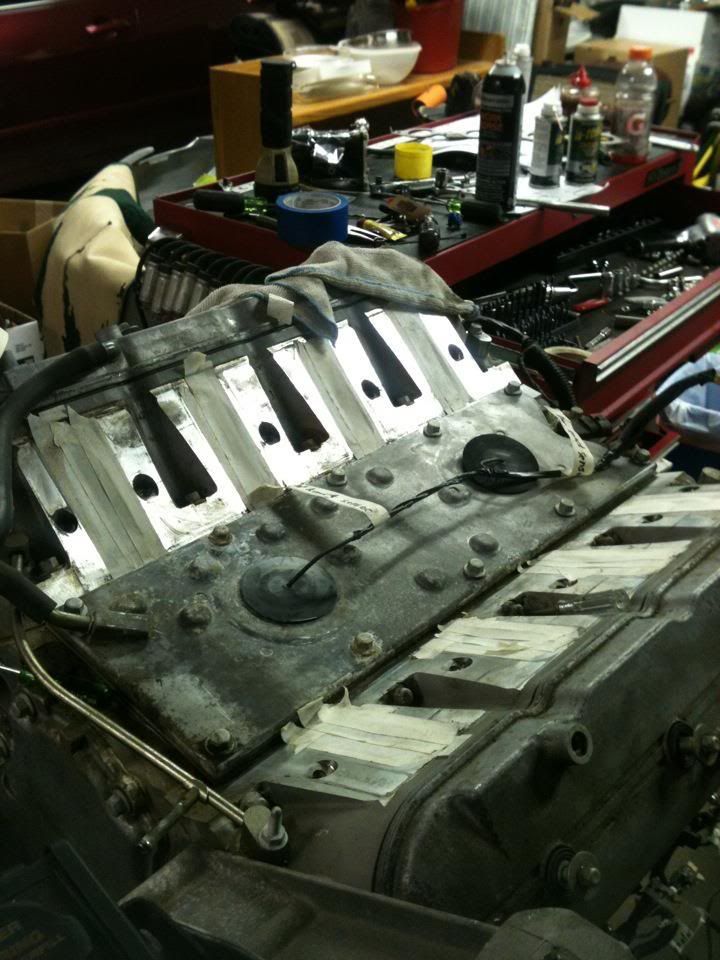 i went ahead and cleaned out the valley so that wont need to be done next week. i will remove the cover next week and clean is more throughly. 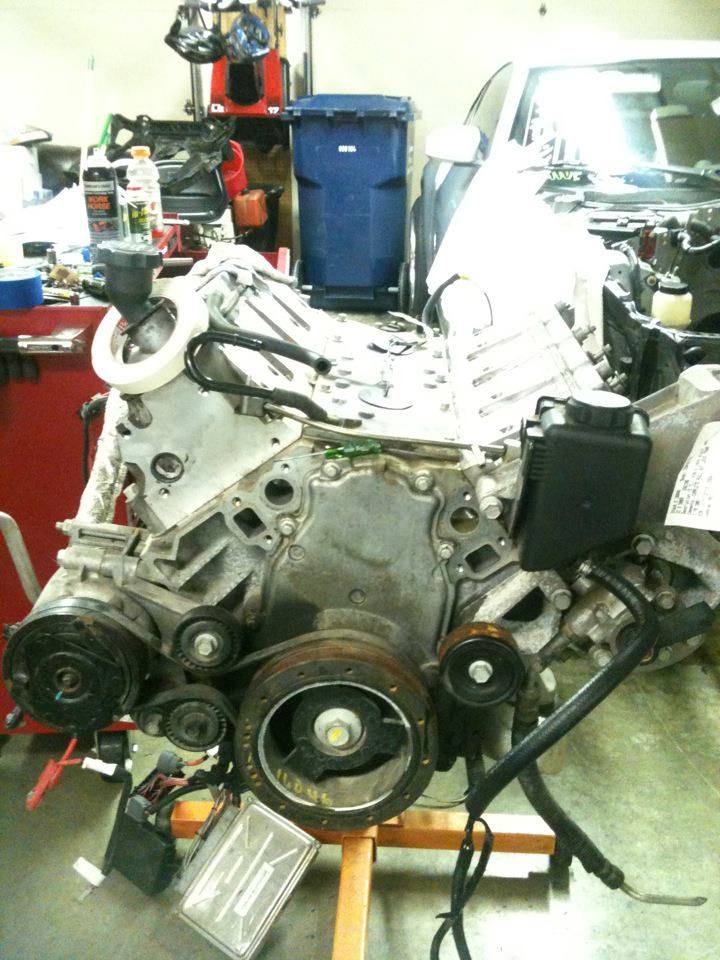 next i removed the waterpump assembly to clean up before installation. i will have the pulley painted gloss black to match the coil pack brackets. 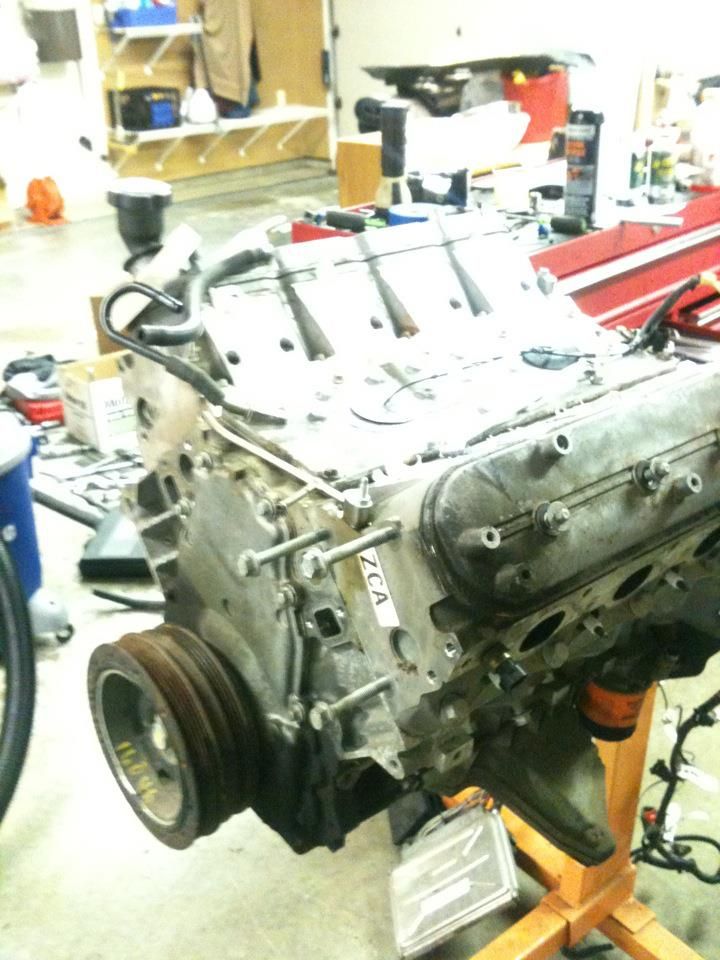 next i removed the alternator and ps bracket because i will be purchasing new brackets for both to clean up the bay just a bit.  lastly i removed both motor mounts and the ac compressor which will be set off to the side for now until i can get some ac lines made. hopefully a few parts will show up this week. i ordered the lokar 48" throttle cable and gm performance spark plug wire replacements. during the week this week while i have some down time at work i will be sanding down the coil pack brackets and the valve covers to they will be ready for paint later in the week. |
|
|
|
|
05-24-2012, 08:15 PM
|
#6 |
|
Zilvia Member
Join Date: Sep 2009
Location: Champaign il
Age: 35
Posts: 214
Trader Rating: (1)
Feedback Score: 1 reviews
|
ok after a long week it is finally time for my Sunday update.
made quite a bit of progress on the tear down. got alot of stuff cleaned up and ready for paint. and got a ton of stuff ordered and on the way. on to the pictures. first off was removing this bad boy took me and another tech and a 24" snap on breaker bar to bust her nut. 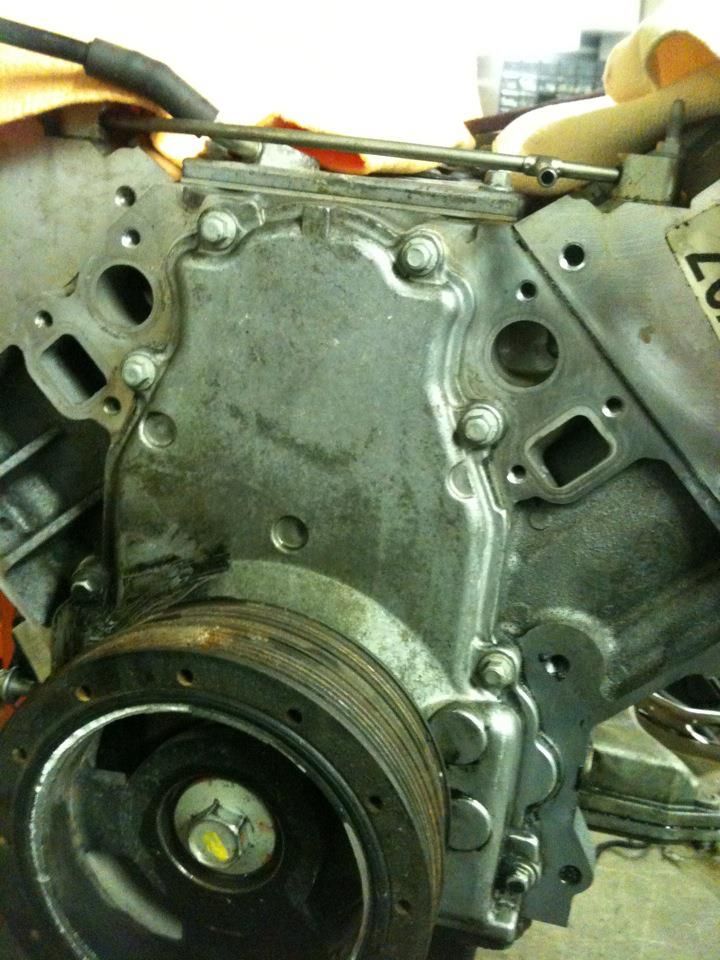 then removed the harmonic balance which was equally as difficult 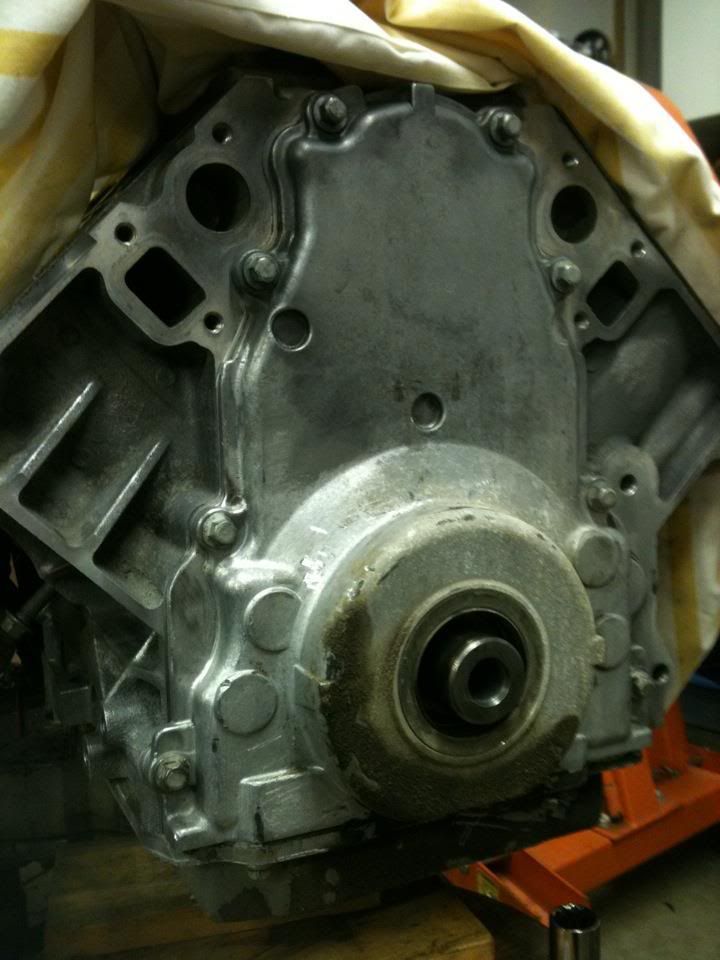 removed the heads to check out what was going on underneath 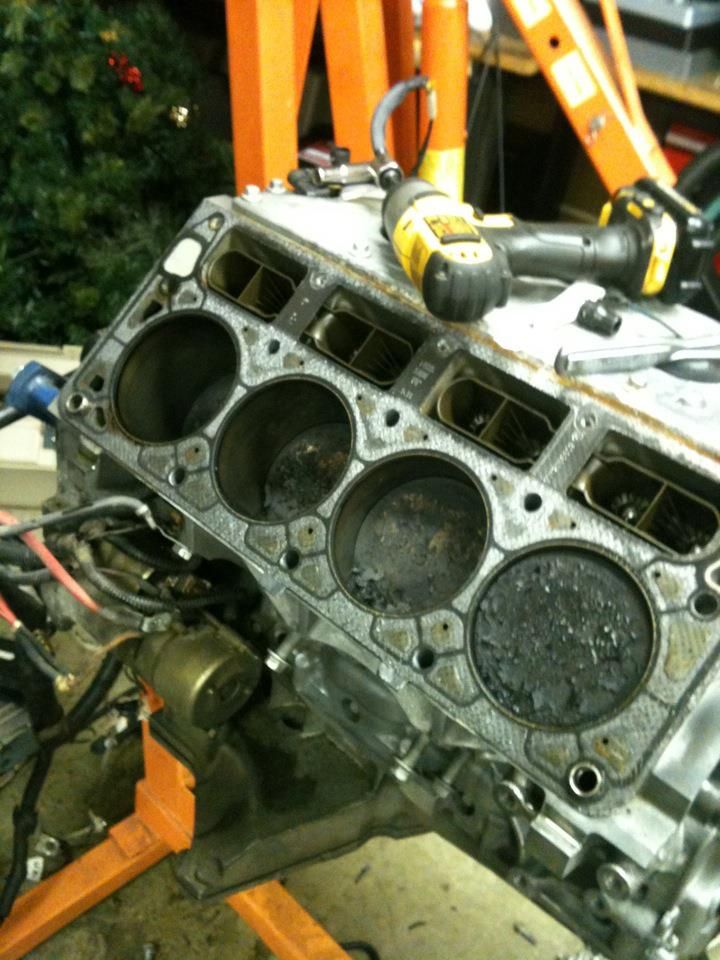 a tad dirty that i was hoping but not a big deal. after i removed the heads i cleaned off the old head gasket. with a razor and a vacuum. 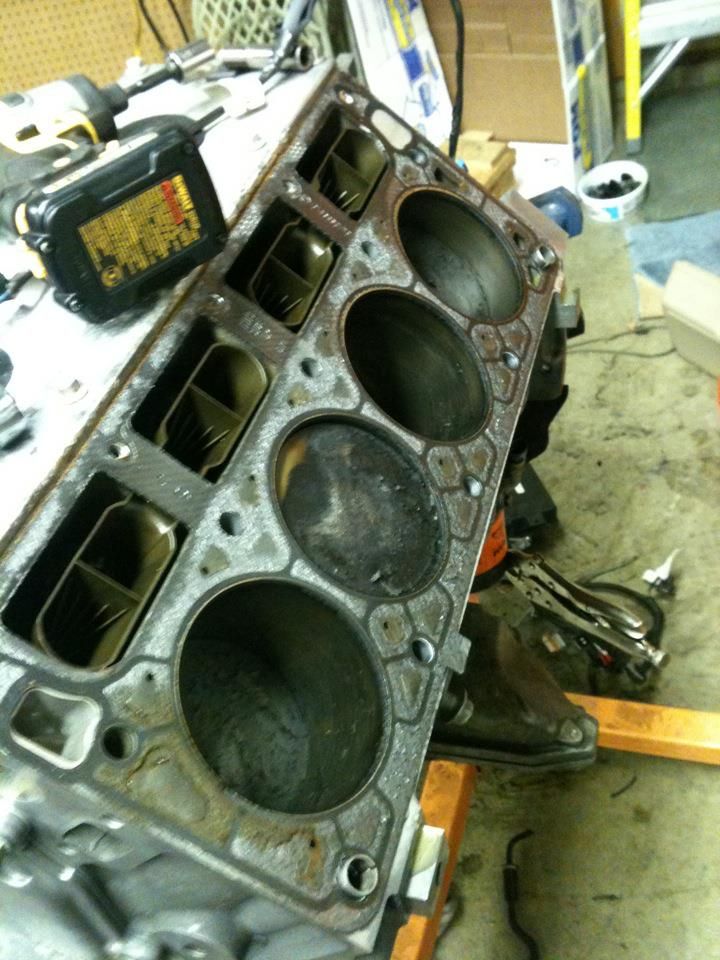 removed the front cover and the oil pan so i could gain access to remove the oil pump and pick up. 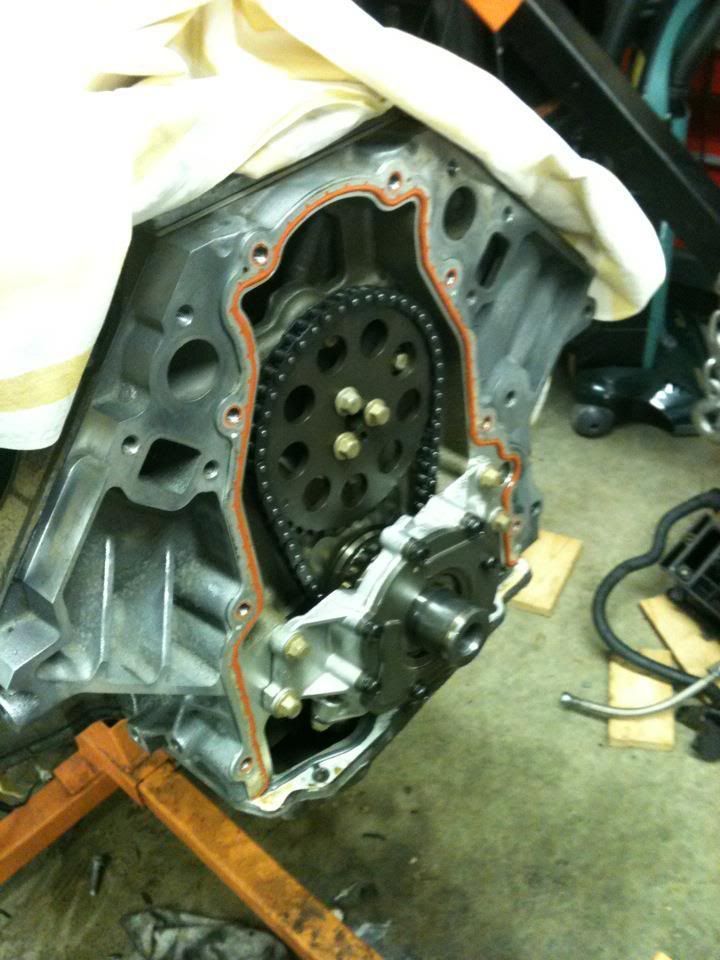 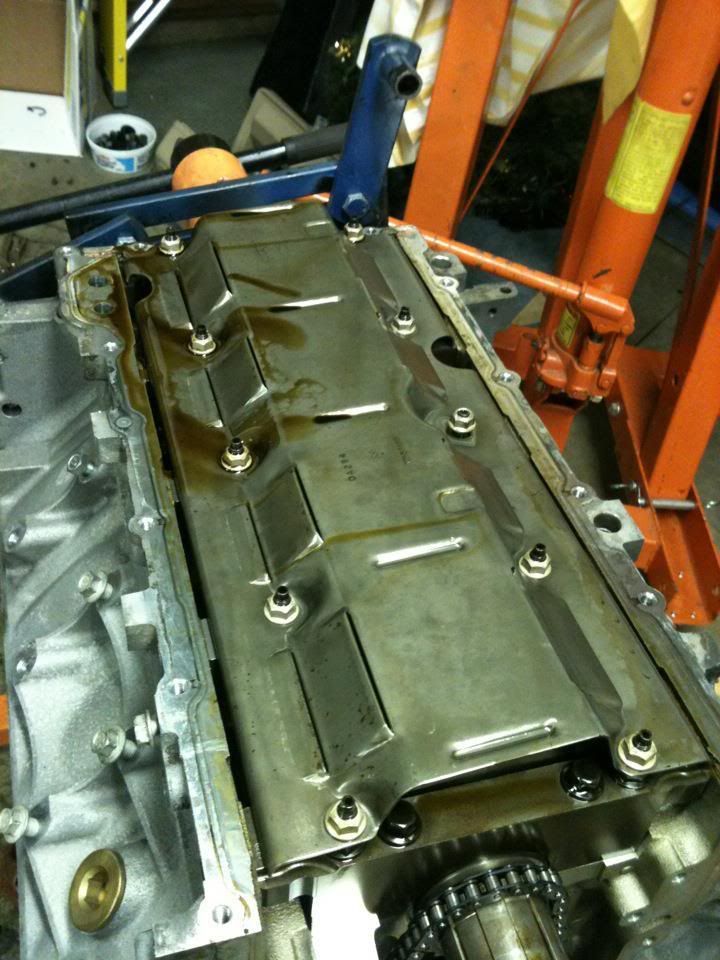 dont forget to line up your timing marks 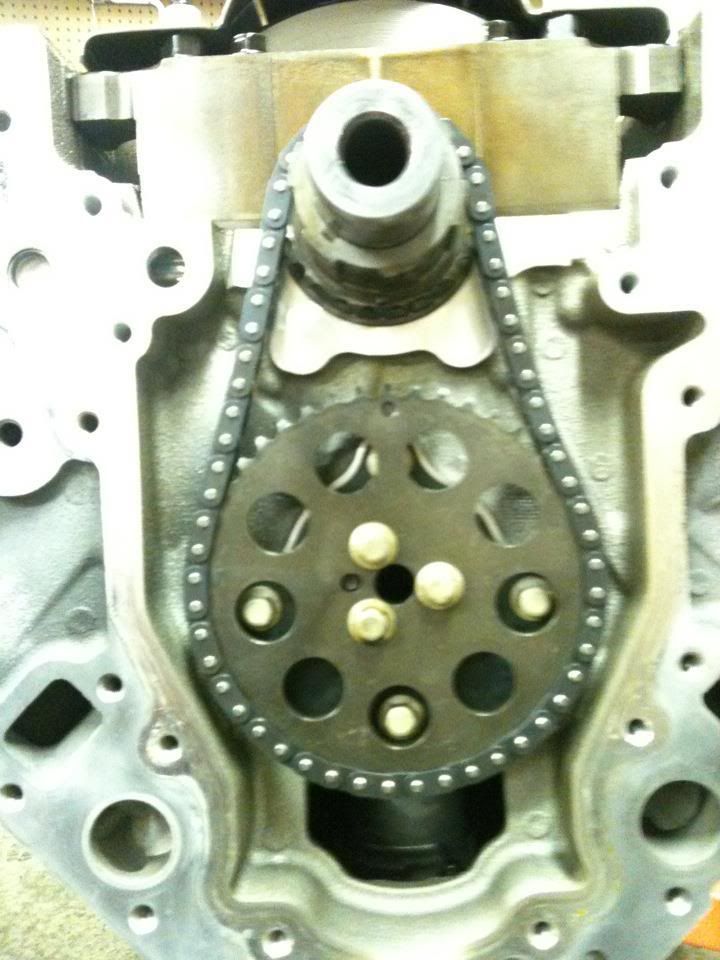 remove the cam cover and cam  i did alot of cleaning this week with scotch brite and brake cleaner to get ready for paint and just to be cleaner. i was going to paint the block but i took a wire wheel to the block and a few cans of brake clean and there was no need to paint the block 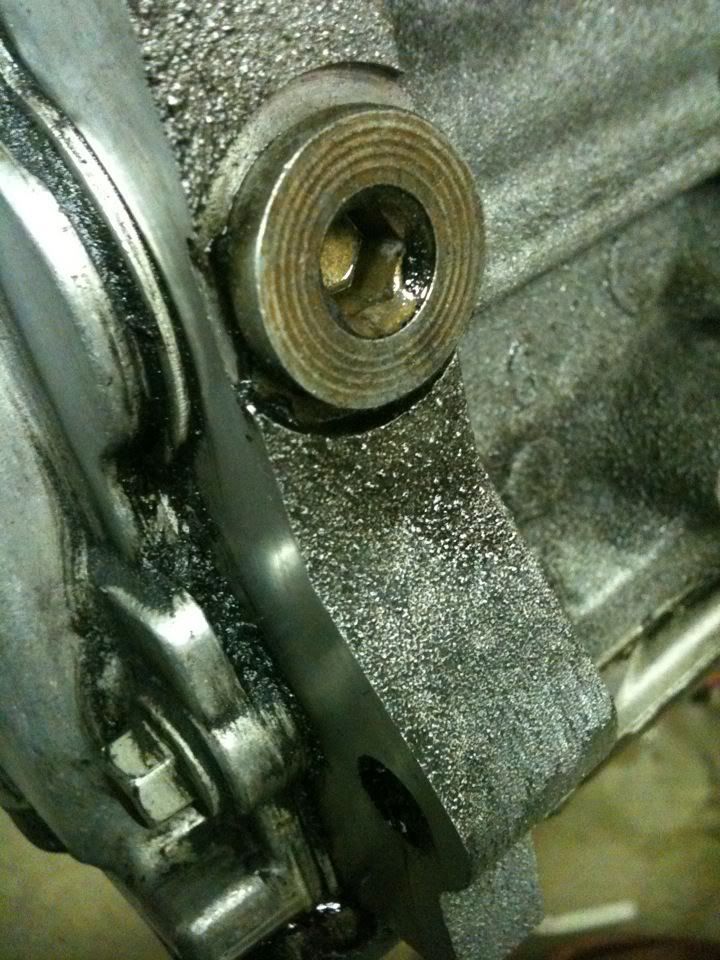 i cleaned up the water pump assembly and re painted the water pump pulley a semi gloss black 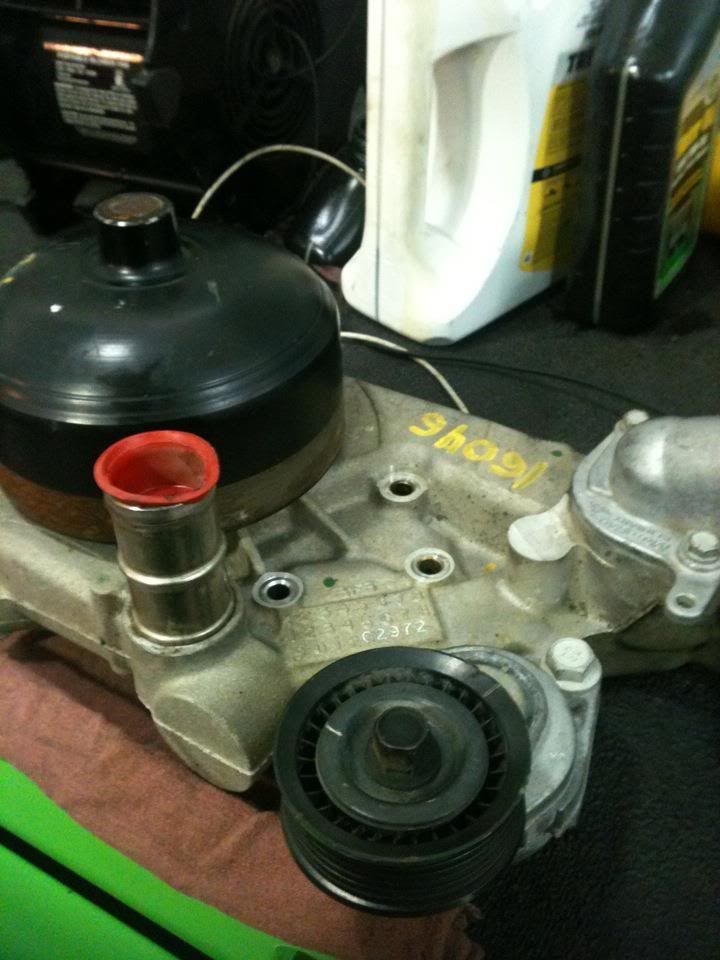 sanded and ready for paint 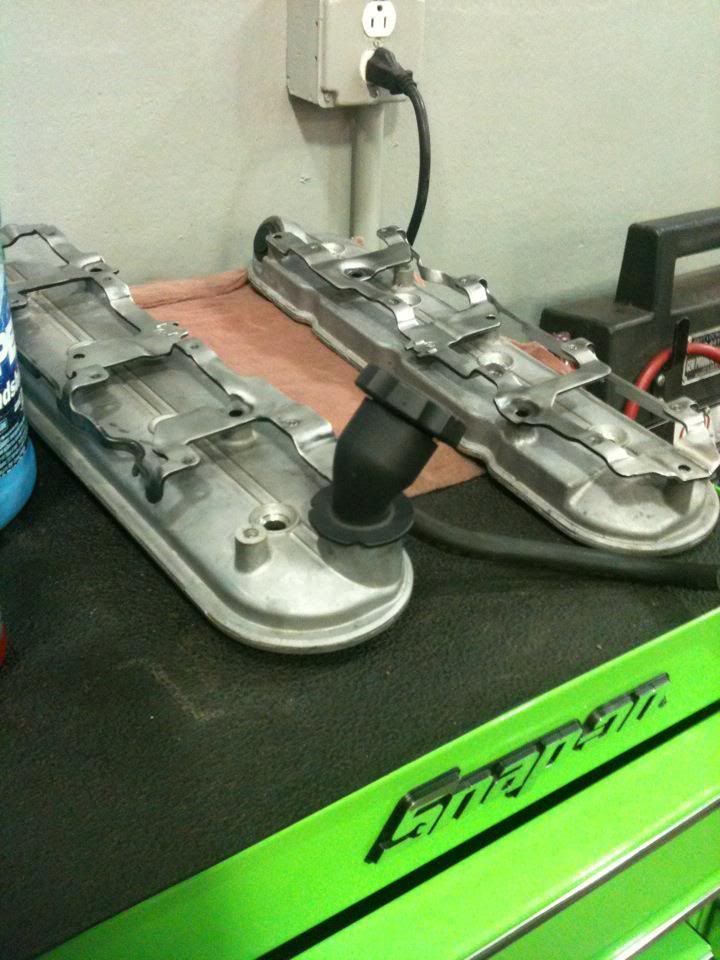  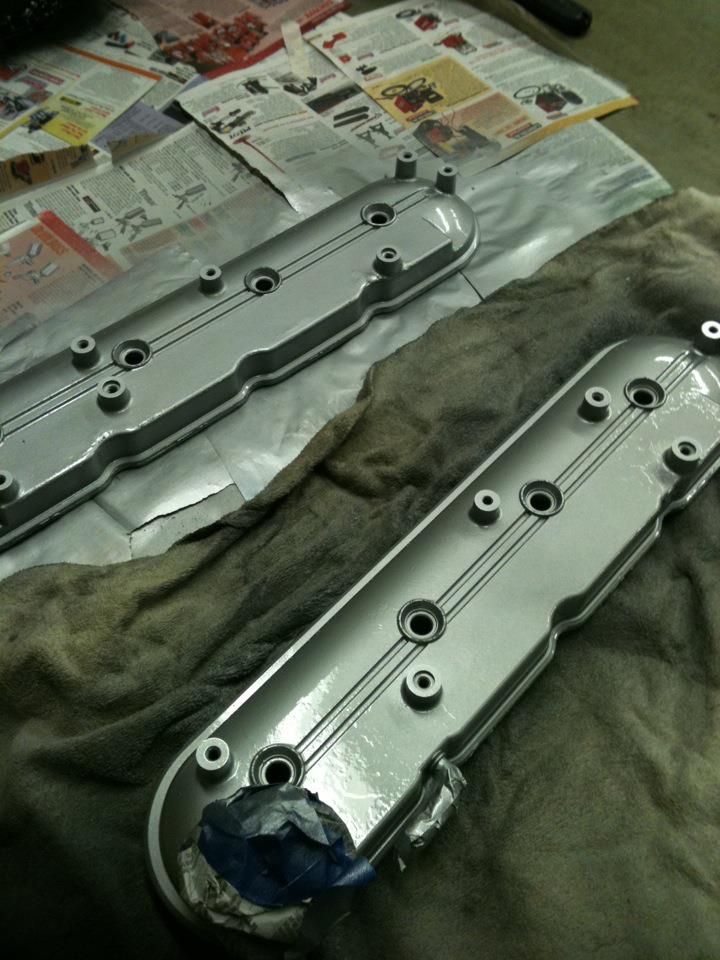 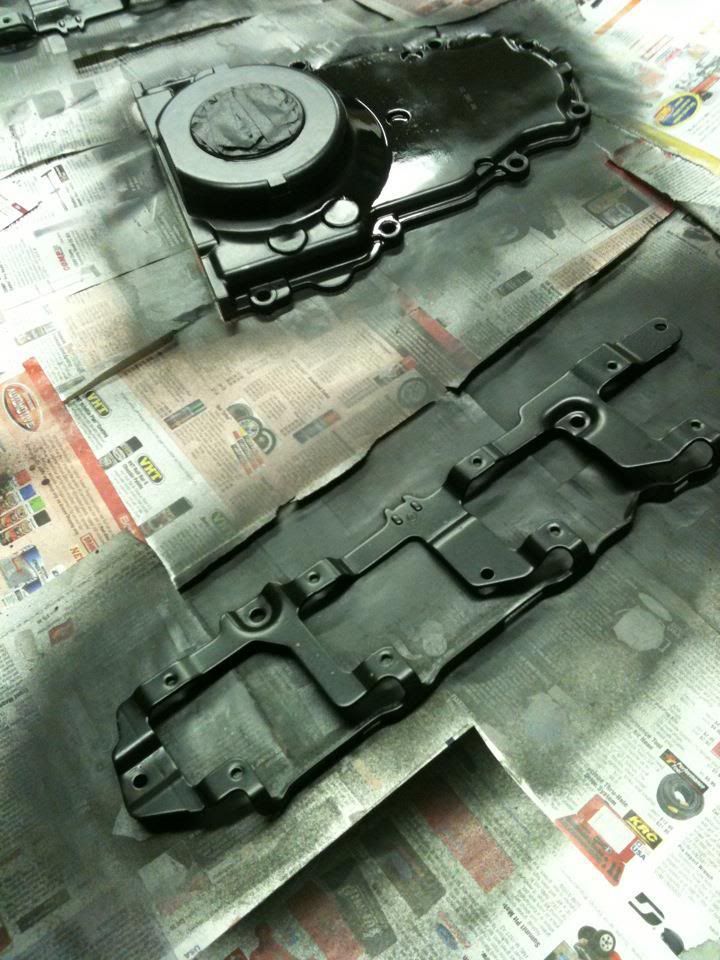 here are a few goodies that came in the mail this week. GM performance spark plug wires 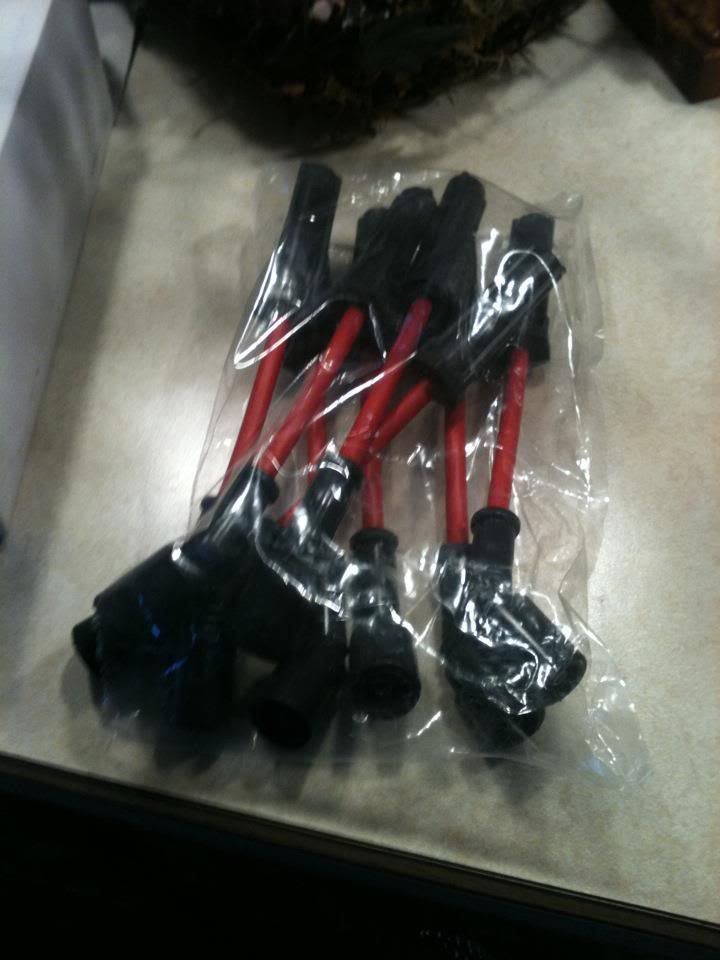 lokar throttle cable 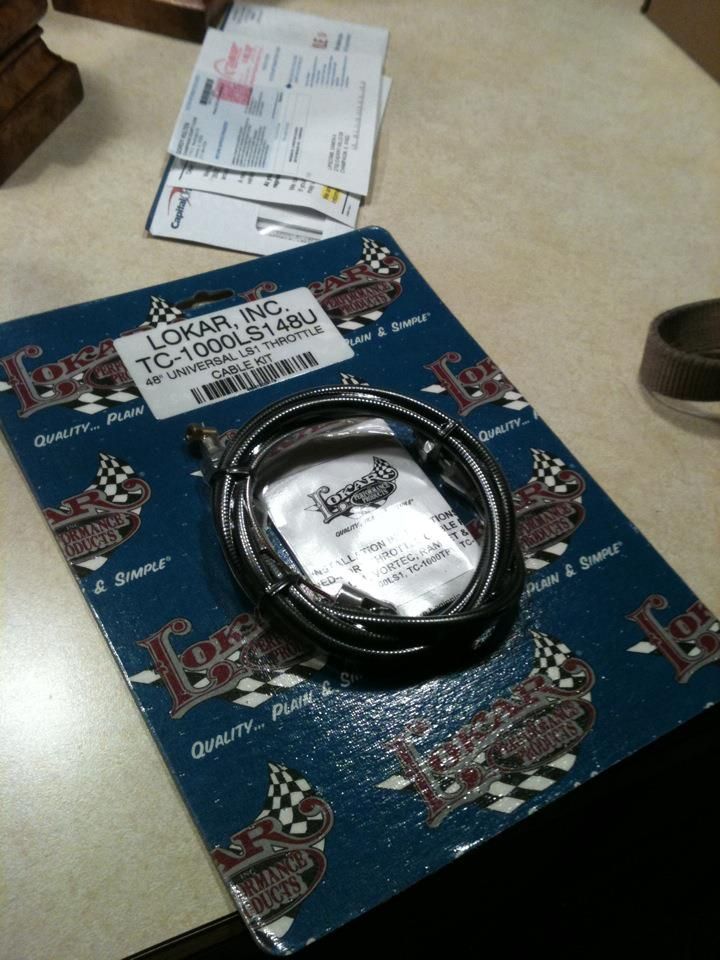 GM Performance clutch assemly 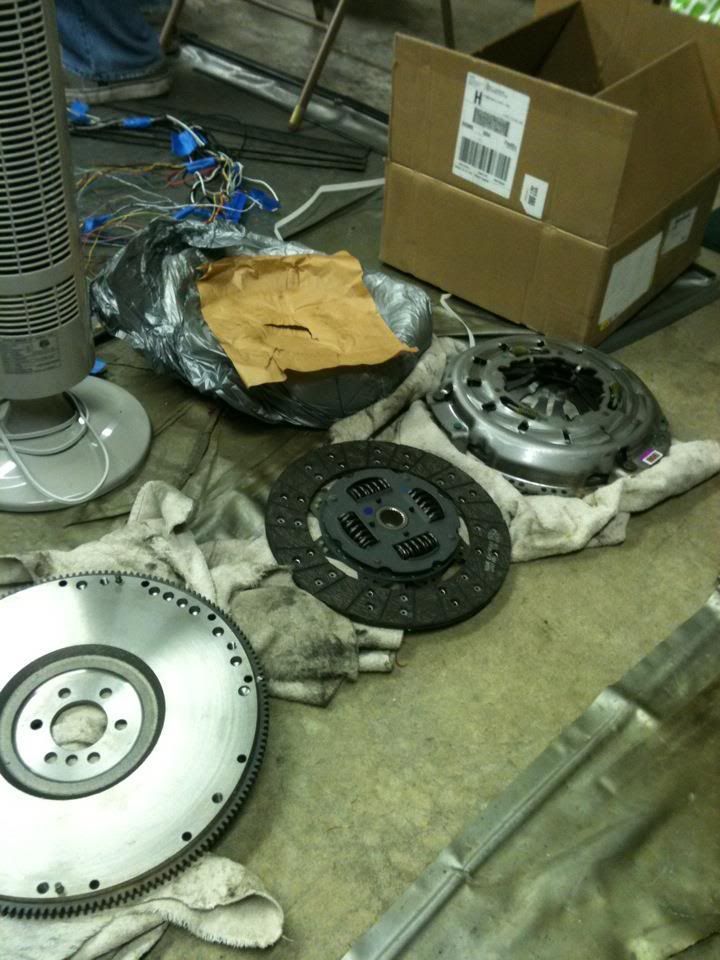 also this past week I have been looking for the wiring diagrams for the ls1/ls6 harness along with the 350z harness. if anyone has acess to these i would love to have them. all next week i should be getting in shipments of parts. sikky mount kit headers ps line and master cylinder ps bracket alternator bracket alternator pulley texas speed torquer v3 cam kit texas speed deluxe gasket kit and a few others goal for next sunday is have the heads rebuilt, cam installed,sikky installed along with the clutch assembly. hopefully i will have the wiring diagram mapped out and i hope i can get the t56 trans ordered sometime next week. also my brand new matco 6s 3 bay tool box will be here tomarro woot ! ENJOY! |
|
|
|
|
05-24-2012, 08:16 PM
|
#7 |
|
Zilvia Member
Join Date: Sep 2009
Location: Champaign il
Age: 35
Posts: 214
Trader Rating: (1)
Feedback Score: 1 reviews
|
ill be honest i didnt get anythign done this week been sick and busier than i have been in a long time.
and every tech at toyota came over and got drunk in the garage. but this week this is what came in texas speed cam kit with torquer v3 cam, dual valve springs, stem seals and titanium retainers. texas speed deluxe gasket kit. alper motor sports alternator bracket and power steering bracket. still waiting for the sikky kit to be delivered. heres the small update on what i got done dual valve springs installed  all 16 in and man were they a Son of a B+@$% to install  I install the cam and cam gear and put her in time so the rocker arms can be installed along with the push rods. but on a lighter note this cam into work last week as well. matco 6's three bay with hutch and stainless steel top. out with the old and in with the new!!! 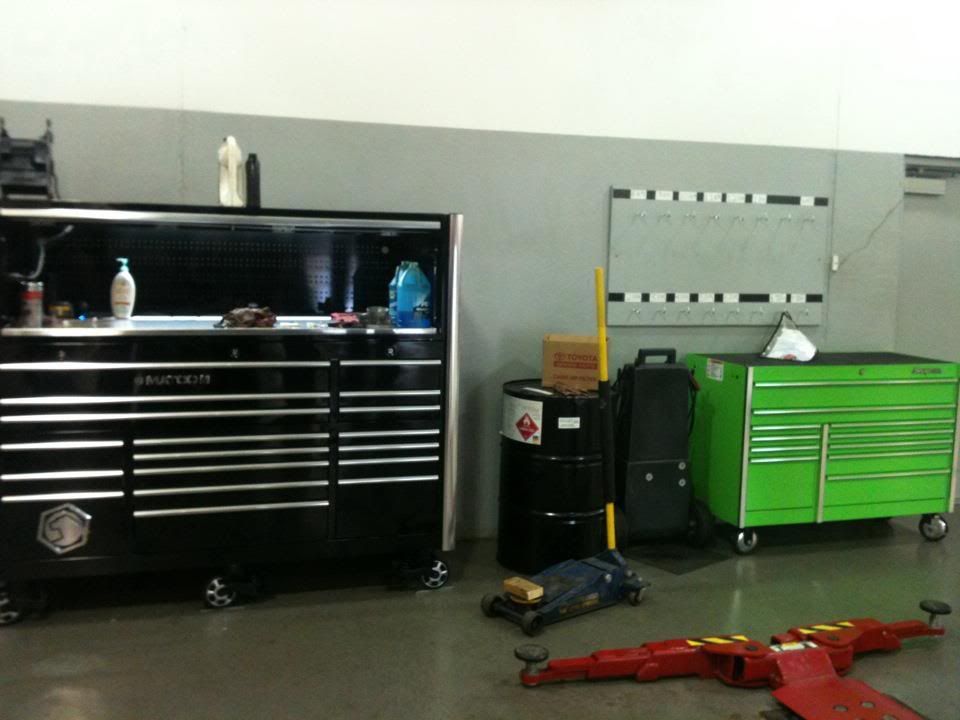 this week i plan to get the motor rebuilt and ready to be installed for when the sikky kit comes in. Parts that will be ordered tonight or possibly in the AM: vengeance fast fuel rail kit harmonic balancer krc power steering pulley SPAL ultra thin fans idle air control valve throttle position sensor idler pulley spark plugs also i put some thought into my intake, exhaust and coolant hoses. and speed source inc in mahomet il will be making most of my stuff. Carl makes amazing welds and his work never dissapoints. enjoy |
|
|
|
|
05-24-2012, 08:17 PM
|
#8 |
|
Zilvia Member
Join Date: Sep 2009
Location: Champaign il
Age: 35
Posts: 214
Trader Rating: (1)
Feedback Score: 1 reviews
|
ok guys finally i had time to getting around to updating this thread.
work has been hectic the past week but here we go left and right heads bolted down with ARP head bolts  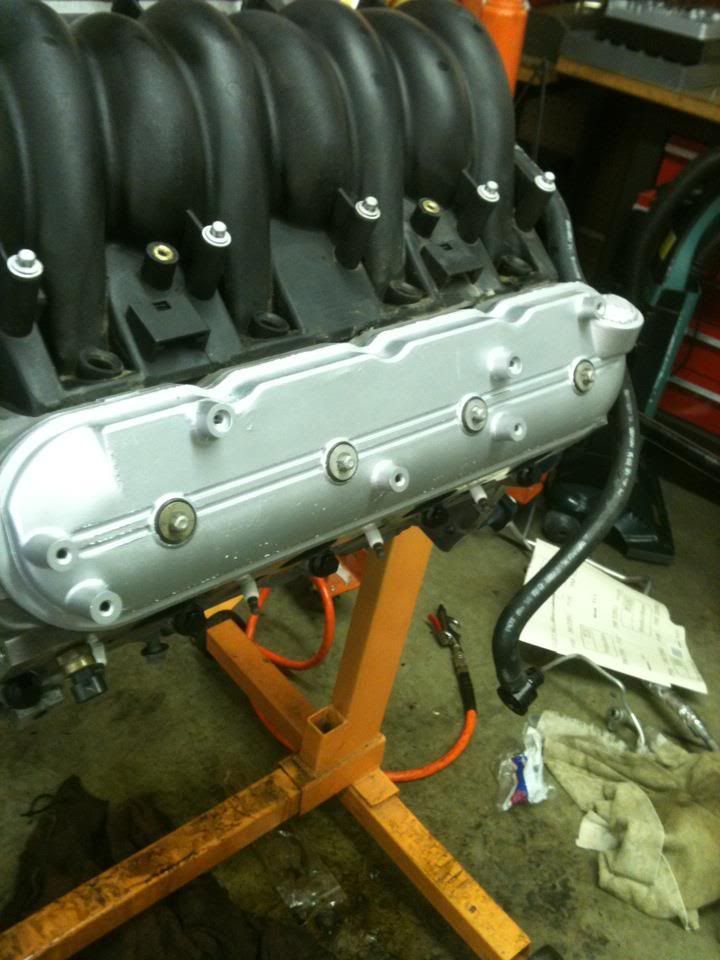 intake manifold mounted up  throttle body with new IAC and TPS 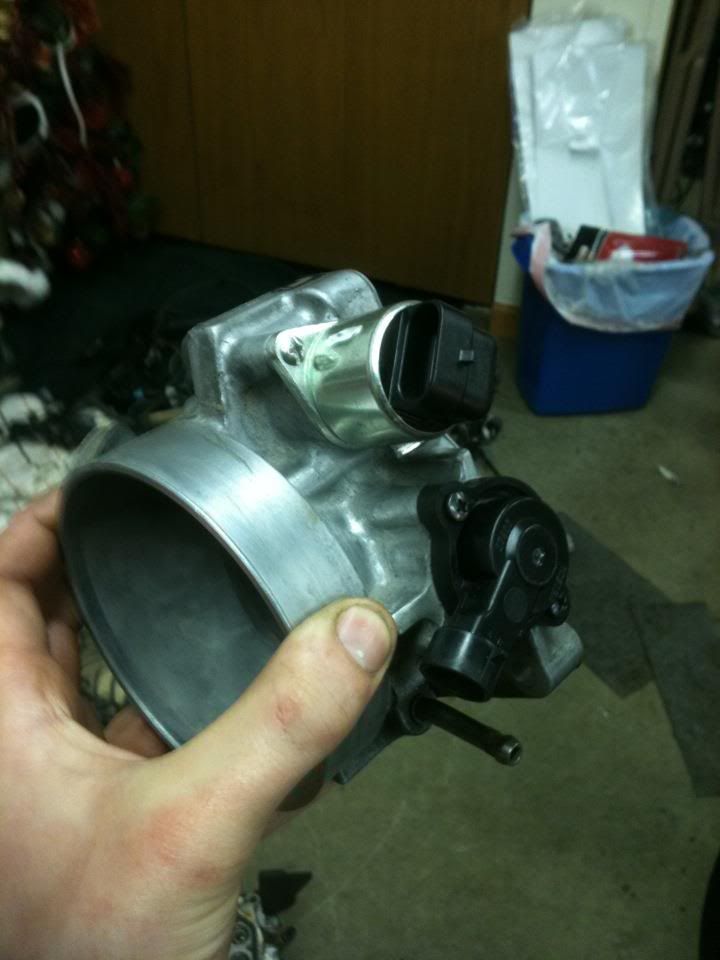 thats about all the physical progress on the engine side of the build we tracked down all the wires on the ls6 harness and have them labeled. next we will do the same to the z harness and salvage as much as possible. this harness needs to not only look oem but be oem spec. Parts that came in this week. drive belt 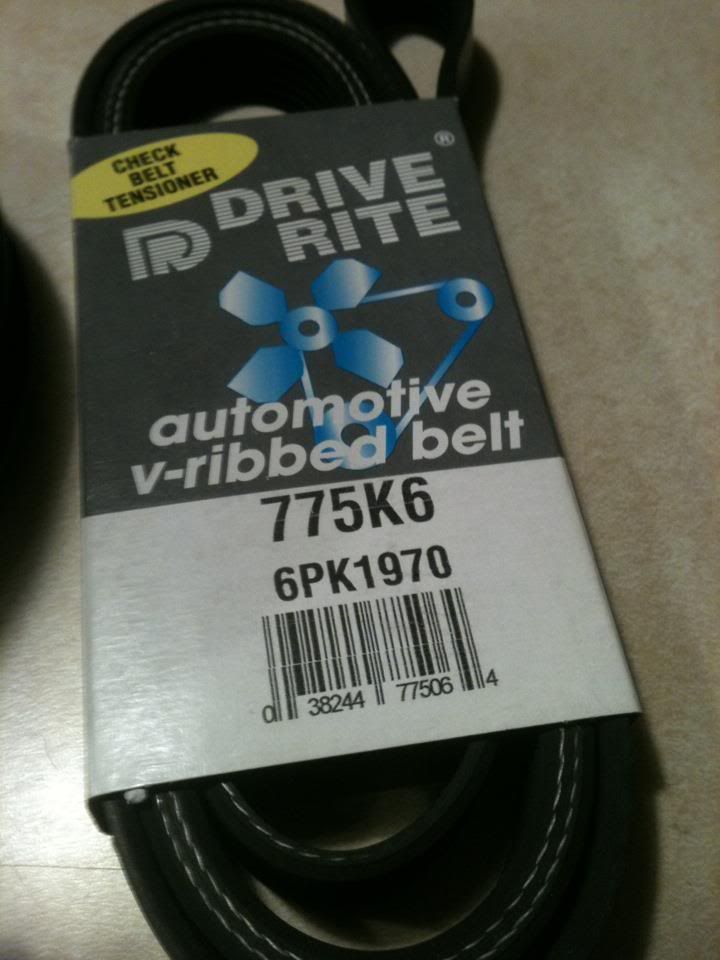 asp balancer  ARP crank bolt  lokar throttle cable bracket  had some issues with mounting this because the ls6 intake manifold is not tapped for a throttle cable considering the drive by wire setup. i got a couple ideas to make it work but havent 100% figured out how i want to do it parts on order sikky products ... still waiting fast fuel rail kit ENJOY |
|
|
|
|
05-24-2012, 08:17 PM
|
#9 |
|
Zilvia Member
Join Date: Sep 2009
Location: Champaign il
Age: 35
Posts: 214
Trader Rating: (1)
Feedback Score: 1 reviews
|
it was XMAS today!
PS line  oil filter relocator kit 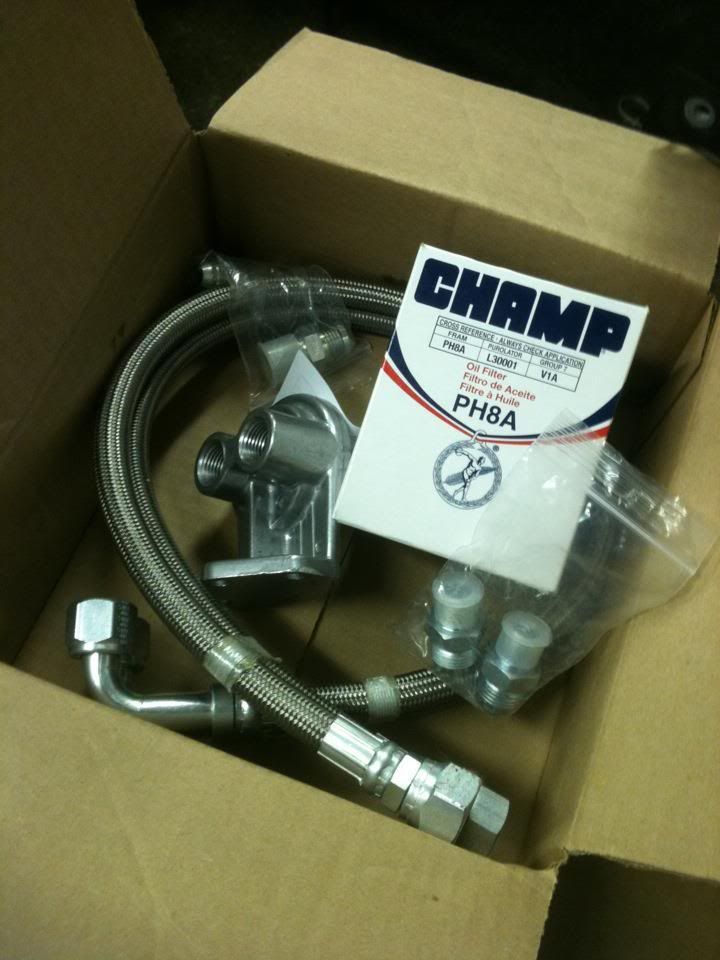 engine and tranny mounts 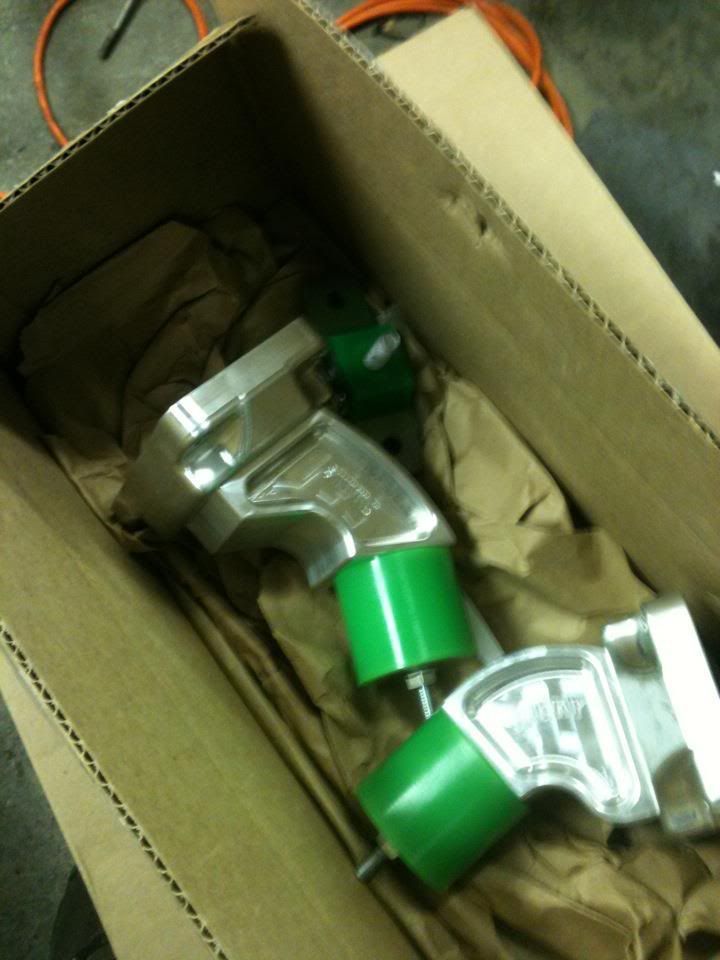 master cylinder 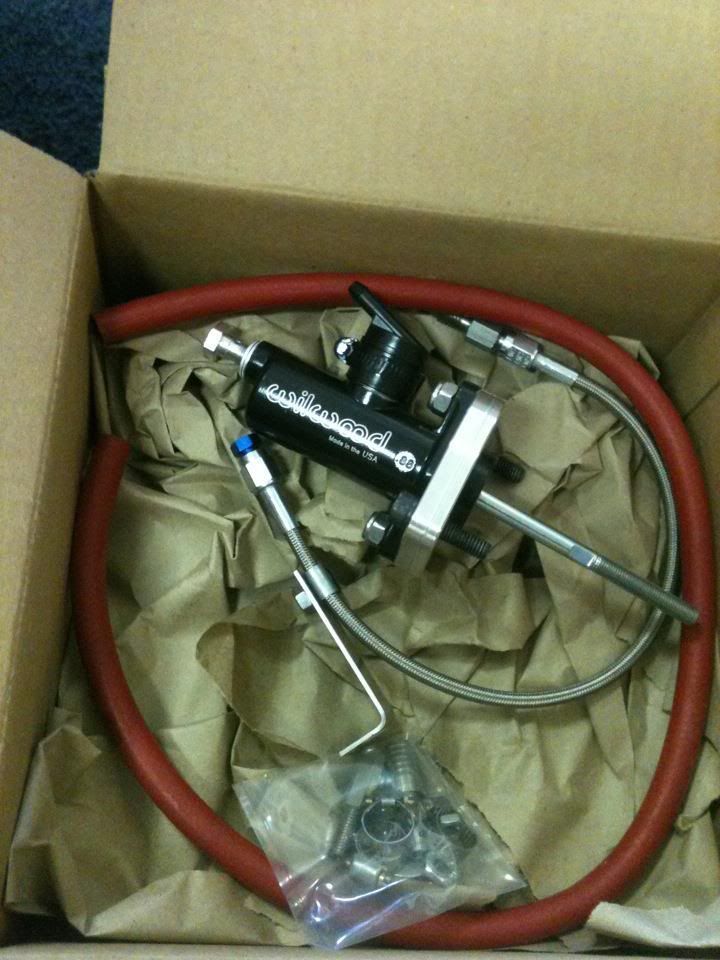 headers 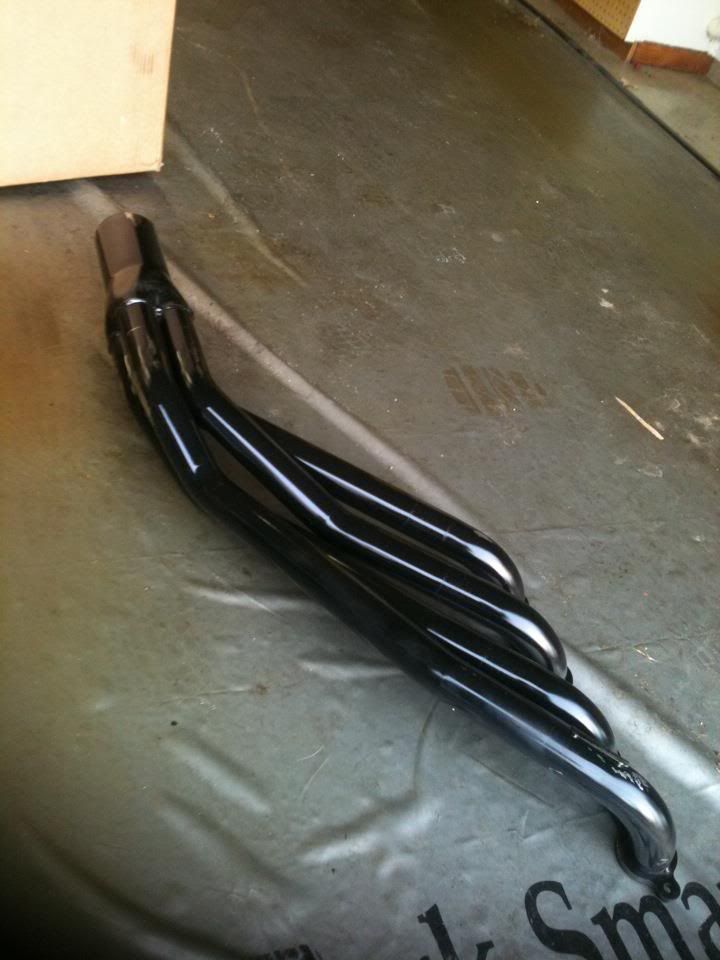 oil pan 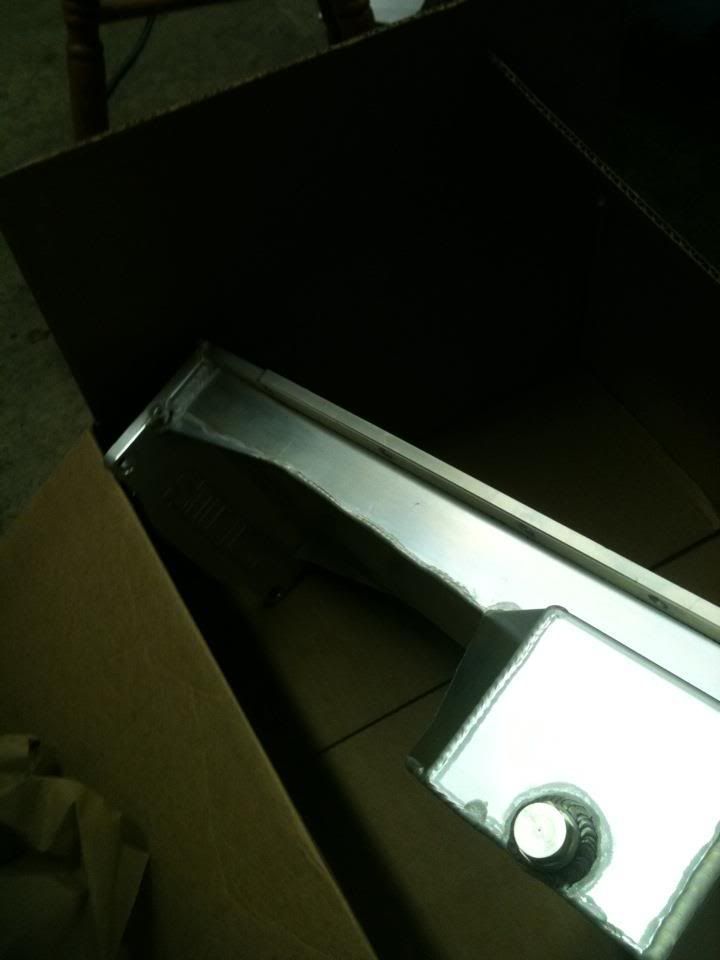 drive shaft 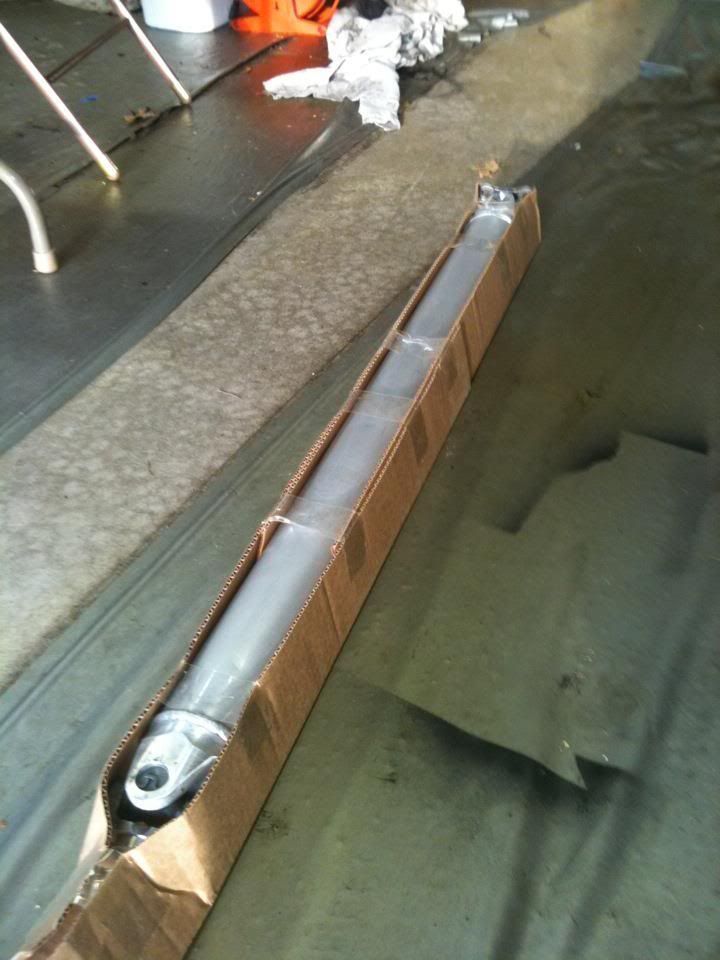 fast fuel rail kit 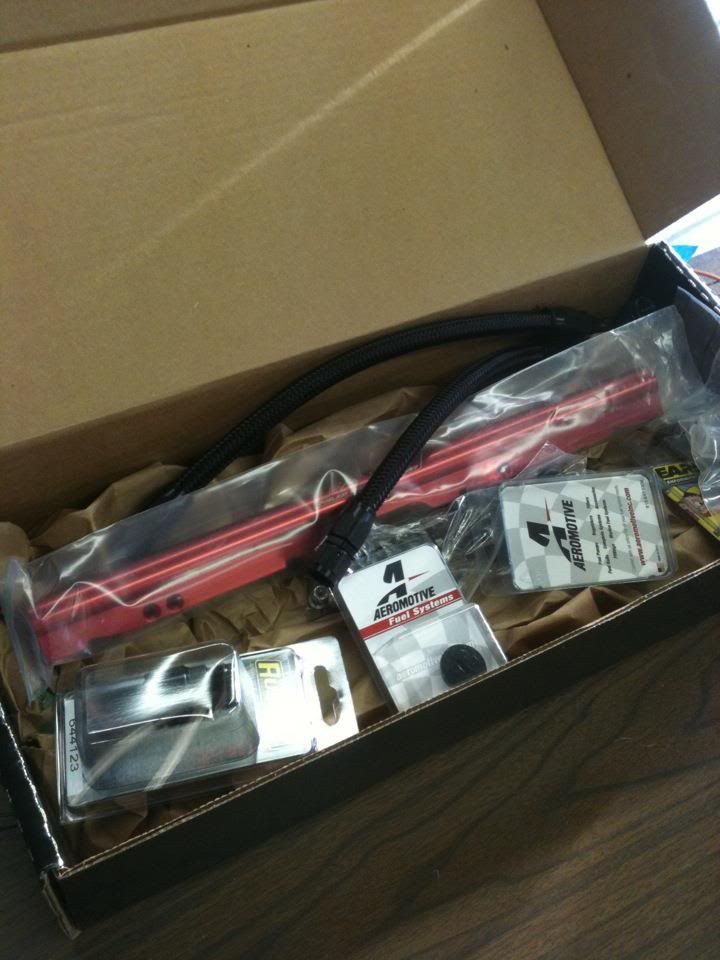 installed pan 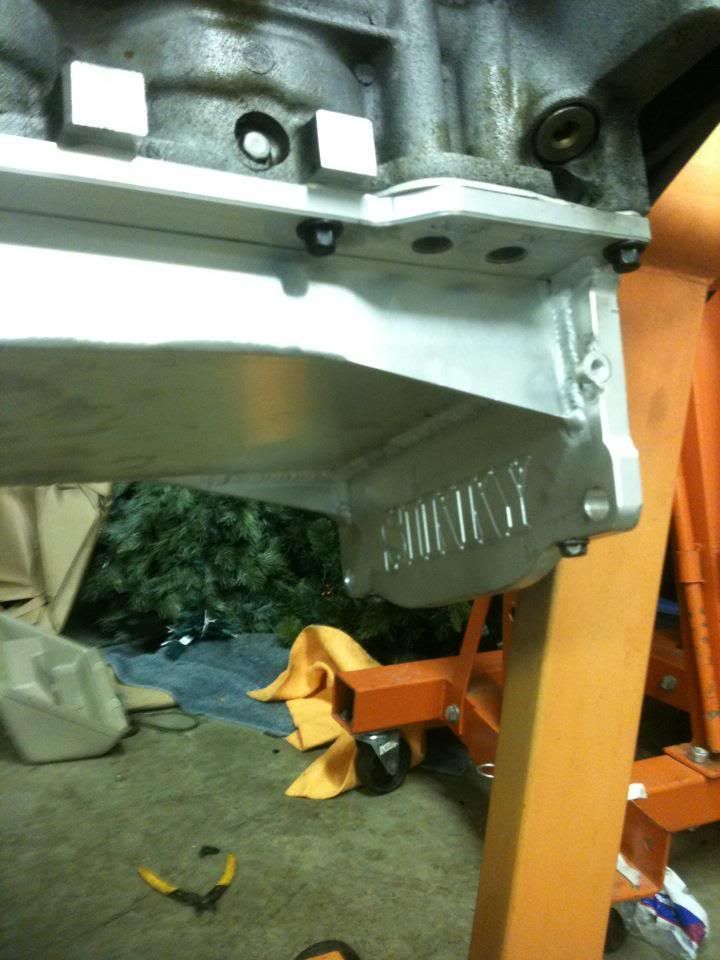 timing cover on i also installed the water pump assembly shortly after this and mounted up the alper motorsports alternator mount  for funsies 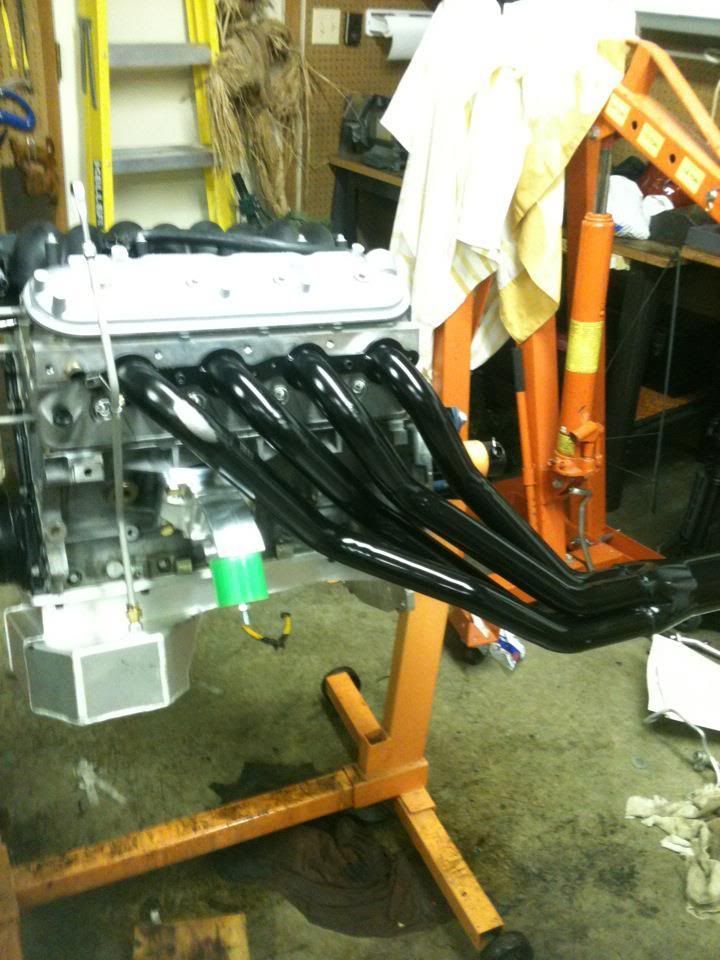 had my trusty pal 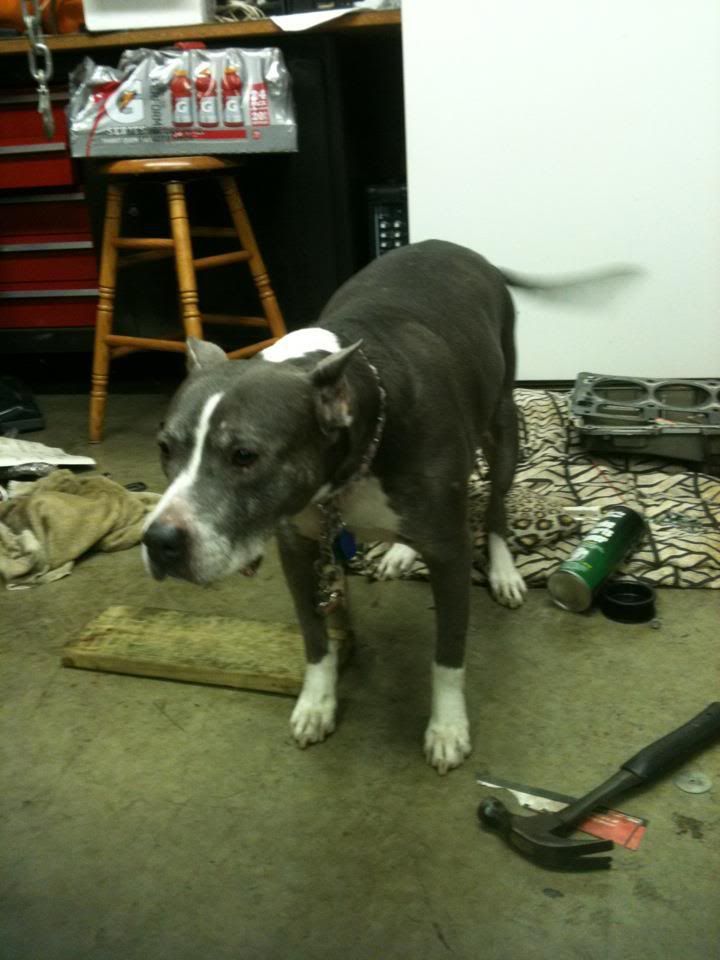 also finished a ton on the wiring |
|
|
|
|
05-24-2012, 08:18 PM
|
#10 |
|
Zilvia Member
Join Date: Sep 2009
Location: Champaign il
Age: 35
Posts: 214
Trader Rating: (1)
Feedback Score: 1 reviews
|
sorry for the lack of updates guys.
been busy with work so i have not been able to upload the pics not a whole lot has gotten done but alot of planning has been finished so the t56 i ordered was a piece of junk and i had to send it back to the company i ordered it from i will be ordering a new one once my money is refunded. i had a chance to set the motor in for a test fit and this is what i came up with  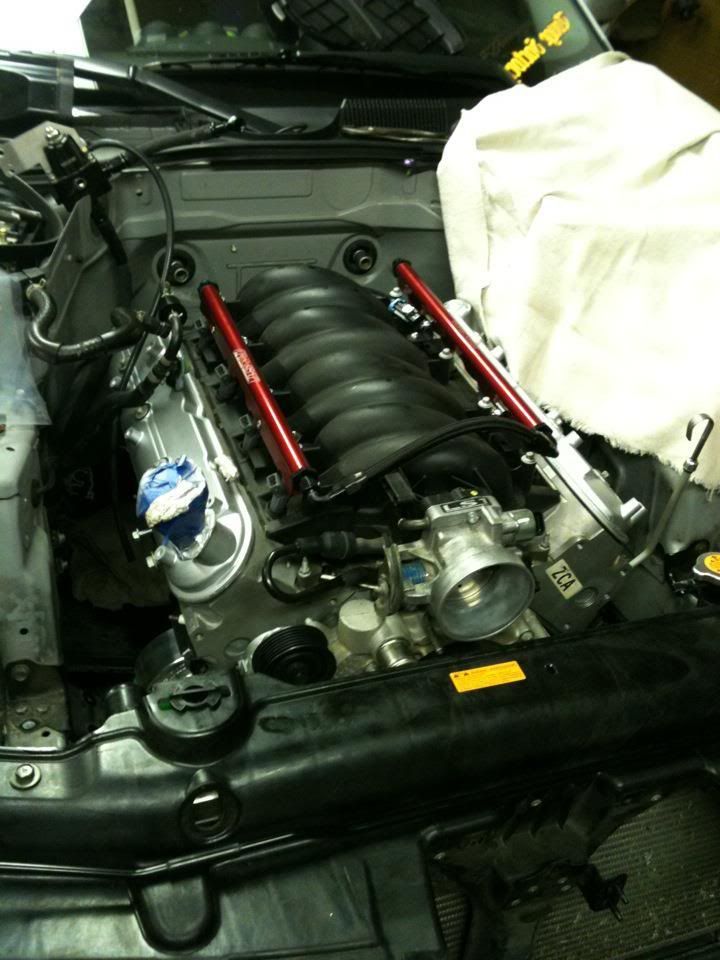 not much clearnace between the tb and the core support i am ordering the lines to finish the fuel setup over the weekend and i am thinking about making a an fitting set up to run the lines back to the heater core so everything will match the black lines from the vengeance fuel rail kit oh by the way the fuel rail kit from vengeance is a nice kit! but the brackets were very wrong. i cut the old brackets from the oe fuel rail and drilled accordingly also i am looking into either running the oem z radiator or possibly making a custom one not sure yet gettign a few second opionions and feel free to chime in. also the harnesses have been tracked down and completed and will be wired together shortly. if the harness comes out as quality as the other tech that is help are hoping we are planning to make these harnesses and compete with other companies just for fun. if it isnt too much work. this weekends goal is install the new master cylinder and hopefully order the new trans today. enjoy ! |
|
|
|
|
05-24-2012, 08:19 PM
|
#11 |
|
Zilvia Member
Join Date: Sep 2009
Location: Champaign il
Age: 35
Posts: 214
Trader Rating: (1)
Feedback Score: 1 reviews
|
so i decided to post this update earlier that later cause i had a bit of extra time tonight.
so this is what came in spal fans water neck fuel compression fitting transmission and bellhousing. so to start off i had to remove the slave cylinder to install the sikky line 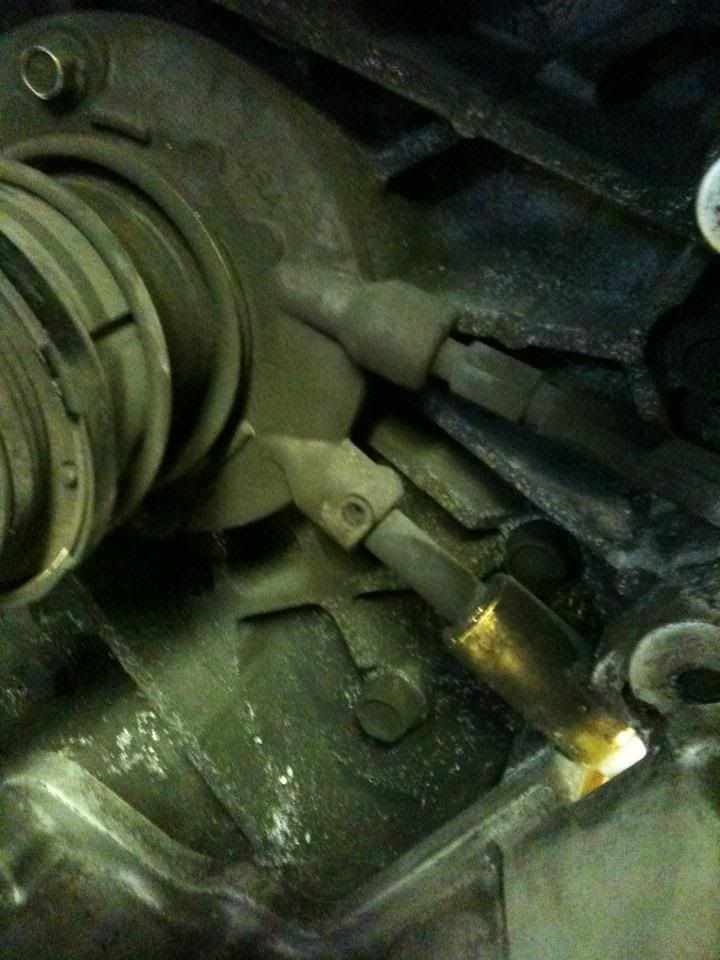 then i mounted up the trans to the engine close up of the exiting line all mounted up and torqued down 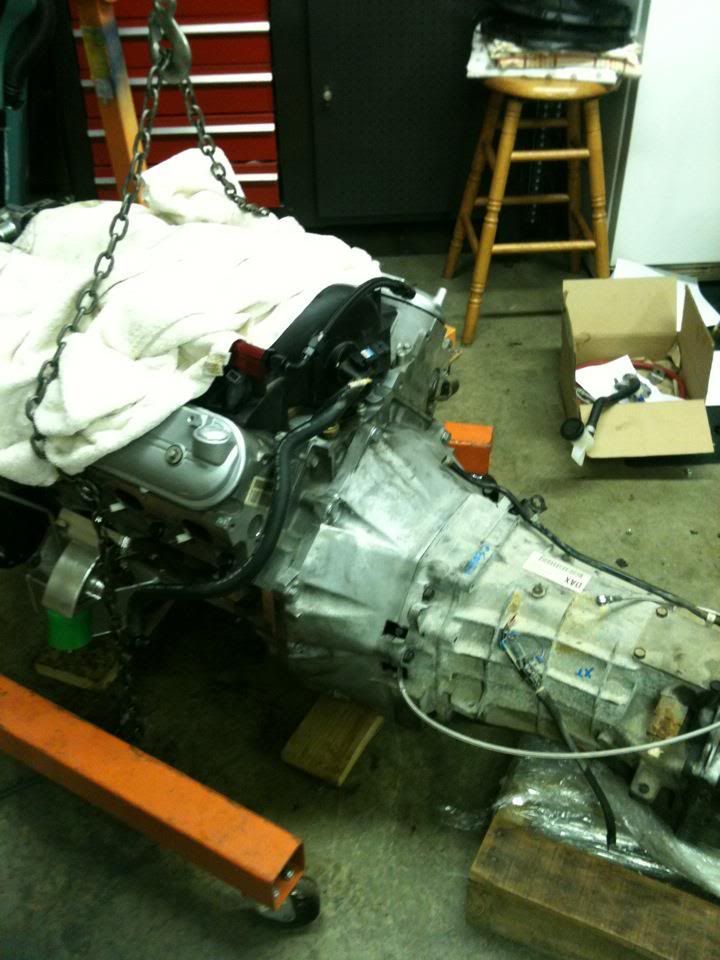 at this point i went ahead and remove the oem shift linkage ill have to install the sikky shifter once the motor is in the car and tilt the engine back to make it work. i then drilled a hole to let the slave line back into the compartment. 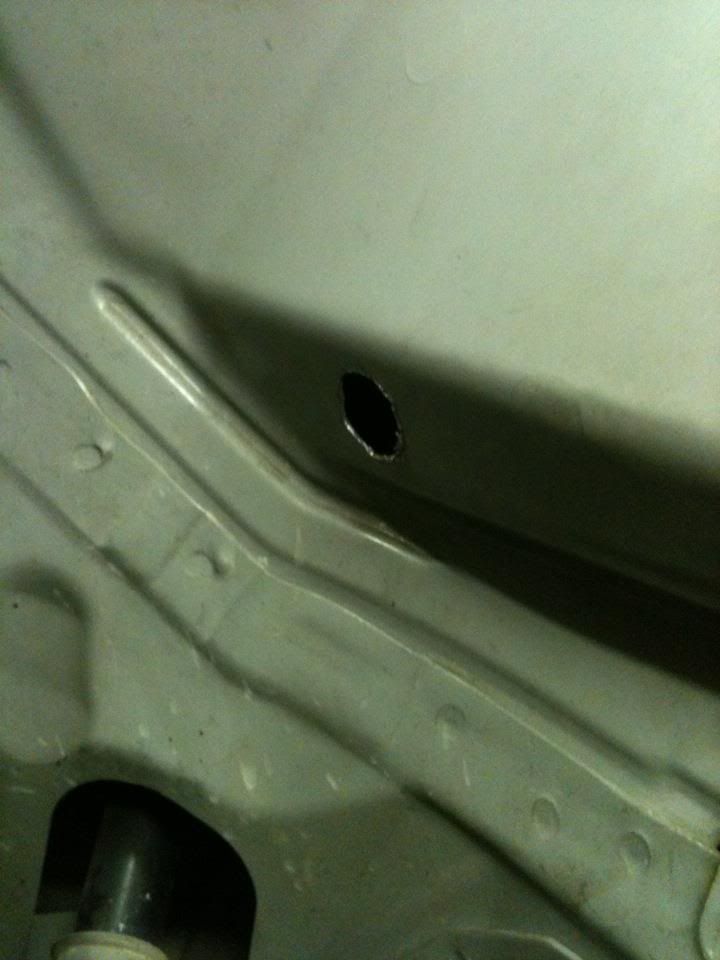 installed the sikky/wilwood slave 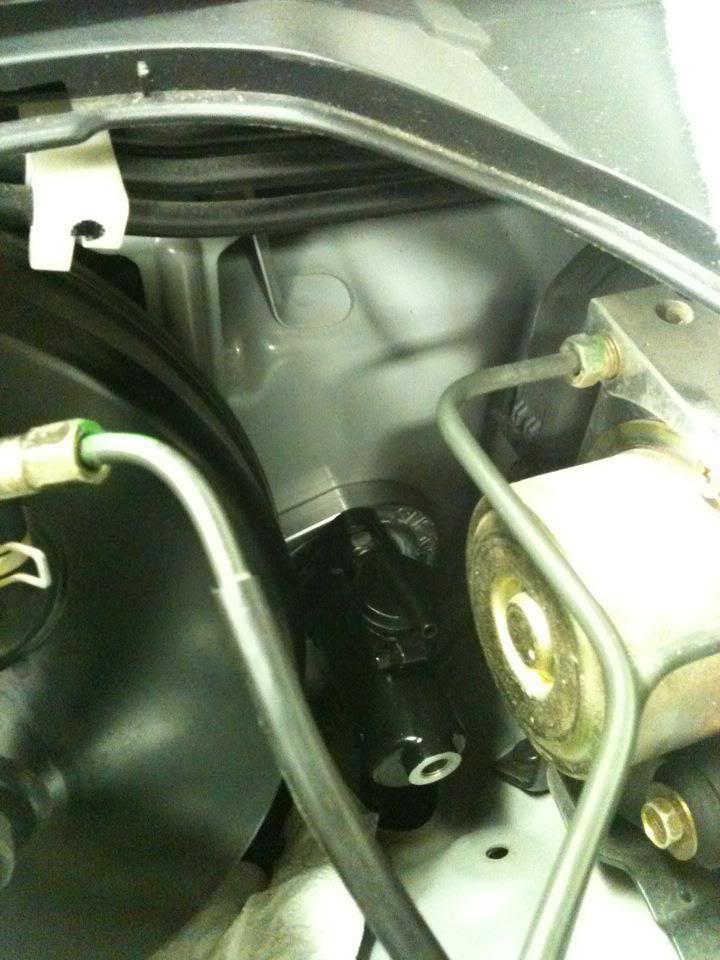 took the stock hardline and used a pipe bended to turn it about 70 degrees then installed the jegs 5/16 compression fitting 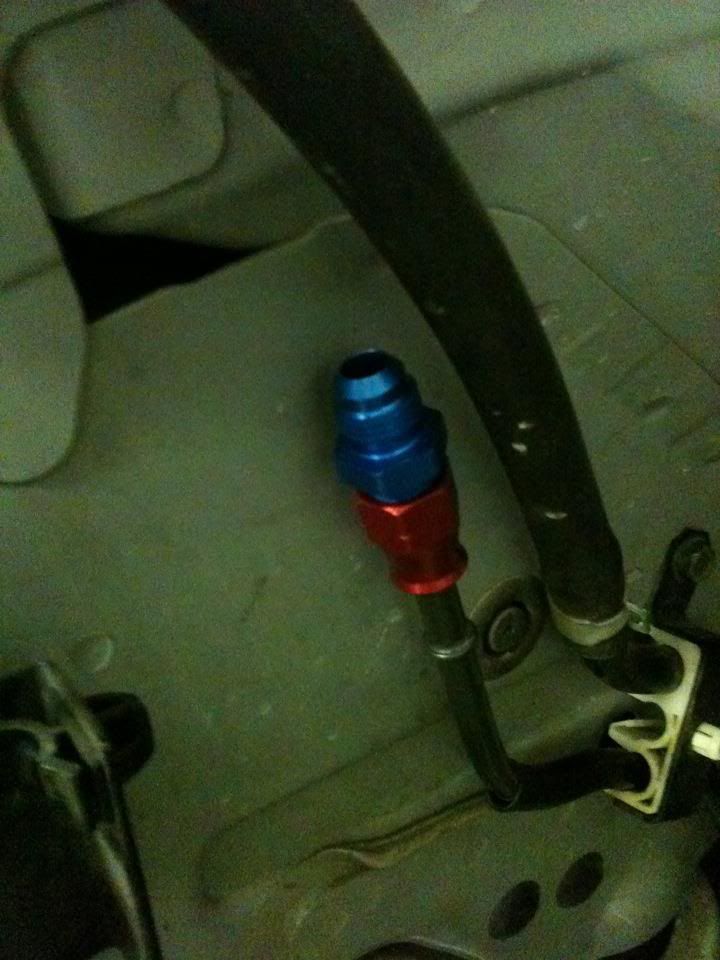 pulling these ends out and going to use earls fittings to run all the coolant lines   street and performance 15 degree water neck with 360 degree swivel  spal fans   enjoy more will be done over the weekend |
|
|
|
|
05-24-2012, 08:20 PM
|
#12 |
|
Zilvia Member
Join Date: Sep 2009
Location: Champaign il
Age: 35
Posts: 214
Trader Rating: (1)
Feedback Score: 1 reviews
|
ok sorry for the late update but ran into quiter a few issues.
there wont be many pictures this update because i bought a new phone and all the pics are on the other phone :/ but here we go i ordered all the lines for the fuel and coolant system and all the hose ends and fittings. all earls fittings and hoses very quality stuff but unfortuneately no pictures :/ tapped the water pump assembly and that is ready to go but no pictures :/ i ran into a few issues i didnt like the way i was going to attatch to the heater core so i am going a different direction. i had to pull the whole motor for the third time because i was unaware that the ls1 trans will not shift into 2,4,6 or R GM no longer makes the piece for the GTO so i called sikky and they shipped me one right away  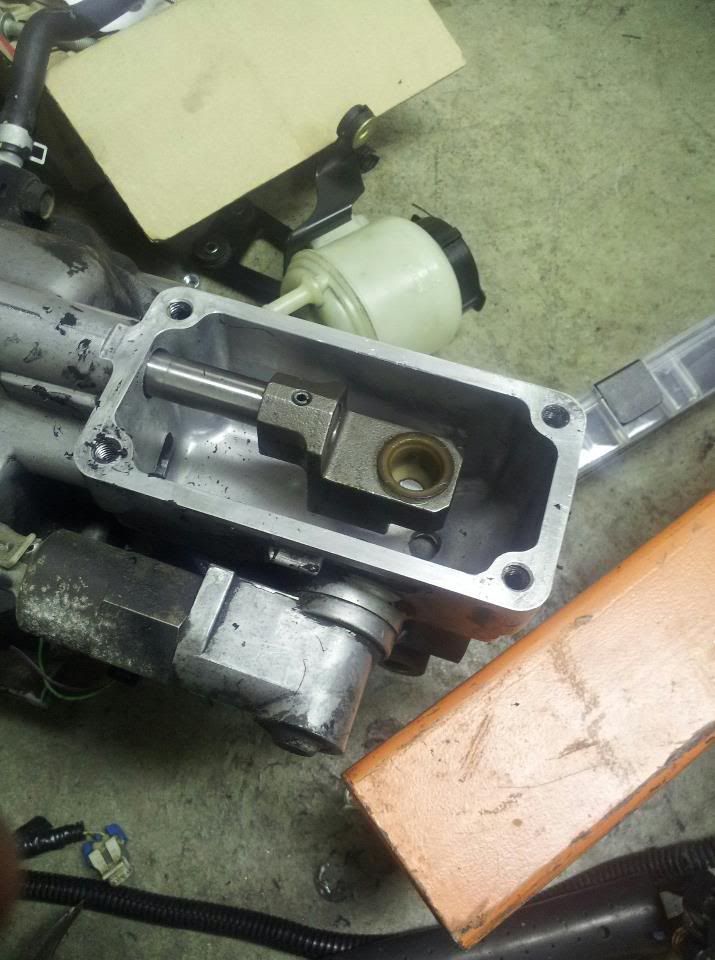 also took some advice from BBS350z and ordered new clutch master cylinder lines 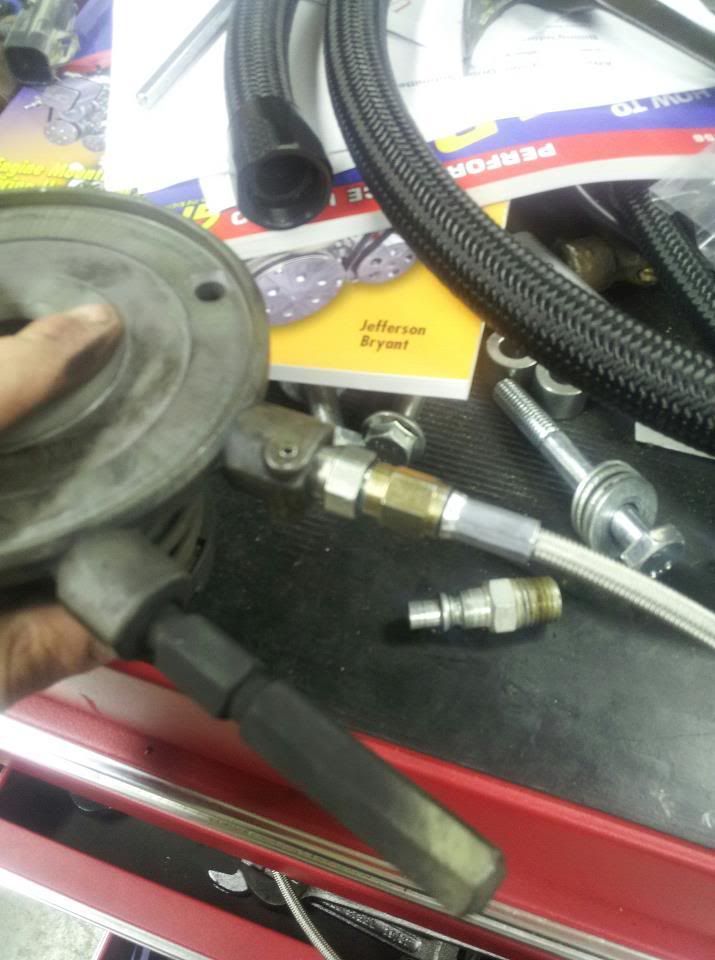 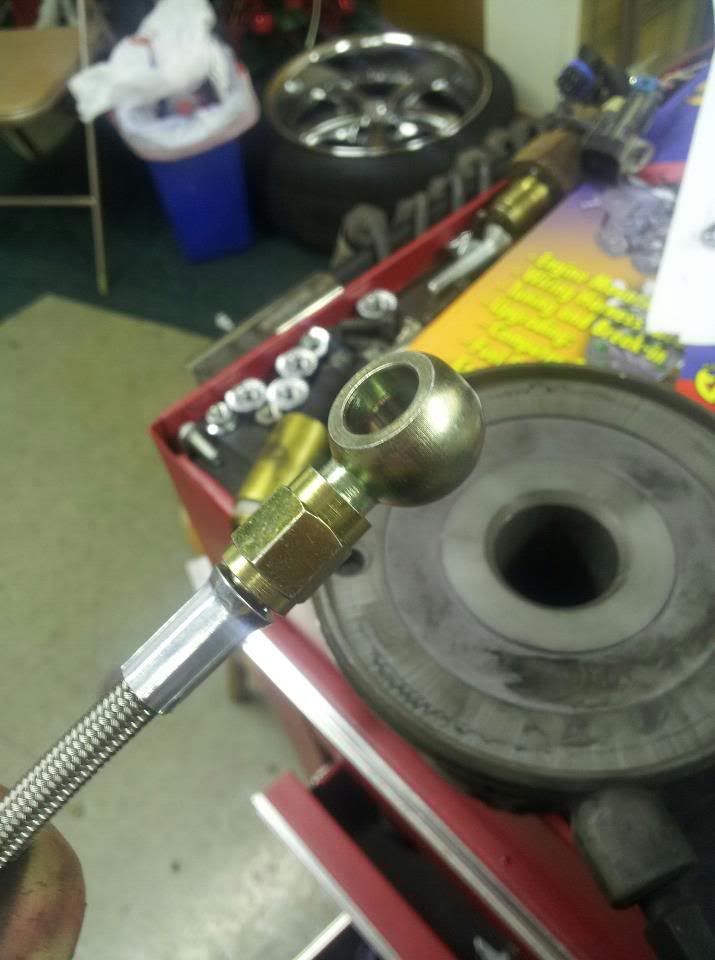 quality stuff and no need to drill. ordered a few clips for the throttle body because i am converting from drive by wire to cable driven www.larryselectricsite.com had everything i needed also got alot of planning done on the harness and more will be finished this weekend enjoy |
|
|
|
|
05-24-2012, 08:20 PM
|
#13 |
|
Zilvia Member
Join Date: Sep 2009
Location: Champaign il
Age: 35
Posts: 214
Trader Rating: (1)
Feedback Score: 1 reviews
|
made quite a bit of progress tonight
power steering bracket came in finally  since my ls6 is drive by wire and i am converting to cable driven i had too tap the intake manifold where the ls1 throttle cable bracket would be 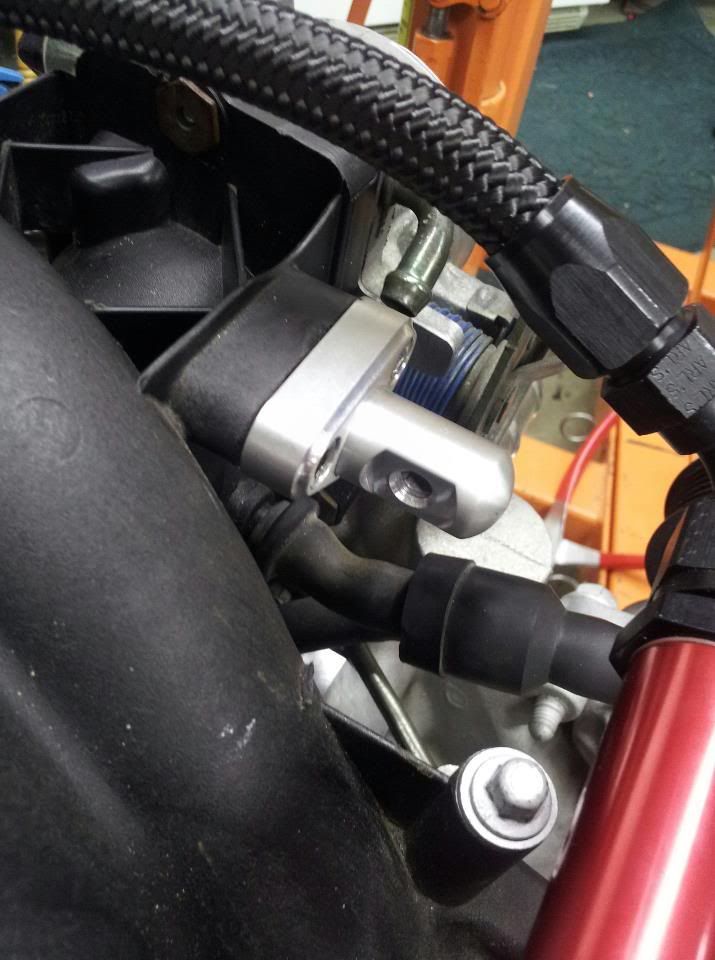 got all of the fuel lines ran and tightened down and done correctly did a little test fit for the heater core lines and finally figured out the way i want to set up the system where it attatched to the oem core 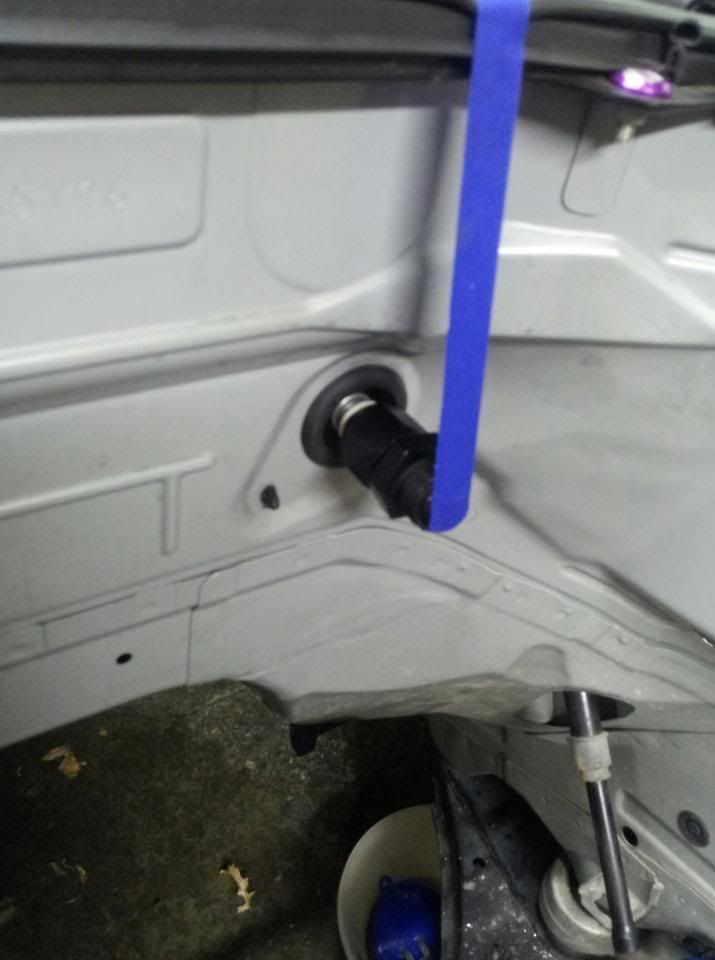 decided to mount up the coil packs because i am not changing their wiring set up 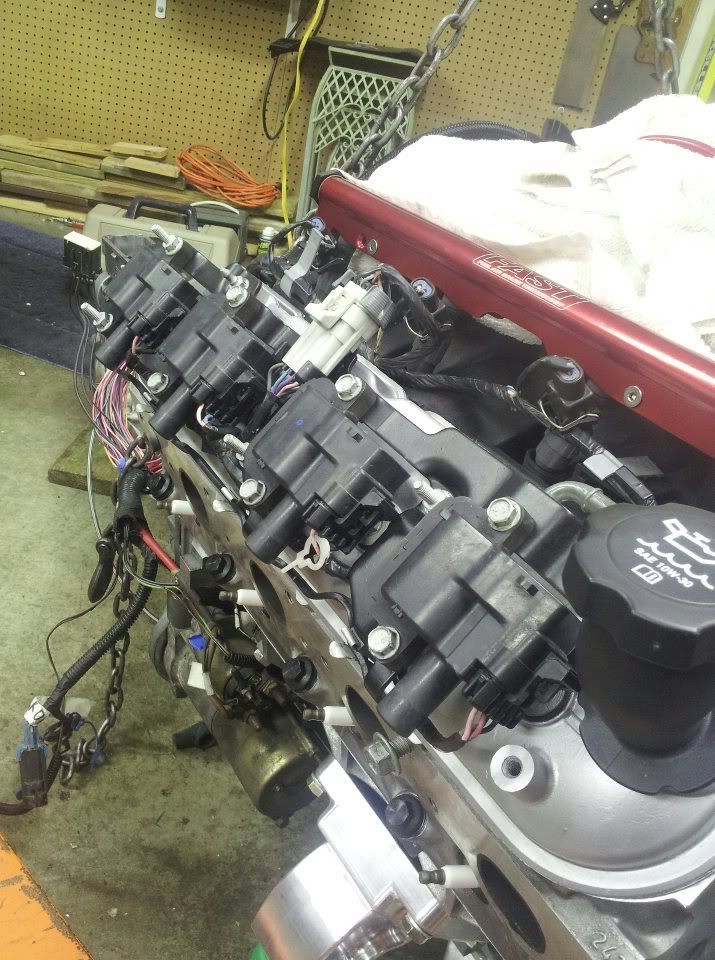 got the slave cylinder and bleeder set up 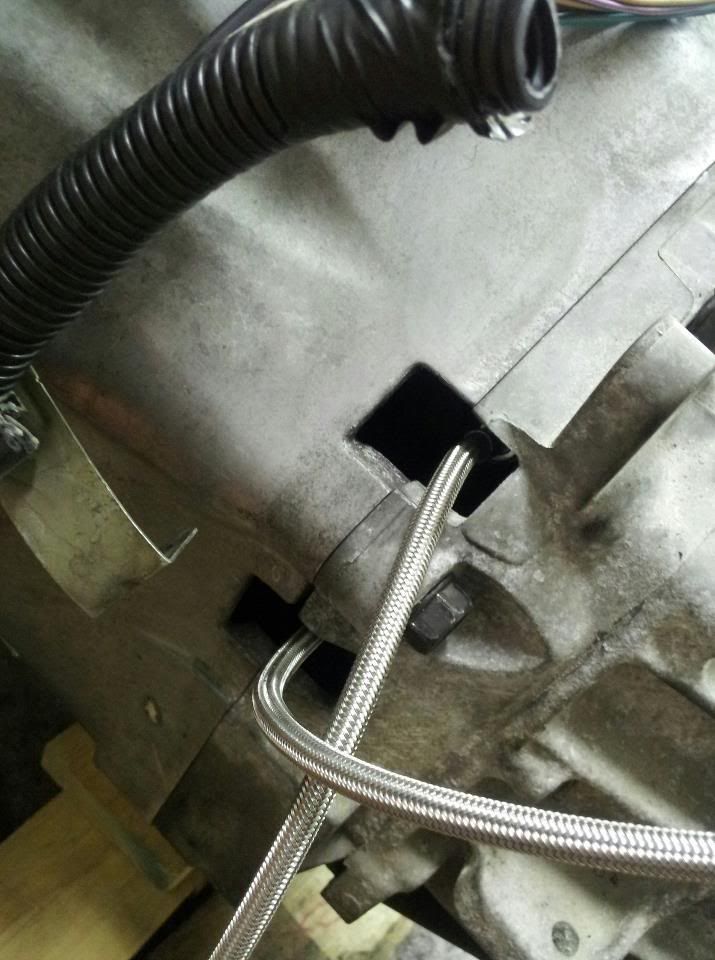 when i went with the alper ps bracket i had to extend the lines a little bit to get them to run thrm to be a tad bit hidden  SIKKKKKYYYY  wired in the tps connect becasue of the conversion 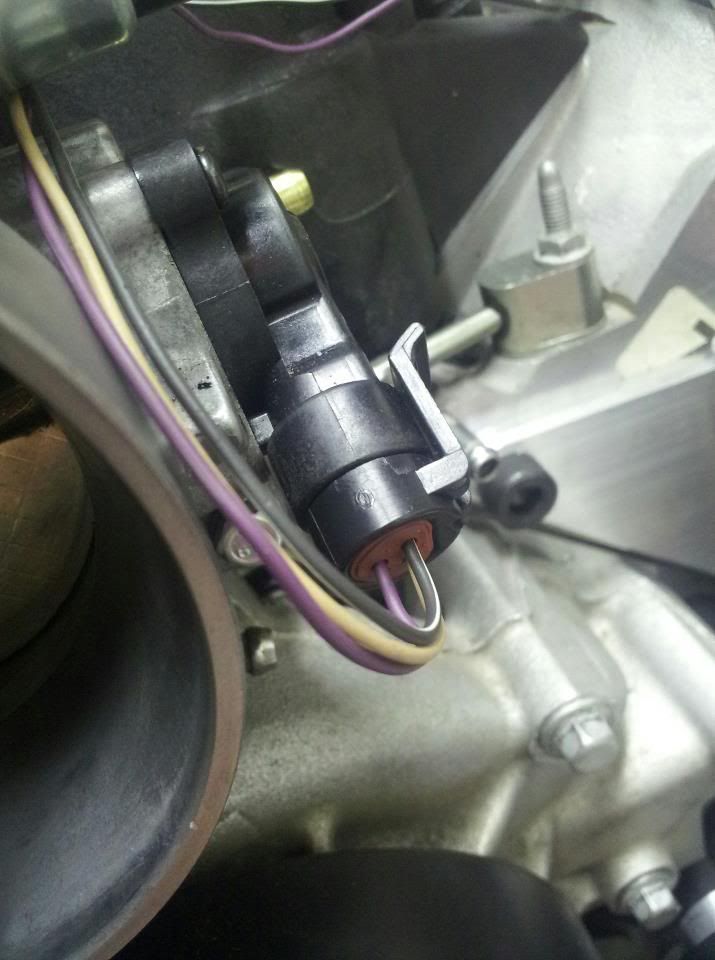 more to come tomarro hopefullly enjoy |
|
|
|
|
05-24-2012, 08:21 PM
|
#14 |
|
Zilvia Member
Join Date: Sep 2009
Location: Champaign il
Age: 35
Posts: 214
Trader Rating: (1)
Feedback Score: 1 reviews
|
got a ton done the past week but havent hadn time to make any sort of update. but finally ill have a minute to sit down and show my progress.
started off the week by removing all the unnessesary wires from the ls6 harness removed 27 wires total 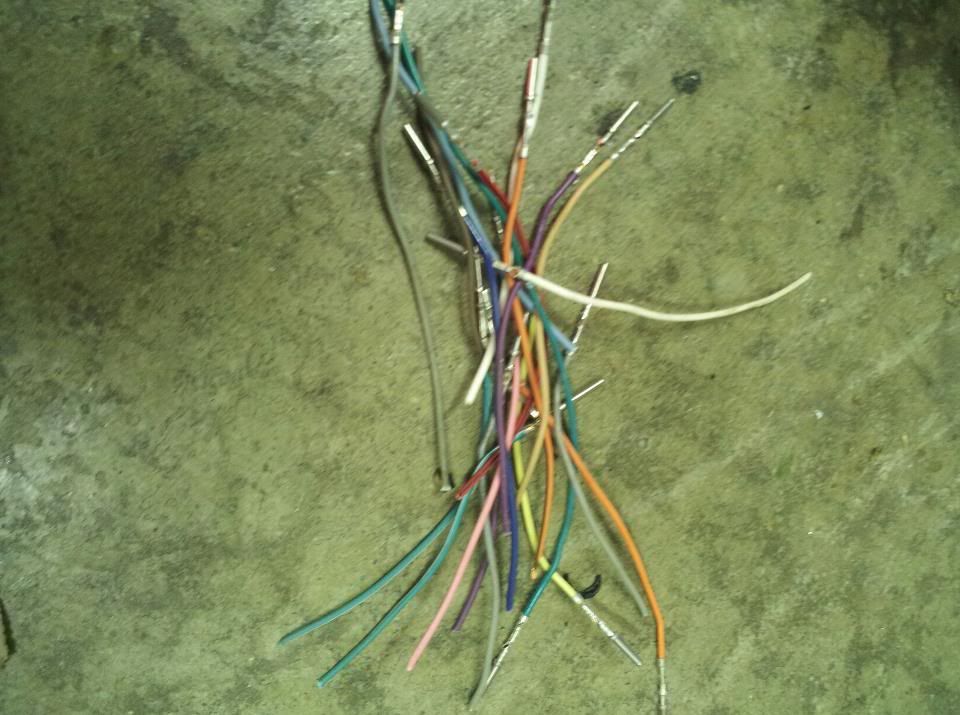 i decided the way that chevy runs there injector power wires was a bad choice so i changed it from each individual injector getting a 12v power wire to a parallel series wire with each injector spliced in 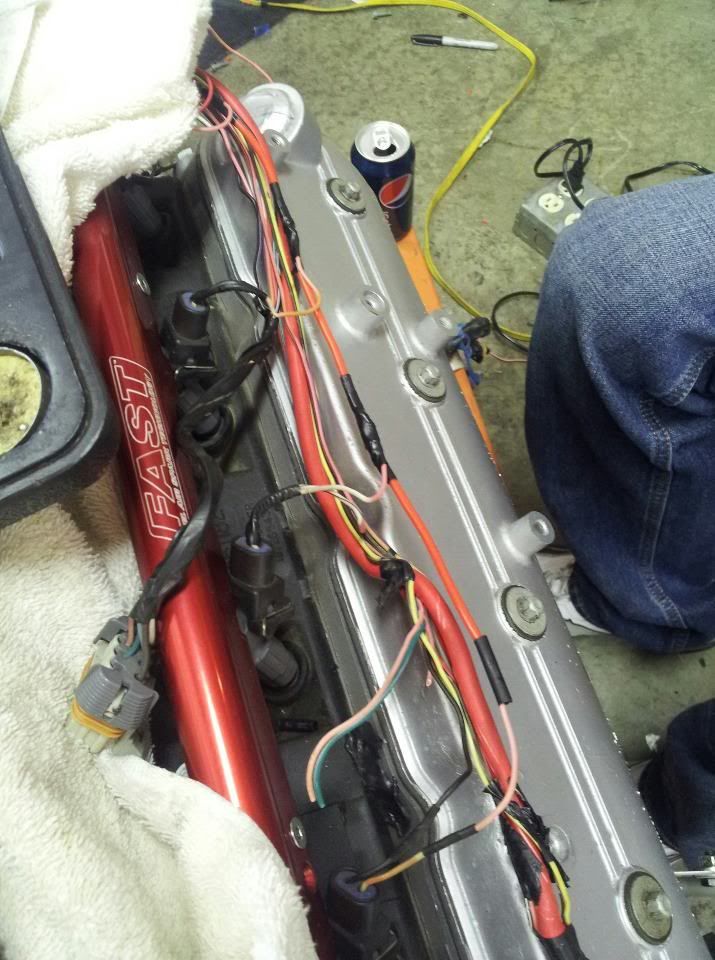 as far as the wiring for the ls6 harness it is finsihed other than one connector for the reverse lamp switch which i am waiting on the connector as we speak. we are working on a way to utilize the stock nissan DLC connector and put it on a switch to change from 350z-ls6 depending on which ecu you are wanting to scan. also we are working on the bugs on the immobilizer for the ls6 so it will crank without the stock signal, we are going to attempt to use the nissan signal. finally all my fittings for the heater core hoses came in and i was able to build those 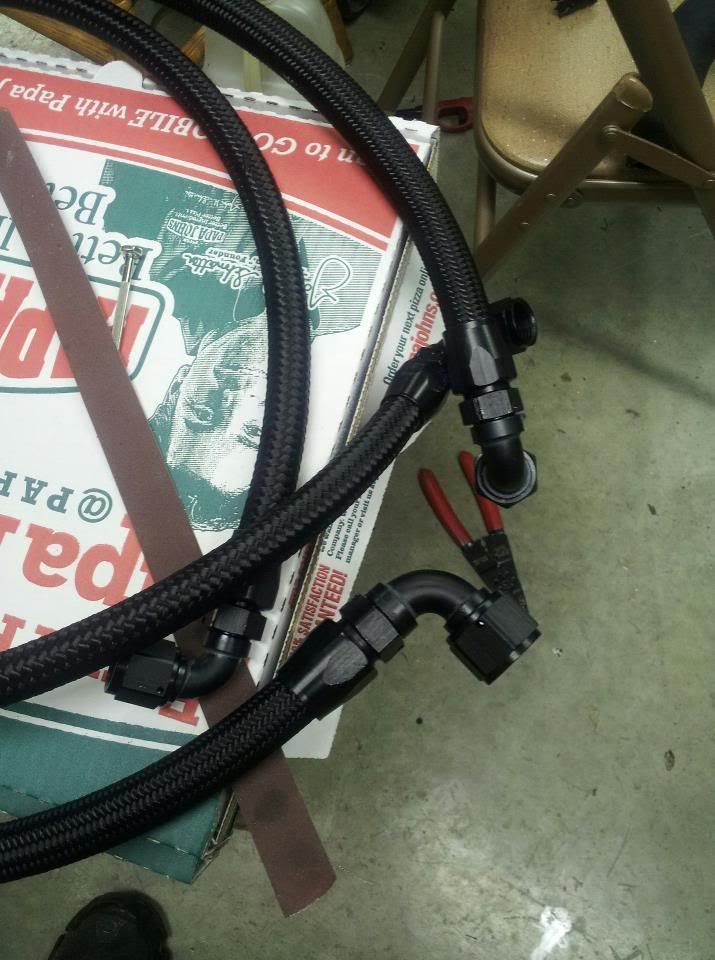 mounted them up to the fire wall 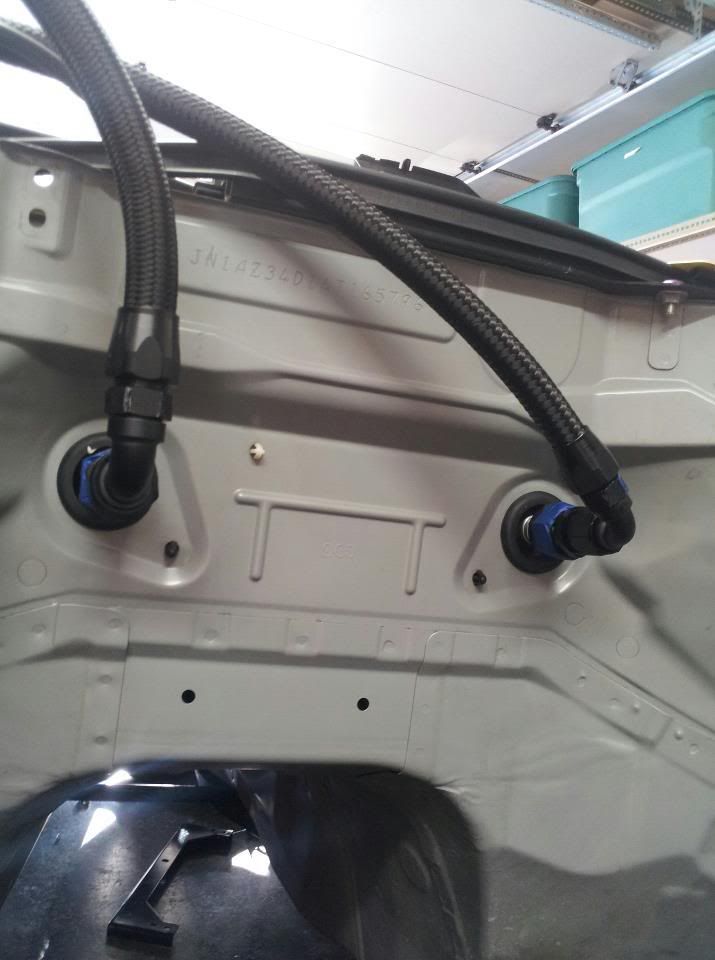 this is a poor picture but there is my clearance for the heater core lines 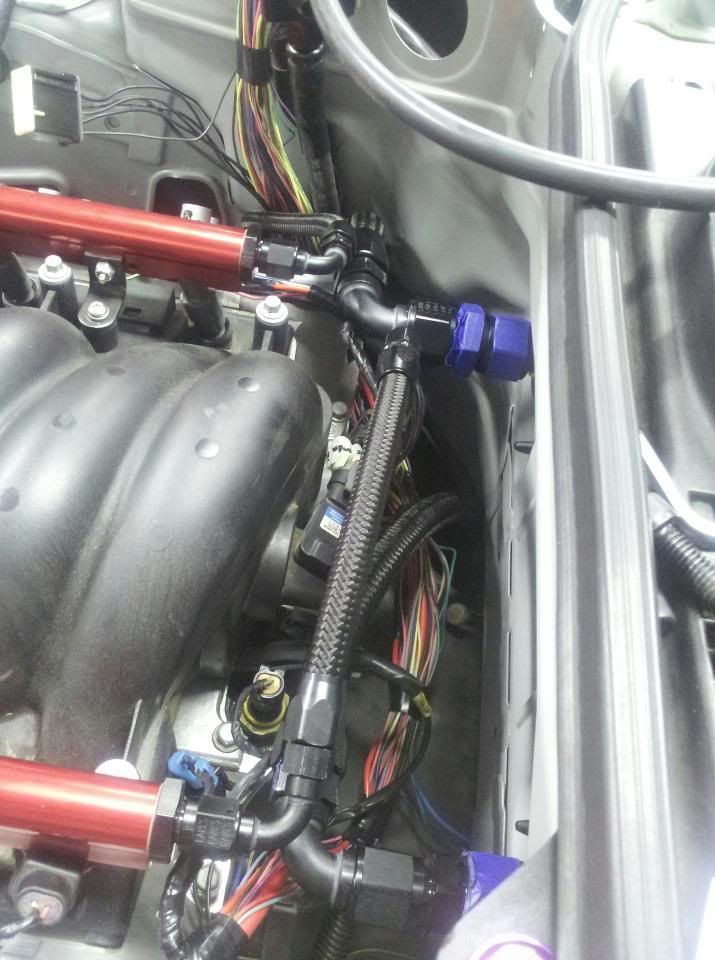 sikky 1 7/8 long tube header clearance and you can see how the coolant is ran to and from the water pump assembly radiator set up the speed and performance water neck worked out well but im going to need to get creative on the hoses that run to and from the radiator from the water pump assembly. if anyone has any suggerstions please let me know! 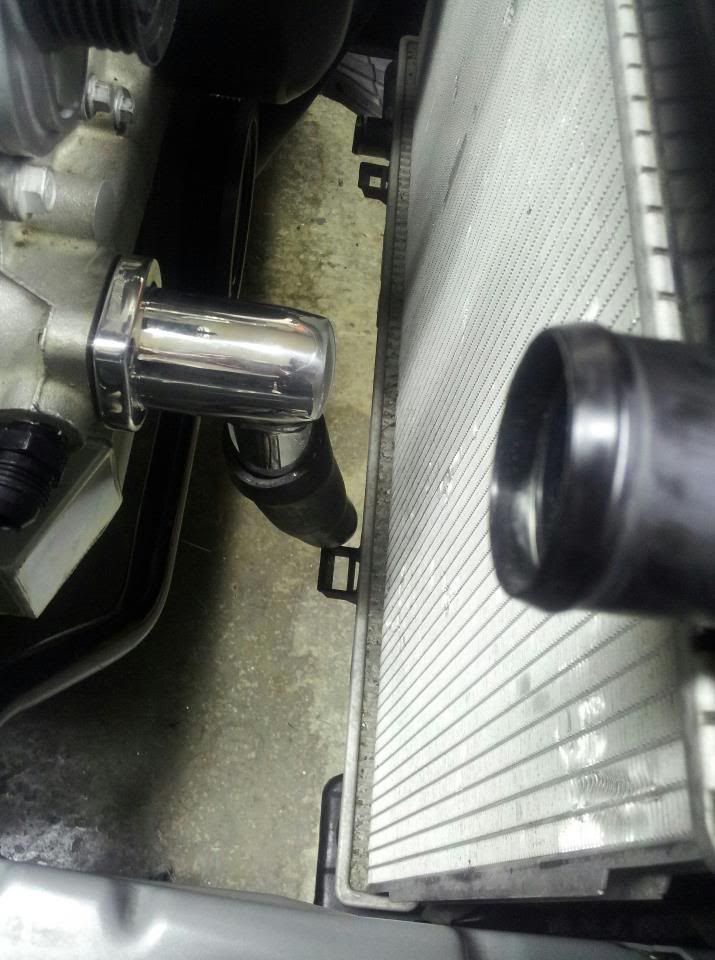 more will be finsihed monday and should be up and running shortly questions comments and suggestions are all welcome! enjoy! |
|
|
|
|
05-24-2012, 08:22 PM
|
#15 |
|
Zilvia Member
Join Date: Sep 2009
Location: Champaign il
Age: 35
Posts: 214
Trader Rating: (1)
Feedback Score: 1 reviews
|
ok got lots done the past couple weeks
got all the wiring from the nissan ecu removed that will not be needed figured out a bunch of power steering stuff and got her to run on fuel for about 3-4 seconds but heres the pics: if you want to run the remote set up like mine you need the ls6 pressure line fitting so that the sikky pressure line will fit 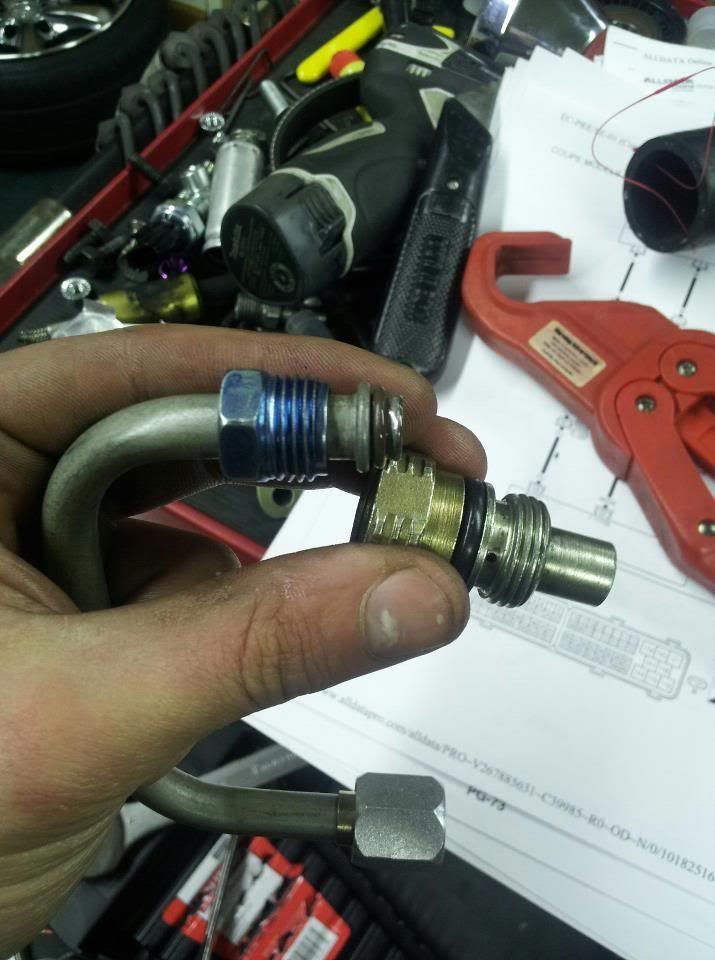 mounted up the power steering cooler roughly where i want it 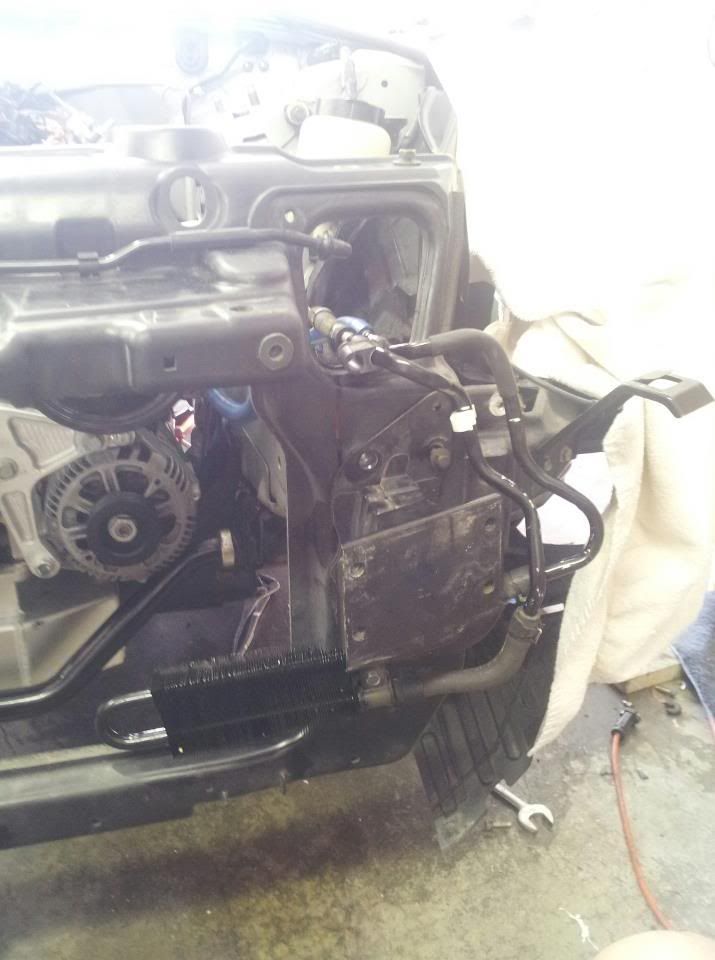 ran the lines up through where the stock vq intake runs   going to run a 1" aluminum tube to connect the upper and lower radiator hoses  removed almost all the nissan harness except for a few minors things this  to this 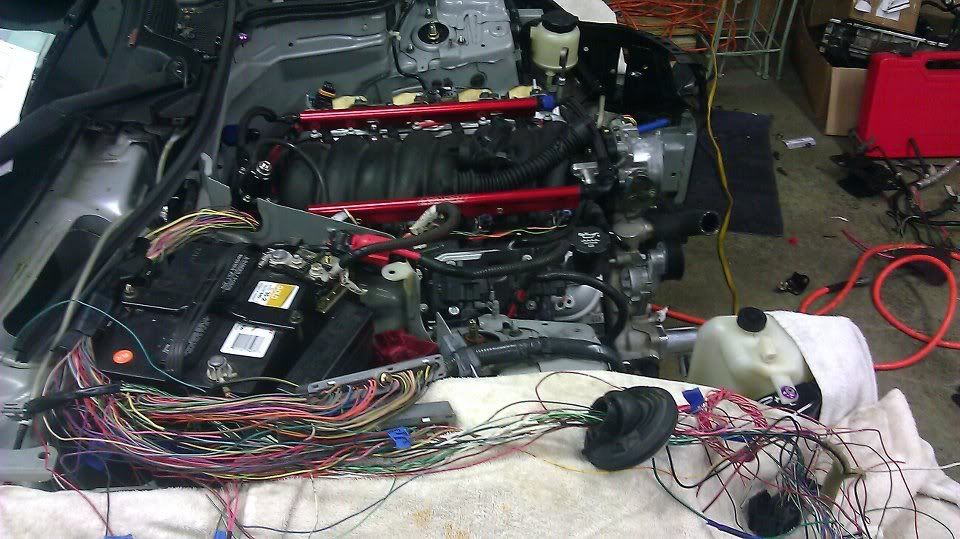 sent the ecm to speed inc in chicago to get the base tune for my cam remove the maf remove the VATS remove the Rear O2 sensors and a bunch of stuff i cant remember i cant figure out how to upload the video or i would seems like it has an extended crank hoping that is because of the VATS but we will find out soon. enjoy! |
|
|
|
|
05-24-2012, 10:44 PM
|
#19 |
|
Nissanaholic!
 
|
and the pushrod engine keeps outperforming the mighty twin cams, supercharged n turbo wonders. Nice build. Either u guys have really good jobs, save every dollar, or dont drink xD, Waiting for more!
|
|
|
|
|
05-25-2012, 12:39 AM
|
#20 |
|
Zilvia Member
Join Date: Sep 2009
Location: Champaign il
Age: 35
Posts: 214
Trader Rating: (1)
Feedback Score: 1 reviews
|
Im a Toyota technician don't drink and getting married but i still manage id love to post the start up video but can't figure out hot to get in from facebook to a forum help?
|
|
|
|
|
06-10-2012, 07:54 AM
|
#22 |
|
Zilvia Member
Join Date: Sep 2009
Location: Champaign il
Age: 35
Posts: 214
Trader Rating: (1)
Feedback Score: 1 reviews
|
Sorry for the lack of updates
I got the ecm back But i dont have the car. Its out getting exhaust made and the intake pipe made. He is also getting the correct angle and length for the throttle cable. But i should have ot back Wednesday and start back to work.on Thursday. As of now literally have to hook up the coolant lines and fire her up and begin work on figuring.out how to make the oem gauges work |
|
|
|
|
06-24-2012, 07:57 AM
|
#23 |
|
Zilvia Member
Join Date: Sep 2009
Location: Champaign il
Age: 35
Posts: 214
Trader Rating: (1)
Feedback Score: 1 reviews
|
ok finnallly for a small update before she is finished.
so we came to the conclusion that the stock tach will not work the can bus system is going to be too hard to by pass. but for some reason the speedo works not sure why or how accurate it is. so im pretty positive i am going to pull all the gauges and run after market ones which i am not familiar with trying to get them to work any suggestions or opinions or part numbers are welcome. i ran the car for about thirty seconds and seems to be ok idle is kinda high but i figured it would be considering new iac new computer etc. it will prolly have to learn a little bit. but today i am buttoning up the whole system and hopefully driving it home. also i popped it in first gear while on the jack stands and under any sort of throttle it kicks out of gear i think the detents might be bad. i want to try it again with it filled with fluid and see what happens . but where is my update utilized the stock z pedal 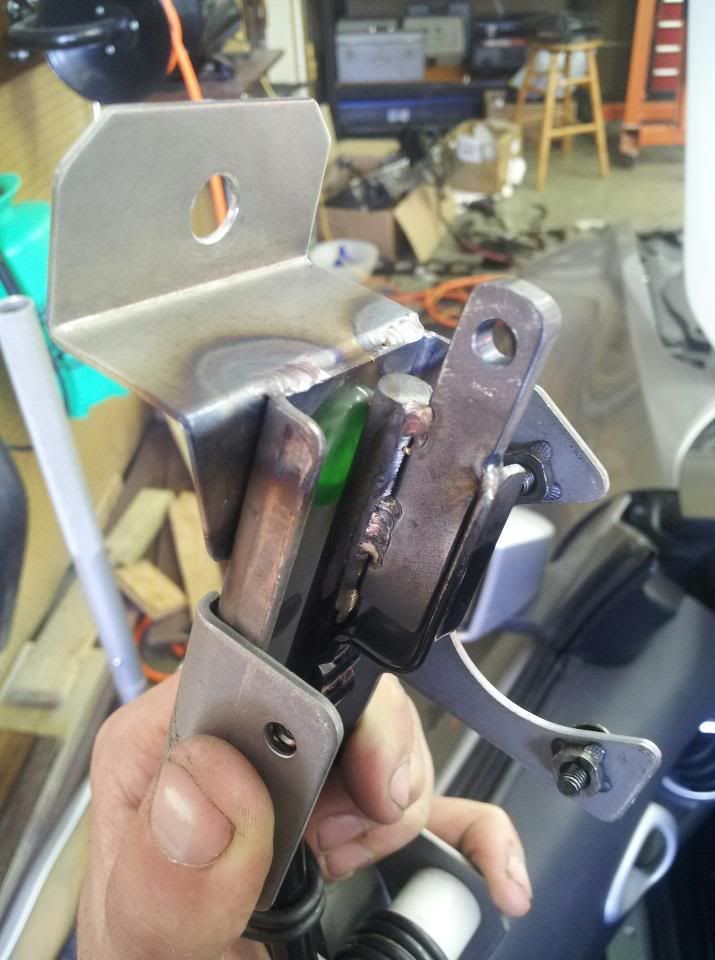 ran the line up through the firewall 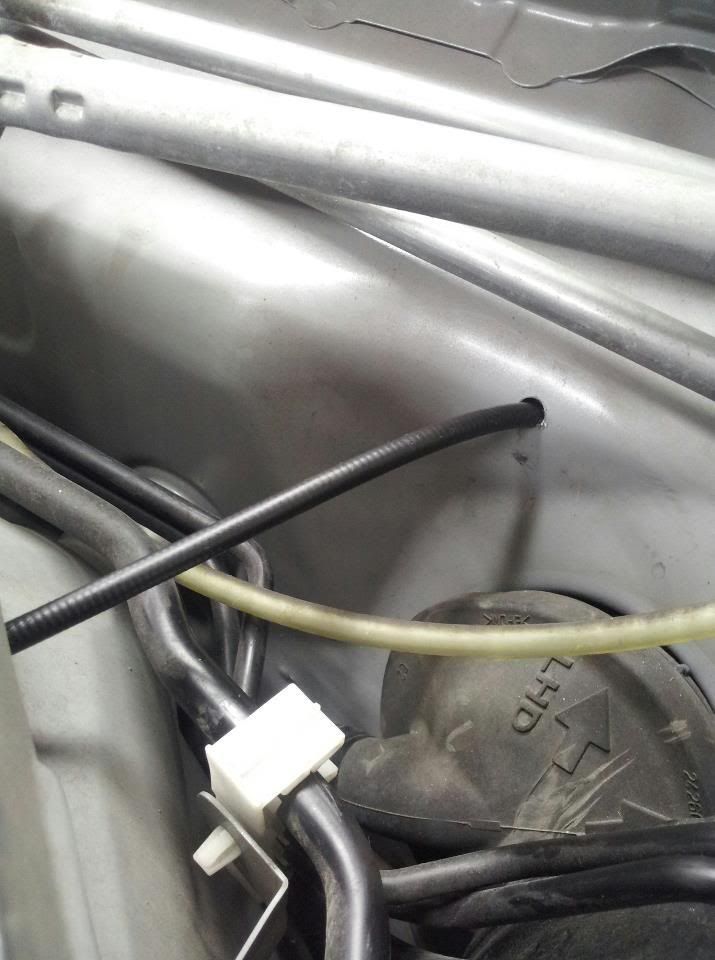 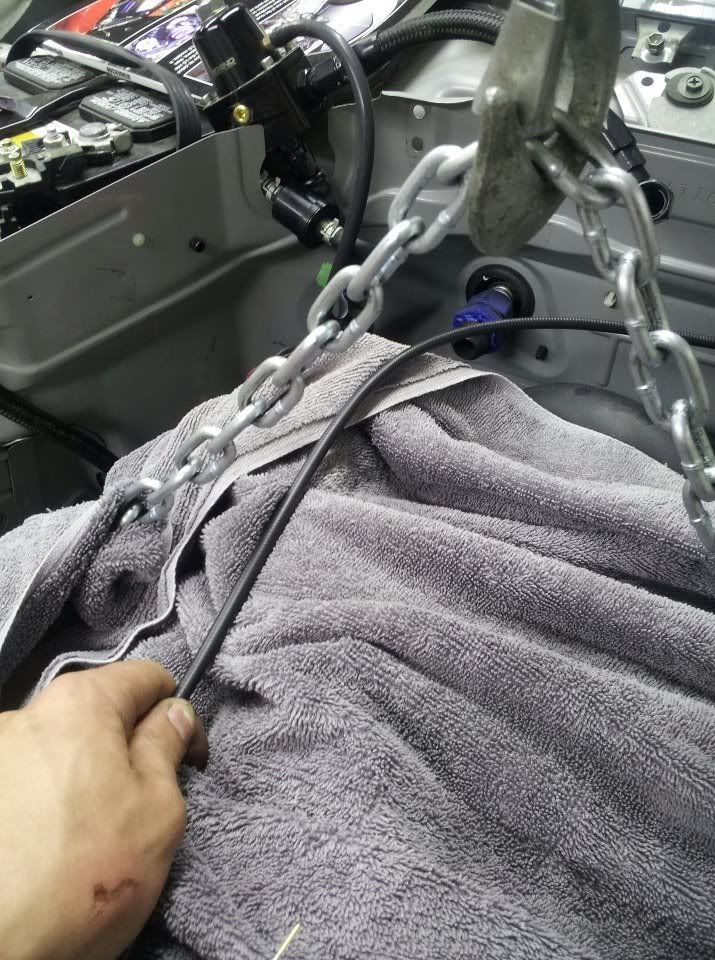  headers were wrapped to prevent heat soak   ypipe that was made   upper radiator hose  enjoy ill be putting it all together today hopefully drving it home tonight |
|
|
|
|
06-24-2012, 07:36 PM
|
#27 |
|
Zilvia Member
Join Date: Apr 2005
Location: Joint Base Charleston
Age: 35
Posts: 223
Trader Rating: (0)
Feedback Score: 0 reviews
|
This thread gives me a hard on. Cant wait to give it a test drive next month buddy. Glad you finally listened to me and got rid of the turbo after 2 years.
|
|
|
|
|
07-06-2012, 06:09 AM
|
#29 |
|
Zilvia Member
Join Date: Sep 2009
Location: Champaign il
Age: 35
Posts: 214
Trader Rating: (1)
Feedback Score: 1 reviews
|
Small quick update
The car moves But ran into a few issues was finishing up the wiring for the coolant relay and something sparked and toasted my relay circuit board but a new one has been ordered. Got the tachimeter ordered and the new circuit board ordered. Was having issues with the sikky shifter it kicks out of gear under any sort of throttle so the requested i ship it back So currently im in wait mode |
|
|
|
|
07-06-2012, 07:20 AM
|
#30 |
|
Post Whore!
 
Join Date: Jan 2005
Location: queens NYC
Age: 39
Posts: 2,561
Trader Rating: (8)
Feedback Score: 8 reviews
|
Great build man! cant wait to hear that thing.
mind sharing where you bought the lsx motor from and the Transmission?? I may be in the market for one soon 
__________________
 s14 kouki ka-t |
|
|
|
|
| Bookmarks |
|
|


 Hybrid Mode
