|
|||||||
| Tech Talk Technical Discussion About The Nissan 240SX and Nissan Z Cars |
 |
|
|
Thread Tools | Display Modes |
 03-19-2006, 10:00 PM
|
#1 |
|
Post Whore!
 
Join Date: Apr 2004
Location: Oregon
Age: 42
Posts: 2,474
Trader Rating: (8)
  Feedback Score: 8 reviews
|
RB25DET timeing belt / Water pump / thermostat removal and install
Ok since i am doing this already and haven't found alot of good write ups here it is as i do it. This is a Series 1 RB25DET. I did this cause my water pump was bent so here it is:
Remove water pump pulley: 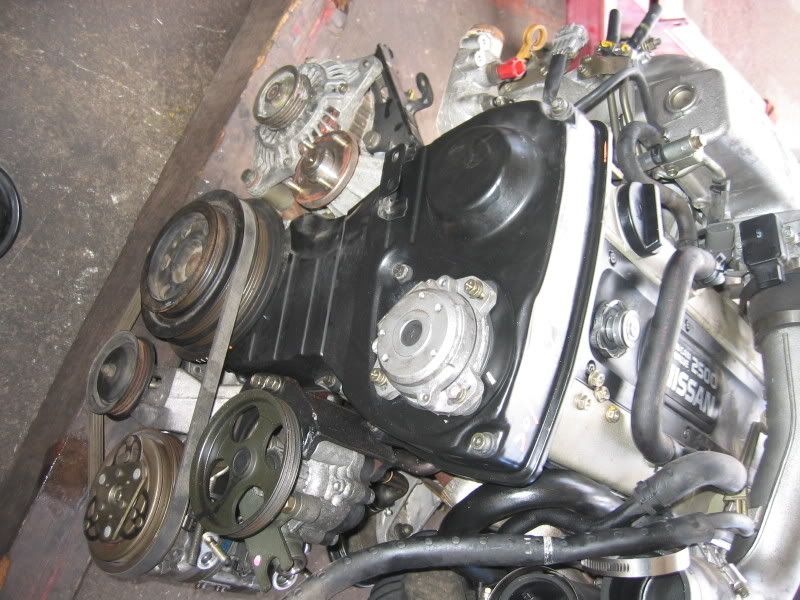 remove the CAS too that is held on by the obvious 3 bolts too Remove bolt that holds un main pulley (it's a 27): 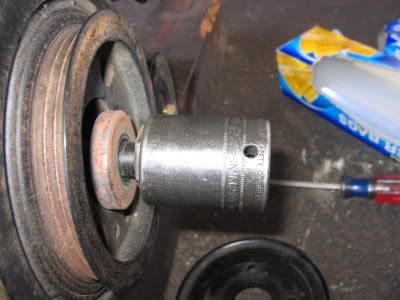 Use pulley puller to take the pulley out: 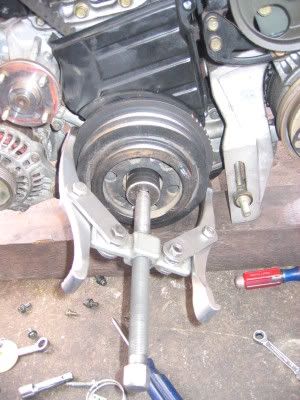 Remove all small bolts the holes are circled in red (they are T5): 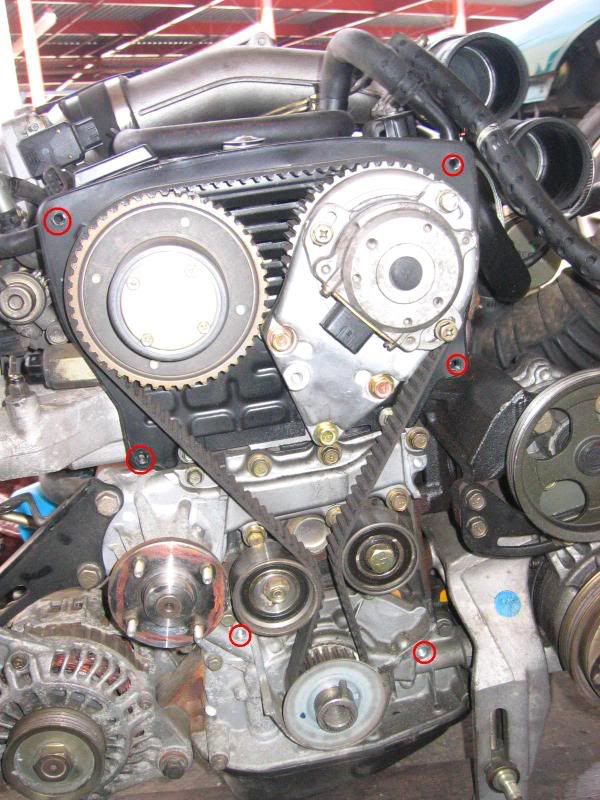 take off this little guard: 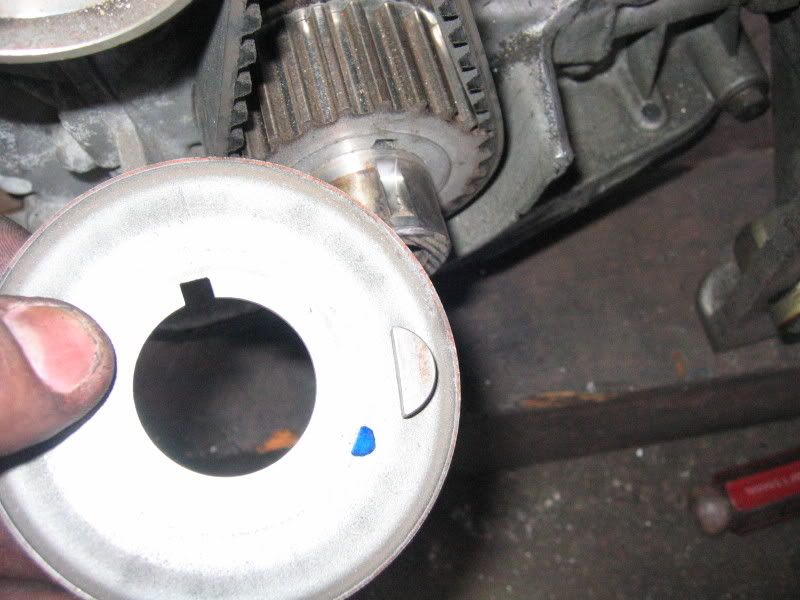 MARK the timeing belt in all 3 places. mark the gears and the belt so you can line them up later I labled mine Rt, LT, and B (for bottom):  Now remove the timeing belt tensioners: 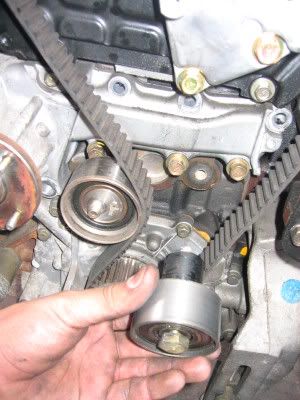 and the back of the other one: 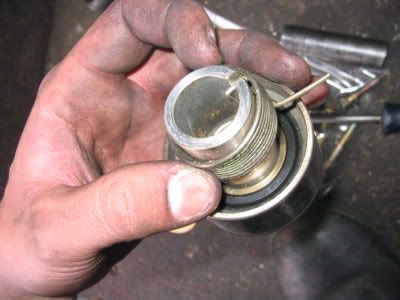 now the 12 bolts that hold on the water pump (you can see them in the pics above) and you should be left with somehting like this, if not cleaner hopefully: 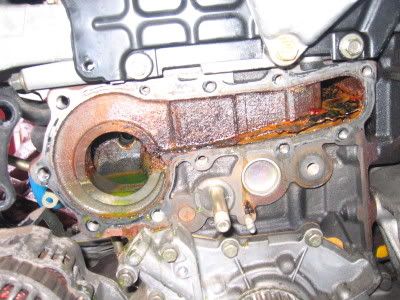 Thermostat: un bolt the Oil dip stick and bend down slightly, Bent the metal hose CAREFULLY that is by the bottom left scew, unbolt: 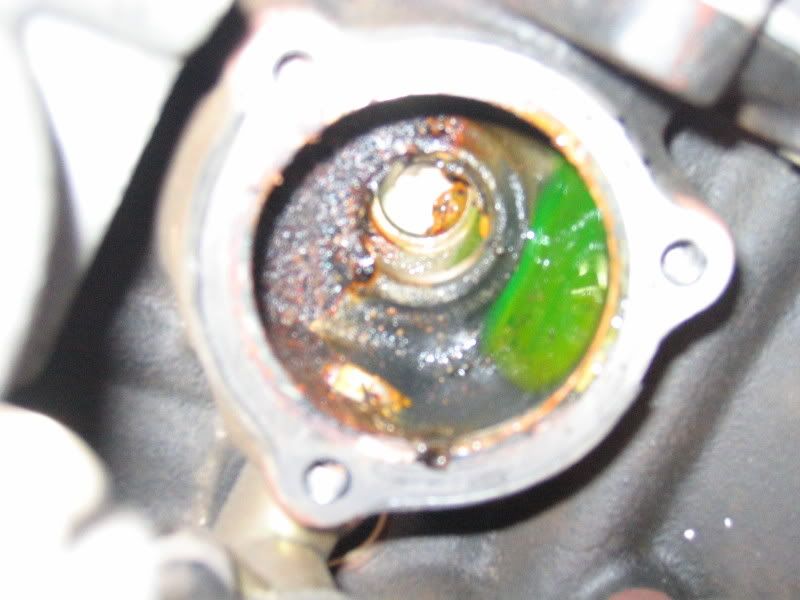 install soon to come.................... |

|

|
| Sponsored Links |
|
03-19-2006, 10:04 PM
|
#2 |
|
R.I.P. Aya, always love
 
Join Date: Nov 2001
Location: Los Feliz/Hollywood
Posts: 18,564
Trader Rating: (215)
Feedback Score: 215 reviews
|
good write up tenchuu, this should be faq'd
__________________
"Having a lot of tracks on a song is like putting stickers on a car to get more horsepower" New Video https://www.youtube.com/watch?v=uebV1OnbRsw Buy my mounts! http://zilvia.net/f/sale-items/51531...ns-mounts.html http://zilvia.net/f/tech-talk/317539...e-mouts-6.html |
|
|
|
|
03-28-2006, 04:13 PM
|
#8 |
|
Post Whore!
Join Date: Apr 2004
Location: Oregon
Age: 42
Posts: 2,474
Trader Rating: (8)
Feedback Score: 8 reviews
|
OK welli kinda owned myself by forgetting the camera when i put this back on. and for torque specs and bolt order i used a RB25DET.org writeup here (i take no credit):
Water Pump Replacement Removal 1. Remove radiator 2. Remove belts 3. Remove water pump pulley 4. Remove timing belt 5. remove tensioner pulley 6. remove idler pulley 7. remove alternator adjustment bar 8. Remove bolts in order shown 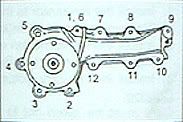 Installation 1. Apply sealant (Nissan RTV) 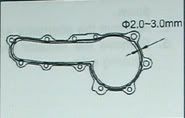 2. Tighten bolts in the order shown below 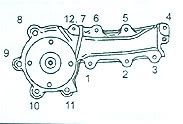 3. Tighten bolts 8and 9 together with the alternator bar 4. Tighten bolts to specs (FT/LBS) M6 = 4.6-6.1 M8 = 11.8-15.5 M10 = 23.2-31.1 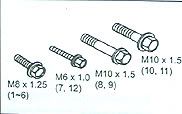 now to put it back on, i lined up all the marks on the belt and the gears so it was back in place. Next i installed the ideler pulley and torqued to 43-58 (N-M) (the ideler is the one on the rt if you are in fron tof the engine) Then it was time for the tensioner. you need a hex wrentch to get this thing to go on. so i made sure that the spring on the back was seated good in it's slot. then made sure that the nut on the end went (nut)---->( shaped washer---->l shaped washer--->pulley---->bolt then after i had all that in and i used the hex wrentch to turn it so i had clearance to get the belt on. i ended up takeing the belt off the bottom pulley, looping it around the tensioners, then slideing it back onto the bottom gears and le tit go. Now i torqued that nut down to .43-58 (N-M) also. then it was a matter of putting on everything the same way it came off (block off plate, then front shielding, then bottom pulley, then upper plate and lastly the CAS and water pump pulley.) I will let everyone know if this works once i start it up and see. i hope it does and will find out soon. |
|
|
|
|
| Bookmarks |
|
|


 Linear Mode

