|
|||||||
| Builds (and builds only) Got a build thread? It goes here, build threads anywhere else on the forum will be locked and never moved. |
 |
|
|
Thread Tools | Display Modes |
|
|
 11-06-2009, 07:59 AM
|
#1 |
|
Post Whore!
 
Join Date: Jul 2005
Location: LA
Age: 39
Posts: 3,402
Trader Rating: (19)
  Feedback Score: 19 reviews
|
My S14 Drift Car Build - LS1 content inside
Ok, so I finally feel comfortable starting on of these threads. I hate it when people make them and don't update them for months.
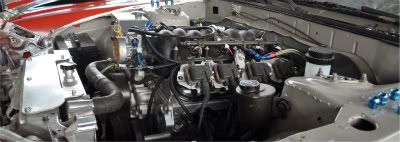
I'm going to start this off with a little nostalgia - a short history as to what the car has been through already. When I got the car it was exactly what I needed it to be - stock, reliable, and it happened to be automatic. These are the pictures I took when I first saw it: 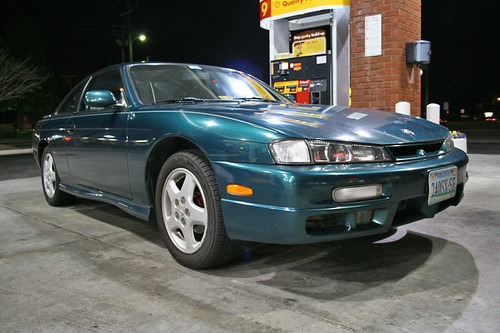 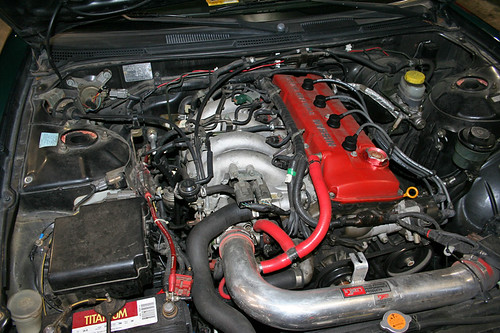 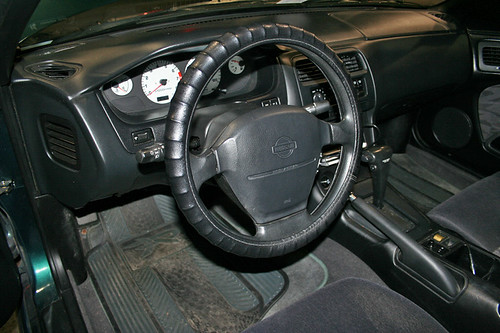 Within a week or so it looked like this: 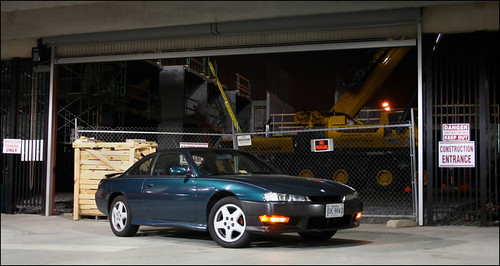 Then a few months after that I painted the bumpers and picked up some lowering springs/shocks: 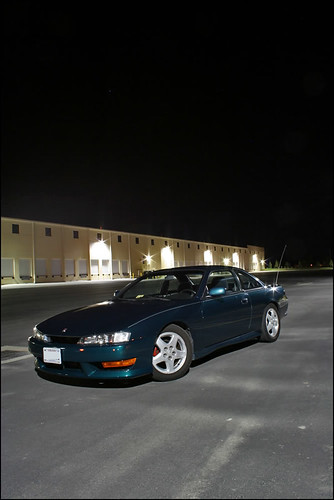 I drove around like that for quite some time, I ended up painting those wheels satin black, then traded them for my old 300ZX TT wheels that were satin black. I believe it was about 7-8 months after the above picture that I went to Japan for the first time and bought coilovers, an exhaust, some wheels and other odds and ends (the car was still automatic KA at this point): 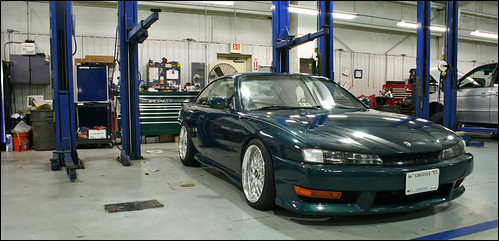 Then I sold those wheels after ~6-7 months, did a 5-speed swap with the transmission out of my old S14 (come to think of it I've had something off of my old S14 on this car every step of the way  ), and bought the Regamasters: ), and bought the Regamasters: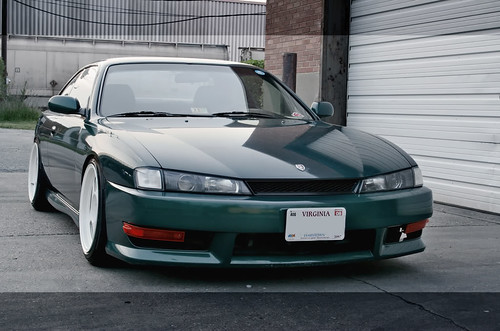 Then I did the SR swap, I'm not sure how long it was after that...I know I did it at the end of May 08: 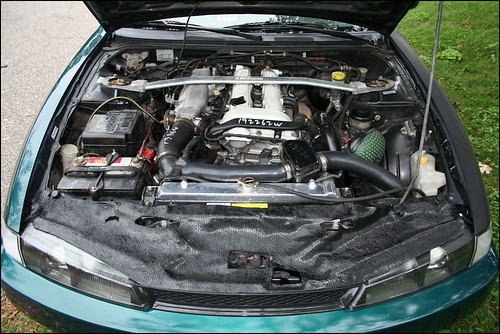 I've done little stuff to it since the swap, finally painted my rear valances and c-west mini spoiler, some s15 injectors, a tubular manifold, a custom intercooler set up (which used the HKS bypass valve off my old S14), a OS Giken 1.5way, got some Fortune Auto coilovers to replace my JICs....oh, and lets not forget building the RSs, haha. This is how it looked up until a few days ago:  .... Now for the build portion! I picked up a LS1 short block a month or so ago and it came with a bunch of extra goodies. I drove it back from Richmond in the trunk of the S14! 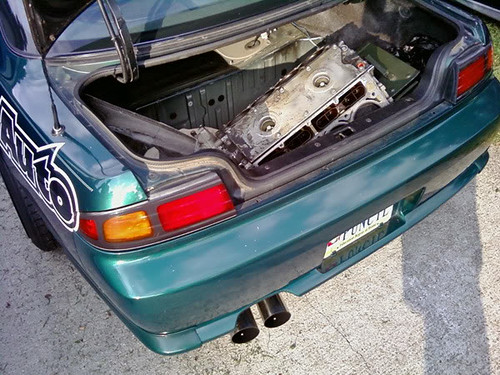 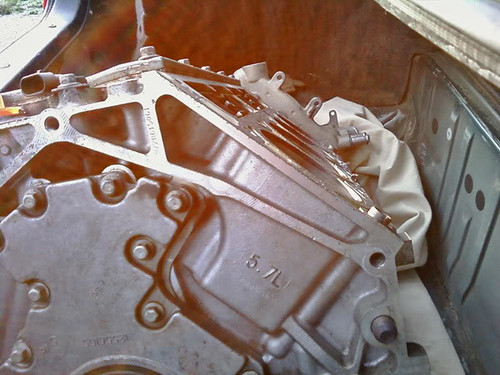 I picked up some 5.3 truck heads, an intake with fuel rails and injectors, some LS3 valves, dual springs w/ retainers, and trick flow hardened push rods since those pictures. I am still hunting for a transmission, wiring harness/ecu, throttle body, and a few other bits. This was the car's state Tuesday: 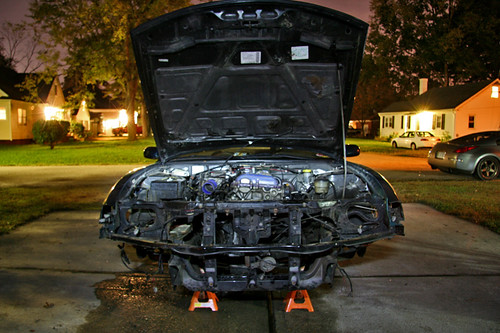 This was the status Wednesday night: 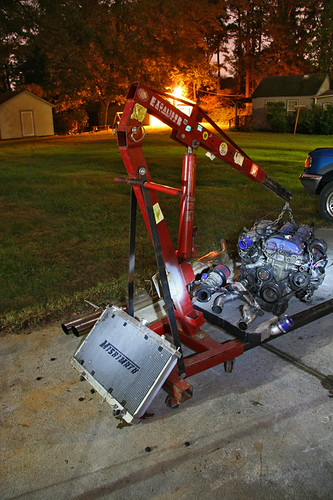 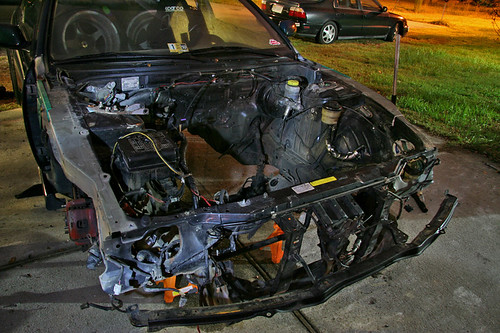 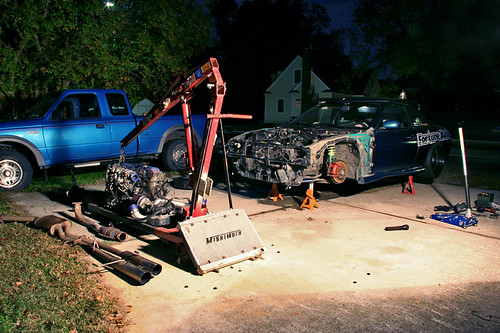 This weekend it is getting towed up to Gloucester where my friend at RE-Spec Garage is going to help me accomplish the next step - cage it, tub it, and a few other things I'll keep as a surprise so you have a reason to keep checking back, haha! Just an idea for my fellow Zilvians out there (because I am going to be struggling). Anyone who donates $10 via paypal will get their name on my car somewhere. My paypal address: Frog800000 (at) AOL dot COM. Obviously with it written like a normal email address. Depending on how many people do it will depend on where I put the names - I am thinking the front windshield would be pretty funny. I will be posting updates in my blog as well - knoop.sumospeed.com. I'll probably post more pictures in there then in the thread because I can host them directly on the blog rather then host them on flickr, then copy and past them here and do the [img] tags.
__________________
 Instagram - SJKnoop |

|

|
| Sponsored Links |
|
11-06-2009, 08:07 AM
|
#2 |
|
Post Whore!

Join Date: Jun 2004
Location: Texas
Age: 41
Posts: 3,960
Trader Rating: (0)
Feedback Score: 0 reviews
|
yes you will be struggling. it took me about 7000 to do everything including my own mounts etc.
i hope you got some cash set aside because unless you understand how to fab you going to spend a lot on mounts, driveshaft, wiring, headers etc. its not as simple as it seems and it adds up very quick even if you did everything yourself. good luck, lsx is very fun.
__________________
hydropgrahics!  ls1...... |
|
|
|
|
03-05-2010, 01:21 PM
|
#6 | |
|
Zilvia Junkie
 
Join Date: Oct 2008
Location: Murrieta
Age: 34
Posts: 360
Trader Rating: (5)
Feedback Score: 5 reviews
|
:]
Yes sir Power torque no need to worry about turbos :] youd be crazy not to go V8
 Nice build though Its NIIICE!! Quote:
|
|
|
|
|
|
11-06-2009, 01:52 PM
|
#8 |
|
Nissanaholic!
 
Join Date: Dec 2003
Location: In a place, near a river, over a lake
Age: 37
Posts: 2,415
Trader Rating: (22)
Feedback Score: 22 reviews
 |
Love the looks, good luck with the build!
__________________
Fu*king ginger bread man stole my wallet... SHIFTlock_slide to side d3m3rs0n: if i have a baby im naming it Brandons Fault Emerson |
|
|
|
|
11-07-2009, 06:19 AM
|
#15 |
|
Zilvia Junkie

|
i'll be keeping up with this build. im planning on doing a v8 swap someday soon hopefully since i just blew my KA. ive calculated how much it would cost me and so far i'd say 4000 for a motor/tranny/ecu/etc. and then 3000 for the Sikky mount kit, so 7000 altogether.
|
|
|
|
|
11-08-2009, 11:02 AM
|
#16 | |
|
Post Whore!
Join Date: Jun 2004
Location: Texas
Age: 41
Posts: 3,960
Trader Rating: (0)
Feedback Score: 0 reviews
|
Quote:

__________________
hydropgrahics! ls1...... |
|
|
|
|
|
11-07-2009, 06:21 PM
|
#18 |
|
Post Whore!
Join Date: Jul 2005
Location: LA
Age: 39
Posts: 3,402
Trader Rating: (19)
Feedback Score: 19 reviews
|
Thanks for the good words guys. We got a lot done today. This shit is going to be crazy, I don't think it has fully sunk in for me yet, haha!
I'll get some pictures up tomorrow...or MAYBE even tonight.
__________________
Instagram - SJKnoop |
|
|
|
|
11-08-2009, 11:15 PM
|
#24 |
|
Post Whore!
Join Date: Jul 2005
Location: LA
Age: 39
Posts: 3,402
Trader Rating: (19)
Feedback Score: 19 reviews
|
Ok...so it took me a little longer then expected to get to these. I was up in Gloucester Saturday through today and we got a lot accomplished. It should be interesting to see how quickly this all goes.
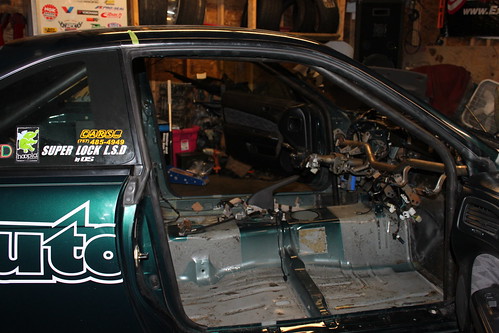
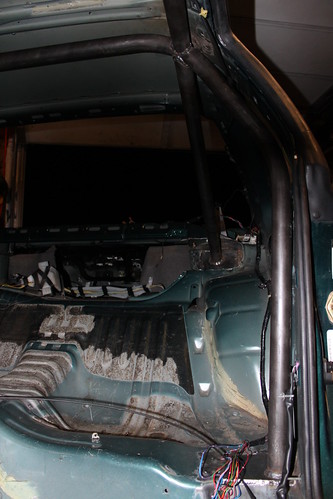
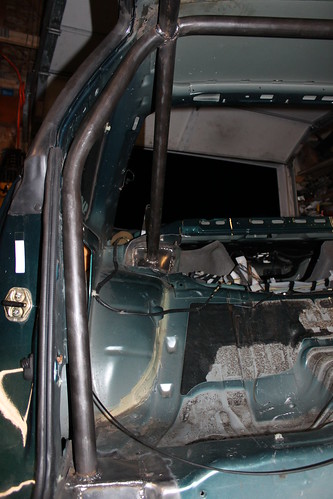
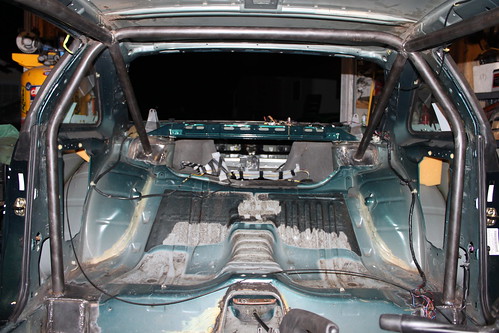
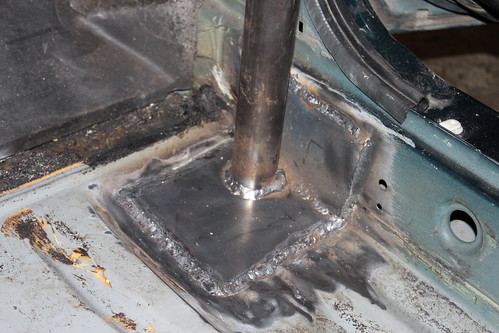
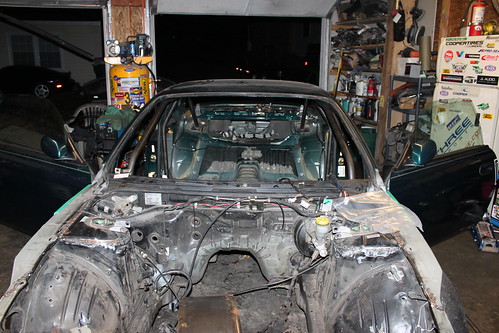
Saturday: On the way up:  Those straps on the front of the car are pieces of shit and we had to stop on the way and replace them with a much better strap, haha. When I got there I finished ripping out the rest of the interior - at this point everyhting was out but the dash/door panels and carpet.   Danny took these shots while Raz and I were dealing with the dash - 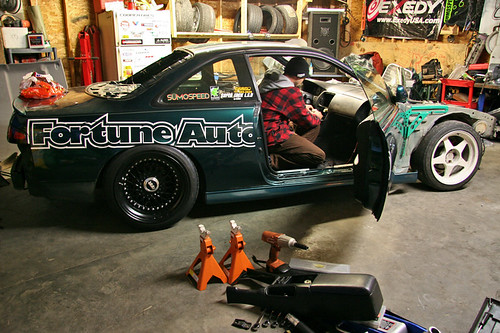 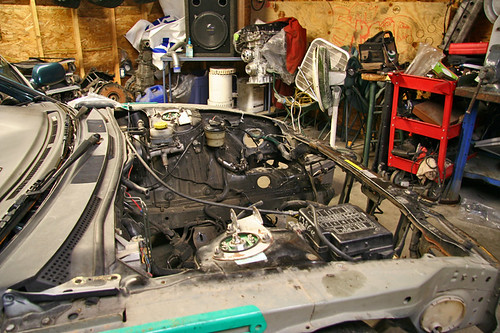 The pile of shit from the interior:  This is what it looks like without the dash: 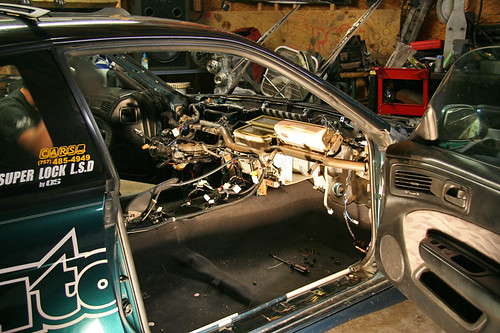 They shove so much shit in there it isn't funny. I meant to take a picture after I ripped all of the stuff out but it'll have to wait until next weekend now. Danny doing work: 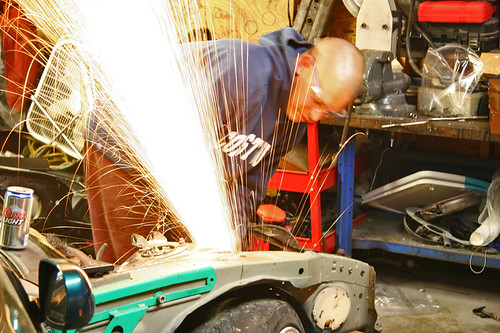 Hmm...there's a lot less stuff in here then there was 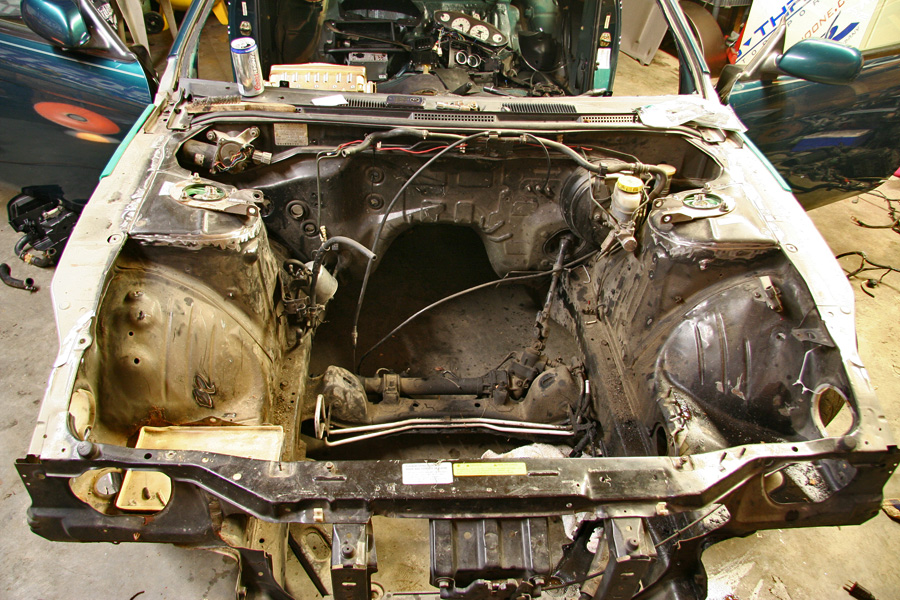 This is what the strut towers look like once the glue shit is removed from all of the seams:  This is what they look like stitch welded: 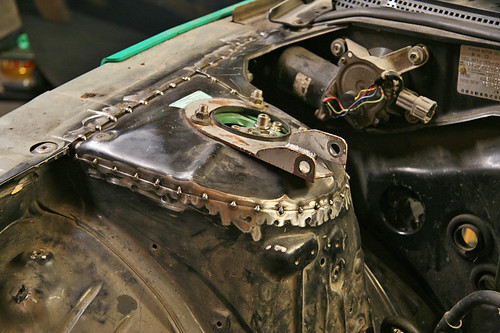 After the dash was out I noticed all of the shit attached to it would interfere with my wire tuck plans...  I removed it all and it left a whole lot more room available.  This little removable cover will make a perfectly accessible fuse box  Sunday: I woke up and drove 30 mins to get some dry ice (no place sells it in Gloucester so I had to go into Hampton). We started on the sound deadening material and got most of it removed....all thats left are some patches on the rear seat back area.  While Eric and I works on that (and 'dry ice bombs') Danny and Raz were working on bending the bars for the cage. The main hoop came out super fucking tight, just like we wanted it (we're using 1.5" 0.125 tubing). A few spots on the inside of the car were hammered in to fit it, but it fits like a glove! Obviously, it is just sitting there in these pictures so it will not look 100% right in some of the pictures.   The front hoops fit as tight as possible as well:  I have to bring my seat up there before we can do the door bars. I am trying to figure out what to do in order to keep my door panels. The panels are thick as fuck, and I am willing to cut them, but I would prefer for the cutting to occur under the elbow rest area...I'm not too sure if that will be possible.  That's all from this weekend. It is difficult to take pictures and work on the car at the same time, haha. In my blog you can see the full sized versions (900X600) of the images in this post.
__________________
Instagram - SJKnoop |
|
|
|
|
11-09-2009, 06:49 AM
|
#27 |
|
Post Whore!
Join Date: Jul 2005
Location: LA
Age: 39
Posts: 3,402
Trader Rating: (19)
Feedback Score: 19 reviews
|
Yes, they are through dash bars. But where the are only requires a small amount of the dash to be cut, and it really will not be noticeable. It is almost directly where the defogging vents are, so you just cut the 1" of material behind those so the dash can still be removed if need be.
__________________
Instagram - SJKnoop |
|
|
|
|
11-10-2009, 07:30 PM
|
#28 |
|
Post Whore!
Join Date: Jul 2005
Location: LA
Age: 39
Posts: 3,402
Trader Rating: (19)
Feedback Score: 19 reviews
|
My friend got some more work done on the cage and sent me these pictures.
     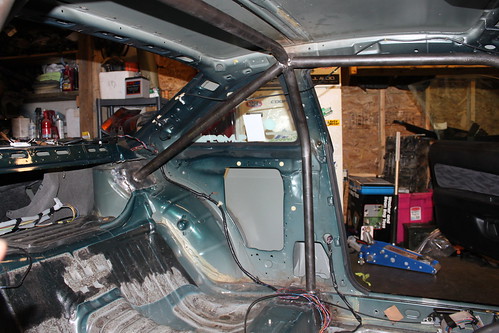    We are going to work on the door bars this weekend when I bring my seat up there.
__________________
Instagram - SJKnoop |
|
|
|
|
11-12-2009, 09:08 AM
|
#30 |
|
Zilvia Member
 
|
cage..
nice cage fitment... I know it takes a little time to get it right but when you aren't hitting your head on it all the time you will be glad you did it hah
|
|
|
|
|
| Bookmarks |
|
|


 Hybrid Mode
