|
|||||||
| Home | Rules & Guidelines | Register | Member Rides | FAQ | Members List | Social Groups | Calendar | Mark Forums Read |
| Tech Talk Technical Discussion About The Nissan 240SX and Nissan Z Cars |
|
|
Thread Tools | Display Modes |
 01-13-2007, 10:55 PM
|
#1 |
|
Post Whore!
 
Join Date: Apr 2004
Location: Oregon
Age: 42
Posts: 2,474
Trader Rating: (8)
  Feedback Score: 8 reviews
|
How to: Install S14 power folding mirrors
OK i managed to piece togather bits and pieces from other forums, and made up the rest. it works.
to start off the reason i did this is that since 80% of the other vehicles on the road where i live are SUVs or trucks, their damn lights blind me and i am sick of re-adjusting my mirrors all the time. so i started out with a 97 S14, with power mirrors i bought JDM power folders and a switch. 1. remove interior bezels from door panels. 2. remove door panels and plastic triangle piece the inside of the mirror. 3. remove 3 10mm bolts hold the mirror on, and the power clip behind the plastic sheet above the speaker. 4. remove center console unclipping the power mirror switch ok now for a break and switching out the mirrors and motors. 1.remove 3 phillips screws that hold on the mirror housing to the stand on all 4 mirrors 2. pull glass off all 4 mirrors (it just pops off) should look like this now: 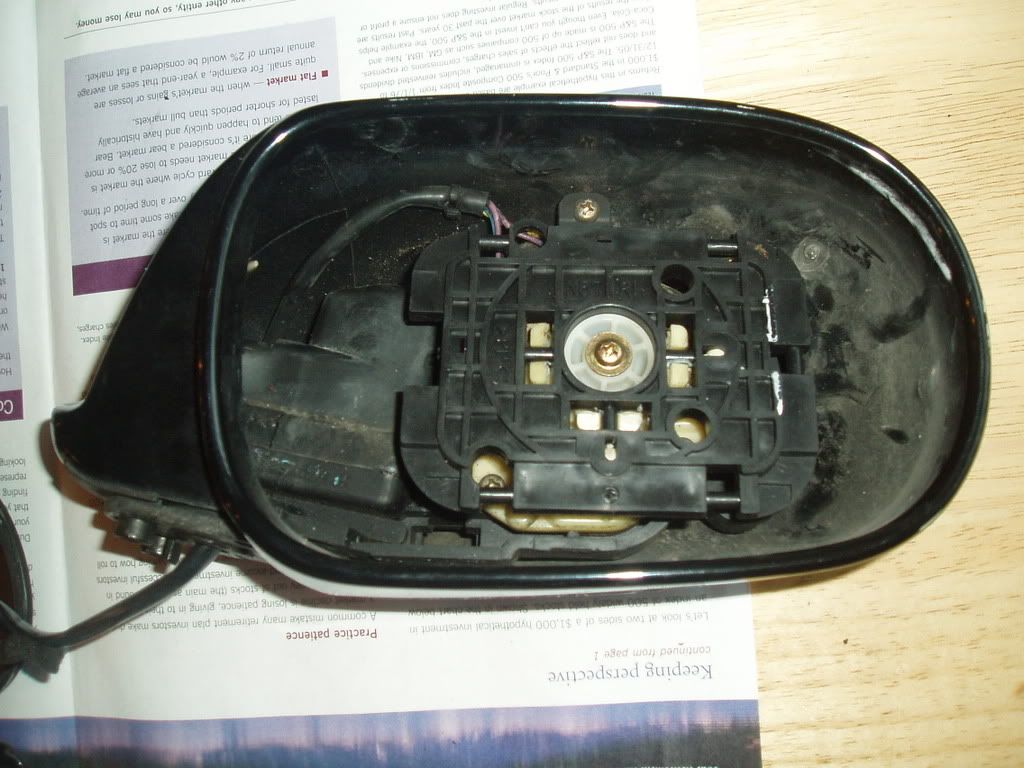 (note this is a folding one^) 3. unscrew phillips serew in the middle and pull off the mirror backing so you are left with this: 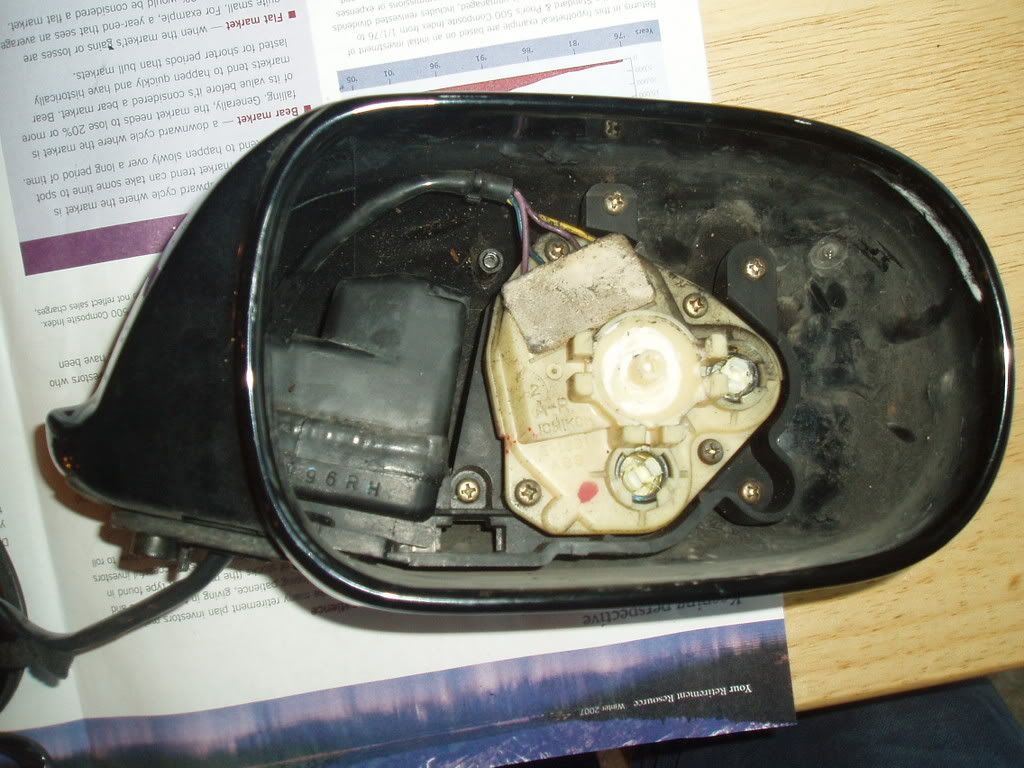 (once a gain a folder, non folding have different screw points^) 4. unscrew the 4 mounting screws and pull the motor assembly out of the folder and into the US housing (can be skipped if you like the paint on the folding mirror better than your US mirror) 5. under the foam on the back of the triangle base there is a phillips screw that holds on an angled piece of plastic that is clamping the wires in place, remove the screw and the piece of plastic, then cut the plug and remove the wires from the base. ok here are some comparison shots for you guys: 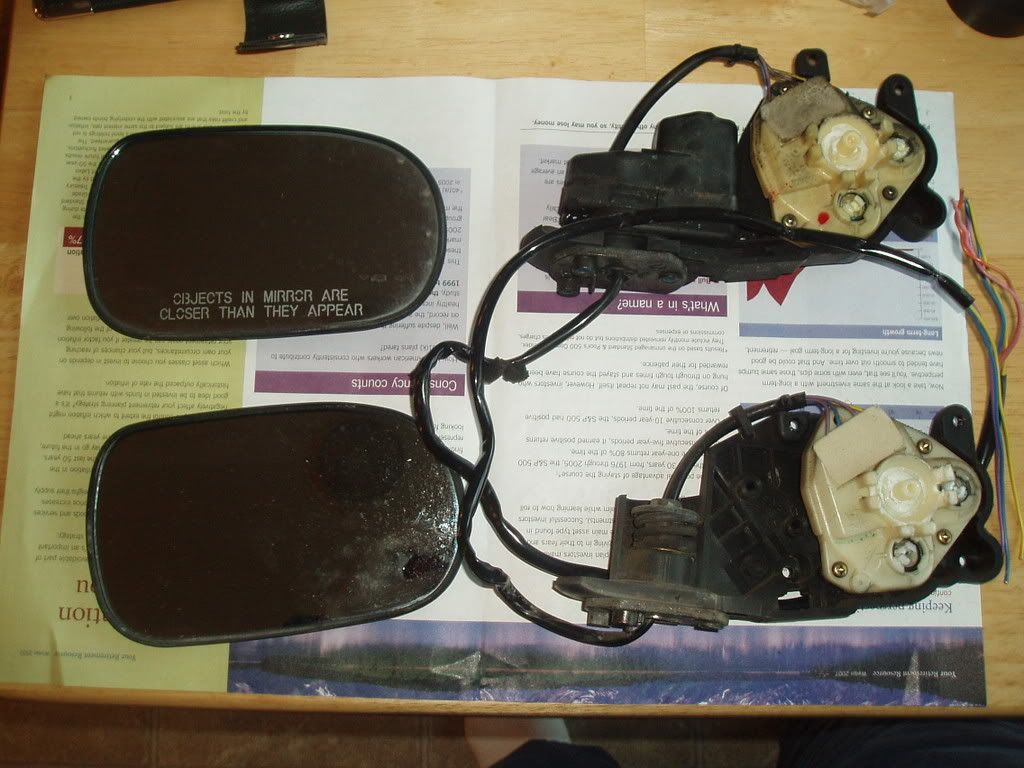 USDM glass top, JDM glass bottom JDM folding motor removed top, USDM power mirror bottom 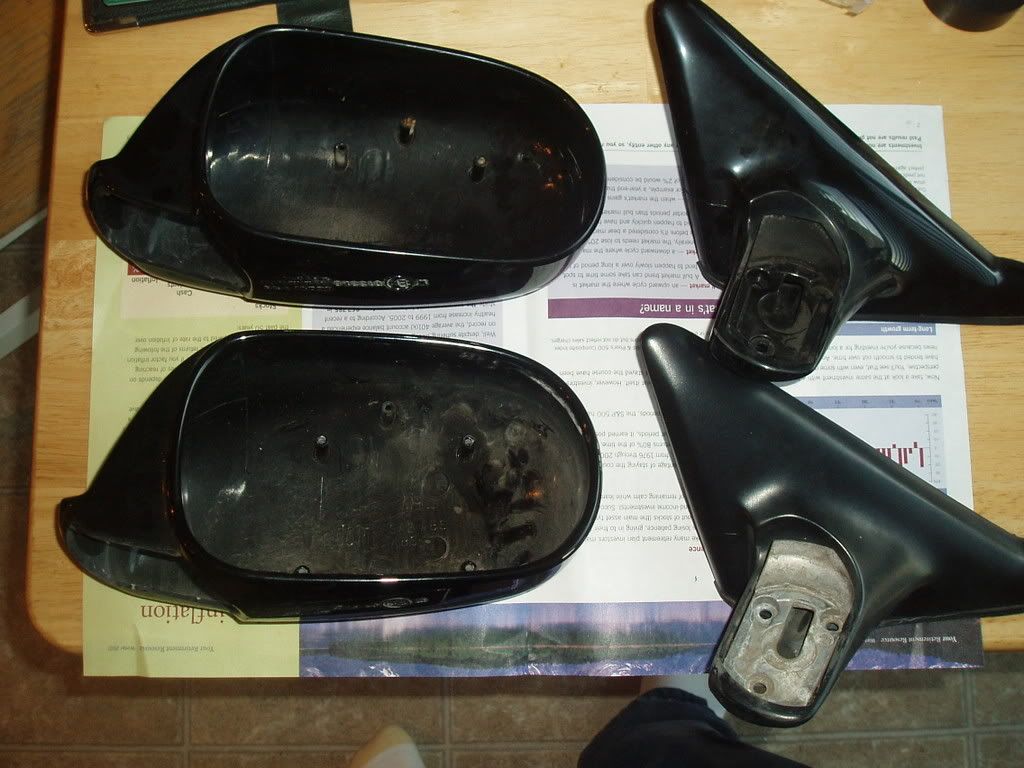 JDM housing and triangle mount top (nice and painted body color) USDM housing and triangle mount bottom (crappy grey plastic) you can use the JDM ones, but you are retarded if you do. the angle is all wrong so it makes your mirrors almost useless. i tried removeing the metal bracket inside the plastic houseing to see if they are interchangeable and if that would correct the mounting angles, but they are not. The plastic is formed to each one and the metal mounts will not interchange with the mount houseings. The mirror houseings however, are interchangeable. since i liked my paint better, i kept my USDM housing. 6. install the motor in the USDM houseing (drops right in perfectly, no modifications) 7. attach whatever houseing you have with the folding motors in it onto the USDM triangle base. now you are done with the mechanical part of the swap (if you can't figure you how to re-assemble from there you don't need to be doing this in the first place) next comes the wireing. do yourself a favor and re-pin things or use some sort of a conector that is not perminate so you can remove if needed without cutting and re-spliceing. The door: the JDM wires use the same base colors as the USDM wires, so connect those up there will be two extra wires comeing from the mirrors, you will have to run 2 wires from mirrors to the center console for EACH mirror. use your diecression on this, either around the hinge, or if you have midget hands and feel like dissambeling the dash you could toss it in the rubber hose that has the main door harness in it for a cleaner look. The switch: you ahve to have the JWM switch in order to do this right, i had it so i will not bother with how to jury rig a switch seperate. OK the JDM switch has some wires comeing out of it, and the USDM wires comeing out of the car are somewhat differant, here is how to hook the wires togather (note : colors should be close for all cars i have been led to belive): Purple/White -> Purple/White Blue/White -> Blue/Black Black -> Black Blue/Red -> Blue/Red Yellow/Black -> Yellow/Red Orange -> Orange/Silver Yellow/Green -> Yellow/Green Now you are left with a Green/Black and a Green/Black/Silver wire comeing off the JDM switch. those two wires connect to BOTH mirrors each, so be sure to have some sort of a bigger connection or splice to work with to "T" the one wire into two. (or solder and wrap) ALWAYS INSULATE CONNECTIONS or you will have "mystery" problems as things bounce around and ground out. heat shrink or electrical tape the connnections as you go. it doesn't matter how you hook those up so long as they are the SAME on both mirrors. you will know if they are not becasue one mirror will go out when the other goes in if they are not correct. remember how i told you to use some sort of interchangeable plugs? swap the wires to the mirror if they are wrong now. button everyhting back up and you are done. estimated time: 3 hours takeing it easy estimated time with drinking and friends and custom installing speakers and tweeters: two days Tools needed: Phillips screwdriver small needle nose pliars (to fish out the wireing through the door) wratched and 10mm socket wire stripper/cutters crimper 1 box crimp connectors (red min of 6) 1 box blade connectors (red min of 8) 1 box blade receptors (red min of 8) 2 T-splices or 2 larger diamater (i went with yellow) crimp connectors hope thsi clarifies everything, any more questions feel free to ask. |

|

|
| Sponsored Links |
| Bookmarks |
| Thread Tools | |
| Display Modes | |
|
|


 Threaded Mode