|
|||||||
| Builds (and builds only) Got a build thread? It goes here, build threads anywhere else on the forum will be locked and never moved. |
 |
|
|
Thread Tools | Display Modes |
|
|
 10-27-2011, 08:16 PM
|
#1 |
|
Nissanaholic!
 
Join Date: Dec 2003
Location: In a place, near a river, over a lake
Age: 38
Posts: 2,415
Trader Rating: (22)
  Feedback Score: 22 reviews
 |
Motor's done.
Yet again, David over at Carroll's Engine Rebuilders, hooked me up. He did all of the following for about a grand. -0.02" over-bore/re-hone -fit/gap rings for the CP pistons -install Eagle rods -polished the crank -installed ARP main studs (including counterboring the crank girdle and turning down two studs to clear the upper pan) -decked the block with my S14 cover Now there is a story behind this job. Since the block is from a VVT motor I told him to use an s14 cover I had in storage, instead of the s13 cover I was running. The last time I had this lower end built the guy just put an oversized washer on the upper corner bolt in an attempt to keep pressure on that side of the cover. If you don't know that's the only differences between the covers; or so I thought. After a closer look he discovers the outer oil pump gear was cracked in that s14 cover; so that was out. So why not just swap the pumps? There's the difference; the s14 pump is actually smaller in diameter than the s13's so you can't. They're unique to their covers. We inevitably just decided to re-install the s13 cover but properly mount it. So he decides he's gonna drill and tapped the block and installed a metric stud. What a champ thing to do. -ACL race main/rod/thrust bearings -installed both f/r main seals -part washed everything -5qts of Joe Gibbs break-in oil -balanced and indicated clutch, flywheel, crank and dampener all with the rotating assembly. All within about a month, and mainly b/c I waited on a couple last minute parts decisions. 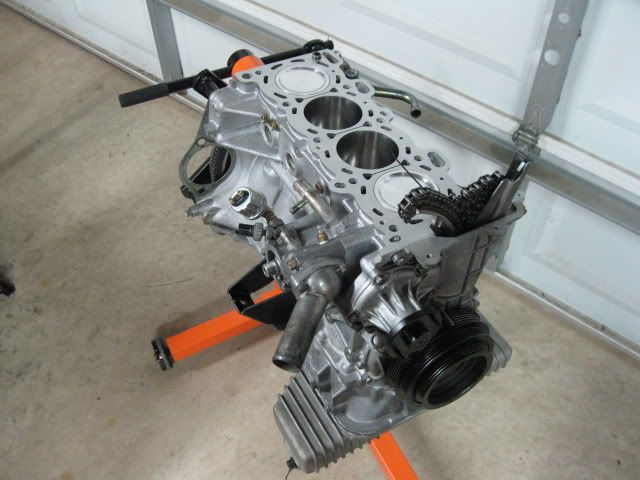 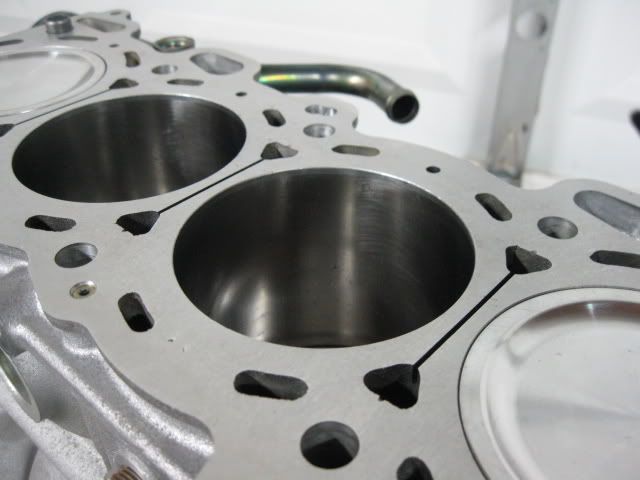 I'm running the head, which was checked after the break down, I was previously running. I'm also doing another Cosworth head gasket but dropping from a 1.5mm to a 1.2mm, and running ARP head studs again. 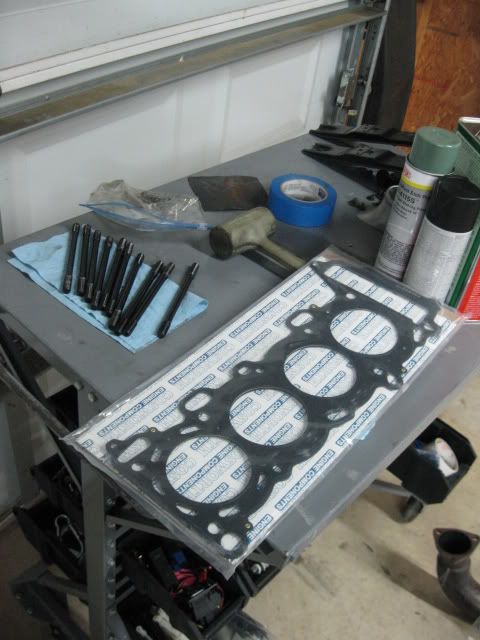 then to clear some space around the shop, and mainly b/c I just want to see it back together, I finished the long block.  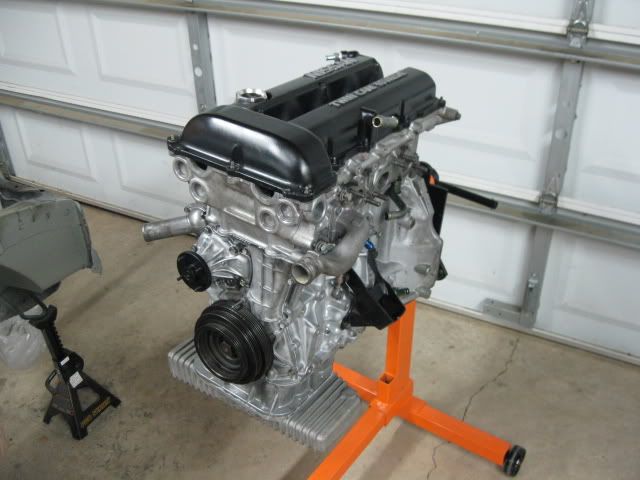 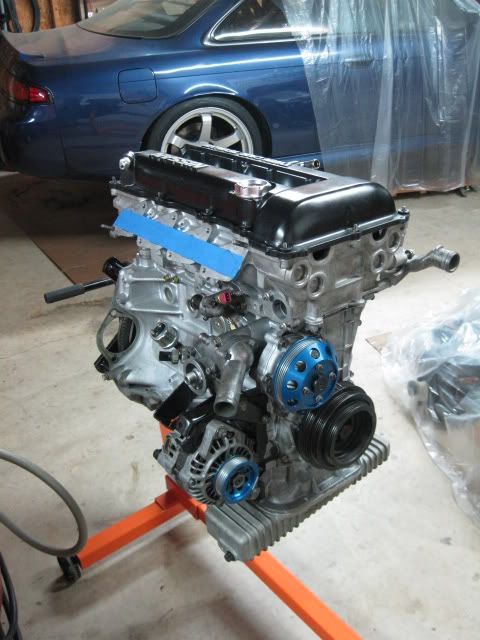 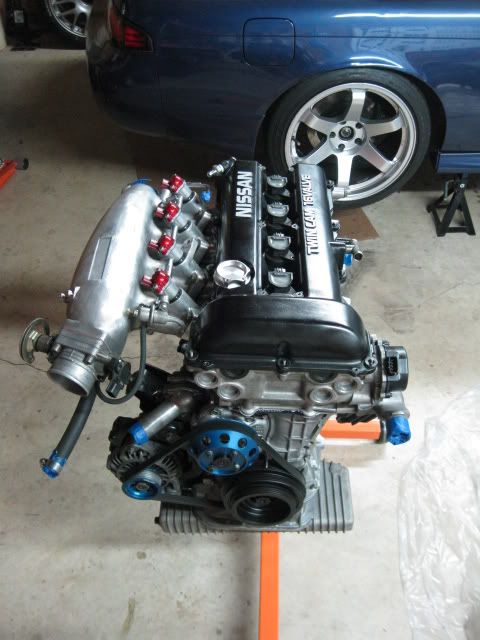
__________________
Fu*king ginger bread man stole my wallet... SHIFTlock_slide to side d3m3rs0n: if i have a baby im naming it Brandons Fault Emerson |

|

|
| Sponsored Links |
|
11-01-2011, 07:54 AM
|
#4 | |
|
Nissanaholic!
Join Date: Dec 2003
Location: In a place, near a river, over a lake
Age: 38
Posts: 2,415
Trader Rating: (22)
Feedback Score: 22 reviews
|
Quote:
Exhaust repair After assembling the motor I noticed, before installing my Tomei manifold, that it was cracked as the base of each runner. So I contacted Tomei just to see if they would do anything and after a few back and forth discussions and sending in a copy of my logged dyno sessions, they agreed that is should not have happened. So I figured while I wait for another one, I'm going to turn my attention to that damn Nur-Spec rattle. Just before doing my last motor, the rattle was really noticeable on my BPU SR; here is a quick video of that. exhaust rattle.mpg - YouTube When I had the exhaust on the last engine it was less noticeable but still an annoyance. I contacted Blitz about it and they suggest I purchased an new muffler and be done with it. Considering I've already removed the resonator on this exhaust and I wasn't feeling the $400 muffler purchase, I figured I would cut it open and see what's going on inside. So this is what's inside a Blitz Nur-Spec; stuff looks beat... 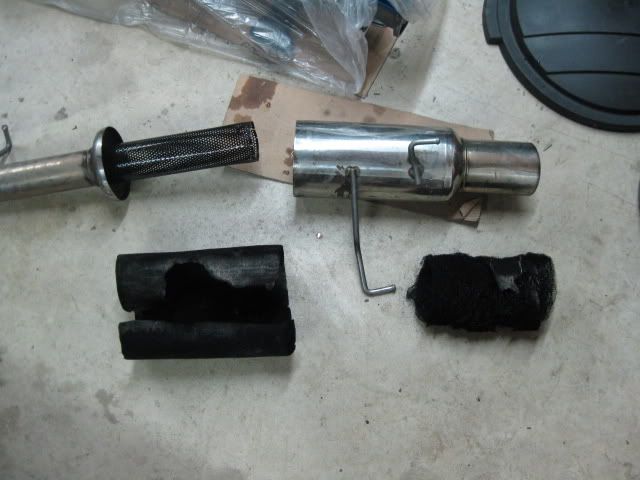 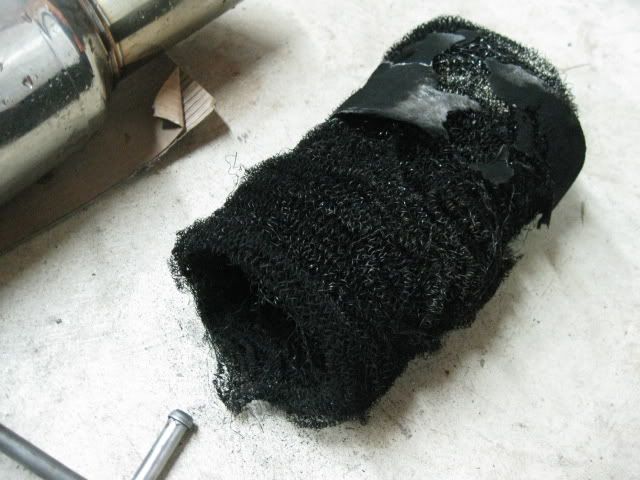 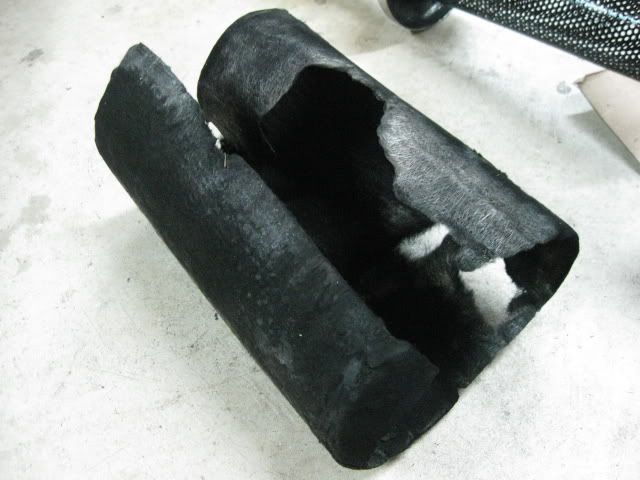 Here is the place it was rattling. You can see how the welds just separated from from the perforated steel. 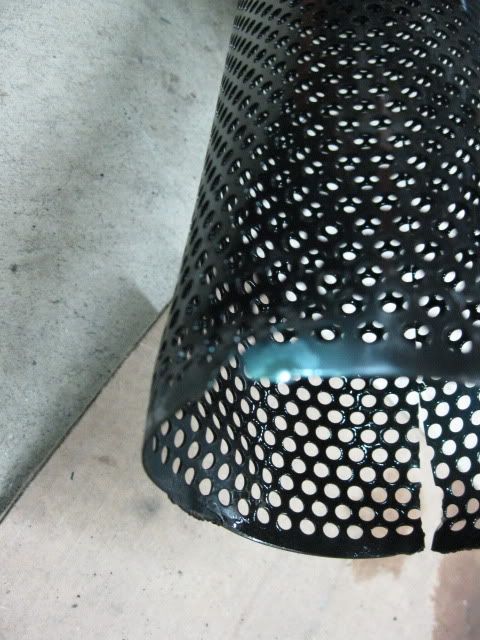 I also noticed that it was slightly bent up on that end as if the perforated tube was actually too long for the assembly. So after cutting it down slightly, re-welding the torn perforated material (a real bitch to TIG). I packed it full of this exhaust fiber mate packing I found online and welded it back up. I have no idea what it's going to sound like and honestly, if the rattle is gone, I'm sure it'll be a good note but we'll see when the car get back running. Surely it'll be quieter? 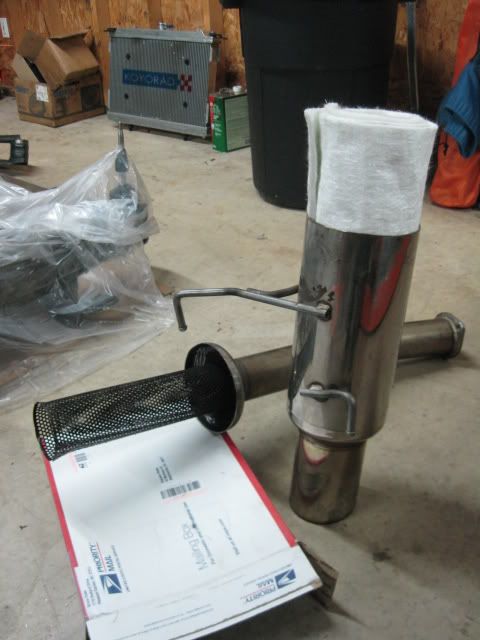 All TIG'd back up! Don't hate, I know its not pretty but it'll be under the car and no one will know the difference. Getting there... One part at a time. My next update I'll be back on the intercooler modifications. 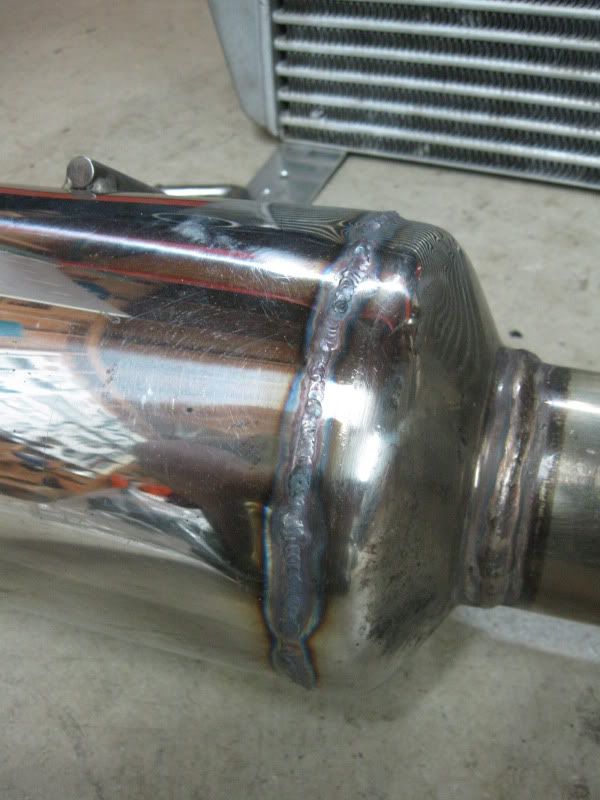
__________________
Fu*king ginger bread man stole my wallet... SHIFTlock_slide to side d3m3rs0n: if i have a baby im naming it Brandons Fault Emerson Last edited by s14unimog; 11-01-2011 at 01:58 PM.. |
|
|
|
|
|
11-01-2011, 01:52 PM
|
#5 |
|
Leaky Injector
 |
Very nice build thread. Maybe I'll see you around at some events next year.
__________________
|
|
|
|
|
11-03-2011, 09:24 AM
|
#6 |
|
Nissanaholic!
Join Date: Dec 2003
Location: In a place, near a river, over a lake
Age: 38
Posts: 2,415
Trader Rating: (22)
Feedback Score: 22 reviews
|
Back to the Intercooler
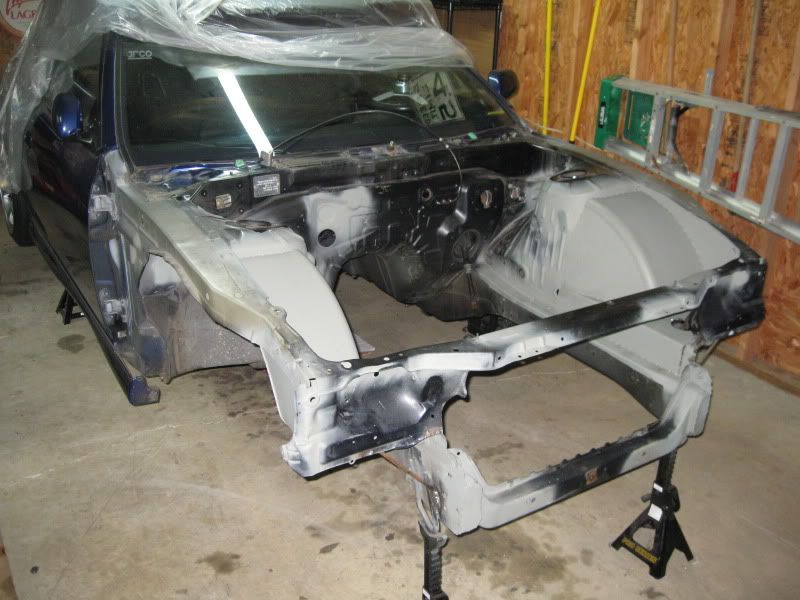
Now that the exhaust is sorted and considering I'm still waiting on another exhaust manifold, I figured I would get back on those intercooler modifications. As I left it, I had not yet sorted the re-oriented barbed connections, nor the mounts, b/c I was waiting on my uprights; plus I got distracted with the exhaust. Here is how that went. 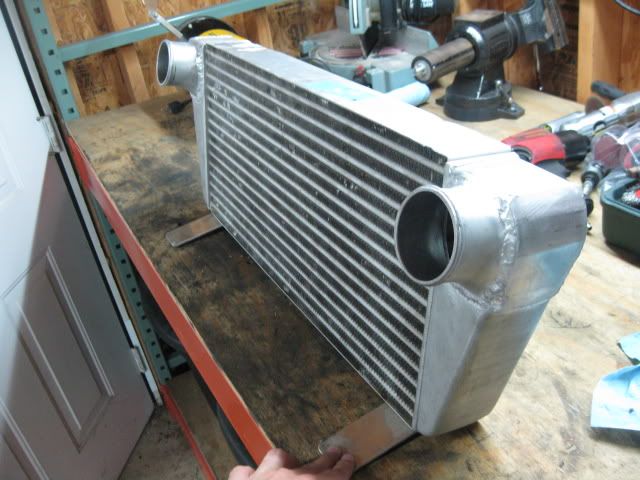 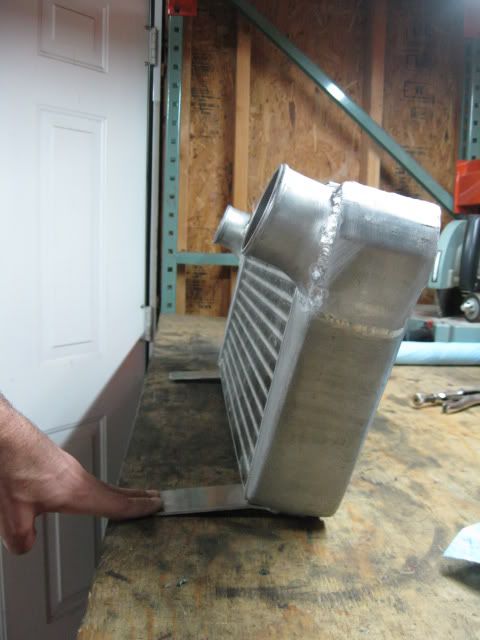 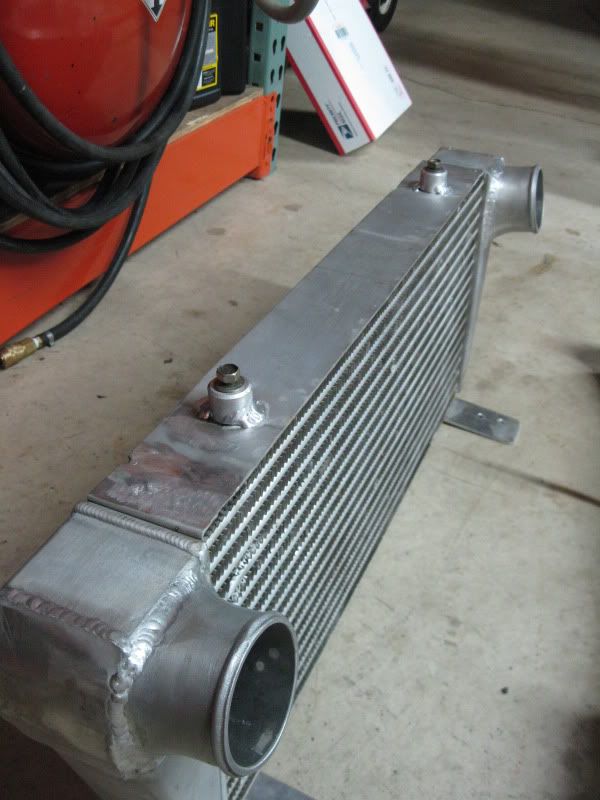 Some close ups on the welds. I'm still practicing, for lack of further explanation, so they're not exactly pennies; yet. 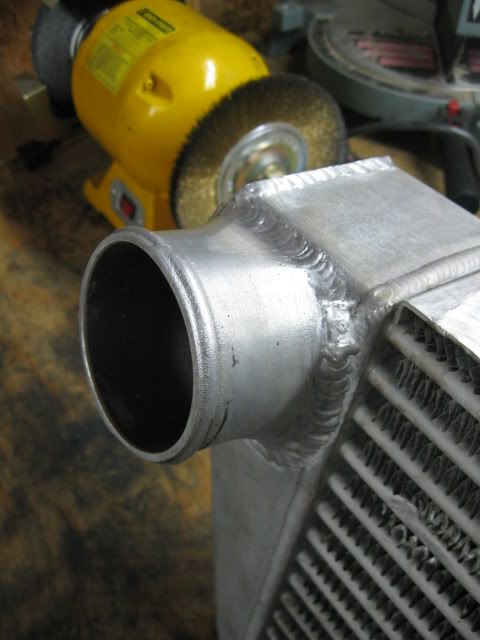 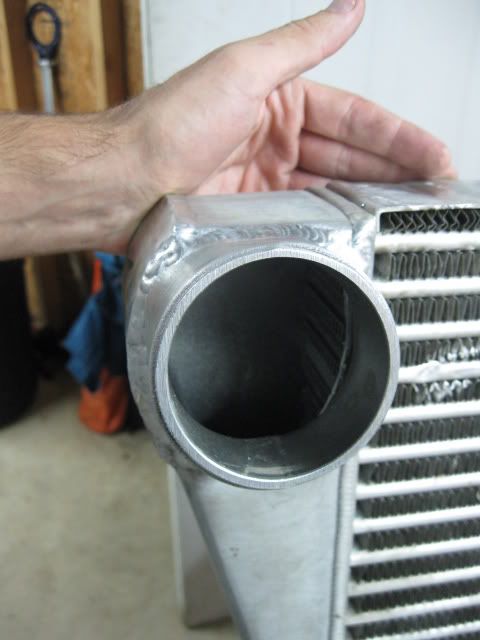 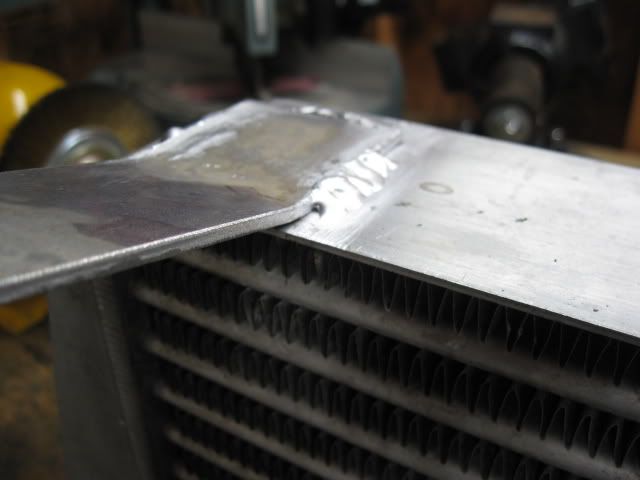 With the intercooler modifications finished up, I needed to sort the piping and body mounts for the upper bosses. I cut an area out of the core support so that the pipes will pass right next to the radiator but noticed after doing so I severely weakened the rigidity up there. Also considering I won't have a center strut (which houses the hood latch) and that my side struts are only bolted in place, I got to work on that a bit. The engine is back in for mock-up. 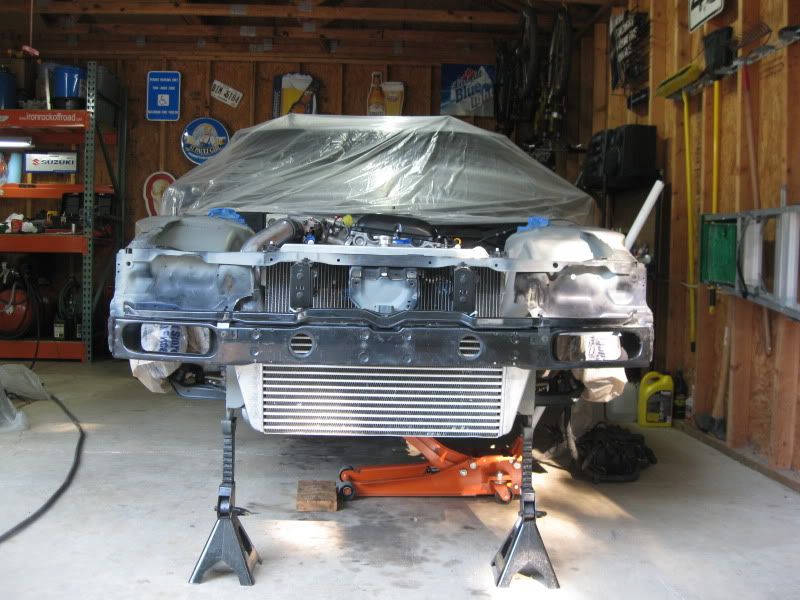 Due to the angle of the picture, the pipe looks closer to the radiator than it really is. Also, if you'll notice, I sorta stretched the original fender well floor to meet the remaining of the core panel. I'll weld that later to help with some rigidity but I also plan to add some struts from the frame rails. More on that later. 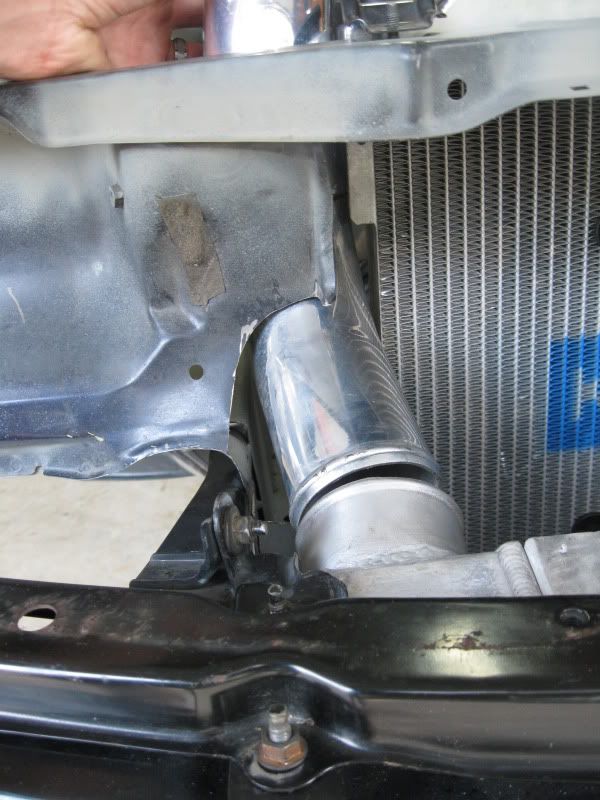 Luckily I only needed to drop about a 4" section out of my cold pipe, so I took that out and tapped it together for now. 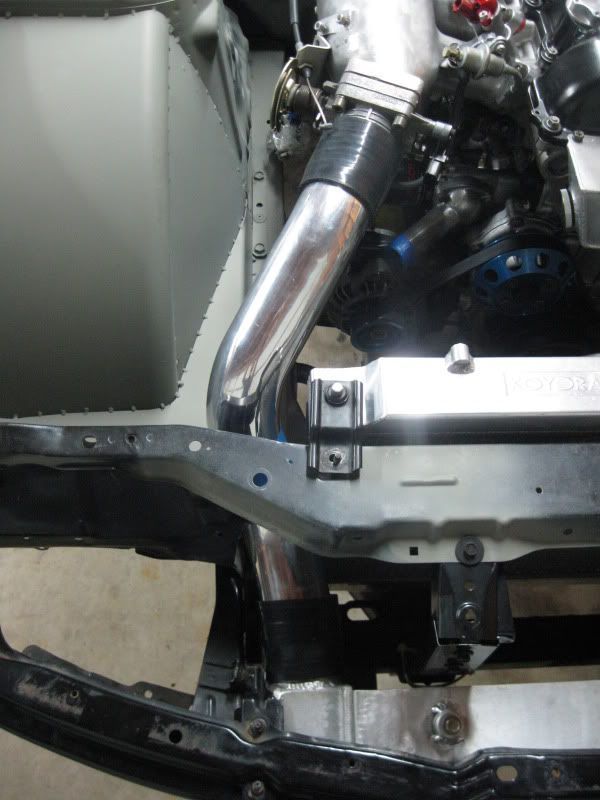 Since none of my original hotpipe will work, I'll have to come up with what I need and have it bent up. 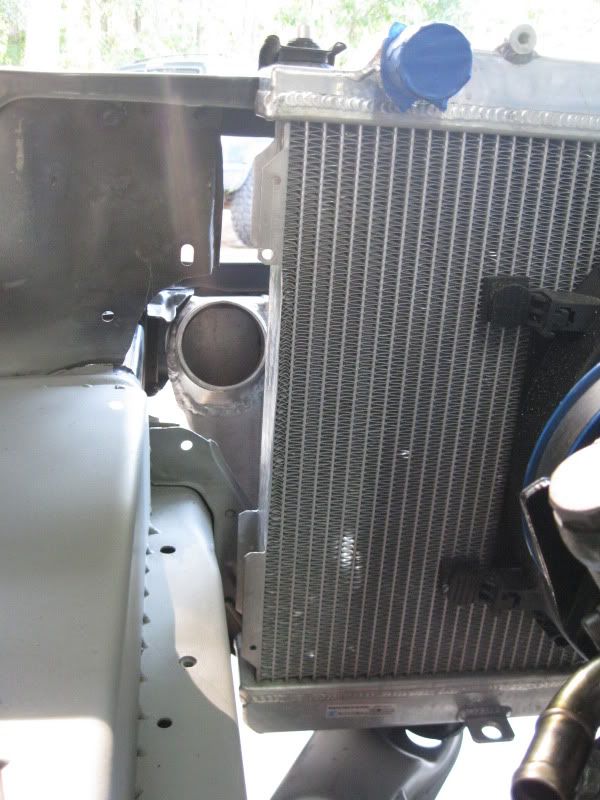
__________________
Fu*king ginger bread man stole my wallet... SHIFTlock_slide to side d3m3rs0n: if i have a baby im naming it Brandons Fault Emerson |
|
|
|
|
12-14-2011, 02:35 PM
|
#7 |
|
Nissanaholic!
Join Date: Dec 2003
Location: In a place, near a river, over a lake
Age: 38
Posts: 2,415
Trader Rating: (22)
Feedback Score: 22 reviews
|
updates - 12/14/11
It's been a minute since my last update but progress has continued. Aside from the car, I picked up this abused '98 Altima and it's needed a bit more of my attention than I originally anticipated. Outside needing a timing chain (check that out HERE for some comedy), it's needed a new clutch, master cylinder, slave cylinder, TOB, headlights, corner lights, tint removed and the list seems to keep getting longer. Either the case, its driveable now and out of my shop.
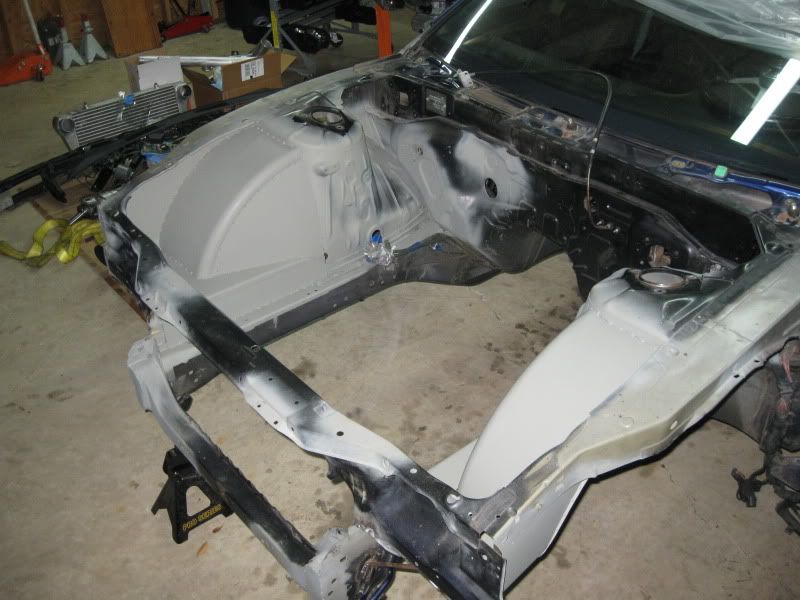
THEN, I've got this whole other interest in 4-wheel drives that is literately just as bad as my obsession with building this car. It's still daily-able but I feel within the coming year it, like the 240, will graduate to a level that is a bit absurd for normal commuting. It's a 5-speed 1997 Cherokee(XJ) with a 4.5" lift, radius arm conversion, 32" Kumho M/T's, DOM steering bars/track bar, swaybar disconnects, custom bump stops, tube stinger bumper I built, and all the little details needed for a lifted truck. Since I bought this truck stock, it's got it's own build life that I've never spilled out but will I guess when the 240 is up again. Here is a couple pictures from my latest trip to Uwharrie National Forest in NC. Pictures never do justice... 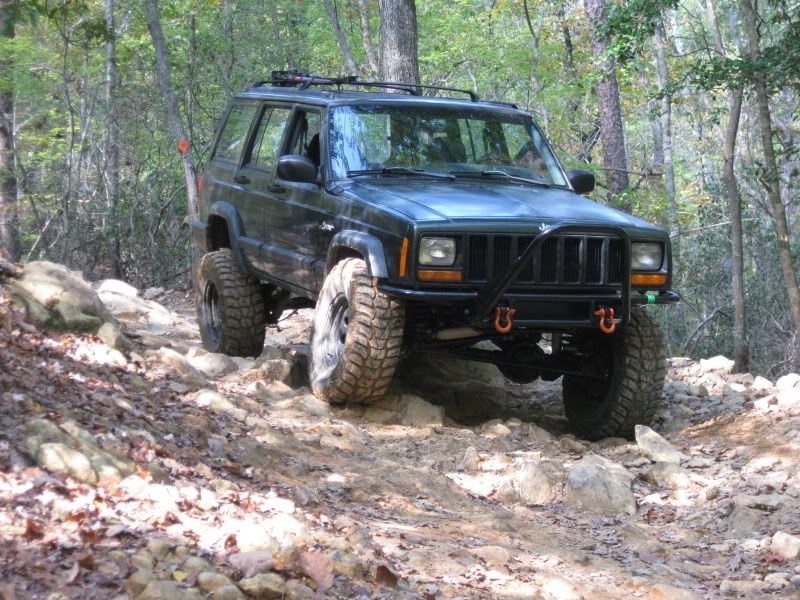 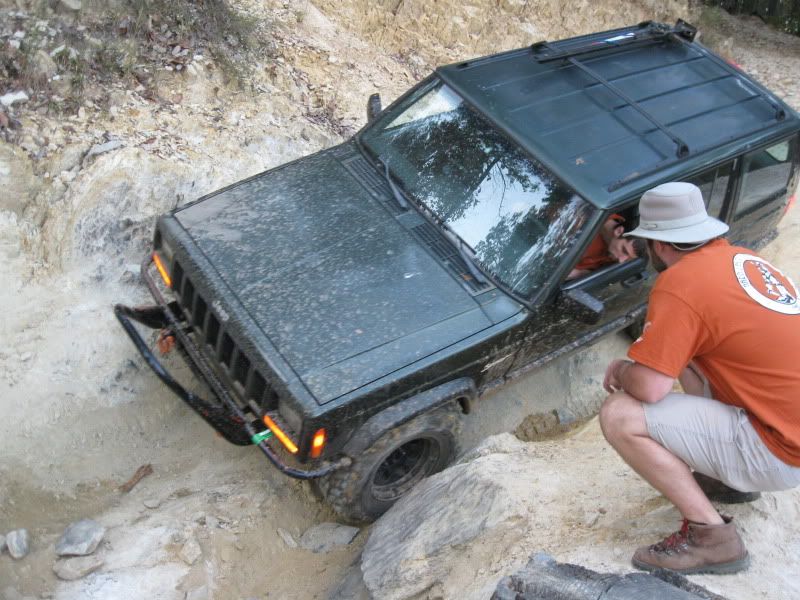 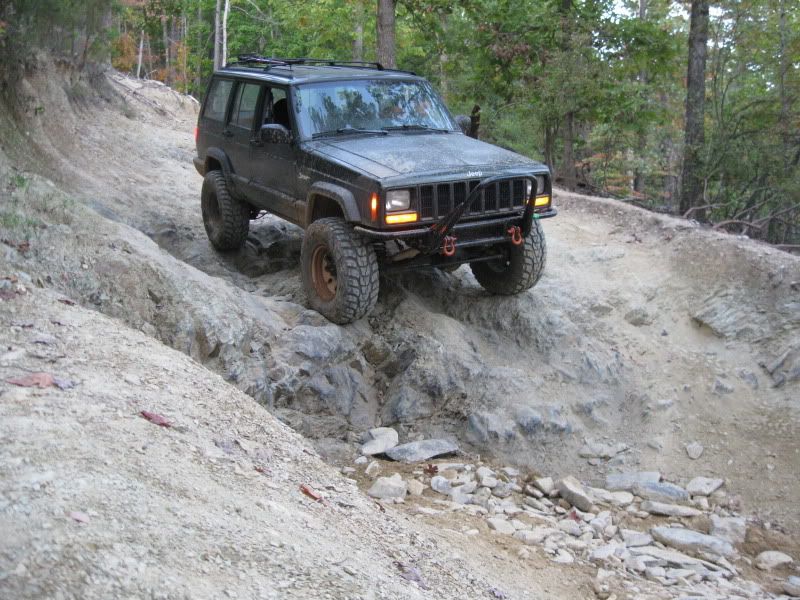 Rep'n Nissan!  ANYWAYS.... The last I left it I had just finished the intercooler and cut down my cold pipe. After cutting the reliefs into the core support it was apparent that the core support and forward fender area rigidity had been greatly reduced. So I came up with some simple round bar struts to take up the support and seam welded the remainder of the core sheet paneling to the horizontal fender area. Here is some on that. 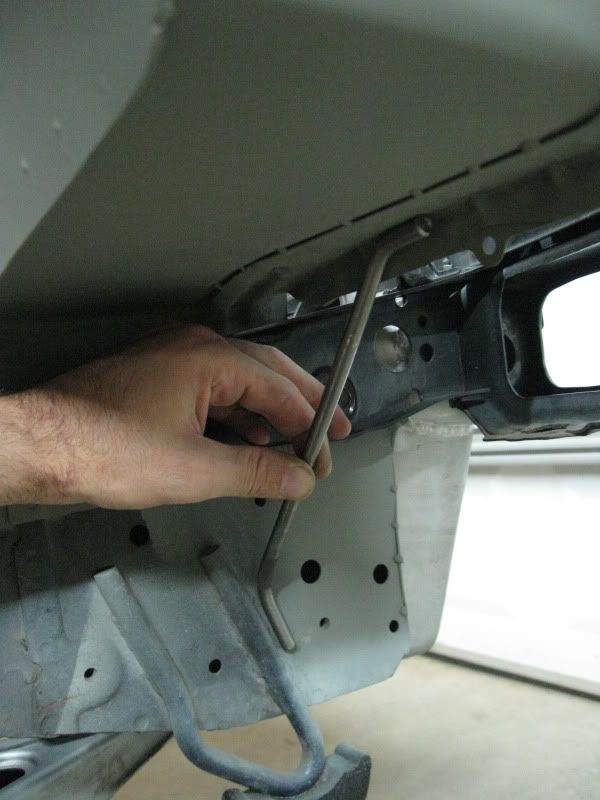 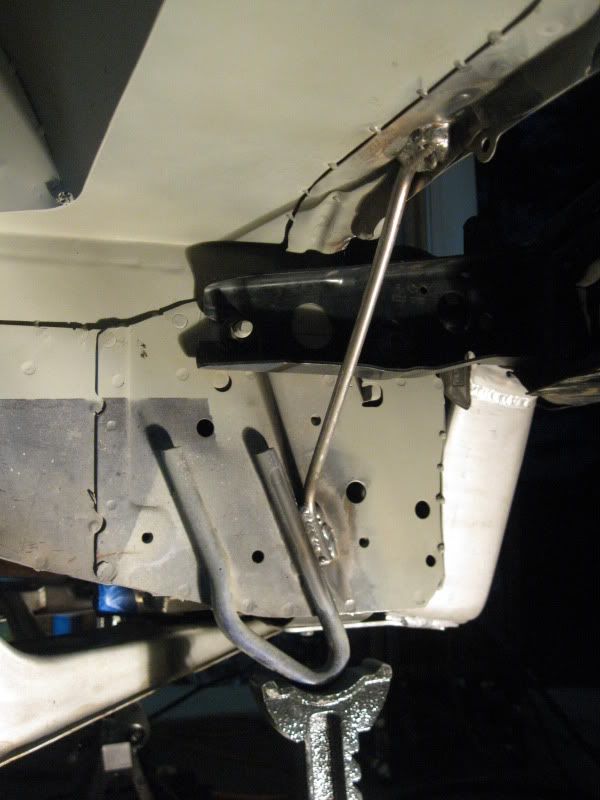 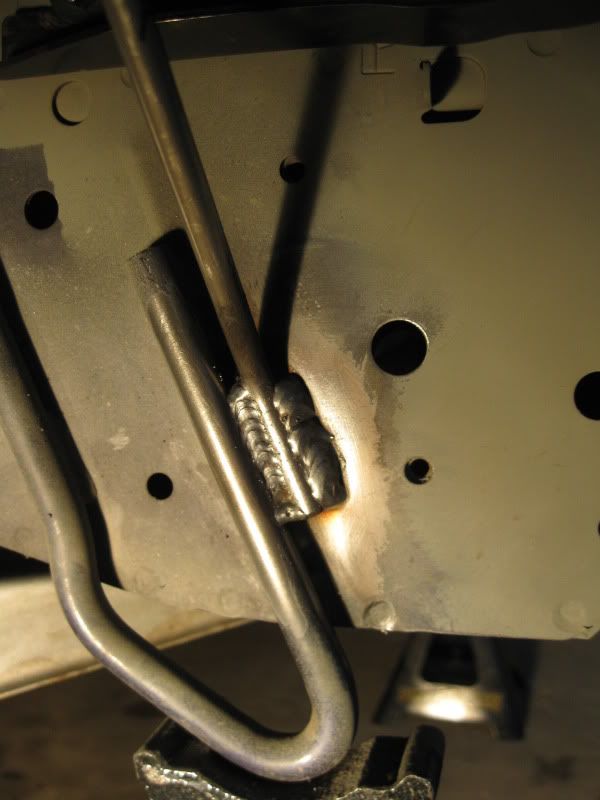 After those support, you can literately stand on that corner with no deflection. Since I removed the center strut from the core support I needed to tie the two outside ones together and come up with a mounting solution for my oil cooler; situated in the grille area. Here is what I did there. 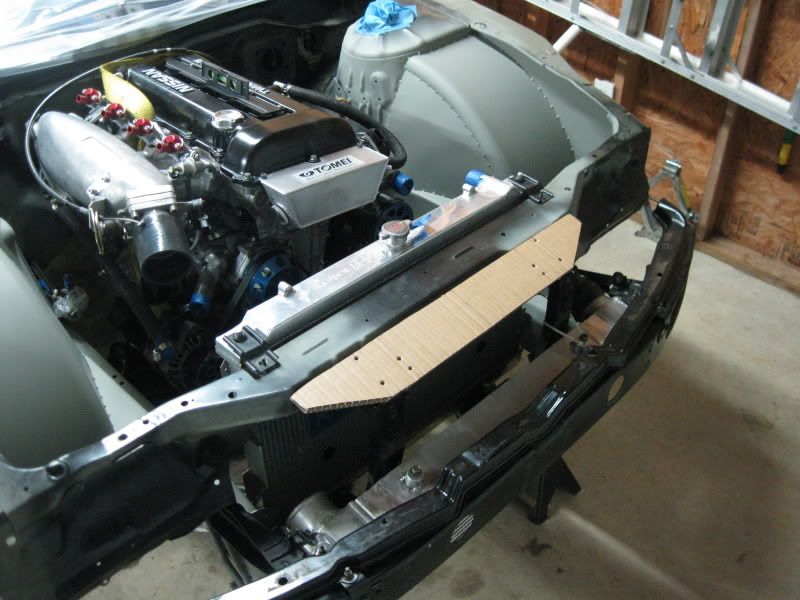 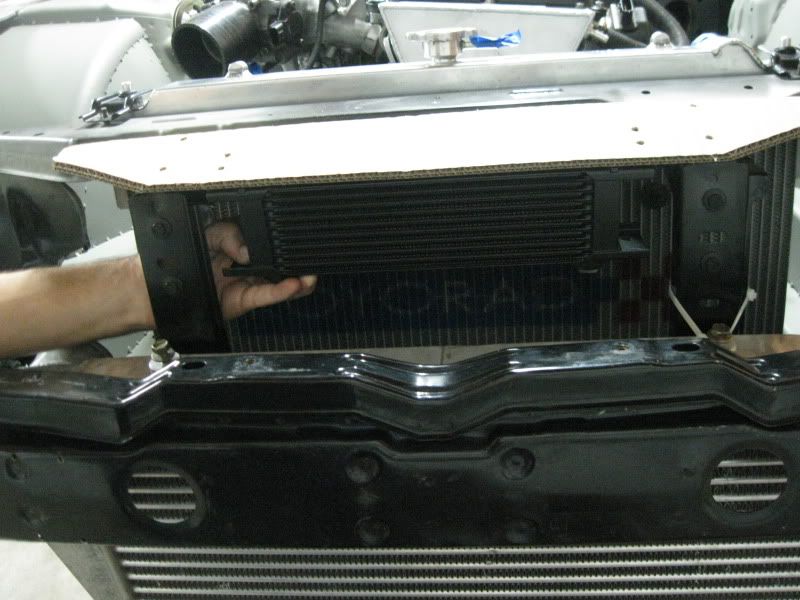 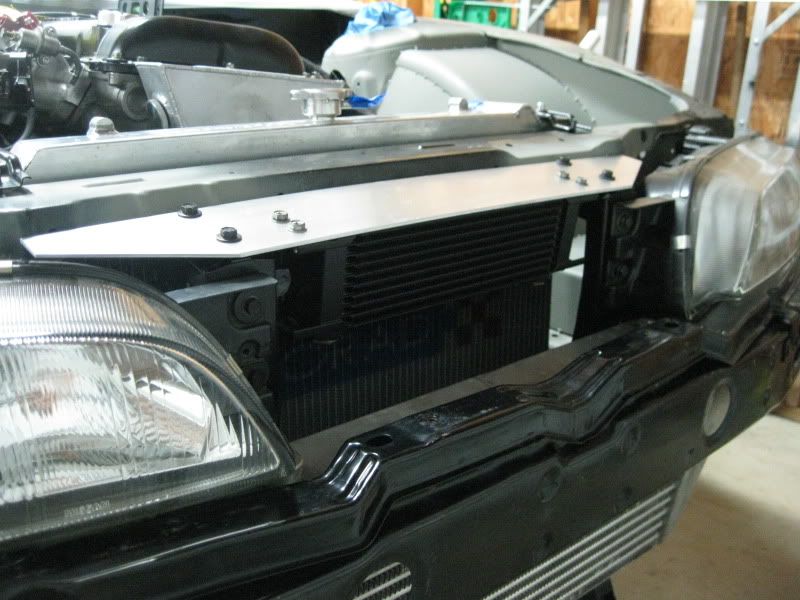 And with my glass lights finally in from Germany, It's starting to look like a car again... Although its all got to come right the f*ck back out for paint. 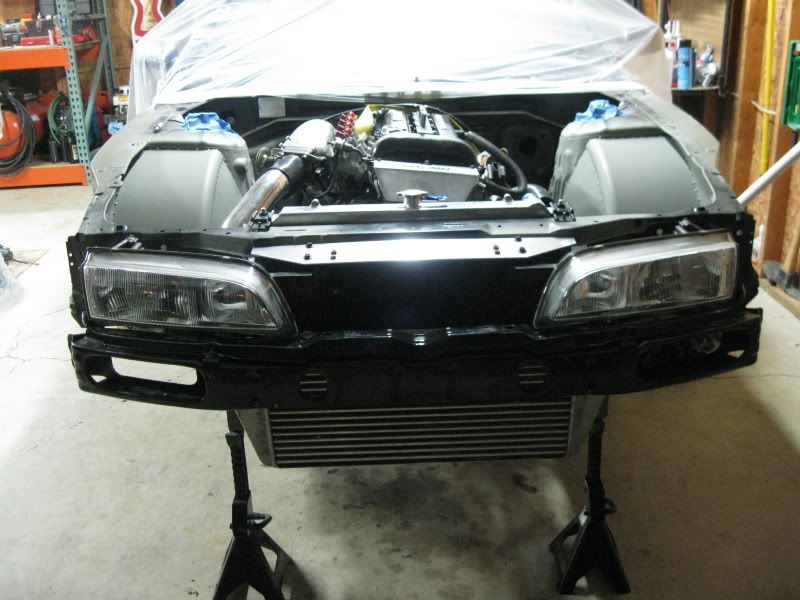 If you didn't notice, I sorta jumped ahead of that oil catch tank. I really like the idea of mounting it to the engine so I made one over retaining that TopFuel hex shaped one I was running. I tried to mirror the shape the freeze plugs outline on the head. I did an "inspection port" rather than the clear tube route. 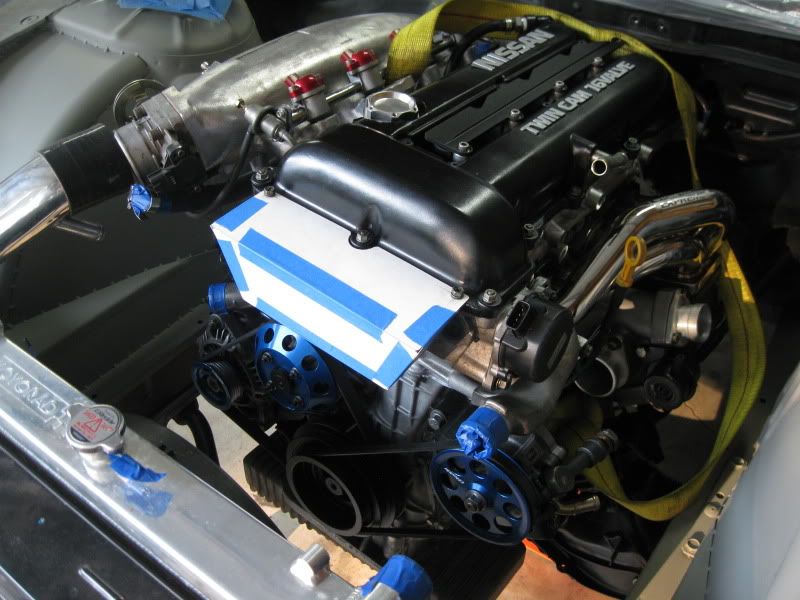 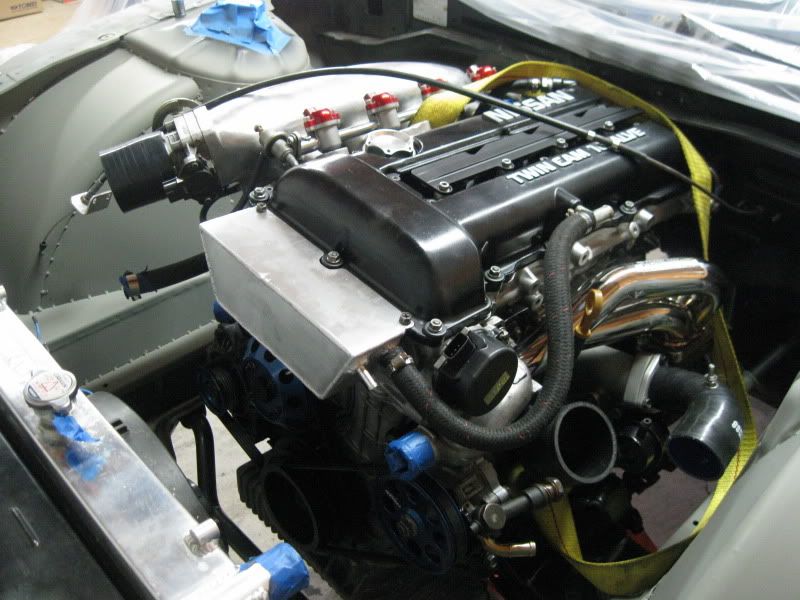 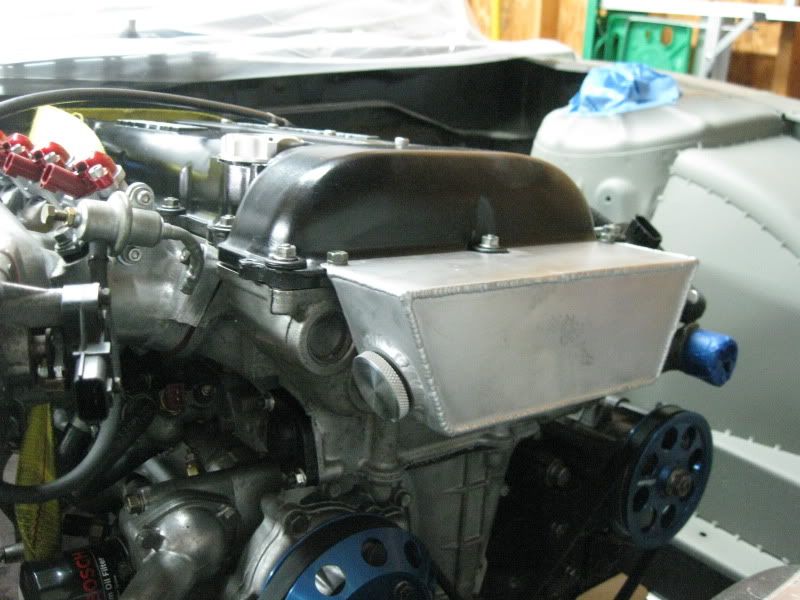 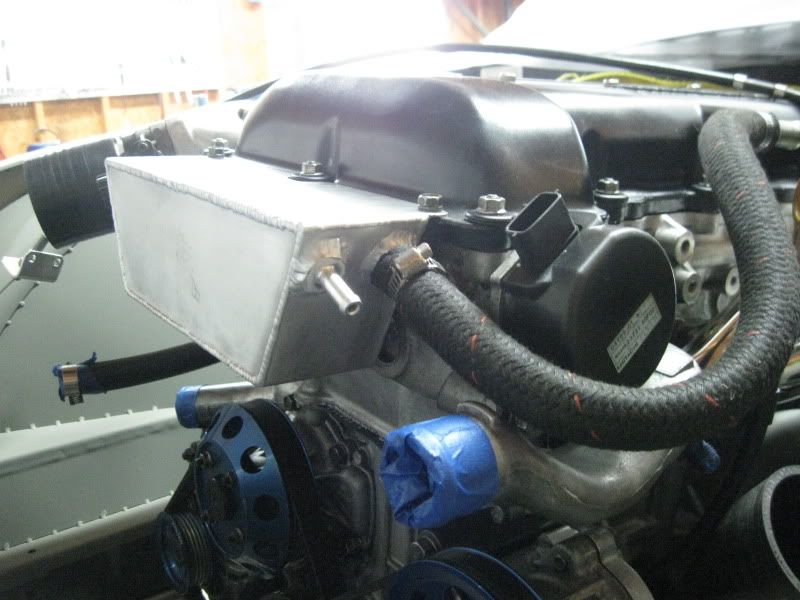 If you're wondering, I got those weld in caps from APSracingusa.com They're a steal for the price and come with an O-ring and receiving boss. Well I bought two. Here is what I did with the other one. I needed a coolant reservoir, considering the stock one won't fit with the tubs, so I made this and mounted on the passenger side. 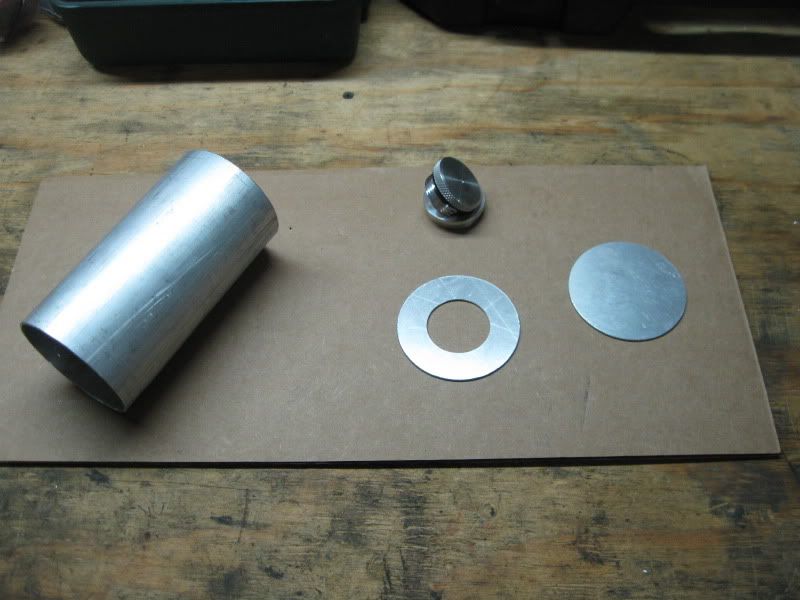 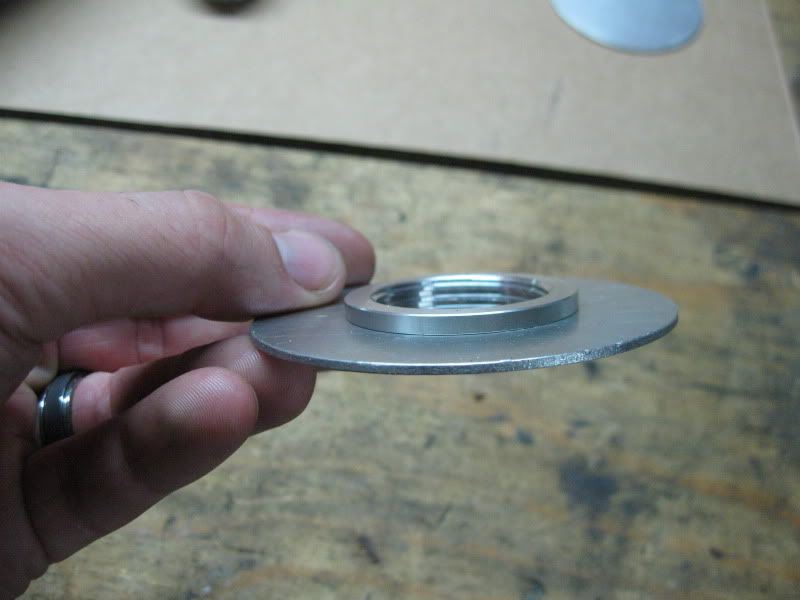 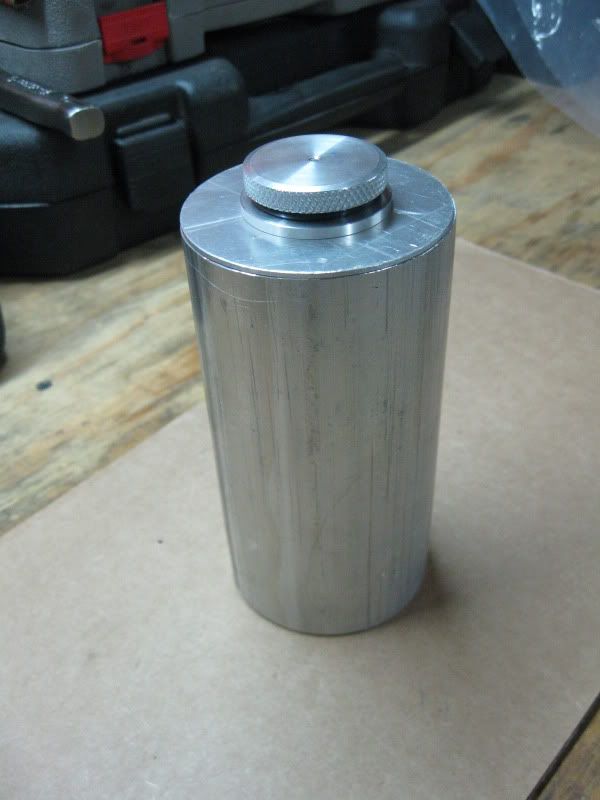 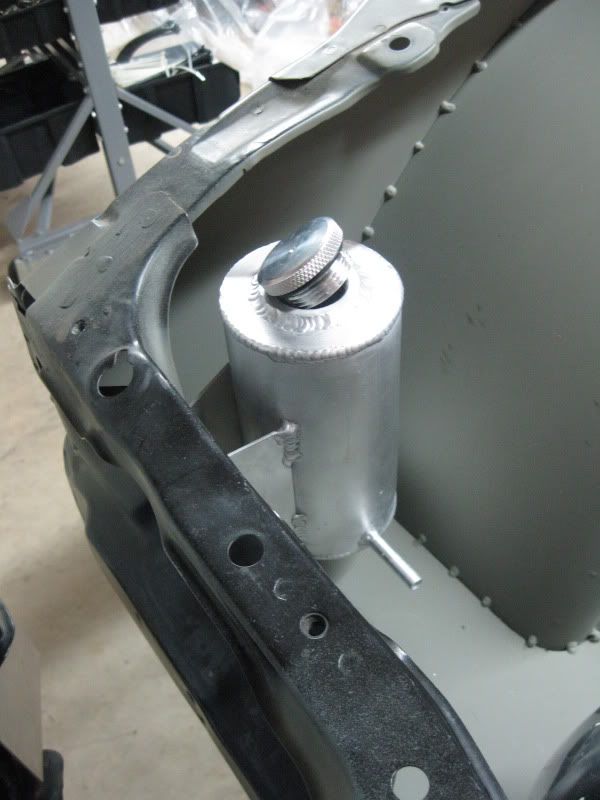 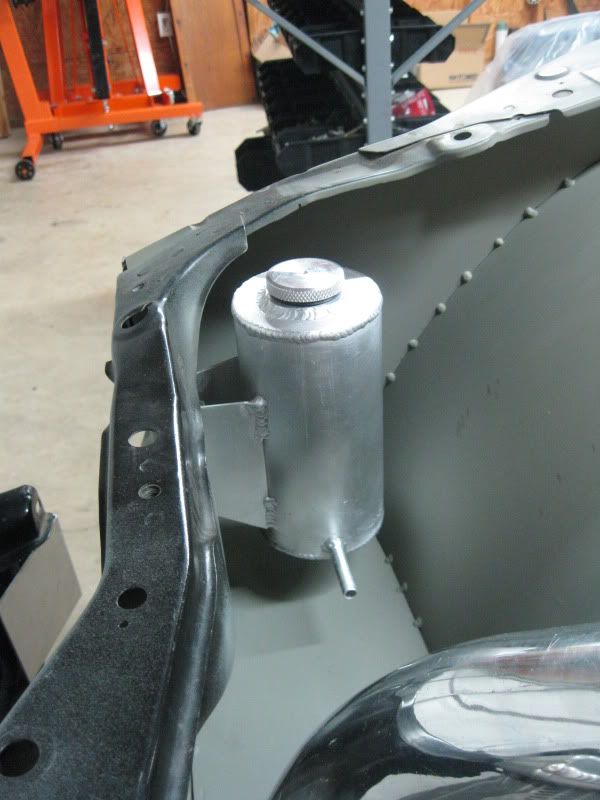 more to come....
__________________
Fu*king ginger bread man stole my wallet... SHIFTlock_slide to side d3m3rs0n: if i have a baby im naming it Brandons Fault Emerson |
|
|
|
|
12-17-2011, 01:45 PM
|
#12 |
|
Nissanaholic!
Join Date: Dec 2003
Location: In a place, near a river, over a lake
Age: 38
Posts: 2,415
Trader Rating: (22)
Feedback Score: 22 reviews
|
Update: 12/17/11
Thanks for the props guys; its nice to see a simple SR build hasn't lost appreciation. After finally receiving my hot pipe from Grand Bending and my back ordered Tial QR, progress continues. I jumped the gun about a month ago and measure out the piping thinking there wouldn't be any bends in it. After receiving the pipe, with rolled ends, I realized it wouldn't clear the radiator without touching. With the rolled ends, the pipe couldn't be fixtured in the bender again so I needed another piece. I revised my print with a 10* bend 6" from the end and 2 weeks later I had another part.
One of my past annoyances with the hot pipe and intake was that nothing was secured to anything. I had the intake resting on the factory fender and it drove me nuts; not to mentioned polished the paint off. So the idea this time is to attach it to the hot pipe with a bracket and this way it can move with the motor movement; which isn't much with Nismo mounts, but better than mounting it to the inside of the bay. Here is how that went. I decided to go with the QR for a number of reasons. I've always loved the look of a 5-axis machined billet BOV, the choice of black anodizing goes perfect with the color scheme of my build, the SSQV Samurai sword *shh-ing* noise was getting old, and from my research/experience a recirculated BOV just works better on a MAFS system. 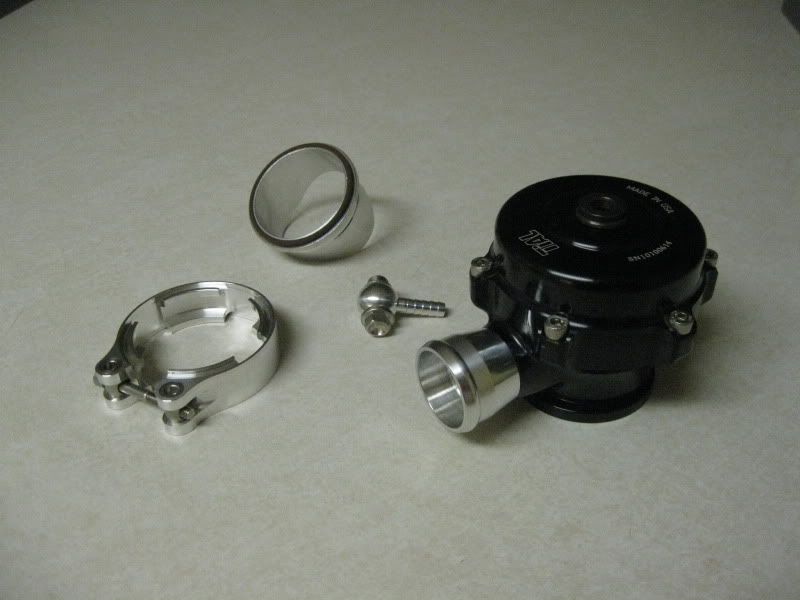 Considering all the little parts I made for this, I forgot to take pictures along the way but here are the components. The intake is a 3" mandrel I had Grand Bending do, the two bolt bracket will be the mount for the intake, the 1.25" barb fitting will provide the recirculation inlet, the smaller 0.313" barb will give my WOT negative pressure for the crank ventilation and of course the provided Tial mount flange. 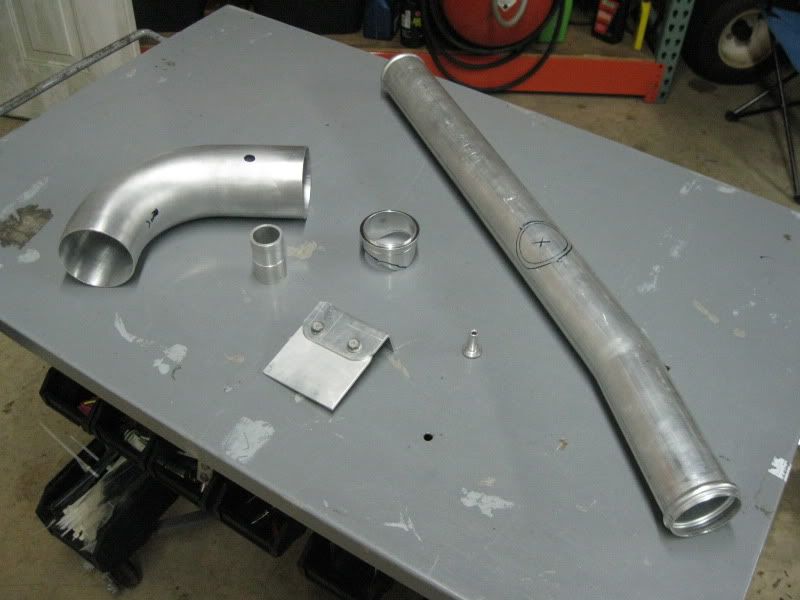 Fast forward a couple nights and here is all that done. 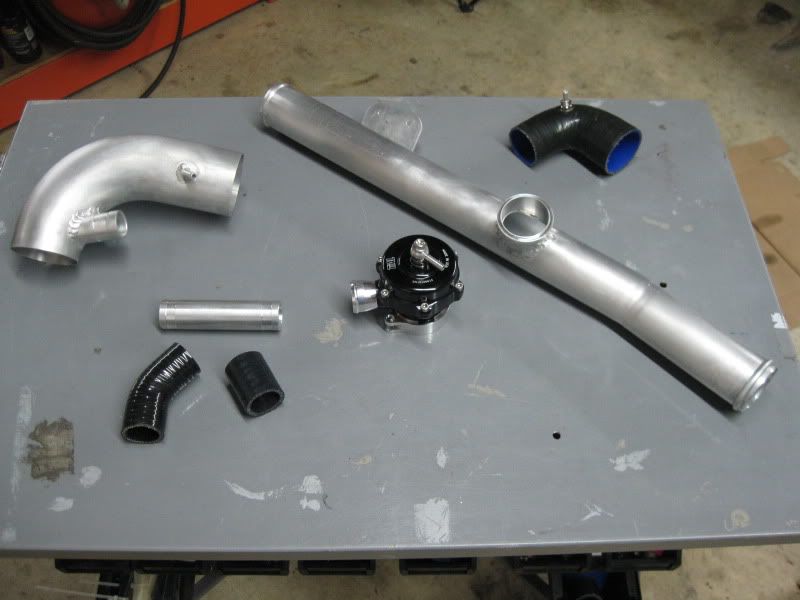 I'll say it again, my TIG isn't the best but it's solid and I'm getting better. All of the openings in the intake pipe have been machined and filed so there are no ledges on the fitting inlets; nor do they extend inward of the pipe. 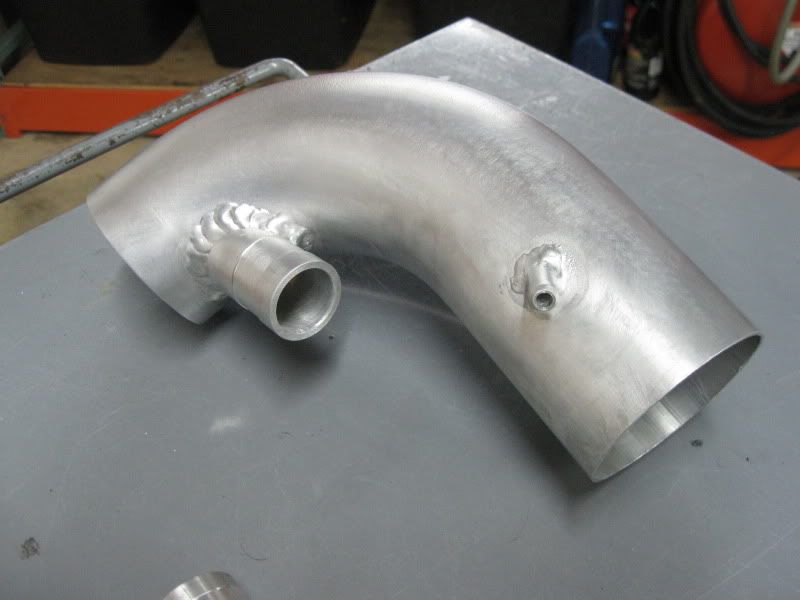 Here is the bracket mounted to the back side of the intake. 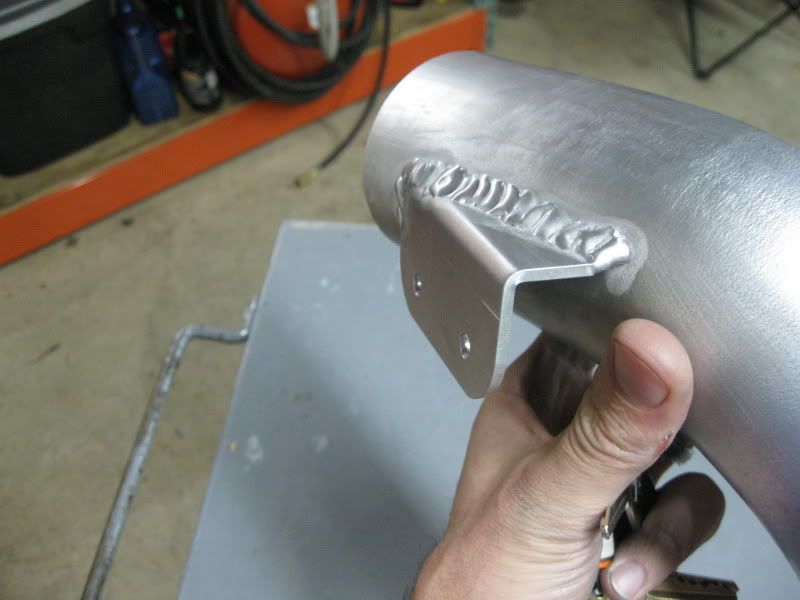 My double ended barbed pressure pipe for the recirculation 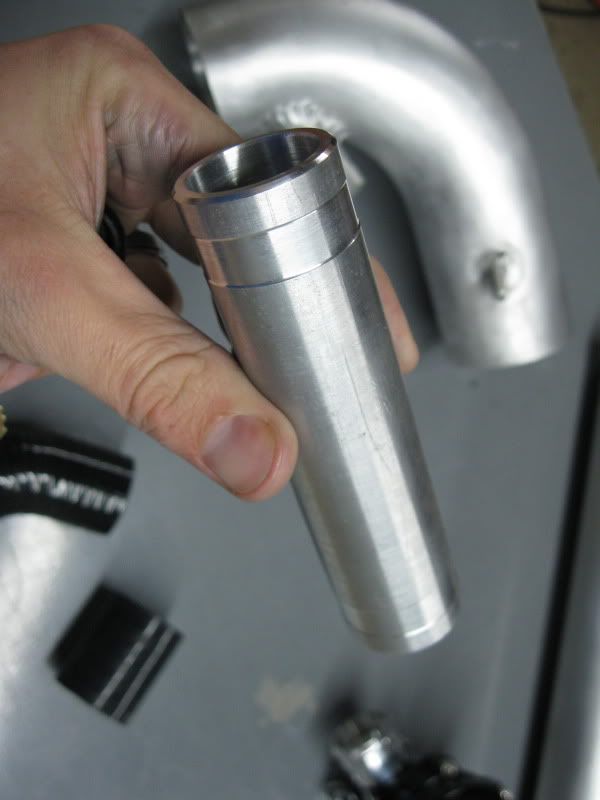 After machining out the hole for the BOV perch I realized that the opening was close to the OD of the pipe so it was incredibly tedious to weld this on without blowing holes in it. I'm betting towards the sides the material on the perch and pipe were no more than 0.060" in tickness each. Almost as bad as trying to weld beer cans together. 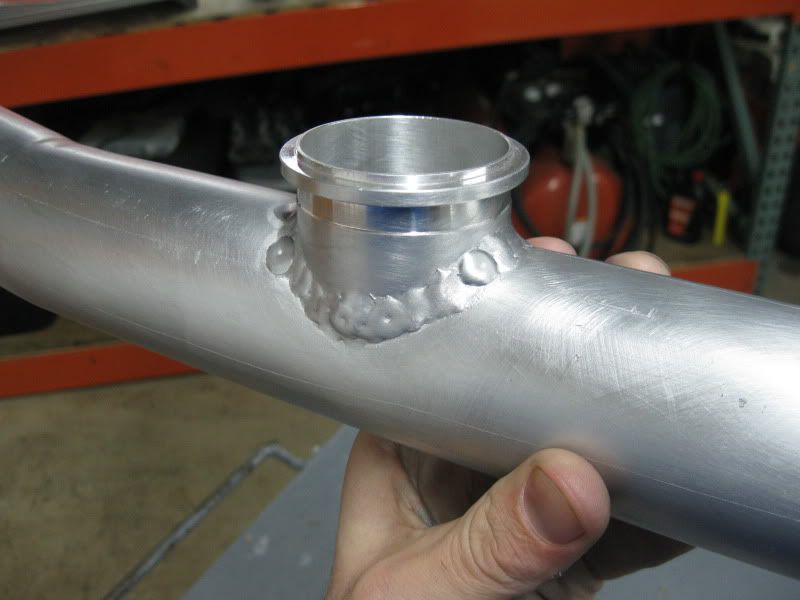 The opposite mount on the hotpipe. Yes I know it looks crocked but I promise they line up PERFECT. 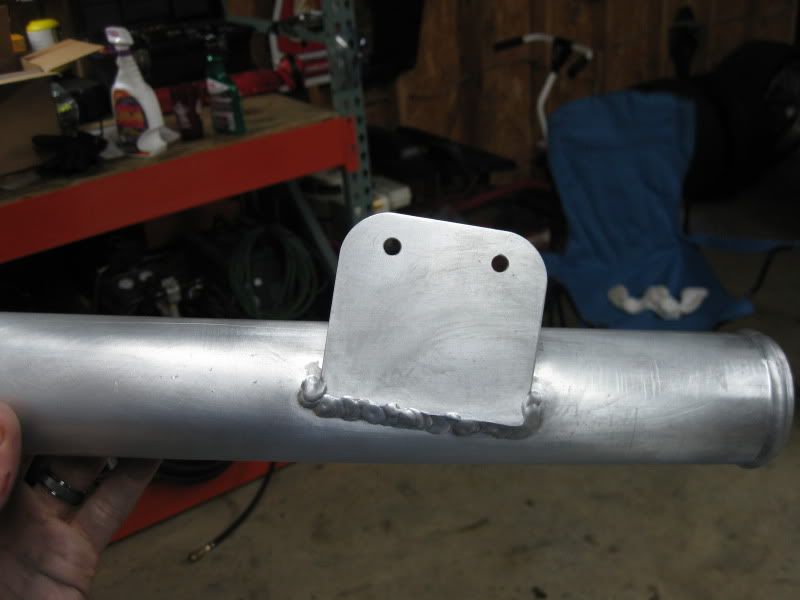 Here are the two mounted together off the motor. Notice the gap, it's just over 1/8" in clearance and SOLID. 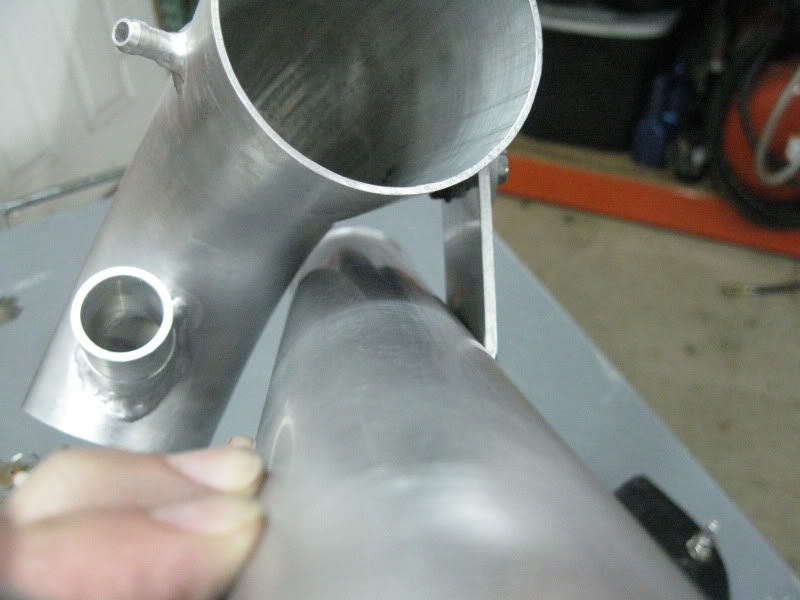 And on the car, plumbed to the turbo and intercooler, nothing changes 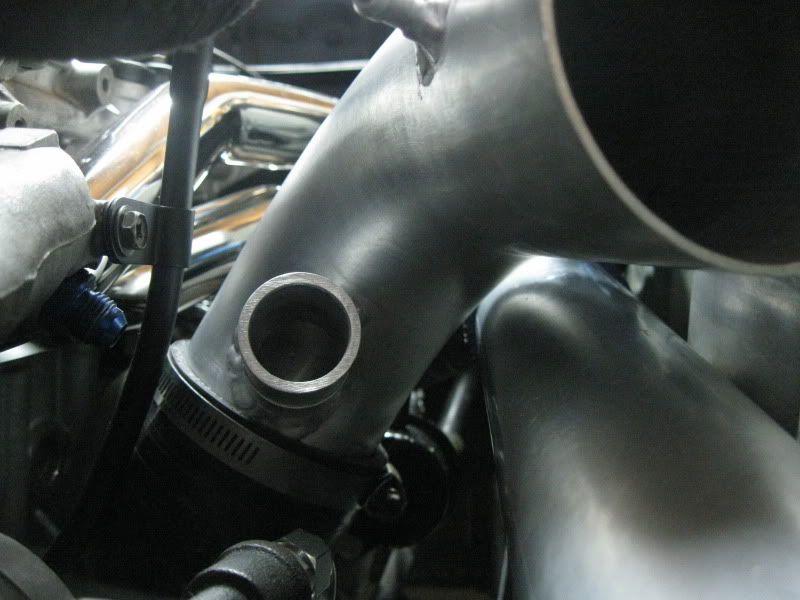 BOV and recirc. installed. The aluminum flange on the fender floor is for my "cold/ram air intake". It's actually a bumper duct you can buy from pitstopusa.com. A 3" barbed connection extends down approx 3/4" for a flex hose connection below the fender. It will be connected to the one I've attached to my Navan bumper. 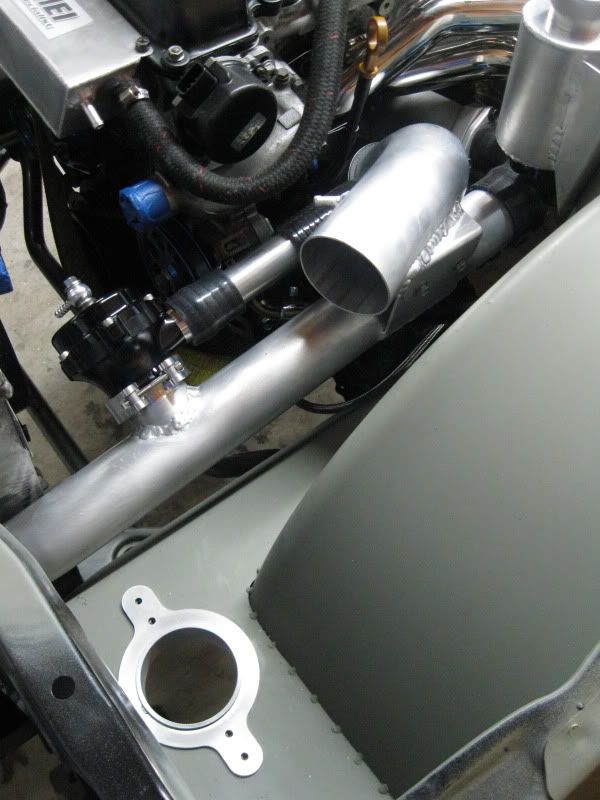 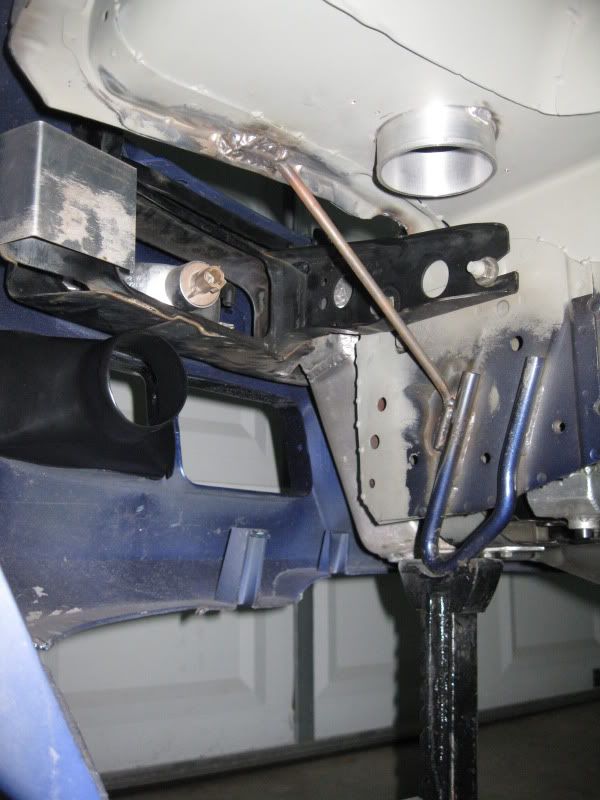 That other aluminum bracket you see on the bumper support is actually a ballast mount for the HID's. I've always been annoyed with placing that box so I bent up this mounts and riveted them to the bumper support. Here is how that's supposed to work. 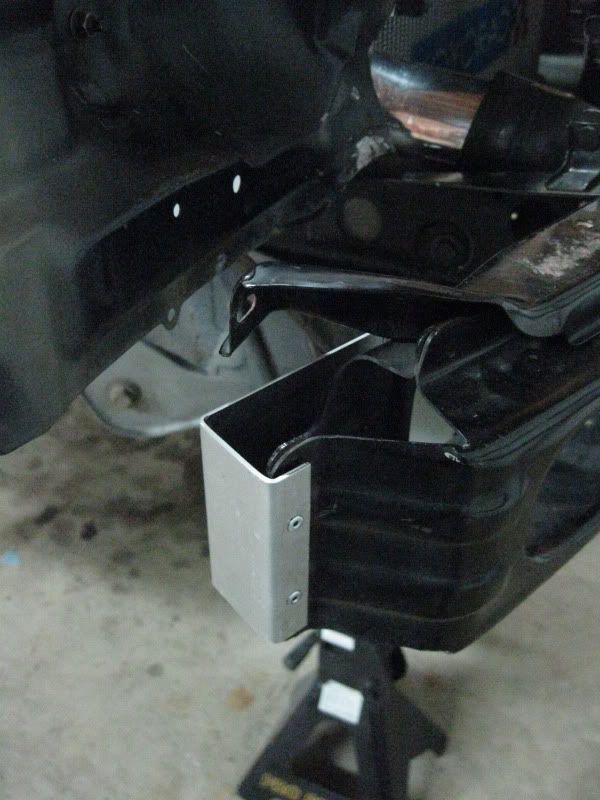 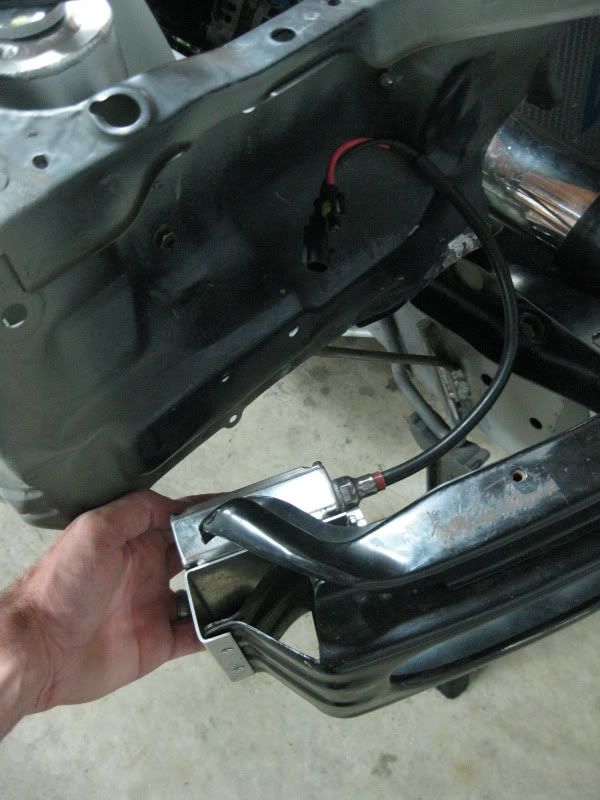 Now with the new filter in place. It's not going anywhere and has approximately 1.0" of clearance all the way around it. Notice the small barb will be connected to my catch tank; I don't have a hose for that yet. 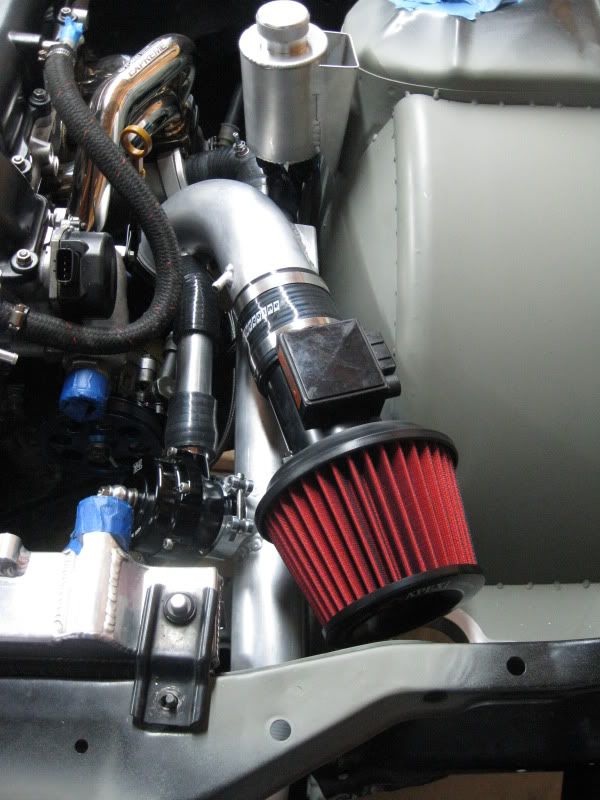 Finally, its looking like its coming back together. With the mock up finished, everything is coming back out, and I'm moving on to paint. I plan to do a single stage SEM Hot Rod Black quart kit in the bay area. Then I will be using a paintable 3M seam seal on the fenders from the underside, so I keep the tacked look, and 3M undercoat everything outside the bay. Should have that sprayed in a couple days  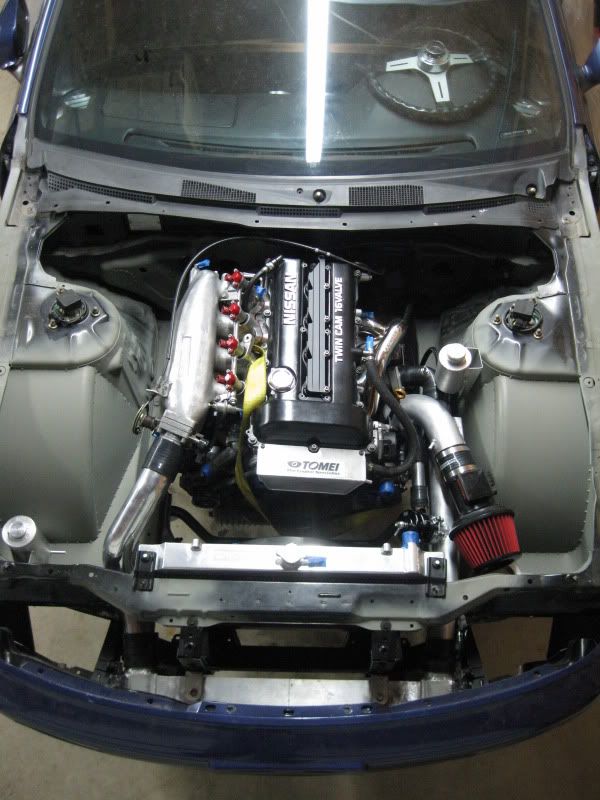
__________________
Fu*king ginger bread man stole my wallet... SHIFTlock_slide to side d3m3rs0n: if i have a baby im naming it Brandons Fault Emerson Last edited by s14unimog; 01-03-2012 at 09:04 AM.. |
|
|
|
|
12-17-2011, 04:25 PM
|
#13 |
|
Leaky Injector

|
|
|
|
|
|
12-17-2011, 04:40 PM
|
#14 |
|
Post Whore!
 
Join Date: Dec 2004
Location: Poconos, PA
Age: 40
Posts: 8,030
Trader Rating: (58)
Feedback Score: 58 reviews
|
DIY, the only way to fly! Nice stuff!
__________________
 Want Air Conditioning in your SR20 Swapped car? Check out www.sr20acbrackets.com for more information! Quest Alternator Conversions for SR20! Check my Group Buy! Tired of lousy internal gates? Go external wastegate with one of my manifolds, Check out my group buy |
|
|
|
|
12-17-2011, 05:38 PM
|
#15 |
|
Zilvia Junkie
 Join Date: Dec 2010
Location: Canada
Age: 35
Posts: 443
Trader Rating: (5)
Feedback Score: 5 reviews
|
love it man! whats the diameter on that bumper duct? i was looking into doin something exactly like that for my swap when it gets more "on the go" except im putting the filter underneath the fender for colder air
|
|
|
|
|
12-18-2011, 10:47 AM
|
#16 | |
|
Nissanaholic!
Join Date: Dec 2003
Location: In a place, near a river, over a lake
Age: 38
Posts: 2,415
Trader Rating: (22)
Feedback Score: 22 reviews
|
Thanks guys
Quote:
__________________
Fu*king ginger bread man stole my wallet... SHIFTlock_slide to side d3m3rs0n: if i have a baby im naming it Brandons Fault Emerson |
|
|
|
|
|
12-18-2011, 03:10 PM
|
#18 |
|
Nissanaholic!
Join Date: Dec 2003
Location: In a place, near a river, over a lake
Age: 38
Posts: 2,415
Trader Rating: (22)
Feedback Score: 22 reviews
|
Thanks! A couple actually. They're all my work's but for MIG I'm using a Millermatic 251 and TIG a Miller Syncowave
__________________
Fu*king ginger bread man stole my wallet... SHIFTlock_slide to side d3m3rs0n: if i have a baby im naming it Brandons Fault Emerson |
|
|
|
|
12-22-2011, 01:14 PM
|
#20 |
|
Nissanaholic!
Join Date: Dec 2003
Location: In a place, near a river, over a lake
Age: 38
Posts: 2,415
Trader Rating: (22)
Feedback Score: 22 reviews
|
Everything is back out and I'm aiming to shoot paint this weekend; just so long as the temperature don't plummet. Which reminds me, I need to go get propane.
__________________
Fu*king ginger bread man stole my wallet... SHIFTlock_slide to side d3m3rs0n: if i have a baby im naming it Brandons Fault Emerson Last edited by s14unimog; 01-03-2012 at 09:07 AM.. |
|
|
|
|
12-22-2011, 05:31 PM
|
#21 |
|
Post Whore!
|
Looks good man, I'm in the process of prepping my bay for paint... Just needs to be wiped down and shot with primer. Wish I had the availability/time to lay paint myself. I'll handle all the prep work though which should keep overall cost down. Keep it up dood!
__________________
*My SR20VET* Does your VTC gear rattle in your S14/15 SR? PM me. |
|
|
|
|
12-24-2011, 11:51 AM
|
#23 |
|
Nissanaholic!
Join Date: Dec 2003
Location: In a place, near a river, over a lake
Age: 38
Posts: 2,415
Trader Rating: (22)
Feedback Score: 22 reviews
|
Preciate it. Sucks with all the family time over this Christmas weekend. It's looking like I won't get much done. That and my machinist from work and I came up with a pretty sweet Christmas present for my dad that has eaten up a bunch of time. I did some CAD work for him a couple months back so we got to trade out work. My dad's gonna trip.

__________________
Fu*king ginger bread man stole my wallet... SHIFTlock_slide to side d3m3rs0n: if i have a baby im naming it Brandons Fault Emerson |
|
|
|
|
01-04-2012, 09:00 PM
|
#24 |
|
Nissanaholic!
Join Date: Dec 2003
Location: In a place, near a river, over a lake
Age: 38
Posts: 2,415
Trader Rating: (22)
Feedback Score: 22 reviews
|
Dec/Jan - the months are bluring together...
I'm starting to feel like road blocks with certain aspects of this rebuild are fueling distractions... That, and with typical fashion of South Eastern US climate, the weather is just about useless this time of the year. You don't really want to be too far from warm air, and it becomes everyones de-motivator to "do things". It's equally annoying when your trying to finish something that's stored in an un-insulated garage. Either the case, the painting is on hold and I started working on a turbo brace/actuator mount.
With the last expreme cracking at the runners I feel it couldn't hurt if I braced the assembly this go around. I still wish they would change their welding up a bit but that's apparently beating a dead horse... I came up with a brace that will be affixed to the motor mount frame on the engine side. This is a rigid foot hold and is also the mount location for the factory brace. What is some-what funny is that 2 years ago, I ground the brace mounting locations off the compressor housing b/c they gave conflicts with my braided stainless coolant hose routing. I never had the brace and just did away with the ugly bosses. I also, around that time, coverted over to the HKS actuator and made a some what mediocre mount that I wasn't too proud of. Solution? Combine and rebuild. I machined the main plate from 6061 1/4" plate and the foot from 3003 1/8". The plan is to tap respective metric threadings in the mount and weld the two together. Unfortunately I didn't have time to weld them tonight, and won't get too until the weekend, but you get the idea. The next update I should have the bay shot. Aw shit; COLOR! 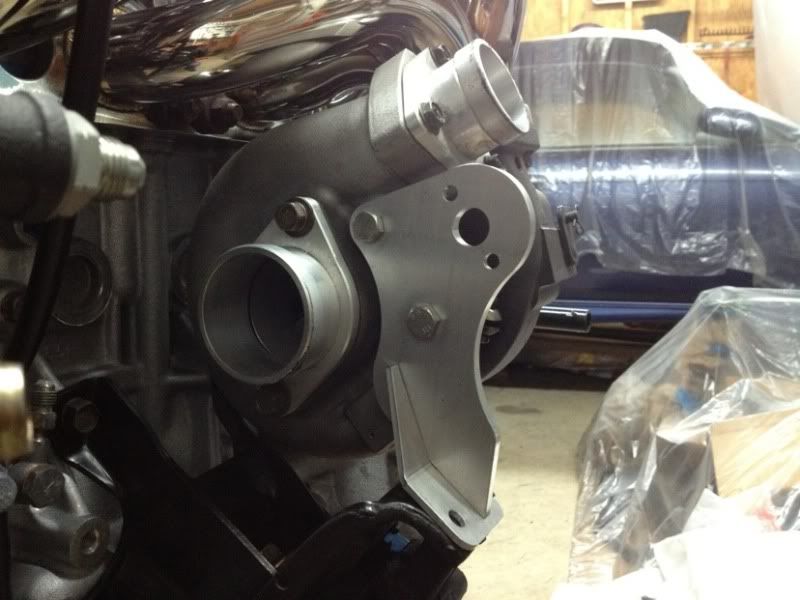 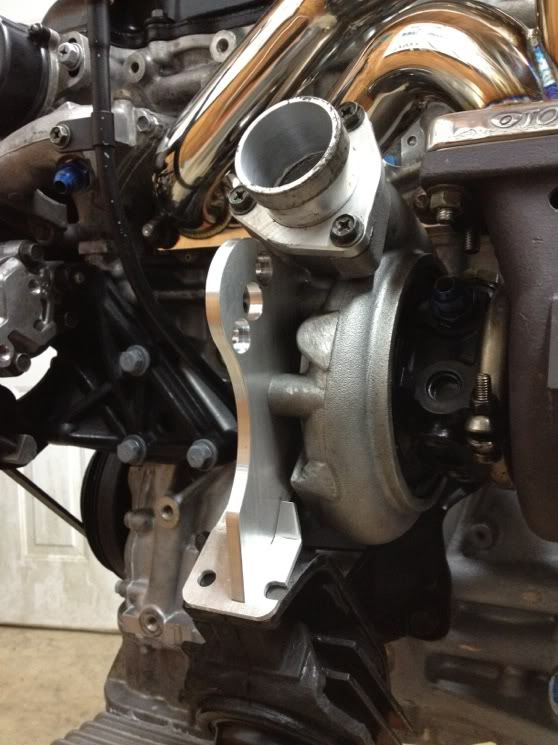 
__________________
Fu*king ginger bread man stole my wallet... SHIFTlock_slide to side d3m3rs0n: if i have a baby im naming it Brandons Fault Emerson |
|
|
|
|
01-04-2012, 10:35 PM
|
#25 |
|
Post Whore!
Join Date: Dec 2004
Location: Poconos, PA
Age: 40
Posts: 8,030
Trader Rating: (58)
Feedback Score: 58 reviews
|
That's a pretty slick turbo brace, and I really think that will help eliminate (or at least slow down) some of the failures with the tubular manfolds. The *only* think I could maybe suggest (and this is all on assumption) is that if you were to debate on selling them, that you would need to create a brace that could incorperate a few different 'clockings' of the compressor housing (if you know what I mean). This is where some of the rod end/turnbuckle soltuions end up working well as it self adjusts to many different setups. Not nitpicking just dropping the idea out there to ya
 Either way, it's a good idea - a much needed one at that. PS: I don't wanna hear any of the 'southeast temps' comments. It was 8 degreees last night up here 
__________________
Want Air Conditioning in your SR20 Swapped car? Check out www.sr20acbrackets.com for more information! Quest Alternator Conversions for SR20! Check my Group Buy! Tired of lousy internal gates? Go external wastegate with one of my manifolds, Check out my group buy |
|
|
|
|
01-04-2012, 10:49 PM
|
#26 | |
|
Zilvia FREAK!
 
Join Date: Jul 2008
Location: on an island, NY
Age: 39
Posts: 1,375
Trader Rating: (11)
Feedback Score: 11 reviews
|
Im not sure if you covered this but running flex pipe with your exhaust will lower the chances of cracking the manifold.
The brace is cool btw.
__________________
 Quote:
|
|
|
|
|
|
01-04-2012, 11:27 PM
|
#29 | |
|
Leaky Injector

Join Date: Dec 2011
Location: Delaware
Age: 32
Posts: 141
Trader Rating: (0)
Feedback Score: 0 reviews
|
lovin the build, amazing fabrication, i do alot fab at work and plan on doing this with my 95. (: and i live in delaware, its f*%$ snowing and my car is apart and is under a car port with plywood as a door and fence on the sides
 ps. stealing the idea you used for fender wells with the wheel lock. have the same problem and now found a good solution thanks!
__________________
Quote:

|
|
|
|
|
|
| Bookmarks |
|
|


 Hybrid Mode
