|
|||||||
| Builds (and builds only) Got a build thread? It goes here, build threads anywhere else on the forum will be locked and never moved. |
 |
|
|
Thread Tools | Display Modes |
 11-07-2015, 11:55 AM
|
#31 |
|
Zilvia Member
 |
week # 9
alright its been longer than a week i know. cus i went to vegas last week for a short trip but i didn't forgot about my build. i did tackle down couple parts and tools on my list so they will arrive on my next day off. i planned to do more this week but its getting dark really early due to time adjust. regardless, this project is moving forward to the right direction. i finalized my order with wiring specialties. sending out my PCM for them to remove security, emission disable and reflash.  picked up some expensive tool.  this is the real start of week 9. pulling off factory oil pan for fueled racing supply moroso pan. went into a small issue. the oil pan has quite a lot of milky water oil mixture. sure enough, water went into engine from the valley cover while i was washing the engine like zeitgeist said.  took off valley cover  the caps on top also didn't help at all and my shock sensors were flooded with water. these two seals didn't help either thats why i got some milky water in the pan.  No problem! one of the benefit of having Ls1 is availability on parts. instead of getting stuck on my plan, went straight to chevy dealer to pick up a 2016 vett.  nah i still love my 14.5. i need to get the plug to cap off the factory dip stick hole anyways and i picked up some valley cover gasket and seals. the intake manifold gasket i ending up returning it cus $100 bucks for that is just too much. i can get that somewhere and i don't need it until later on the build.  ok back to work. some clean up before pulling the new pan. i really like the design of the pan. it comes with studs and nuts instead of bolts. i heard people having fitment issue with sikky pans which comes with bolts.  fits right on it.  everything bolts up. engine mount on and subframe on.  back to the T56. the shim from tick performance arrived couple days ago. put that on…  cutting off the ear. don't really know what was that originally for. it has no functionality but taking up space….  grind it down and smooth out the edges.  installing the fueled racing supply clutch line and remove bleed. it was a big time PITA to take this damn rolling pin off for some reason. (yes i did take the O ring out.)  after the long separate. they are finally back together.  next day i went to spend some money again on tools and pick this up.  i m completely new to welding so i've spent close to $2k to just get this set up. its a brand new Lincoln 180 dual 110 and 220 walt MIG welder. cus i know i will be welding more in the future project. this welding will give me a lot of room to grow in skills.  when u see a welding machine and these on a 240sx build, u know whats gonna happen next….  here's how the swap sits now. ls1 t56 back together which it went thought quite a lot of new parts inside. as it sit, new valley cover gasket and seals, oil pan, dip stick cap, engine mount, pilot bushing, light weight flywheel, new flywheel bolts and Ls7 clutch, input shaft seal and of course my anal cleaning on every parts.  i was gonna start cutting the fender well but it gets dark so damn early now. that will be next week mission. so thats it for this week. keep the comments and ideas coming!! thanks for watching. Last edited by SR2oD3T; 03-13-2018 at 06:47 PM.. |

|

|
| Sponsored Links |
|
11-07-2015, 12:56 PM
|
#32 |
|
Zilvia Junkie
 Join Date: Feb 2007
Location: Cross Country
Posts: 494
Trader Rating: (21)
  Feedback Score: 21 reviews
|
For the holes around, the sensor, did you add some rtv? It was actually put out by GM to dam the holes with rtv after replacing the sensors. Forgot to mention it
Check the wires for corrosion as well |
|
|
|
|
11-07-2015, 01:25 PM
|
#33 | |
|
Zilvia Member
|
Quote:
|
|
|
|
|
|
11-09-2015, 06:53 AM
|
#35 |
|
Zilvia Junkie
|
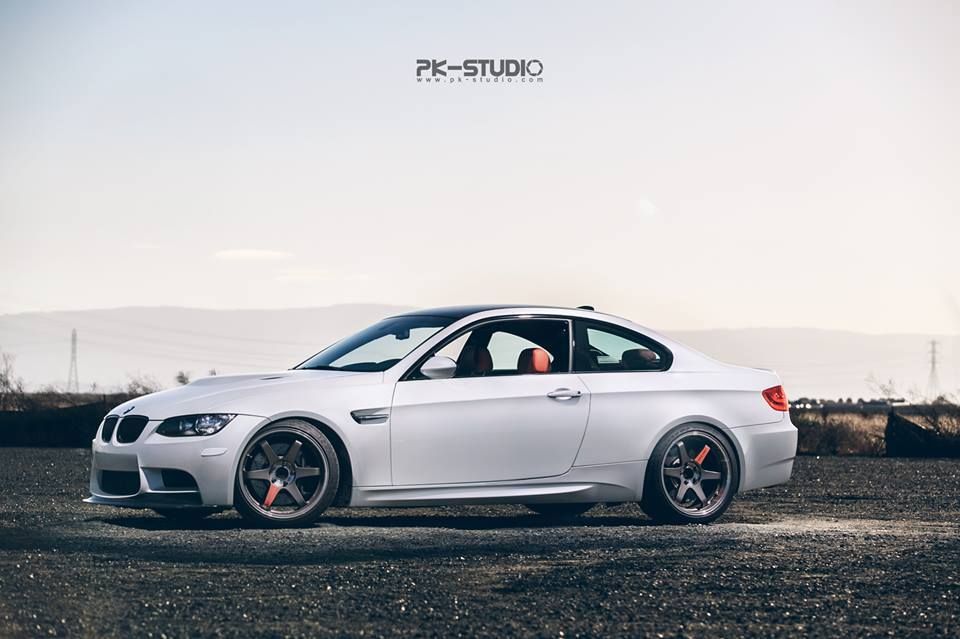
Cool update man. Glad to see your progressing.
Also Nice E92 M3 in the garage boss 
__________________
89 S13/2JZ Silvia(Project Phoenix) IG @awrperformance FB awrperformance |
|
|
|
|
11-10-2015, 07:26 PM
|
#36 |
|
Zilvia Member
Join Date: Apr 2010
Location: New York
Age: 46
Posts: 221
Trader Rating: (2)
Feedback Score: 2 reviews
|
Nice build, good work and I applaud you for tackling things that are new to you,e.g the welding and wiring. I am currently doing my front tubs on my s13 and I'm using 1 trailer fender cut in half for both sides. Why are you using two trailer fenders? Are you possibly doing rear tubs? Or did you get an extra one just to experiment? I have to do my wiring now and I hate just thinking about it lol
|
|
|
|
|
11-11-2015, 10:27 AM
|
#37 | ||
|
Zilvia Member
|
Quote:
 Quote:
|
||
|
|
|
|
11-11-2015, 10:33 AM
|
#38 | |
|
Zilvia Junkie
|
Quote:
 Gorgeous M3 you have there. I have always wanted one of those bad boys. I need your job 
__________________
89 S13/2JZ Silvia(Project Phoenix) IG @awrperformance FB awrperformance |
|
|
|
|
|
11-16-2015, 12:44 AM
|
#39 |
|
Zilvia Member
|
week # 10
week 10 here we come. although i have two days to work on it, feels like i didn't do much. fabricating from scratch just takes a lot of times especially i m anal. but I'm getting there. lets get started. the cutting started. say good bye for the ugly rusty battery tray.  i ending up cutting all on the side as well.  more cutting on the other side.  after some measuring, cutting some cut board to get idea.  something like that.  cutting the trailer fender for test fit.  like this.  after i got some idea, i went to the local metal shop and got some metal cut. was gonna get 16 ga to match with the trailer fender but they ran out of it. didn't wanna ruin my plan of the day so i ending up getting 14 ga, just one step thicker, which it worked out great cus its a little stronger and not as easy to bend.  start with the first piece. trim to fit.  both side trimmed to fit. i just let them sit on it now. i actually f up the first cut of the fender. i didn't leave enough room for the edge. if i keep cutting to create the edge that get close to the side of the strut tower, the fender will be come too short. so i ending up re do it and leave much more room for the edge. this is the final fitment. the can see there's a sharp edge that extended far enough to the side of the strut tower.  thats the failed piece vs the re done piece. its not that bad on the failed piece, i just want it to be perfect. thats the reason why i bought a pair of them.  here's a better pic i took the next day with some lights. its actually perfectly wrap around the strut tower with the sharp edge. it just slightly burnt on the tip makes it hard to see.  this is how it sits now. once its done, it will be perfect line up horizontally and parallel.  all the welding gears arrived while i was working on the project. perfect timing. the lincoln welding pack did cost me quite a lot but i gotta say, its totally worth it. even tho i haven't start using them, i can totally feel the quality on their products. heres the auto darkening helmet, gloves, welding jacket and some other goodies. the full set up is ready to go.  on the side note, this is how to keep on track of all my expense on this swap, all notes for wiring and receipts. i just pasted $10k mark which is a median number most people estimate. there's $2k was welding tools and supply tho so I'm at about $8k for just LS1 swap expense.  looking back, look like i didn't do much but i actually did quite a lot. just the pictures won't be impressive. moving forward will be finish tubing the front end with the new welding gears. i might be able to put the swap in for test fit. will see how it goes. again, thanks for watching. I'm getting there…. Last edited by SR2oD3T; 03-13-2018 at 06:57 PM.. |
|
|
|
|
11-24-2015, 10:09 AM
|
#42 |
|
Zilvia Member
|
week # 11
looking back on thread, i did quite a lot in almost 3 months. still, far from being finish. anyhow, it is moving forward. full geared ready to do my first weld ever.  pretty useful cart to help u dial the setting.  first i tried to weld some metal to test it out.  getting ready for the first official welding piece.  all set up and ready to go.   it took a lot of time to measure, cut and grind to get close to perfect shape before i weld.  more welding  the trailer fender on its final position.   second working day continue on the other side.  engine bay side cover weld on.  both side on and it's getting dark again. i just stood there and watched the bay for 10-15 minutes.  some pictures taken in the morning with better light.  the fender side cover is just sitting on there waiting to be welded. i couldn't figure out how to get a nice connection on the top but i think I'm just gonna leave it the way it is.  the other side without fender side cover. this is where I'm at now. its a great achievement for me. there were 5 pieces of sheet metal to fabricate on each side. each piece, i measure, cut, grind and test fit for about 30 times to get to the way i want. the weld is not beautiful at all due to my rookie skills, some burn through still needs to be fixed.  seam sealer or bondo will cover them up i think. the good news is, they all line up straight and balance, leave about 6.5 inch toward radiator support. just need to finish the side cover and clean up the weld next so i can move forward and back to the business. seam sealer or bondo will cover them up i think. the good news is, they all line up straight and balance, leave about 6.5 inch toward radiator support. just need to finish the side cover and clean up the weld next so i can move forward and back to the business. thanks giving week coming up, but that won't stop me from working on it. stay tuned and thanks for watching. comments and ideas are welcome! Last edited by SR2oD3T; 03-13-2018 at 07:15 PM.. |
|
|
|
|
11-24-2015, 12:29 PM
|
#43 |
|
Nissanaholic!
 Join Date: Apr 2003
Location: Austin, TX
Age: 40
Posts: 2,183
Trader Rating: (33)
Feedback Score: 33 reviews
|
Absolutely amazing work bud keep up the progress. welds will look nicer with practice but great start.
So I wanted to share a thread link with you that I started regarding the use of Russell Quick Disconnect Fitting...not sure what fittings or kit you would be using but here is the FYI: http://zilvia.net/f/showthread.php?p...54#post5980254 |
|
|
|
|
11-24-2015, 01:03 PM
|
#44 |

Join Date: Nov 2015
Location: Seattle,WA
Age: 26
Posts: 24
Trader Rating: (1)
Feedback Score: 1 reviews
|
I love the build because its all you and you have done everything yourself. I respect that and can't wait to keep watching it grow! One suggestion i have is to use por-15 to paint the inner fenders so they wont rust after the welds are done and its a good base if you decide to paint the bay black. Just a suggestion but keep up the great work.
__________________
Nobody likes the tuna here |
|
|
|
|
11-24-2015, 02:28 PM
|
#45 | ||
|
Zilvia Member
|
Quote:
thanks for the heads up. I haven't got a chance to study the structure of the Fueled Racing fuel kit. once the test fit for the ls1 is done, fuel kit is going in. I'm pretty sure its its the screw on type. if not, I don't feel safe using it either. Quote:
thank you for the kind word. i did got lazy last time and sent my sr20 for rebuild but the result just did not meet my expectation. not that it didnt work or the engine blew up, but just a dirty engine bay that they will never help u to clean it up, wiring installation kinda messy, dirty steering wheel. the worse part is, when i wasn't the one building it, i have no clue whats going on when i have issue on a track day. i complete lost boost on my last track day and didn't know where to look at. ending up the pin on the waste gate fell off, 2 out of 5 turbo elbow bolts wasn't tighten at all and i missed the second half of the track day. not that i wont make mistake, but if im the one building it, it will be much easier for me to figure it out. and i pay attention to details. and yes, i will for sure paint some under coat underneath the tub. those sheet metal already have a small amount of surface rust cus its raining season... i'll look into the paint u recommend. thanks. Last edited by SR2oD3T; 11-25-2015 at 07:55 AM.. |
||
|
|
|
|
11-28-2015, 11:34 AM
|
#47 |
|
Zilvia Member
|
week # 12
its thanks giving week, i still managed to get my hands on it for 1.5 day. finish welding the tub and did some quick test fit. started off receiving the pro harness with my PCM flashed from wiring specialities.  finish fabricating the side pieces and complete all the weld.  cleaning up my ugly weld by grinding them down with flap disc.   most people don't have to do this step as they have better welding skills. i just decide to do a small layer of bondo to cover up my mess.   time to do some test fit.  again, putting the swap from the bottom is way too easy. did not take me long and will less likely to scratch up anything after painting the bay.  first time sitting in it's sweet home.  also test fitted the aluminum drive shaft. didn't wanna find out it doesn't fit and get stuck.  did some thin bondo the next working day to smooth out the edges.  this is how it sits now.  fitment was spot on. didn't need to hammer anything. shifter lines up almost perfectly middle. drive shaft fits like it should.  oil pan sits above cross member and line up alright. tranny is slightly lower than crossmember but i will likely put some under body tray to protect them.  the second half day, i went to the SF car show to crab myself out.  2017 lambo aventador SV  speaking of v8 s14.5. there was a finished product  can't tell from far but for sure its a drift spec super charged v8 s14.5 can't tell from far but for sure its a drift spec super charged v8 s14.5 thats it for this week. 3 months down on this project, finally see some light. i think I'm getting close to half way done. will drop the swap out next week and prepare the bay for paint. it should be pretty quick after paint. body work just takes forever to look decent . for the time being, gotta get my ass back to my busy working week at work. thanks for reading. happy thanks giving every one!! Last edited by SR2oD3T; 03-13-2018 at 07:24 PM.. |
|
|
|
|
11-30-2015, 03:52 PM
|
#50 |
|
Nissanaholic!
Join Date: Apr 2003
Location: Austin, TX
Age: 40
Posts: 2,183
Trader Rating: (33)
Feedback Score: 33 reviews
|
I am sure you already planned on it but....dont forget to get a new starter while the motor is out. Its much more of a pain in the ass to get it done with the setup in the car. Just changed mine out last weekend.
|
|
|
|
|
12-01-2015, 01:33 PM
|
#51 | |
|
Zilvia Member
|
thanks for the kind words.
I think I saw him drifting on Sonoma as well. I used to go there every week like 2 years ago. Quote:
that's some good info. didn't know it will be a pita. I think I will stick with the start for now cus it starts fine when I test drove it. i'll definitely keep an eye on it. |
|
|
|
|
|
12-02-2015, 03:20 PM
|
#52 | |
|
Zilvia Member
Join Date: Nov 2003
Location: Austin, Tx
Age: 45
Posts: 200
Trader Rating: (8)
Feedback Score: 8 reviews
|
Quote:
My turbo LS s13, also in Texas, is beyond HOT inside the car during the summer. I've stripped the interior to lay down Lizard Skin sound and heat barriers. Nice progress so far! Keep it up
__________________
91 240sx 03 Pathfinder |
|
|
|
|
|
12-06-2015, 01:41 PM
|
#53 | |
|
Zilvia Member
|
Quote:
interior is fine. just gonna take me more time to rip the carpet off and wrap it with the material. any recommended material btw? most people getting dynamat for sound, not much review for heat. thanks. |
|
|
|
|
|
12-07-2015, 05:27 PM
|
#54 |

|
I can't say I've know anyone to use it, but Lizardskin makes a ceramic thermal coating, not sure if you've looked into it or not.
http://www.lizardskin.com/car-ceramic-insulation.html |
|
|
|
|
12-07-2015, 08:08 PM
|
#55 |
|
Zilvia Member
|
week # 13
this is a tough week as it was raining on one of the working day that slow things down. when it stopped raining, it gets dark  . im still within the schedule however. . im still within the schedule however.first pulling out the swap in 10 mins. this part is easy.  some final cutting on the strut tower and inner tub.  sanding down the bondo smoothing out the edges.  looks pretty good and it covered up my ugly weld  and my compressor kinda took a shit on me... wasted like an hour on fixing it.  primer is on.   seam sealer on inner tub.  sanding down the whole engine bay for primer. factory paint does not have any clear coat protection at all. u will see metal with slight sanding.  wipe down the under side ready for some goody.  3M undercoating is on. i m impressed with the result. very easy to apply. just spray it on and u are done with the fresh under body.  all primered and undercoated.  thats it for this week. sucks that its gonna rain again on my next project working day. i m gonna finish painting the bay no matter what. spending too much time on the engine bay without staying in the topic. still debating on the heat insulation. i think im just gonna do the tranny tunnel for now as from research, heat is mostly coming from the tranny being too close to the tunnel costing heat transfer into the cockpit. again, need to speed up the process and stay in topic... thanks for watching. Last edited by SR2oD3T; 03-13-2018 at 07:28 PM.. |
|
|
|
|
12-08-2015, 09:53 AM
|
#56 |
|
Zilvia Member
Join Date: Nov 2003
Location: Austin, Tx
Age: 45
Posts: 200
Trader Rating: (8)
Feedback Score: 8 reviews
|
nice work
I cant give you much feedback on how dynamat sheet compares to Lizard Skin type products. I'd assume dynamat sheet is more for a sound barrier as opposed to heat. For heat, it's a combo of things. Yes the Tranny creates heat, but the LS runs about 20-50* HOTTER than the SR in it's normal operating range. 235* is considered acceptable by GM, shoot the 2nd fan doesn't turn on til 235* IIRC. not to mention, long tube headers run right below the floor pan as well. If you want it manageable, do something about the firewall, floor and trans tunnel. Just from experience in my car, no heat shielding, no sound deadening on floor or firewall, replacement carpet with 1/2" jute padding the car will get hot. Longest stretch of driving in the summer (only 90*) was an hour and I was drenched with sweat. You have everything stripped already, it would suck to have to pull it all out again later. Just my $.02
__________________
91 240sx 03 Pathfinder |
|
|
|
|
12-08-2015, 10:45 AM
|
#57 |
|
Zilvia Member
Join Date: Feb 2007
Location: 'Merica
Age: 37
Posts: 198
Trader Rating: (0)
Feedback Score: 0 reviews
 |
Does that gold reflective stuff actually work? If so, that could be put on the firewall, and it'll still look good in there.
__________________
Determined to be famous, destined to be infamous.
|
|
|
|
|
12-08-2015, 01:03 PM
|
#58 |
|
Zilvia FREAK!
 Join Date: Oct 2009
Location: Near that guy you know
Posts: 1,561
Trader Rating: (11)
Feedback Score: 11 reviews
|
Apply heat shielding material of your choosing to everything under the car, between the frame rails, up until the gas tank. Any header wrap your exhaust up to the same point.
|
|
|
|
|
12-08-2015, 02:50 PM
|
#59 |
|
Zilvia Junkie
|
The Gold reflective tape from DEI is a great product.
Easy to install and working with in close spaces. It leaves a lot of residue if your trying to remove it.
__________________
89 S13/2JZ Silvia(Project Phoenix) IG @awrperformance FB awrperformance |
|
|
|
|
12-08-2015, 03:01 PM
|
#60 |
|
Leaky Injector

|
I was thinking about using the 3m undercoating, did you use the proffesional? Also my tubs are bare metal right now, should I shoot primer down then the undercoating or just the undercoating? I'm thinking primer and undercoating
__________________

|
|
|
|
|
| Bookmarks |
|
|


 Linear Mode

