|
|||||||
| Builds (and builds only) Got a build thread? It goes here, build threads anywhere else on the forum will be locked and never moved. |
|
|
Thread Tools | Display Modes |
 11-05-2011, 01:56 PM
|
#1 |
|
Leaky Injector
Join Date: Oct 2011
Location: Panama City Beach
Age: 37
Posts: 52
Trader Rating: (0)
 Feedback Score: 0 reviews
|
S13 302 build
Hello zilvia. I am new to this forum and kinda new into the 240 world. I have worked on a lot of friends' cars but never owned a 240 myself until recently. I picked up a roller for pretty cheap off a friend, and did some research on a cheap swap that I wouldnt really want to mess with too much later down the road. I couldnt find much information around the net about a 302 swap, but the cost of domestic parts pretty much sealed the deal. If there is interest in this build then I will make this a legit "how to" thread, but if I am going to get flamed I would rather just keep it to myself.
Like I said the only reason I went with this swap is because of part pricing and availability. Ford parts are STUPID cheap, and they are EVERYWHERE. My budget for this build was $1500 and that includes buying the car and a healthy amount of aftermarket parts. I am converting the car from EFI to carb just to make the swap easier. I would prefer to run EFI, but for now I just want the car to run and carb very simple when it comes to wiring. Current Parts- 1991 s13 hatch chassis ($100)-friend 1994 5.0 HO from a mustang gt ($499 + $160 shipping)-prestigemustang.com T5 transmission ($80)-craigslist '94 mustang motor/tranny mounts ($36)-rockauto.com Edelbrock Torquer 2 manifold ($55)-cragslist Holley 600 cfm carb ($25)-friend Summit HEI distributor ($84)-ebay Carter Mechanical Fuel Pump ($26) ebay Modified chrome front sump oil pan ($40)-local shop Total cost so far- $1105 screw the budget, I want to have a car I can enjoy for a while I should get my clutch and flywheel in next week, then I can mount the tranny and take measurments for a custom driveshaft. After that, its a toss between having a custom manifold made to clear the steering rack or modify the steering rack itself. I am going to go with whatever is cheaper since this is a budget build. Here is a pic I took of the motor last week while test fitting the mounts. 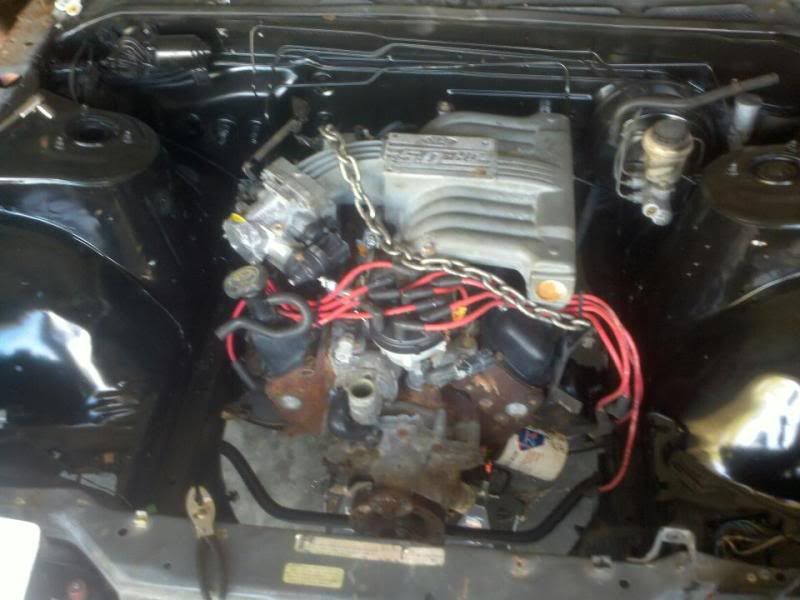 Here is a picture of the biggest problem with this swap. This is on the driver's side, and as you can easily see the steering shaft is an issue. I have sourced parts online to be able to modify the steering shaft, but I am going to take this picture to some local fabricators so I can get an accurate quote on a custom manifold. I would rather not modify the steering shaft, but we will see how much a custom manifold will cost. 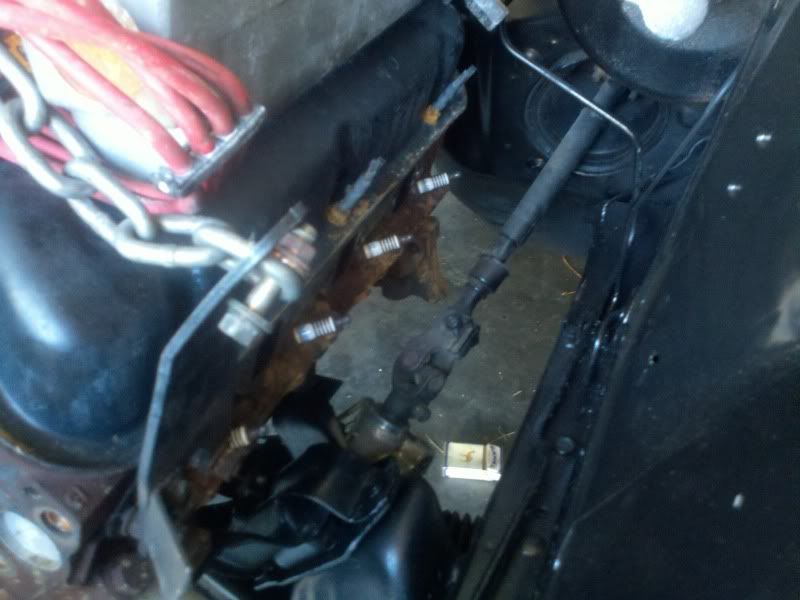 As promised here are some pictures of the cross member I drilled out for the motor mounts to fit. I used a step bit, and drilled the exisiting holes to make them bigger.  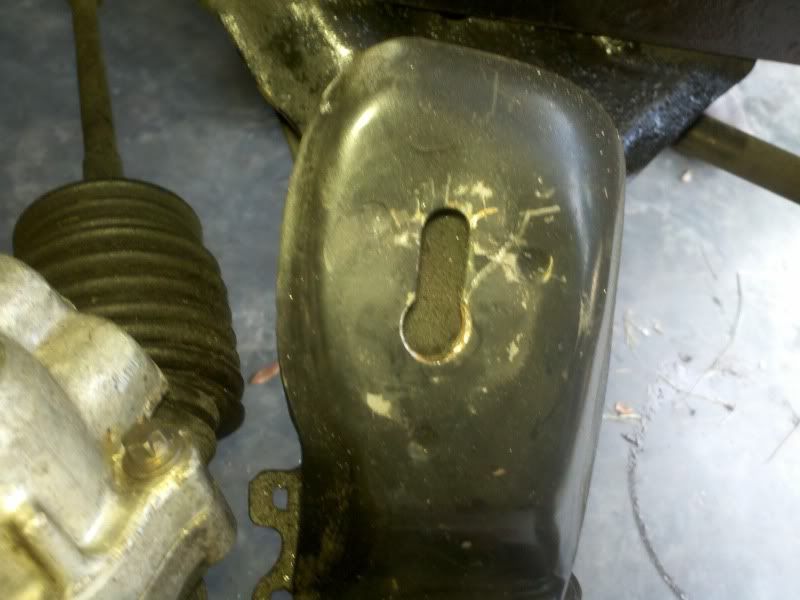 The motor sits in pretty well with the modified cross member, but it sits a little too low. The oil pan wont have much clearance over the cross member, so I am going to space the mounts for more clearance underneath. I am still waiting on parts that I expected to get last week, but here soon I will be able to get the oil pan on so I can find the final position for the motor. Here is a picture of how it currently sits in the car. 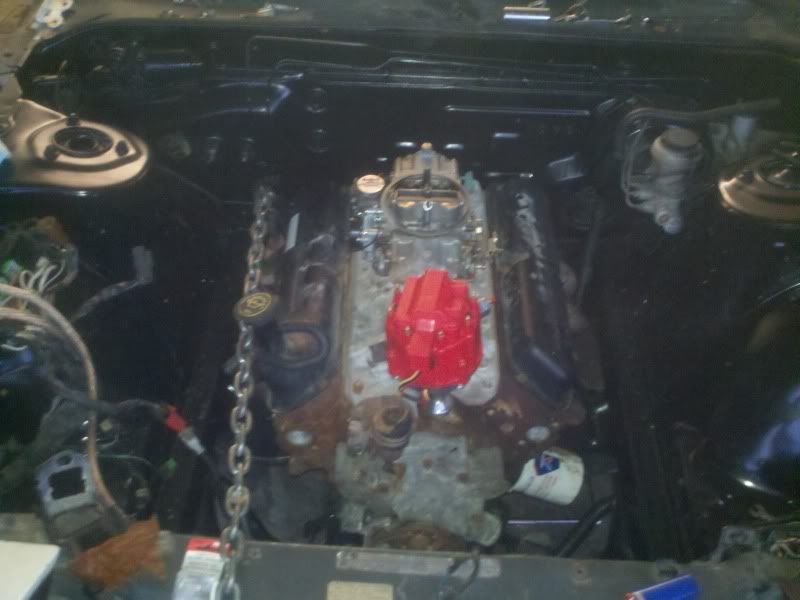 And here is a picture of the passenger side motor mount. You can see how low the mount holds the motor, so I need to find a way to space the motor up for more oil pan clearance. 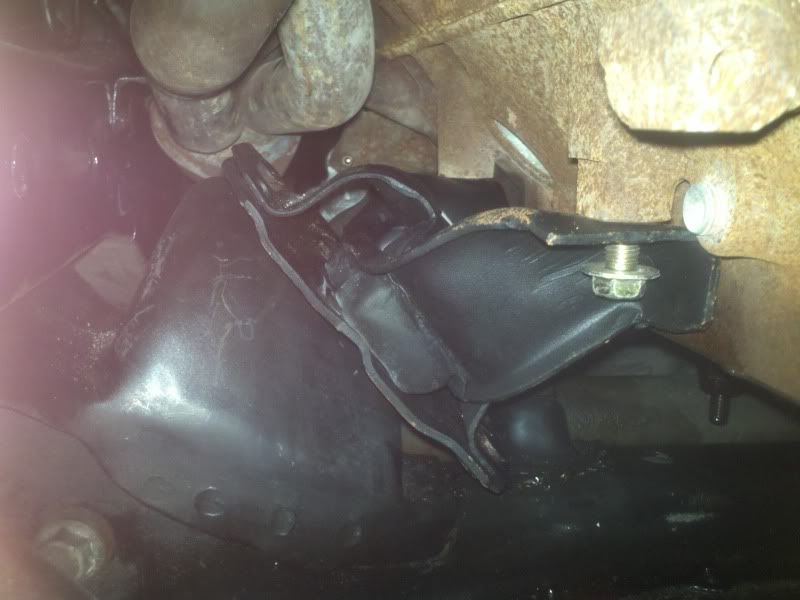 Also got the transmission "test mounted" today. Looks like its a little more forward than what I thought it was going to be. Everything is currently loosely mounted, but will be pulled farther back once it finds final position. I am also probably going to have to persuade the tranny tunnel with a hammer a little bit once I raise the motor to where it needs to be. Sorry for the horrible picture, and I know its off center, but you get the general idea where the shifter currently wants to come through the floor.  Here is a picture of the firewall clearance. The motor sits about 2 inches forward of the firewall. If I can find a way to move it back for better shifter clearance I will, still a work in progress. 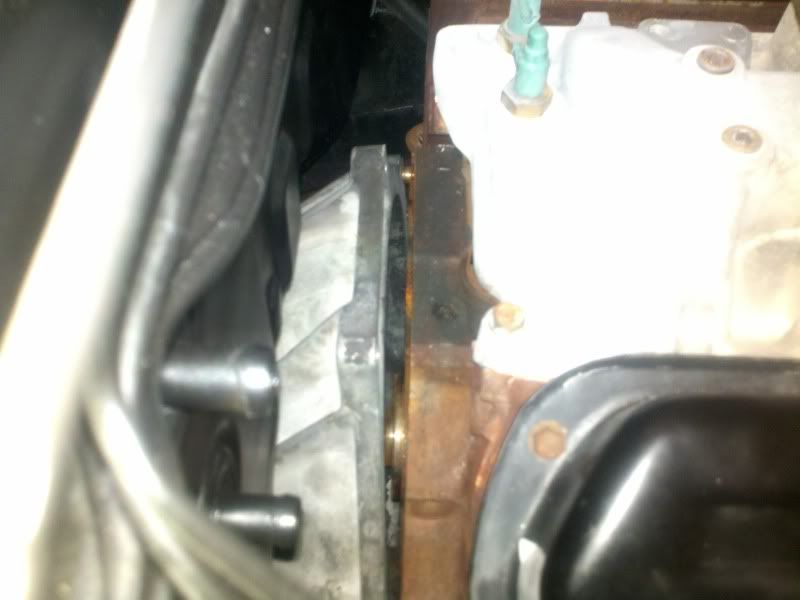 Drivetrain parts were pretty dirty. 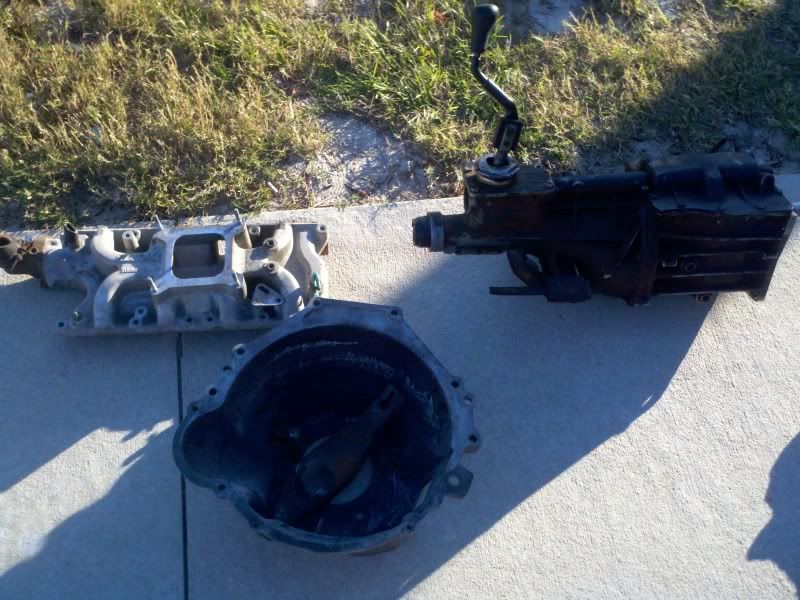 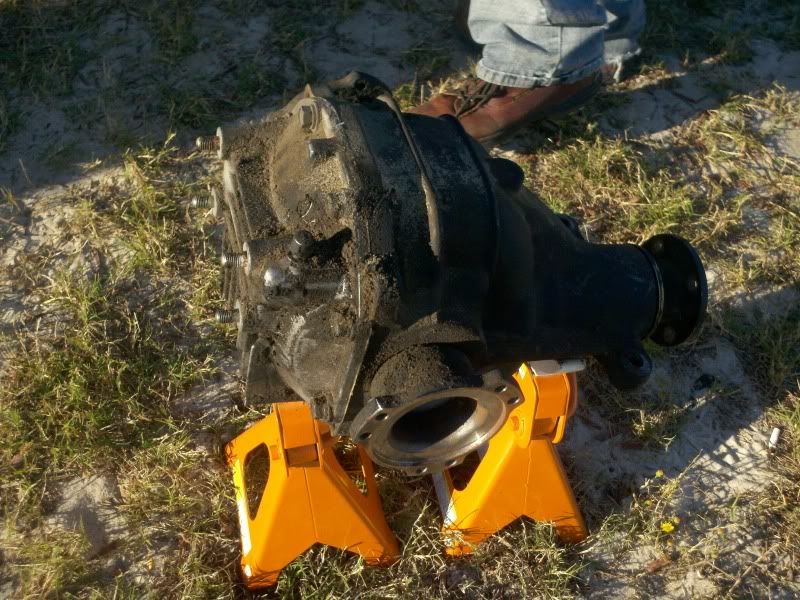 So I took the sand blaster to them and got them prepped for paint. 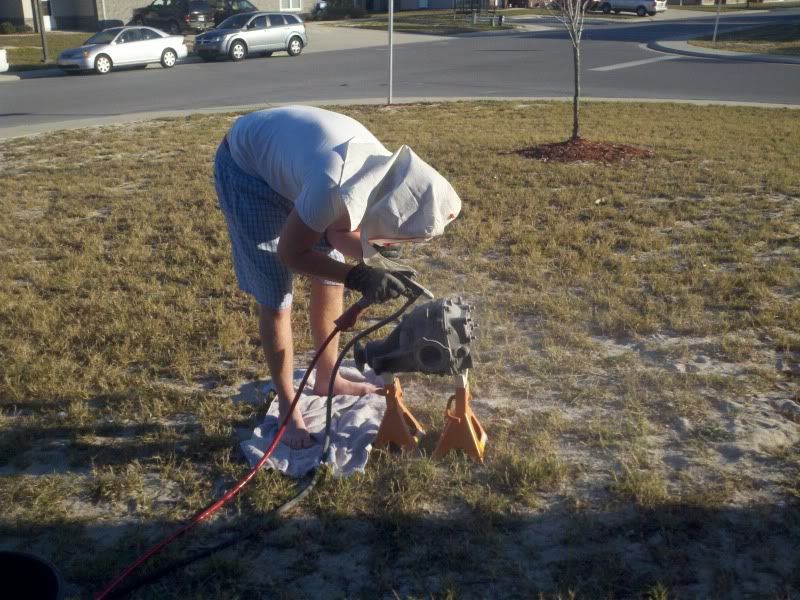 I was pretty busy most of this weekend but I finally got some time today to make some progress. I let a friend borrow my electric grinder so I didnt get to the steering like I wanted to, but I was able to space the motor up like I wanted, which made a HUGE difference. Also was able to move the motor back in the engine bay today. I wanted to do that so I would have more clearance for a radiator and get closer to lining up the shifter with the chassis. Spacing the motor up was pretty easy. Just used longer bolts for the motor mounts to the block, then re-inforced the bolt with a steel sleeve. The leaves were a little short, so I threw two nuts  at the top of the bolt to fill the gap. Also, I was able to tighten the top nut against the block for a little more peace of mind. Going to eventually weld up some support brackets but thats not coming til later. at the top of the bolt to fill the gap. Also, I was able to tighten the top nut against the block for a little more peace of mind. Going to eventually weld up some support brackets but thats not coming til later.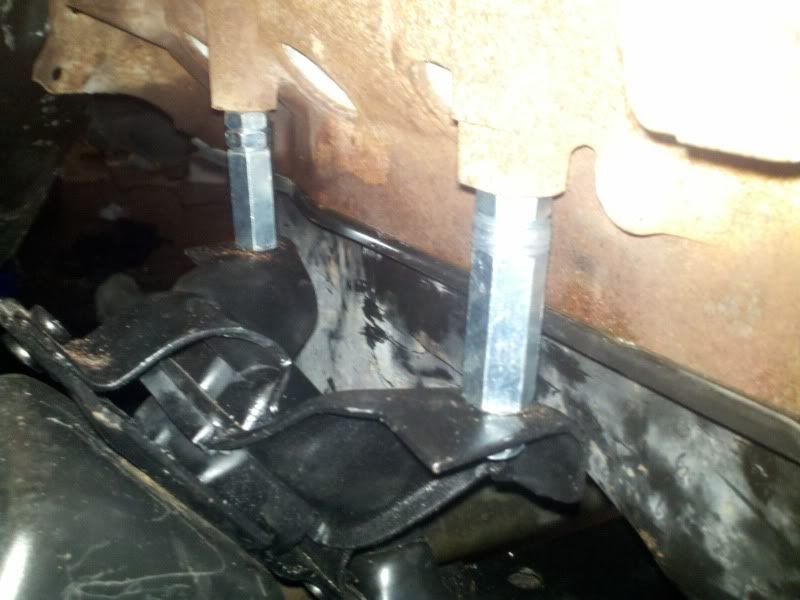 Got a couple of really good benefits out of raising the motor. With a little persuading with a hammer on the oil pan, I was able to get the stock oil pan to clear the crossmember. The only place the pan was hitting was on the hard lines on the back of the steering rack. Dimpled the pan in a little to clear that, and it fit like a charm. I know its a bad picture, it was really hard to get a good angle. When I have the motor back out again I will take a picture of the pan. 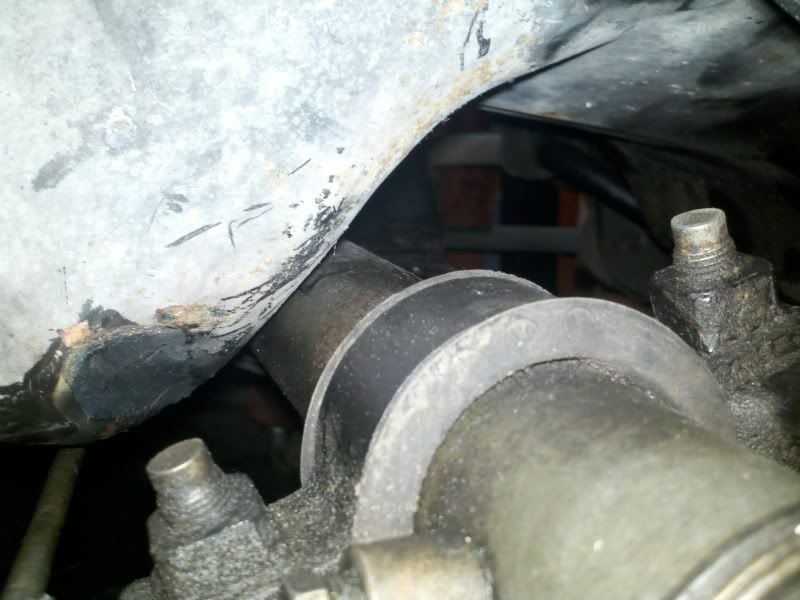 Then after raising the motor I wanted to try to figure out how to get it farther aft in the engine bay. The simplest solution I could come up with was just switching the mounts. Moved the driver side to the passenger and visa versa. This gave me the exact clearance I wanted. I will have to persuade the tranny tunnel with a hammer now that the motor is farther aft and up, but overall it fits much better in the bay. Firewall clearance is now very close. 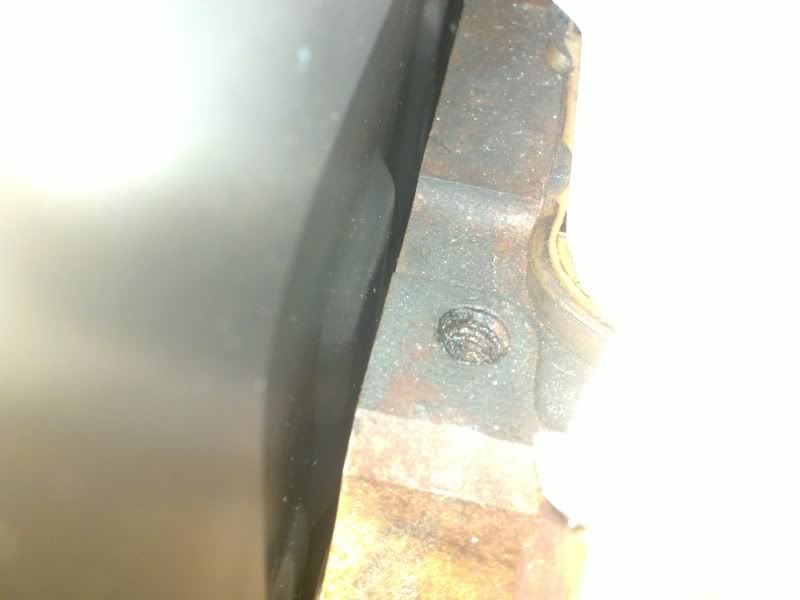 And I am going to have to run the original heater lines through the A/C ports in the firewall. I dont care about air conditioning, but I want to keep the heater. 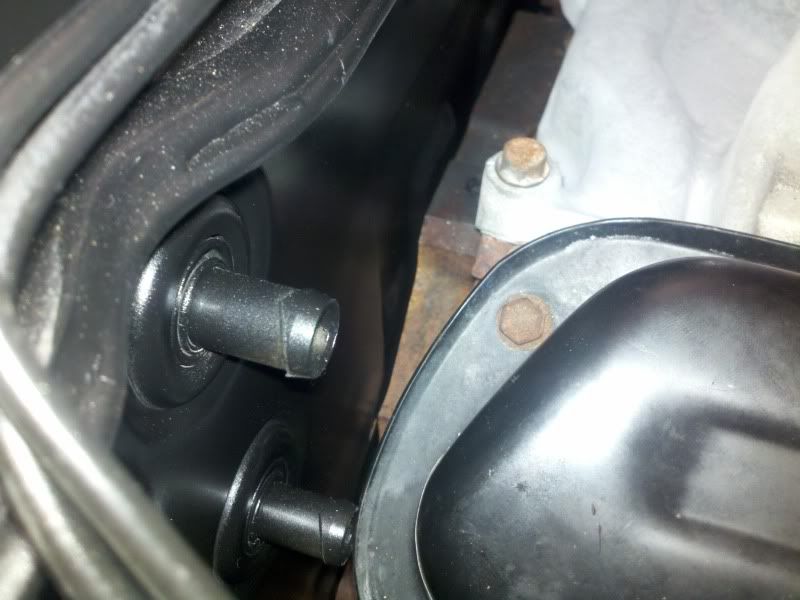 But this frees up A LOT of space near the steering shaft. I did a quick test fit and I think the OEM manifold will fit now without modifying the steering which is huge. If the OEM manifold fits, it also means that most shorty style headers will fit. I am going to modify a little more and try to get some long tubes in there. 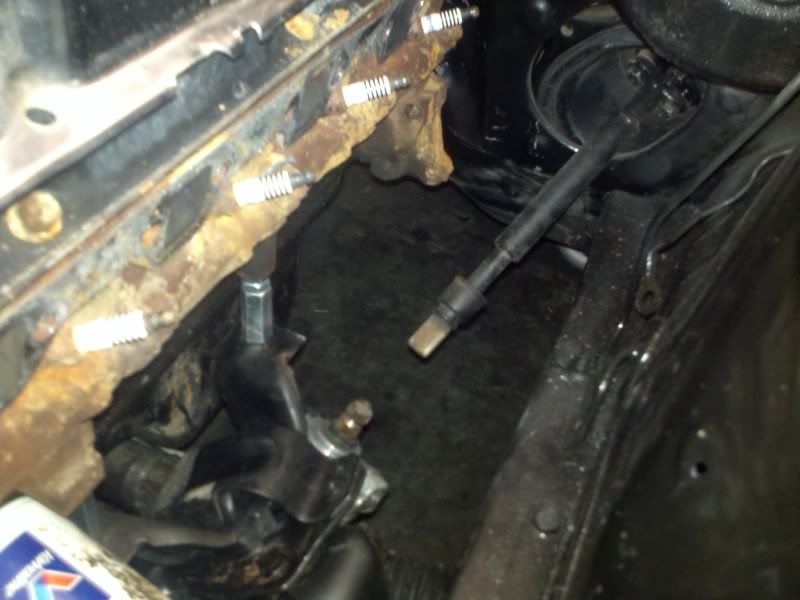 Here is a picture of clearance in the front. I dont have a radiator yet, but I put the water pump pulley on and set a shroud with slim fans in place just to get a general idea. 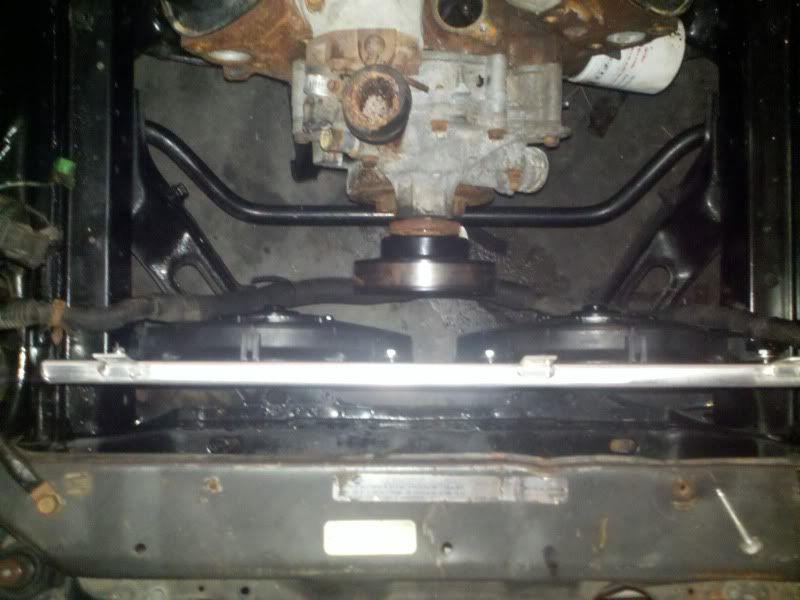 Here is a picture of how the motor now sits in the bay, and this will be its final spot. I am going to have an issue with hood clearance, but I plan on the spacing the back of the hood to clear the air cleaner. 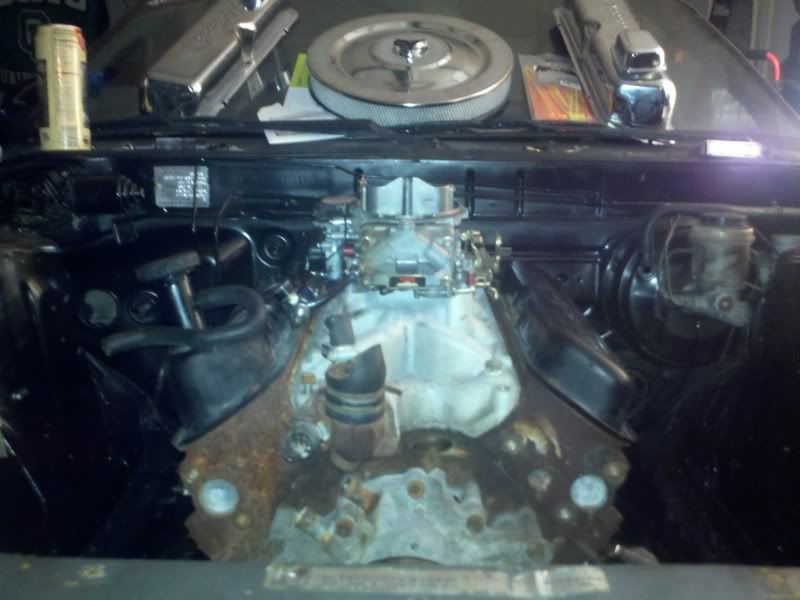 Slowed down a lot on the car and started taking my time with a lot of details. That along with my wife giving birth to our first baby stig, project has been taking a lot longer than I originally anticipated, my apologies for the long overdue update. The two studs I had as an extension were not going to work. There was no way they were going to be strong enough. I was able to pick up some aluminum from work, hit them on the drill press and make perfect motor mount extensions. The driver side had to be notched a bit to fit around the block, but other than that they were a perfect bolt up. 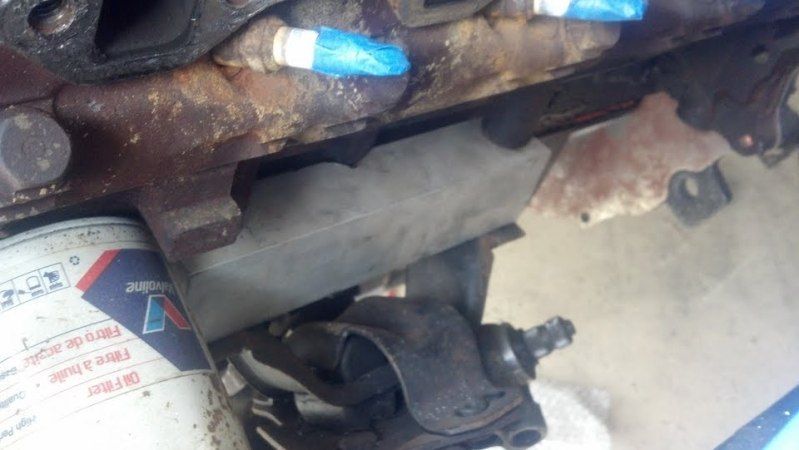 I picked up some aftermarket shorty headers and got the steering figured out fairly easily. If for some reason I wanted to change the headers later on, I wanted to modify the steering instead of notching the header. You can pick up double U joints from flaming river or jegs, but I couldnt justify spending $150+ on one when I could make it myself. I just took 2 stock steering single U joints, put a socket between them and welded them together. Yes, its not as pretty as buying an aftermarket one, but it was free. The catch with a double U joint, is you MUST brace the steering shaft to prevent it from binding over itself. You can buy the steering shaft braces from jegs for about 30 bucks, then just make a bracket and weld it to the frame. I dont have any pics of this right now, but it was very simple and relatively easy to do. The hardest part was welding the steering shaft perfectly straight after shortening it. Also got the ignition setup complete. I decided to run an MSD ignition box and blaster coil. I mostly wanted this setup for a rev limiter. I knew one day I would get a little hyper and blow the mullet madness sky high, so I wanted something to prevent that. After I had most of the motor figured out, it was time to start on the interior. Took out all the panels/wiring/sound deadening. 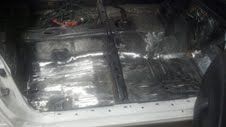 Starting fitting up the cage and get it welded in. 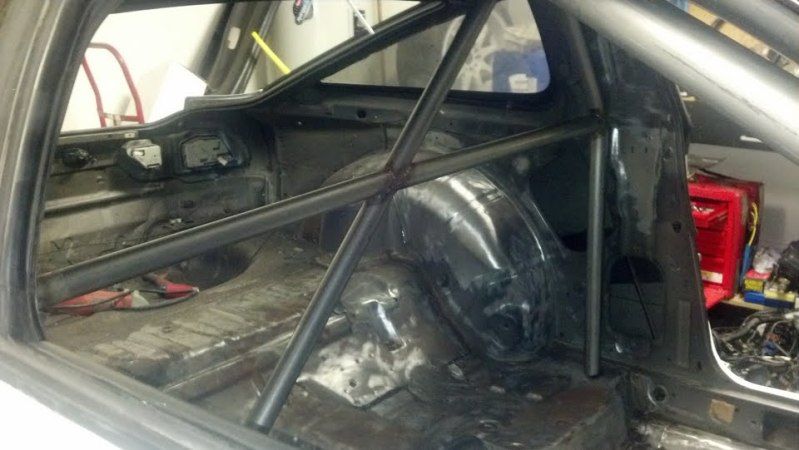 Finally picked up some interior parts. F1 spec buckets (decent seats and got them for a crazy price) G Force 6 pt camlock harnesses (5 year FIA legal), OMP wheel w/ nrg hub assembly, Jegs digital gauge cluster and ARC 8000d switch panel 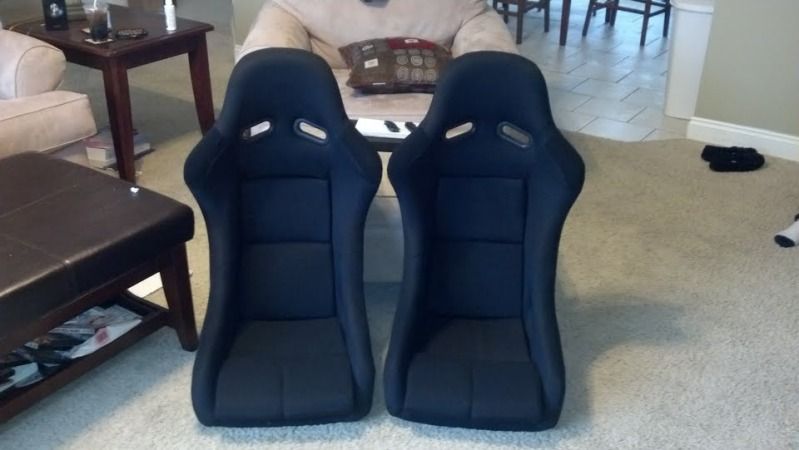 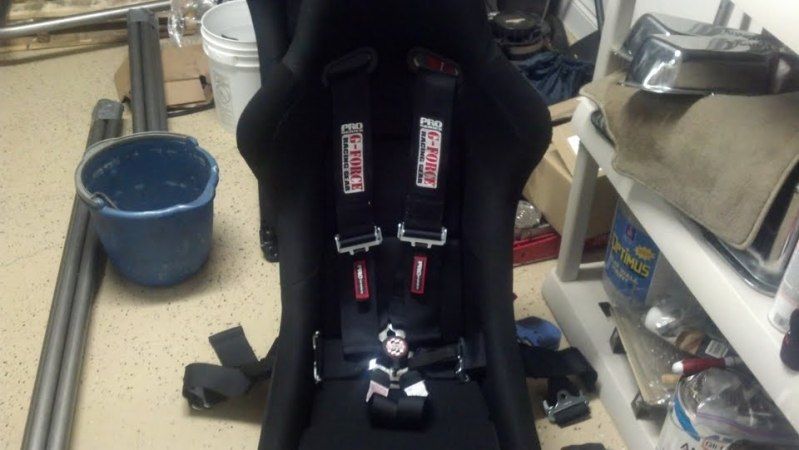 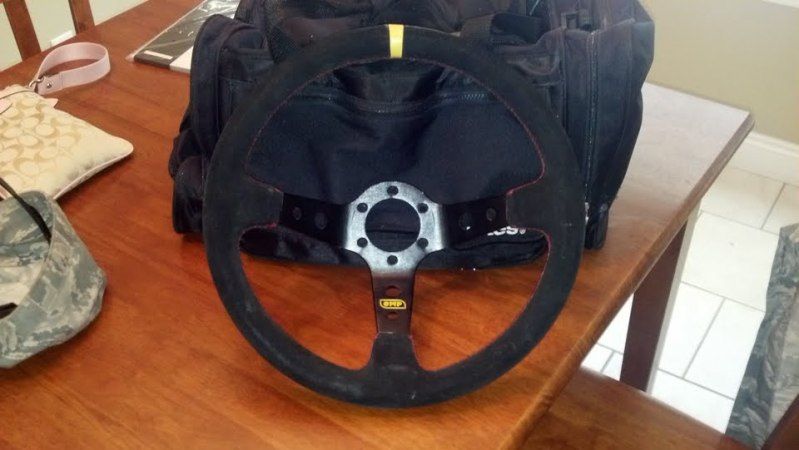 There is a tinted plexi panel to go over the cluster 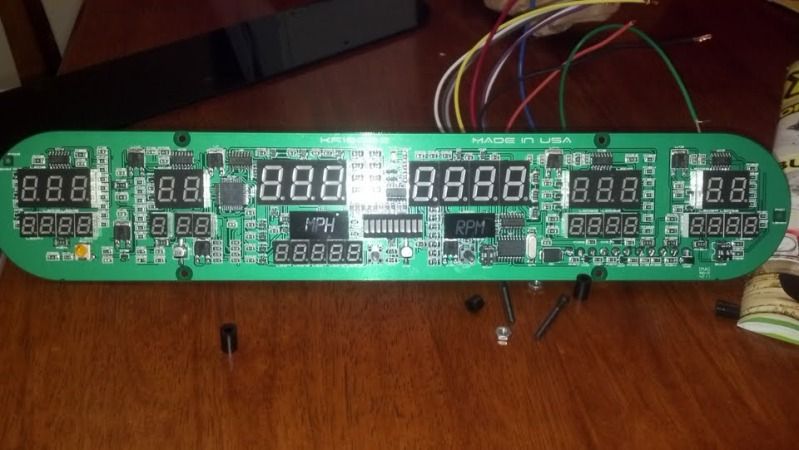 Got the full custom interior harness made and checked everything for power. The ARC 8000D is stupid simple to install. I have a battery kill switch setup inline to the relay box, then everything is literally plug up and go. My dash also looked like complete garbage, so I decided to wrap it with some purple zebra print fabric. Also in the process of carbon wrapping the swtich panel and gauge panel. Not too happy with how this first turned out, so I am going to go back an redo it. 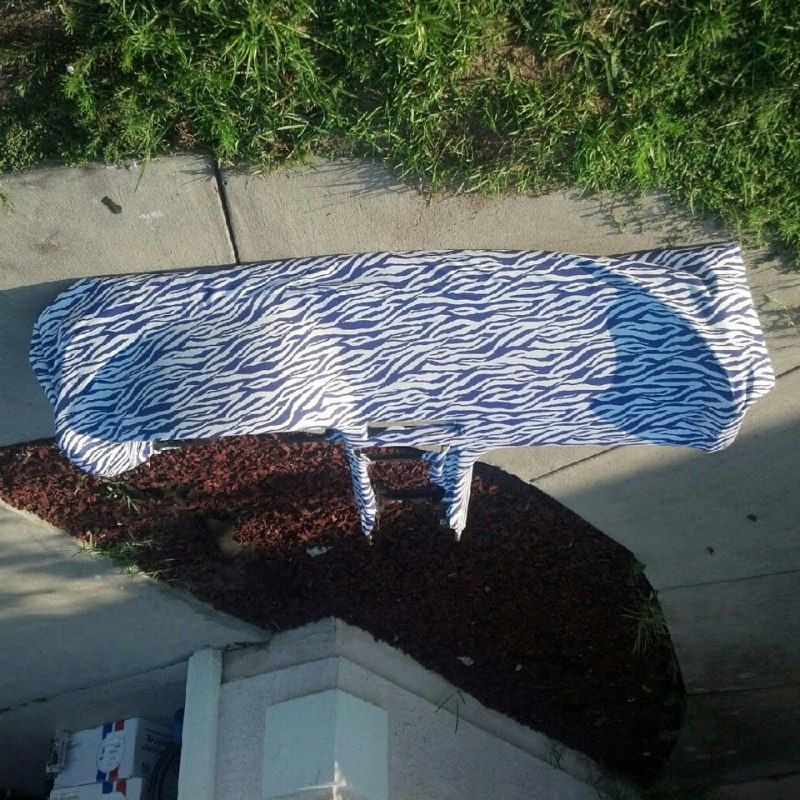 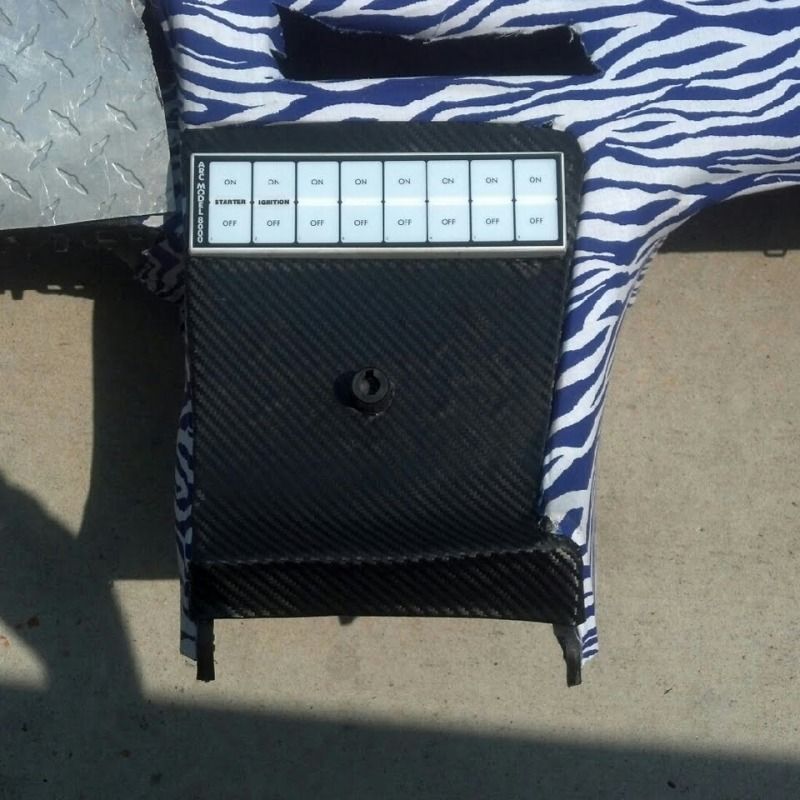 Then time to paint the interior before everything starts going back in. Still waiting on paint to dry, florida humidity blows. 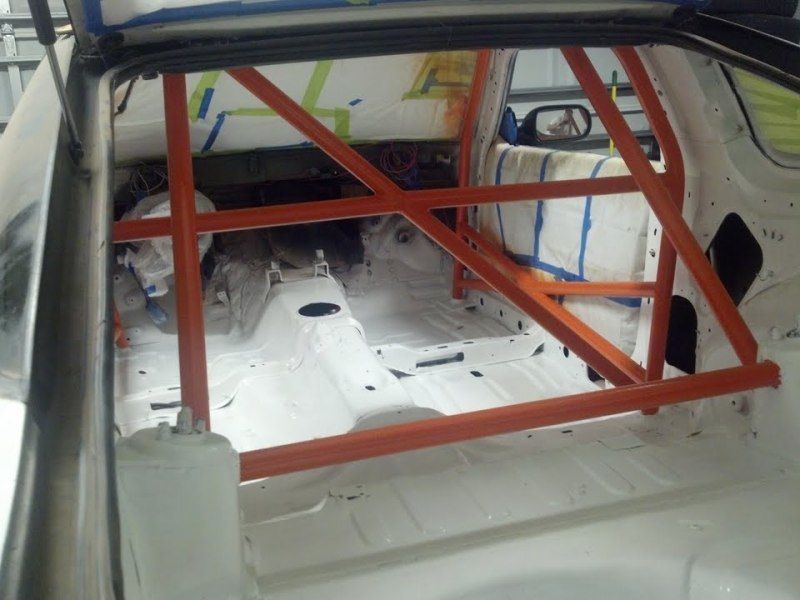 Went on a spree of paint that day and decided to clean up the motor as well. I dont think it looks too bad for a polished terd.  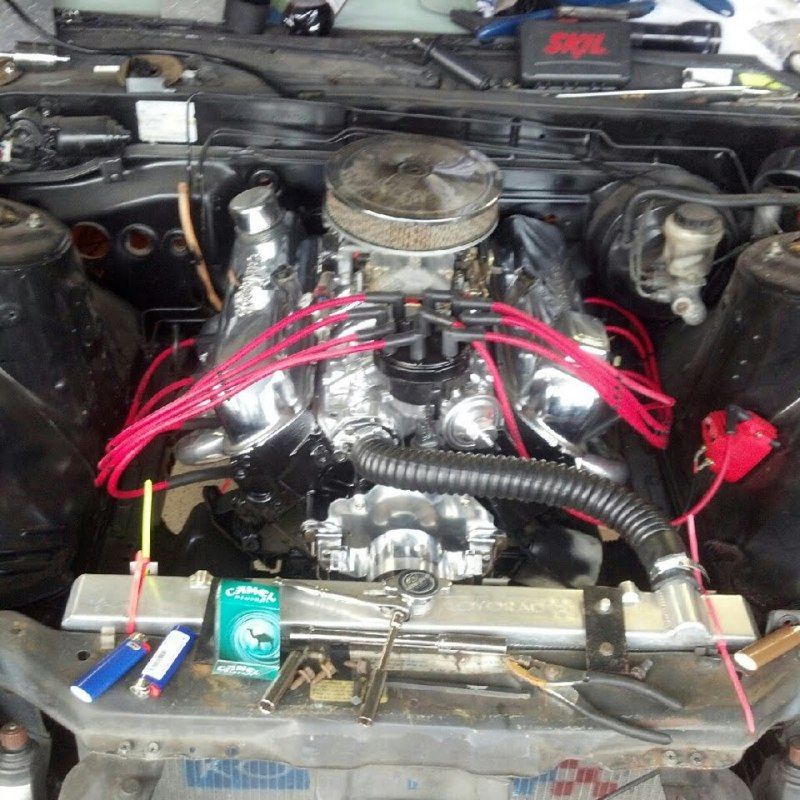 Getting there slowly but surely...more updates soon Honestly I completely forgot I had started this thread. The car is finished, and I am currently trying to sell it. I wish I could keep it after all the work put into it, but I got orders and just moved to alaska, where this car would be completely pointless. I will post up the few pictures I have, and if you have any questions about the build, just send me a pm and I will try to help you out. The car is currently in panama city if anyone is interested in buy it! Transmission Mount Exhaust Routing- Dual 2.5" to a single 3" 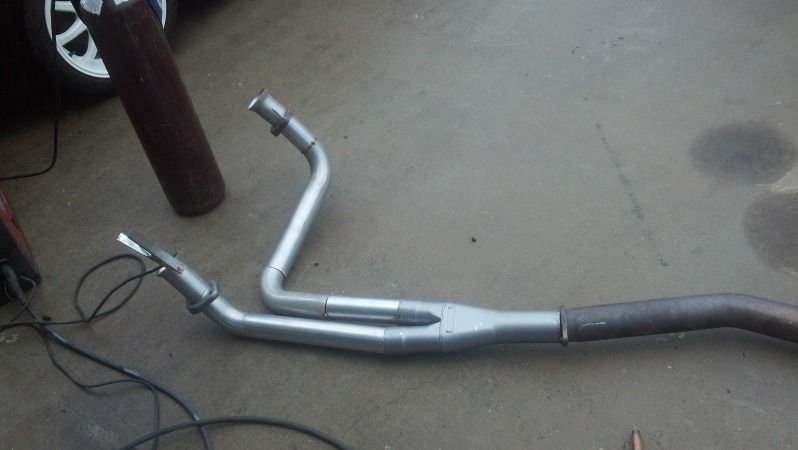 Steering Mod. Not beautiful, but effective and VERY cheap 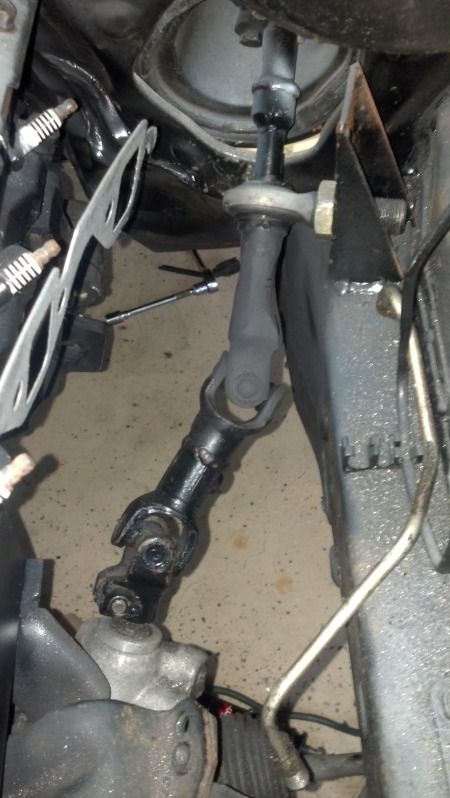 Pretty Flush with a little camber 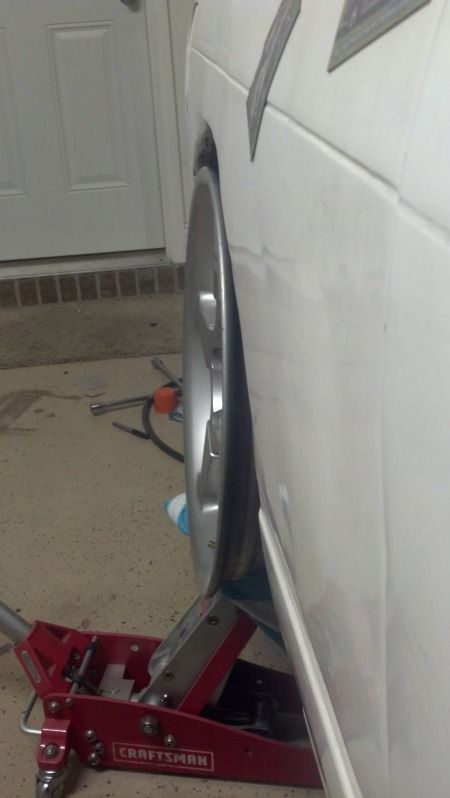 Crappy Picture of the digital dash  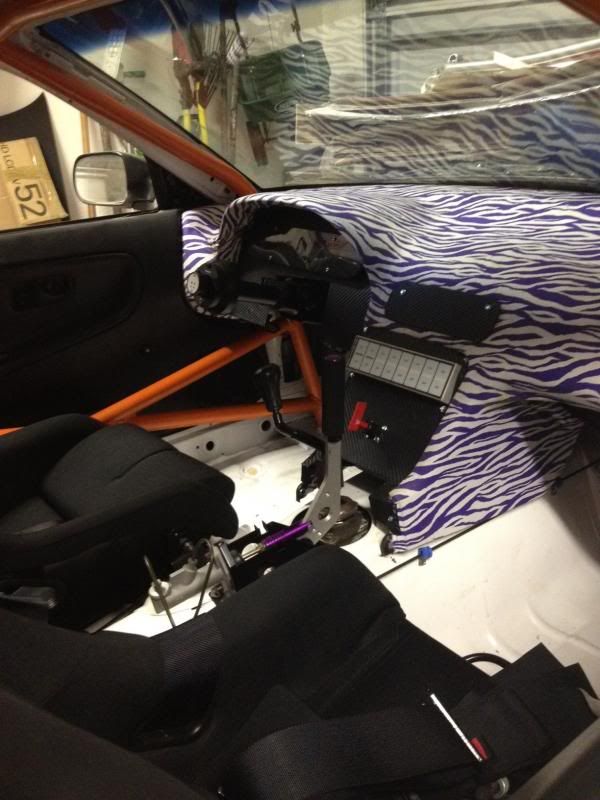 All said and done it led to this: 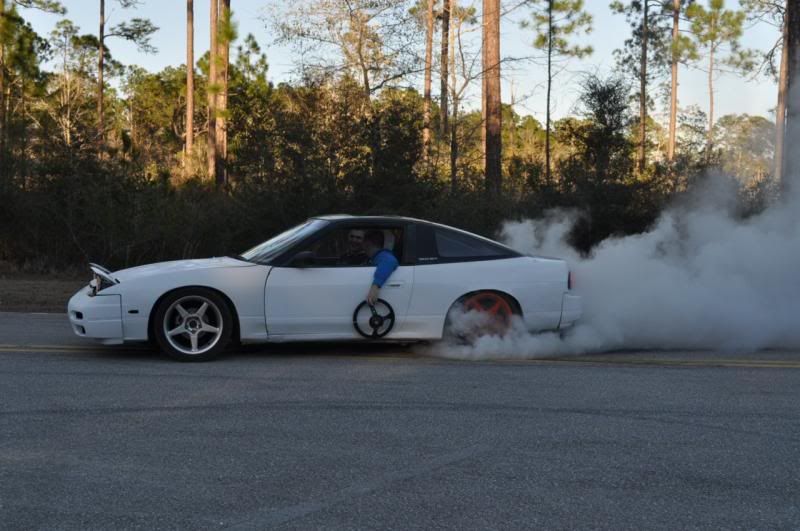 Last edited by broke 20; 06-18-2013 at 12:39 AM.. Reason: updating |

|

|
| Sponsored Links |
| Bookmarks |
|
|


 Threaded Mode