|
|||||||
| Chat General Discussion About The Nissan 240SX and Nissan Z Cars |
 |
|
|
Thread Tools | Display Modes |
 06-24-2008, 10:46 PM
|
#152 | ||
|
Zilvia Junkie
 
Join Date: Jul 2007
Location: Cincinnati, Ohio
Age: 39
Posts: 544
Trader Rating: (3)
  Feedback Score: 3 reviews
|
Quote:
Quote:
__________________
Now metal fabricating, welding and powder coating. PM me with your needs! 
|
||

|
|
06-26-2008, 10:20 PM
|
#155 |
|
Zilvia Junkie
Join Date: Jul 2007
Location: Cincinnati, Ohio
Age: 39
Posts: 544
Trader Rating: (3)
Feedback Score: 3 reviews
|
A test of my patience.....
Well this next mod definitely tested my patience. I needed to modify the door lock to match the ignition. I really didnt need to but I wanted to, and I can, lol. Well first thing first was to remove the door handle from the door. I got the two bolts holding the handle to the door removed. I thought thats all I would have to do. After coming up with no way to get the lock off that was holding it, being pressed on time I got pissed pulled out my trusty BFH (Big fucking hammer, for those of you that dont know) and a flat tip screw driver and beat the shit out of the lock till it broke out and I was left with the door handle that looked a little something like this from the back:
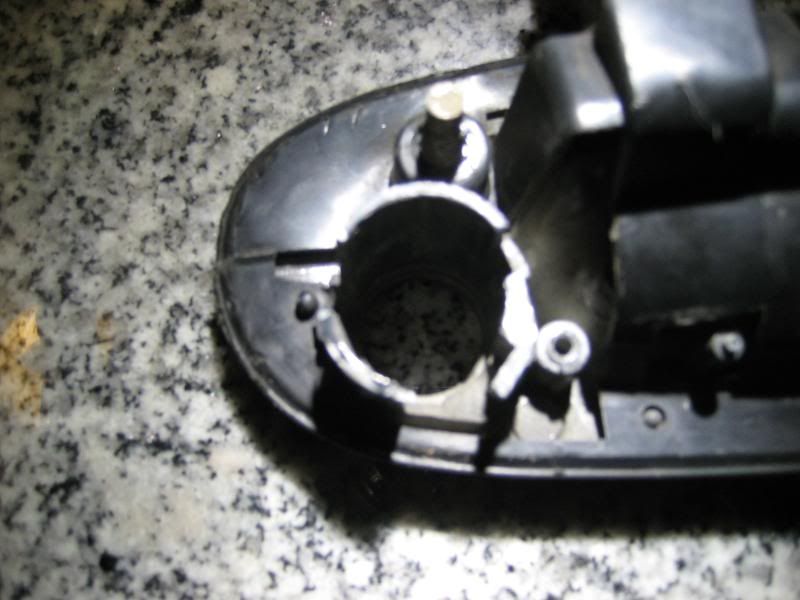 So now the task is to combine this 240sx door handle with this 350z lock: 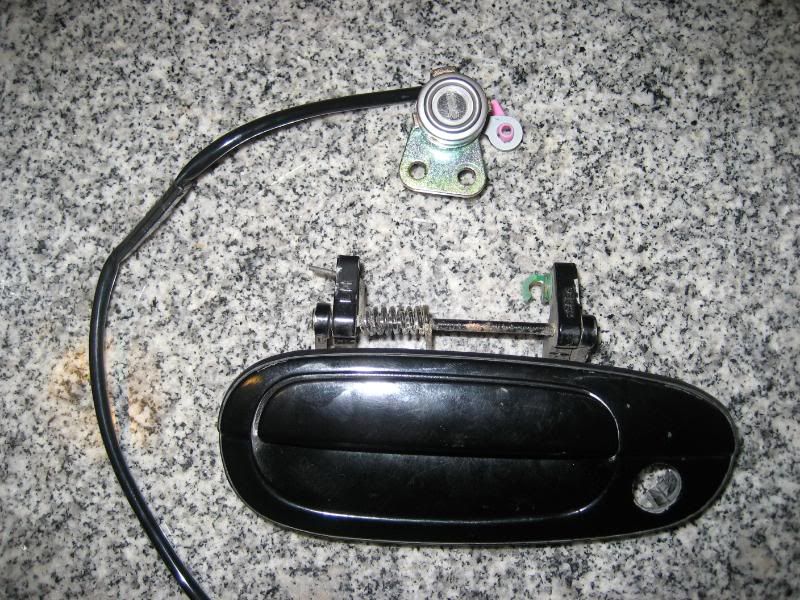 So I devised a plan and got out my dremel and went to work. I thought a diamond cutting blade would eat right through this metal but hell no it didnt. It took me FOREVER to get through this metal to cut out the bulk of it. I then got out my grinder and ate up as much metal as I could. Even that took forever. I even tried the grinding stone attachment for the dremel, still took forever to even make a dent. Suprisingly the most effective tool for this task was the mini drum sander attachment for the dremel which also happened to be the last thing I tried. Go figure. I underestimated this little attachment, luckily I had plenty of replacement sand paper covers for it, because I went through quite alot of them getting the metal down to this:  Test fitted the lock to see if my plan had panned out and I was happy to find out it did: 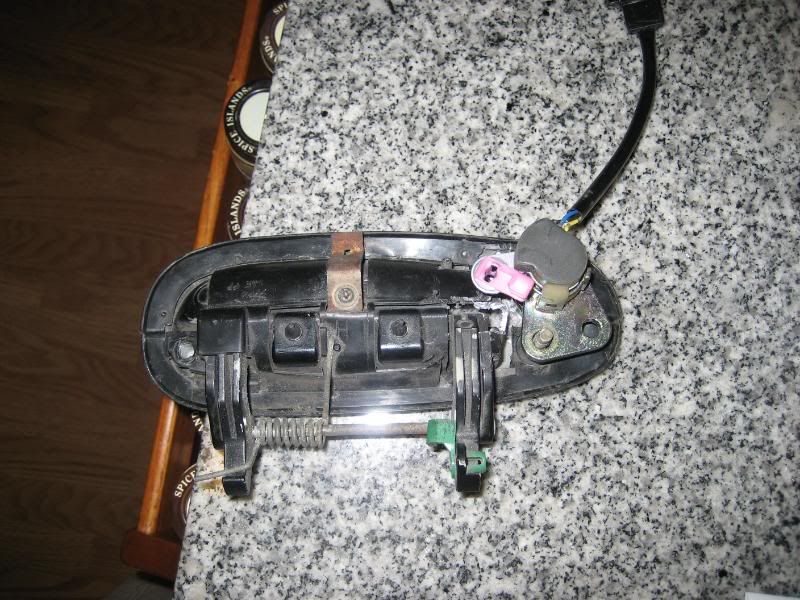 Did some additional grounding on the lock hole just a bit more to allow the 350z lock to fit in the slot better and cut out a section of the handle for proper clearance of the key swipe. If you dont get the idea, I will explain. As you can see the 350z lock mounting hole lines up with the stud that takes the nut that mounts the handle to the body. The idea is to break the stud out, put a longer one in so the lock mount can go between the door mounting hole and the nut that tightens it to the door. For stability I am going to add another stud through the other mounting hole, I will either have the stud welded to the back of the handle or I will drill one though the front of the handle which shouldnt be a big deal to cover up since I am shaving that body line that it will land on. At the end of it all the handle turned out a little something like this: 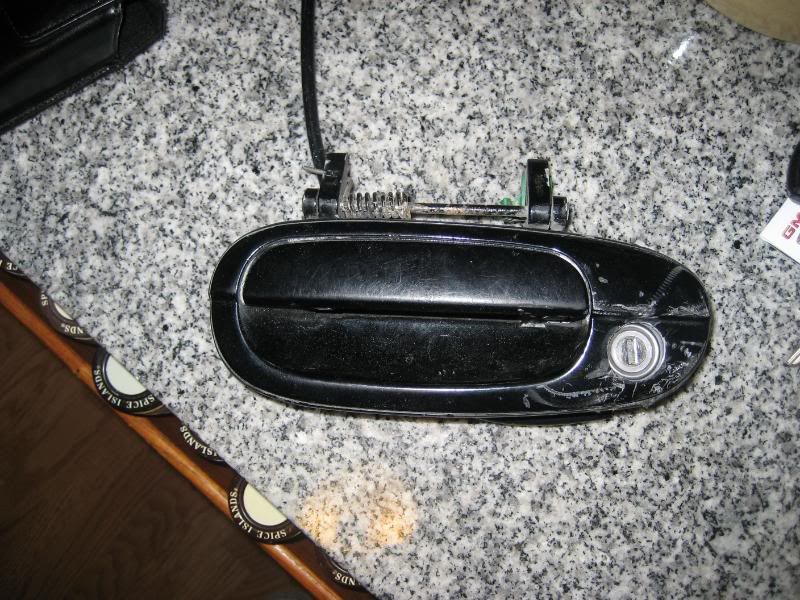 (Ignore the scratched up look on the handle, it got so hot the paint melted during the grinding process. No worries it will get sandblasted clean) Passenger side lock will get shaved for cleanliness. Bet your keys dont look like this  : :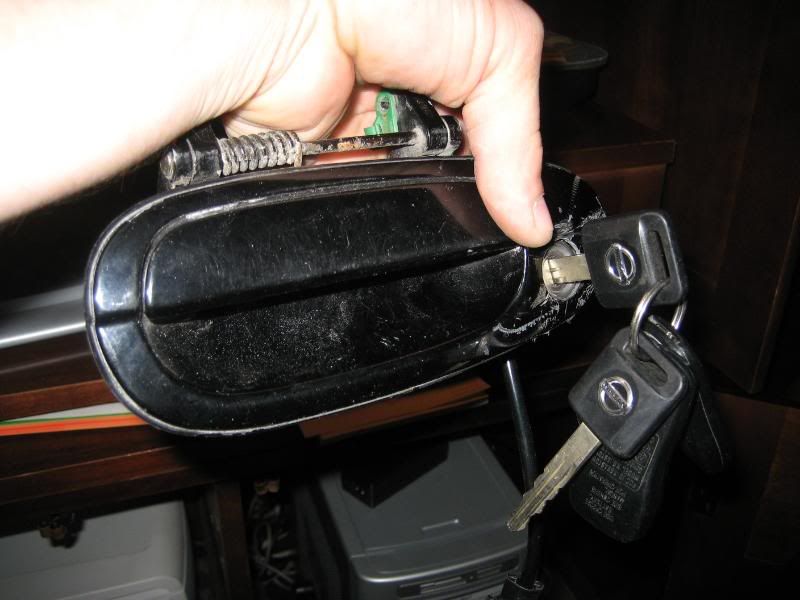
__________________
Now metal fabricating, welding and powder coating. PM me with your needs!
|
|
|
|
06-30-2008, 05:54 PM
|
#159 | |
|
Zilvia Junkie
Join Date: Jul 2007
Location: Cincinnati, Ohio
Age: 39
Posts: 544
Trader Rating: (3)
Feedback Score: 3 reviews
|
Quote:
__________________
Now metal fabricating, welding and powder coating. PM me with your needs!
|
|
|
|
|
06-30-2008, 06:10 PM
|
#160 |
|
Post Whore!
 
Join Date: May 2006
Location: San Diego, CA
Posts: 9,135
Trader Rating: (19)
Feedback Score: 19 reviews
 |
Excellent timing! I just got my Solex 'barrel style' locks in, and need to figure out a way to get the lock in the door handle. Good pics
 I believe I'll be grinding out most of the metal, like you did, and JB Welding the lock in there. Nice to see what I'm up against.
__________________
 Jordan Innovations has a new web site! www.JordanInnovations.com -- All your favorite FD Pro Drifters love it, trust me -- www.JordanInnovations.com |
|
|
|
07-10-2008, 10:23 PM
|
#163 |
|
Zilvia Junkie
Join Date: Jul 2007
Location: Cincinnati, Ohio
Age: 39
Posts: 544
Trader Rating: (3)
Feedback Score: 3 reviews
|
Ok thought I would put up an update, its not much but its something. Finished my dash, one dilema I had was since I cut out the hump where the old cluster went the drivers side upper vent didnt lie flat against the dash anymore because the vent overlays where the hump starts to form. So what to do? I thought maybe I could heat it up and form it but I was afraid it wouldnt form right and melt/bubble up so I got to thinkin and I came up with this:
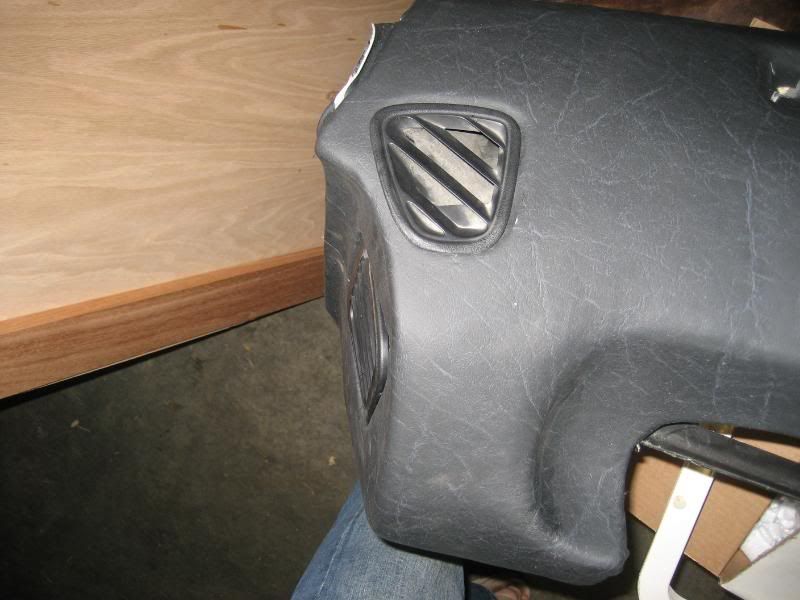 I used a passenger side vent off a rhd S14, I figured it had to be the same as the passenger side vent on lhd S14s except mirrored and it was. So with that I put all the duct work under the dash back together. I was pleased to see that everything went right back to where it normally does stock: Passenger underside:  And the area I was worried about not going back together the same, the Driver underside:  As a whole: 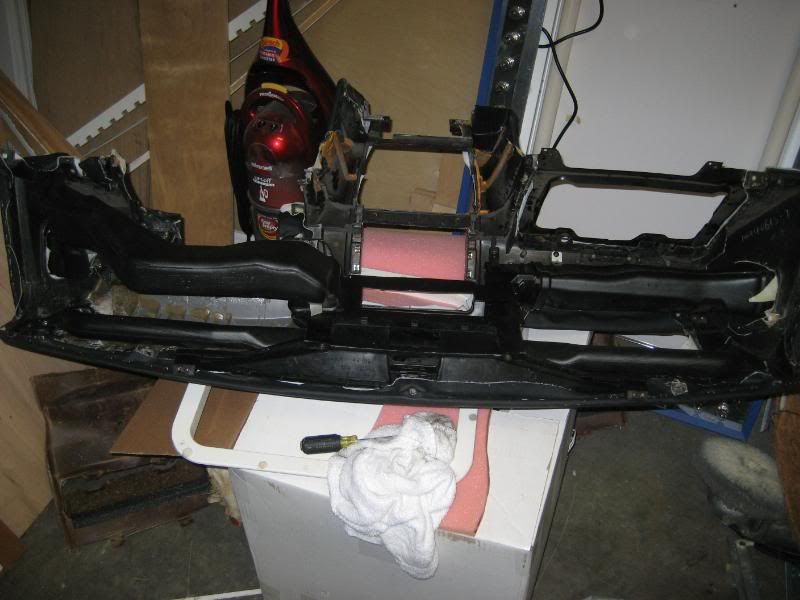 The only thing that didnt fit right is the duct end that feeds the drivers side upper vent since it wasnt the orginal vent. I heated it up with a torch and worked the plastic to take the new vent. It worked, its not pretty and I heated it up a little too much, but it works and you will never see it:  And the finished product: 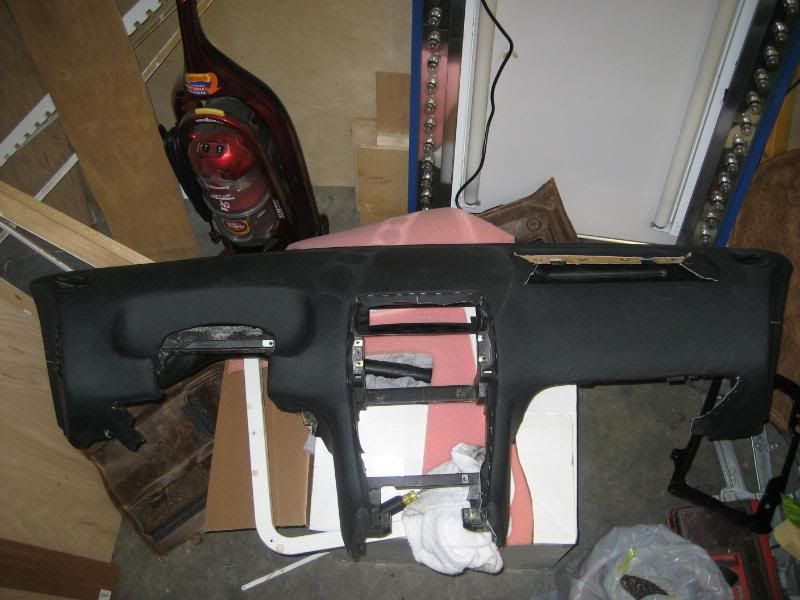
__________________
Now metal fabricating, welding and powder coating. PM me with your needs!
|
|
|
|
07-15-2008, 11:46 AM
|
#169 | |
|
Future Moderator

Join Date: Jun 2007
Location: Places
Age: 36
Posts: 12,903
Trader Rating: (17)
Feedback Score: 17 reviews
  |
^ Likewise, this is a build I look forward to. I think it should be called a 250zx
__________________
Quote:
|
|
|
|
|
08-01-2008, 06:53 PM
|
#170 |
|
Zilvia Junkie
Join Date: Jul 2007
Location: Cincinnati, Ohio
Age: 39
Posts: 544
Trader Rating: (3)
Feedback Score: 3 reviews
|
Ok ok! Here is an update, keeping it real with the 350z theme, it was time to do the window switches. I got home from work today and I was excited to find my 350z trim pieces came in.
Here are the window trim pieces side by side, brand new S14 trim pieces (had to buy new ones because finding ones where the screw hole in the handle is in one piece is damn near impossible to find used) on the left, used painted blue 350z trim pieces on the right: [IMG] 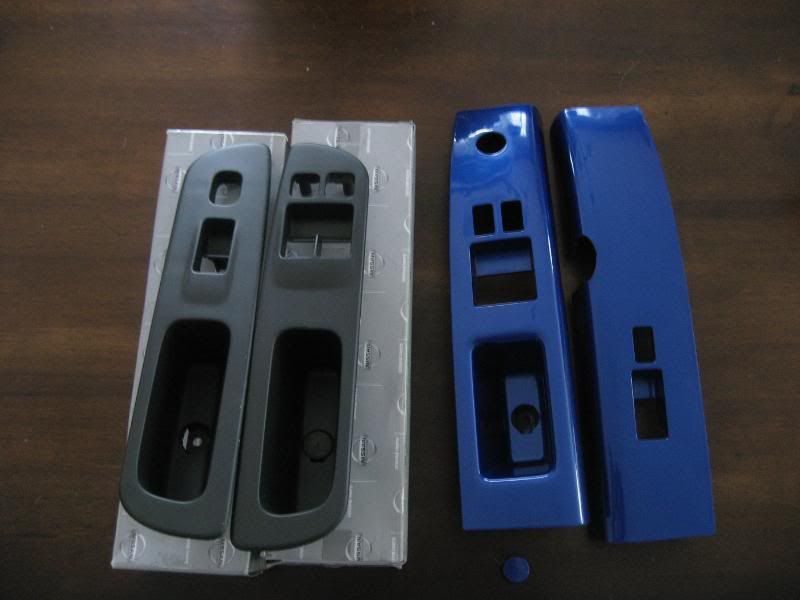 [/IMG] [/IMG]First things first, get the blue paint off, did this using aircraft stripper, dont get this chit on your skin it burns!: 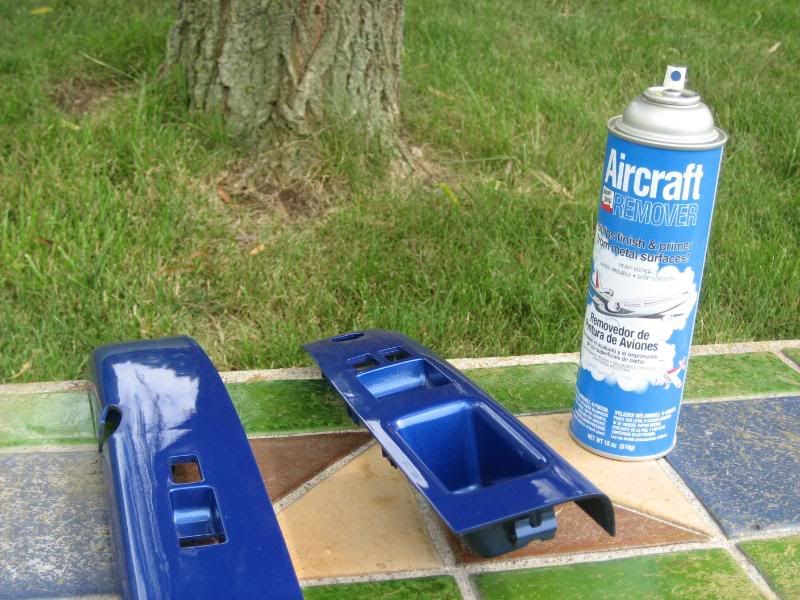 Spray it on: 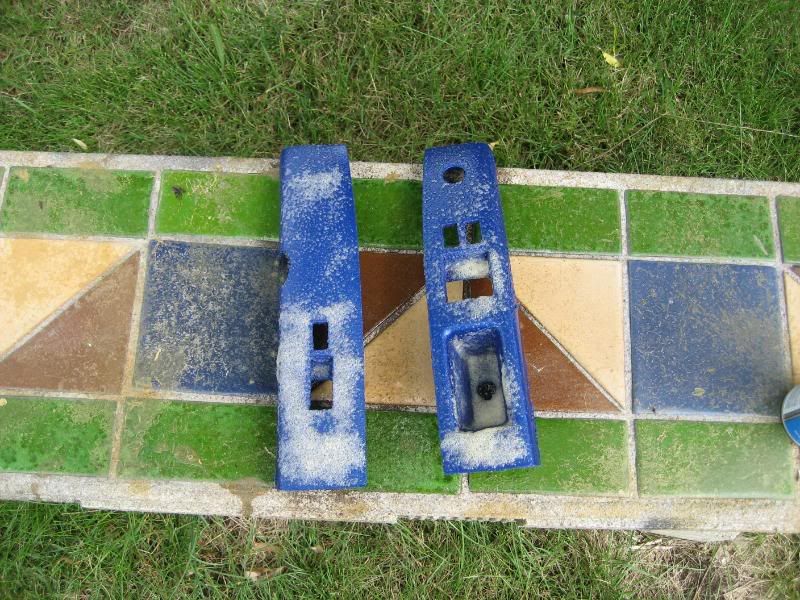 Let it sit for a minute till it starts peeling up: 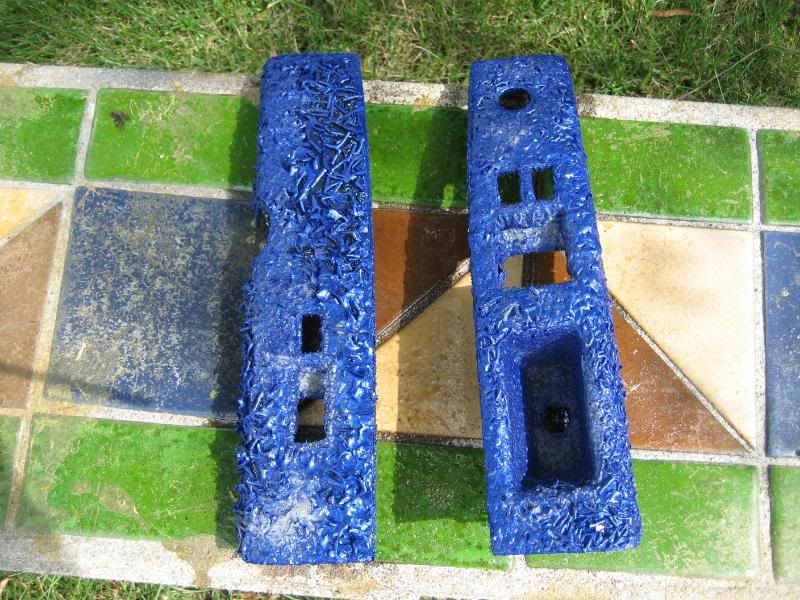 Wash it off, and the result: 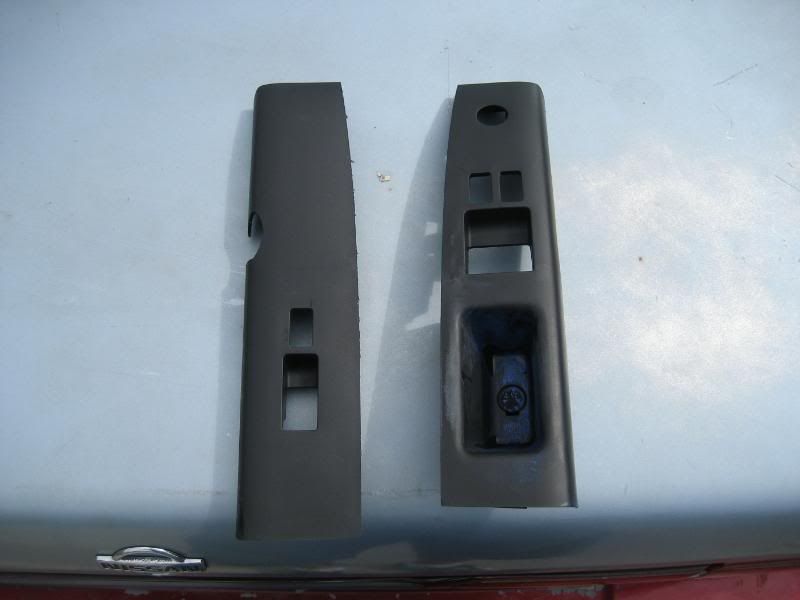 Now to cross the two I have to cut out the stock cut outs in the S14 switch trim and replace them with the 350z cut outs, using my handy dremel and a diamond cutting blade all the while being careful to retain the stock mounting points for the new window switches: 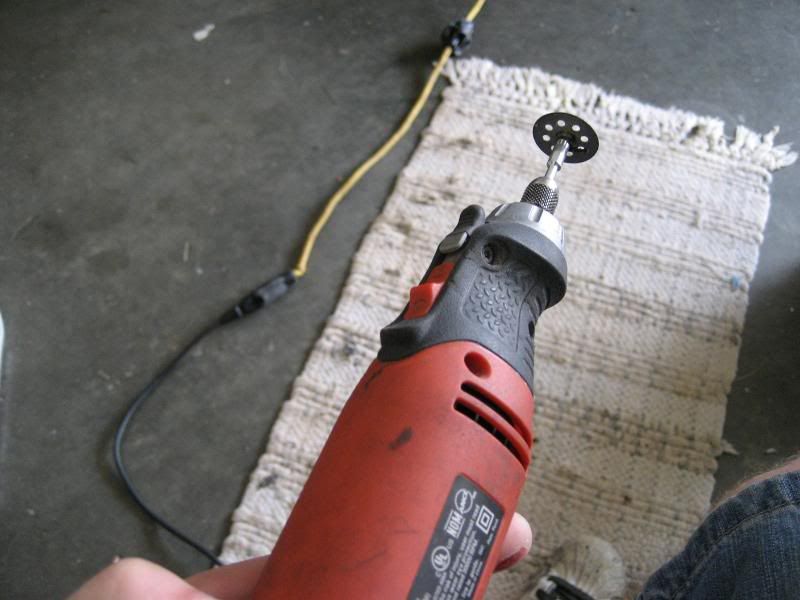 After some cutting: 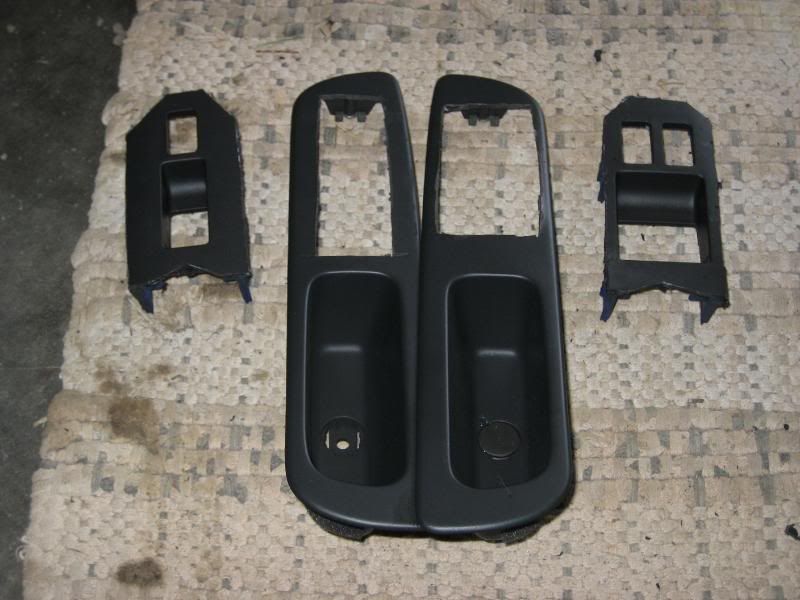 Whats left over after the mayhem: 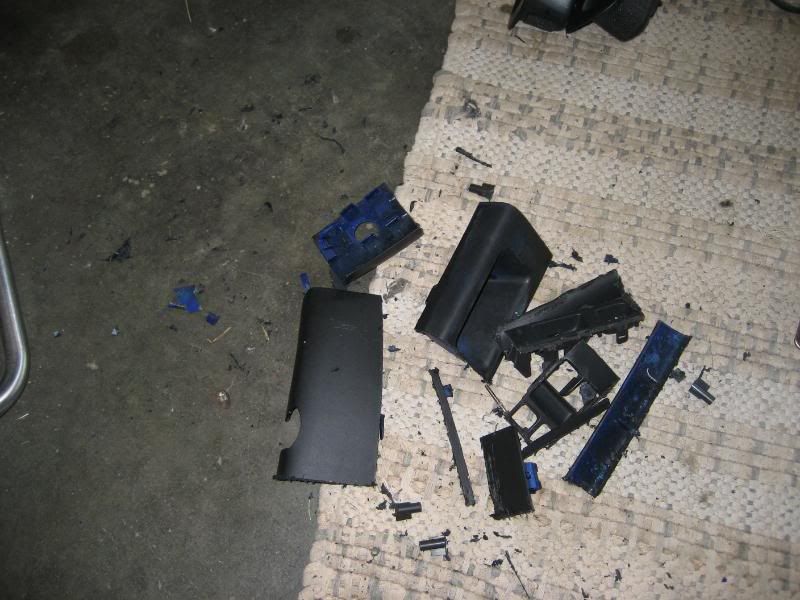 Got out my new favorite glue, gorilla glue fast dry: 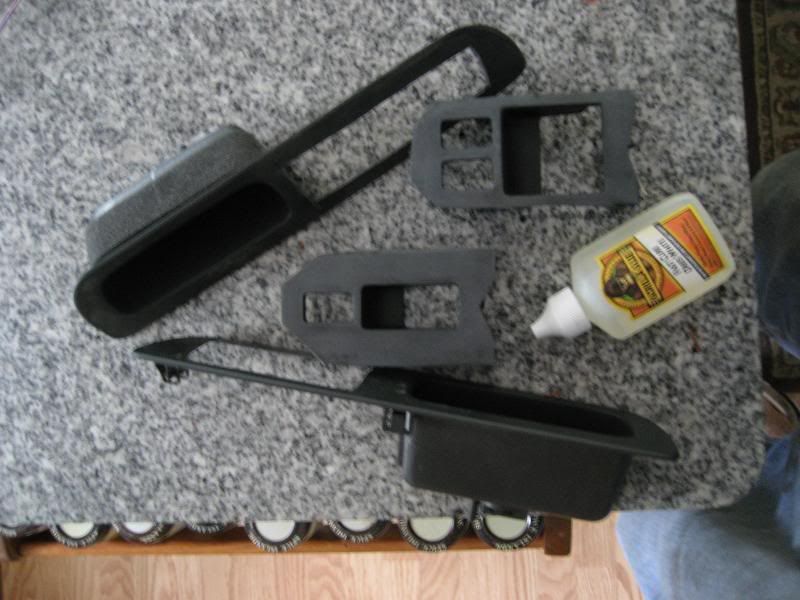 Glued the new pieces in place, clamped them with some vice grips to let dry: 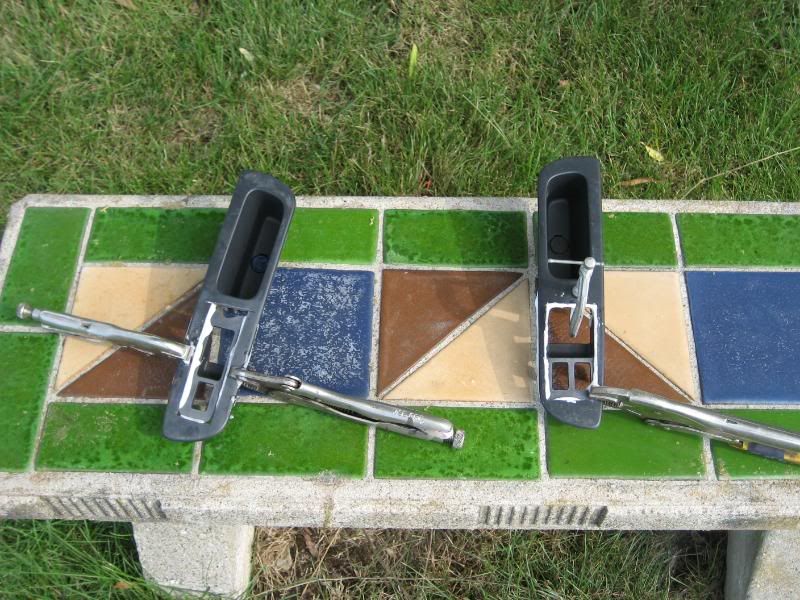 After drying: 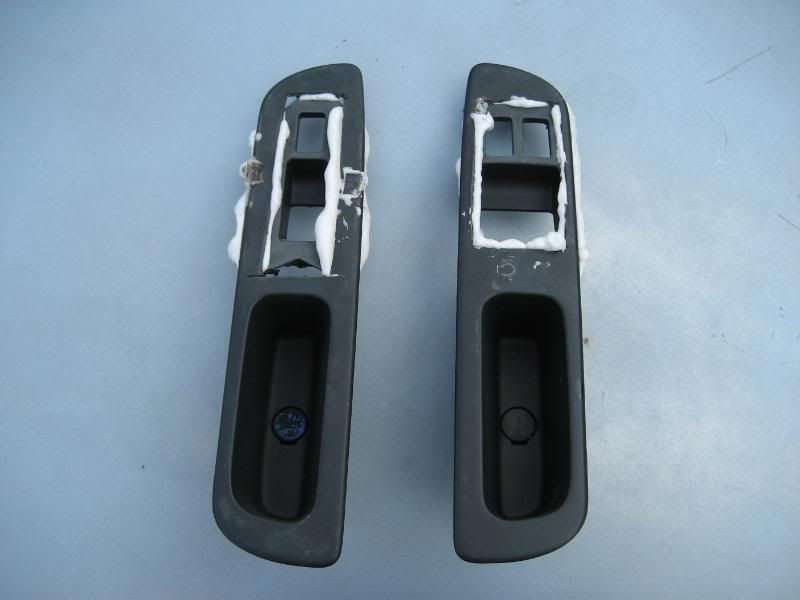 Excess dried glue trimmed away: 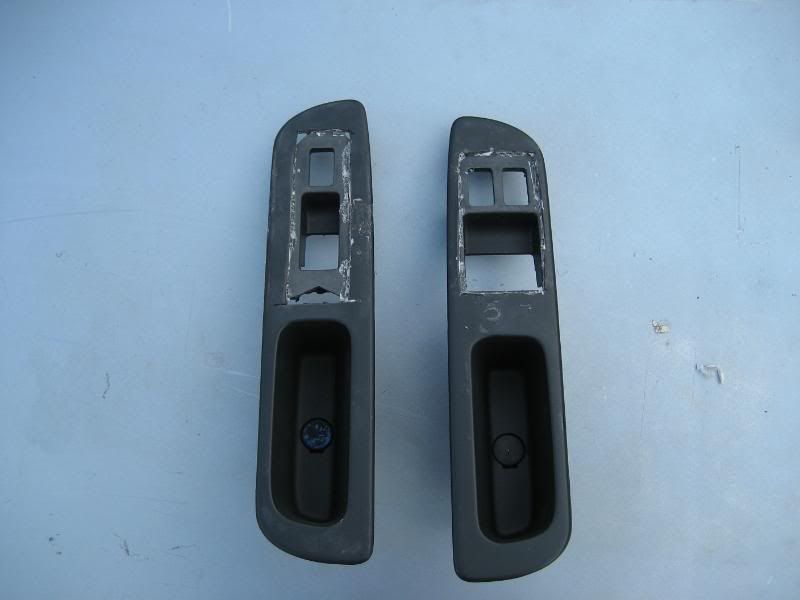 Got out the bondo and the sandpaper and went to work smoothing them together and the result: 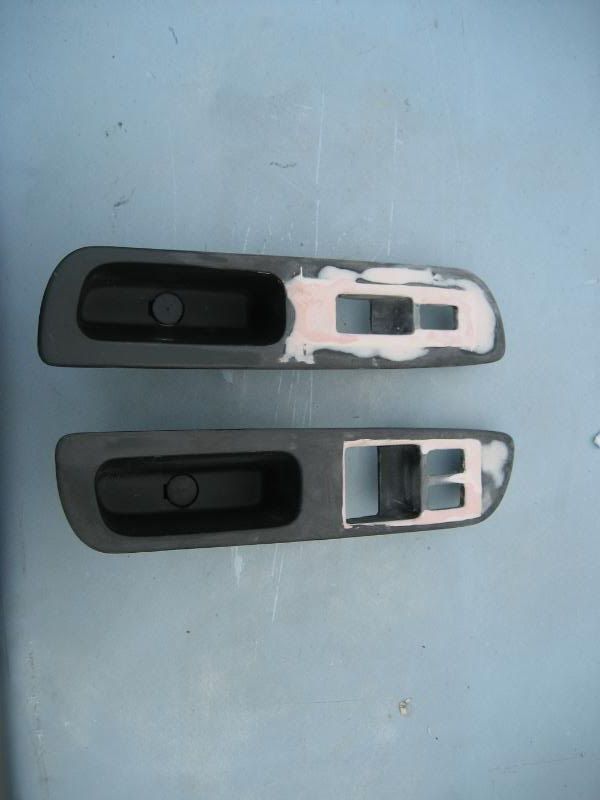 Got out the black texture paint to add the stock look back:  Plugged the switches back in and here you have the finished product: 
__________________
Now metal fabricating, welding and powder coating. PM me with your needs!
|
|
|
|
08-01-2008, 07:06 PM
|
#172 | |
|
Zilvia Junkie
Join Date: Jul 2007
Location: Cincinnati, Ohio
Age: 39
Posts: 544
Trader Rating: (3)
Feedback Score: 3 reviews
|
Quote:
__________________
Now metal fabricating, welding and powder coating. PM me with your needs!
|
|
|
|
|
08-01-2008, 07:33 PM
|
#175 |
|
Nissanaholic!
 |
all this work and the car can only turn out one of two ways
NICE AND DIFFERENT OR REALLY FUCKING UGLY. 350 z interior is not that nice, and please dont put 350z body panels on this car.
__________________
giantroboteyes.wordpress.com/ |
|
|
|
08-01-2008, 07:41 PM
|
#176 | |
|
Zilvia Junkie
Join Date: Jul 2007
Location: Cincinnati, Ohio
Age: 39
Posts: 544
Trader Rating: (3)
Feedback Score: 3 reviews
|
Quote:
Overall its a challenge for me to dip into regions I have never had experience in, trying to figure out wat I cant do and it keeps me busy between saving money for the next big purchase, lol.
__________________
Now metal fabricating, welding and powder coating. PM me with your needs!
|
|
|
|
|
| Bookmarks |
|
|


 Linear Mode

