|
|||||||
| Builds (and builds only) Got a build thread? It goes here, build threads anywhere else on the forum will be locked and never moved. |
 |
|
|
Thread Tools | Display Modes |
 09-28-2008, 09:32 AM
|
#211 |
|
Zilvia FREAK!
 Join Date: Nov 2006
Location: queens, n.y
Age: 33
Posts: 1,333
Trader Rating: (9)
 Feedback Score: 9 reviews
|
Just spent my sunday morning dedicated to finishing my english paper, reading this. +1
__________________
 www.tm-spl.com Kouki's & some apple juice. |

|

|
| Sponsored Links |
|
10-04-2008, 05:31 PM
|
#212 |
|
Users Awaiting Email Confirmation
 Join Date: Sep 2005
Location: hawaii
Age: 36
Posts: 213
Trader Rating: (4)
 Feedback Score: 4 reviews
|
Ok.. its been a while since ive been inside the car. Decided to make the headliner fit the japanese manual seatbelt conversion trims. So heres the new trim with the stock headliner. Didnt really find any write-ups or anything on what to do about it. Im assuming people just replace it with the japanese headliner, or just reapply new headliner material and let the rest hang below the trim... which i think would look gross.
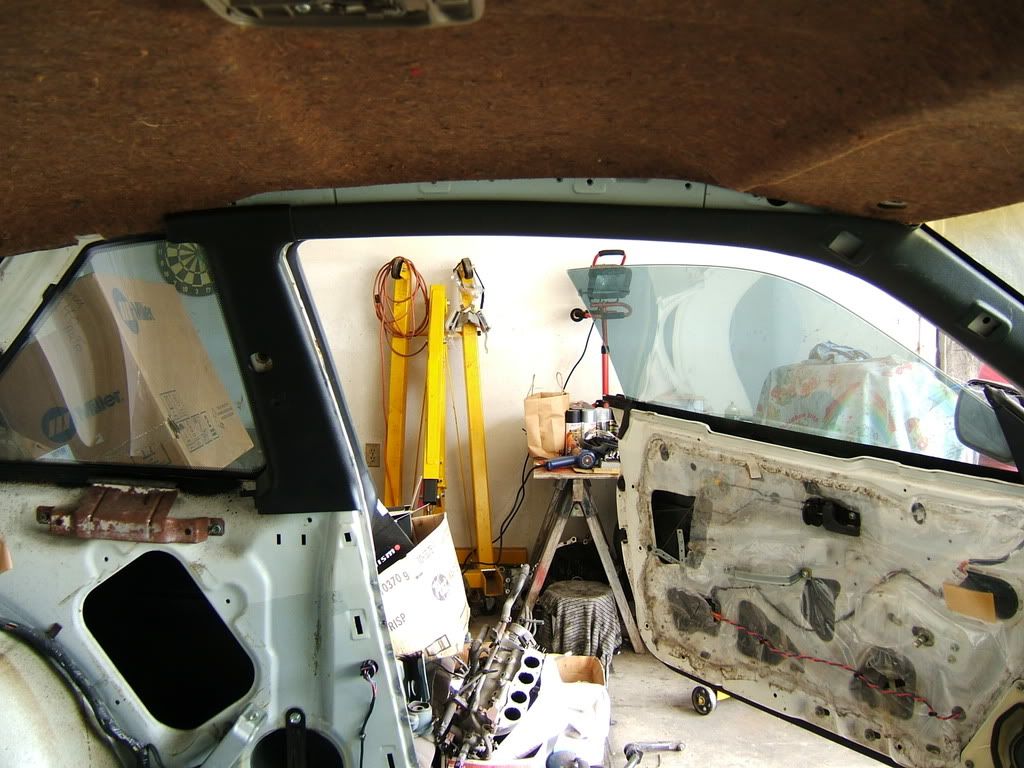 Thats a pretty big gap, so heres what i did. First i made a cardboard cutout to fill the gap. 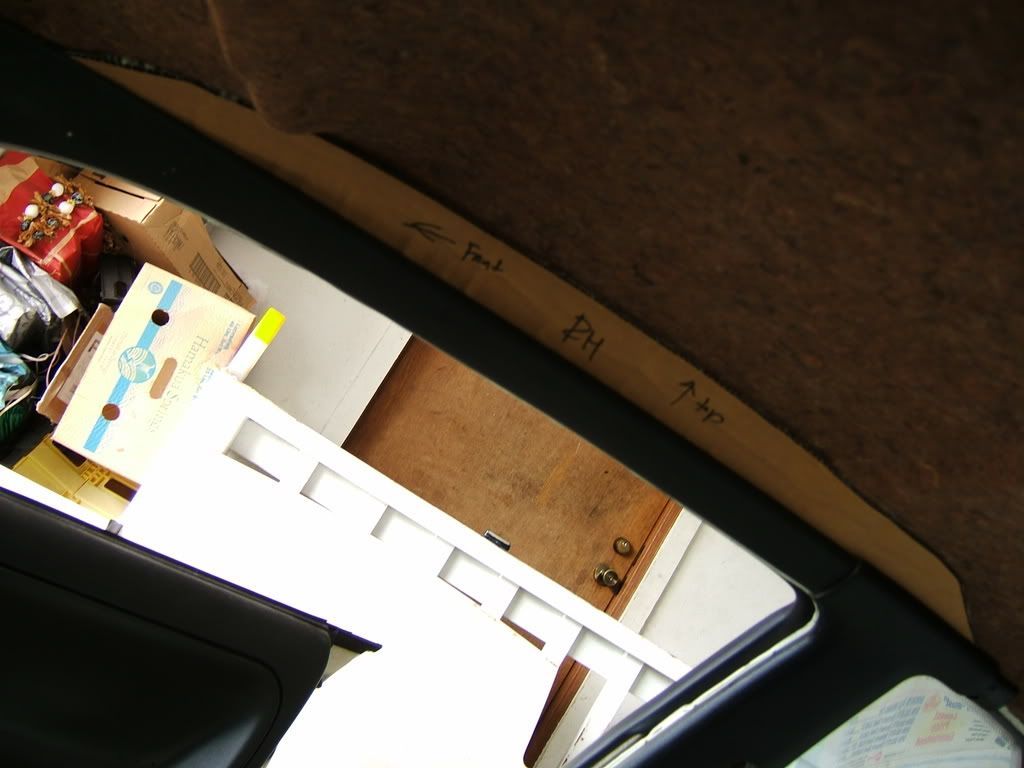 Then used some 3m spray on adhesive and mold the cardboard to the material and gap. 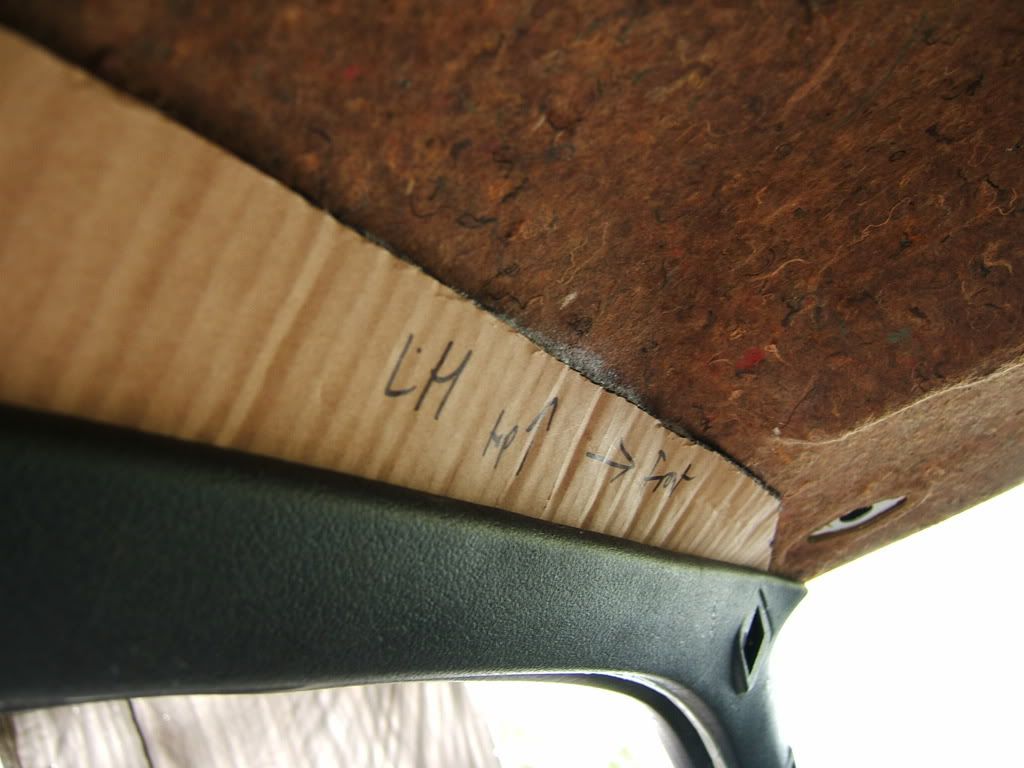 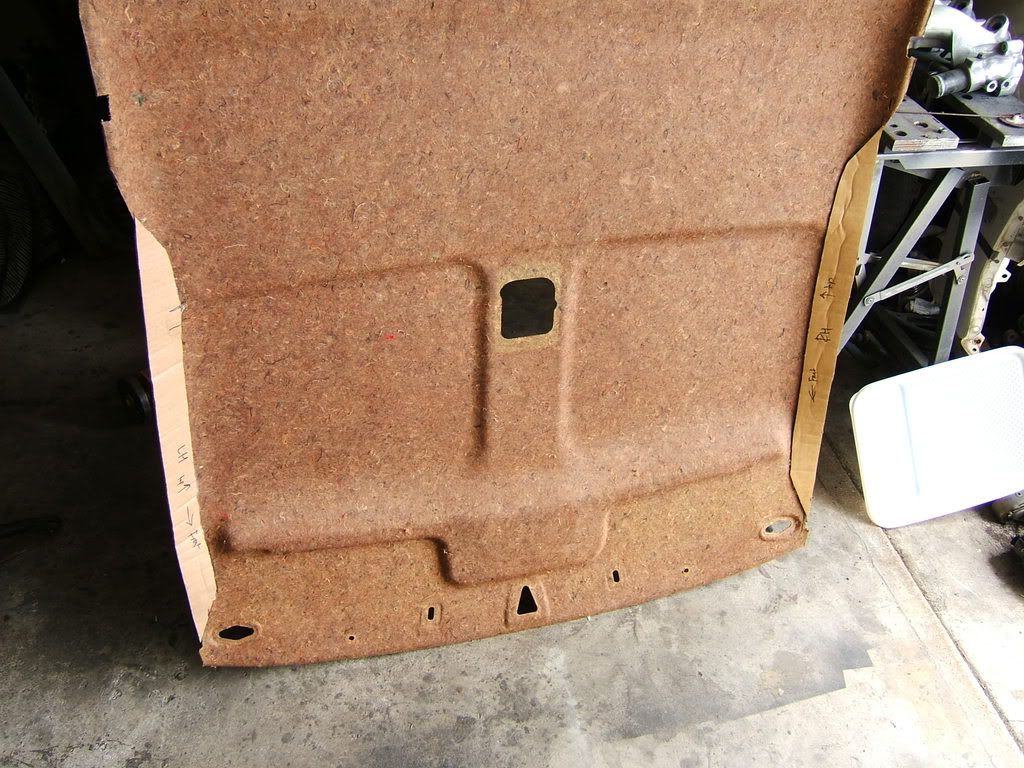 Then i took the old headliner material and just layed it over the cardboard just to get a flatter surface. 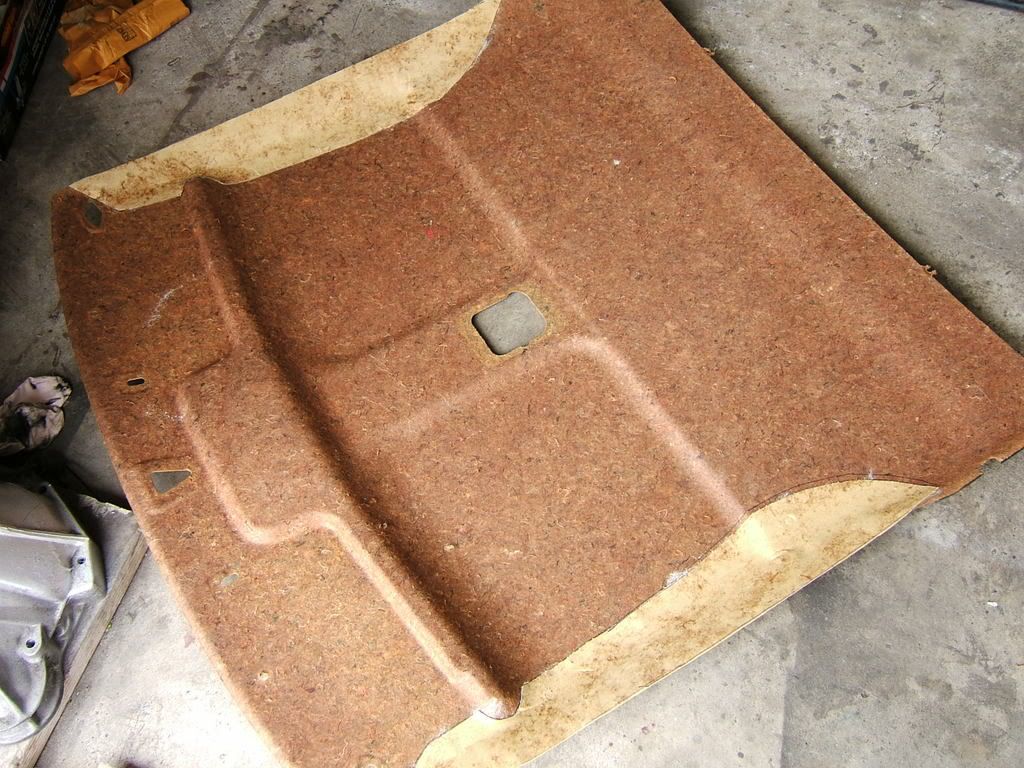 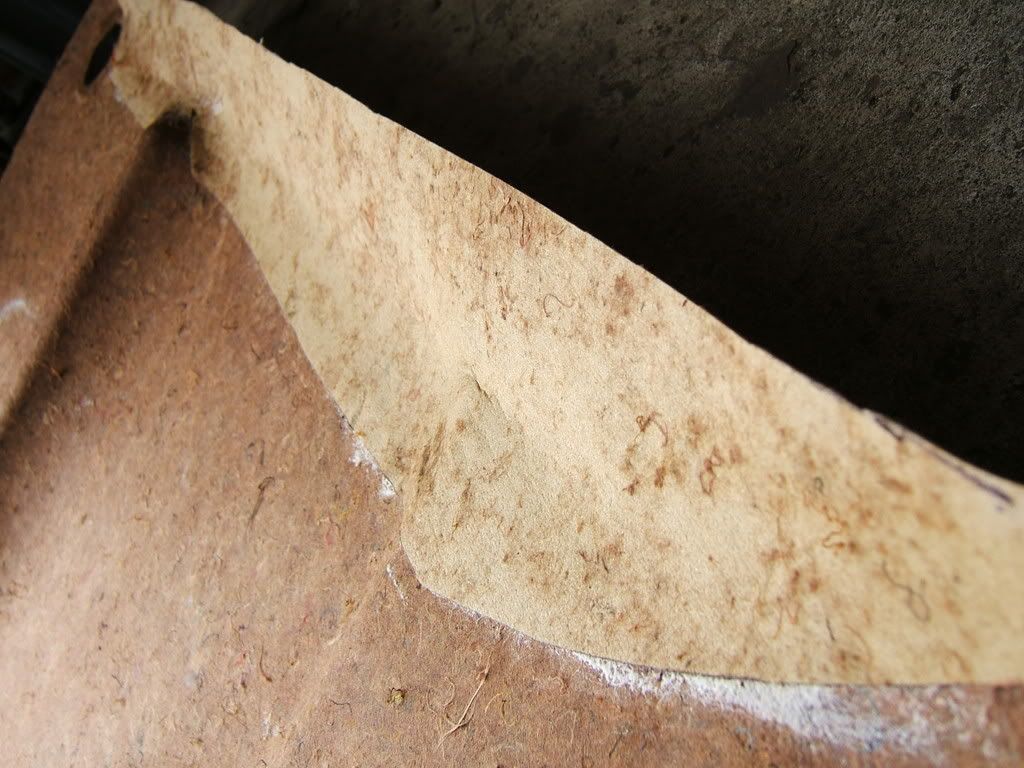 Next i will go and purchase some headliner material and thin foam stuff to lay over before the headliner material, hopefully to get the smoothest look possible. |
|
|
|
|
10-05-2008, 08:04 PM
|
#215 | |
|
Users Awaiting Email Confirmation
Join Date: Sep 2005
Location: hawaii
Age: 36
Posts: 213
Trader Rating: (4)
Feedback Score: 4 reviews
|
Quote:
Well, heres what i did today. Worked on fitting the not-so-well-fitted aftermarket carpet. I swear i never want to do this again, i could not get it to fit well without having to do the innevitable... spray on adhesive. I figure if i need to ill just rip it off and re-apply adhesive again. And got all the holes cut. Anyways, i just got the driver side pretty much finished... need to go buy more adhesive. 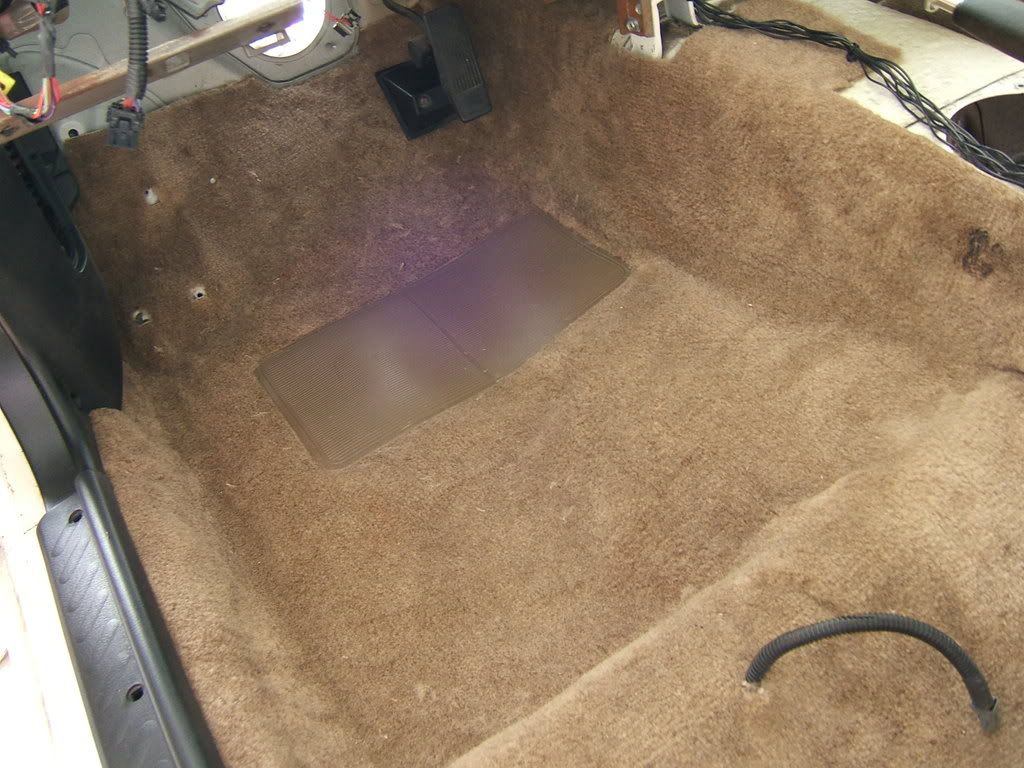 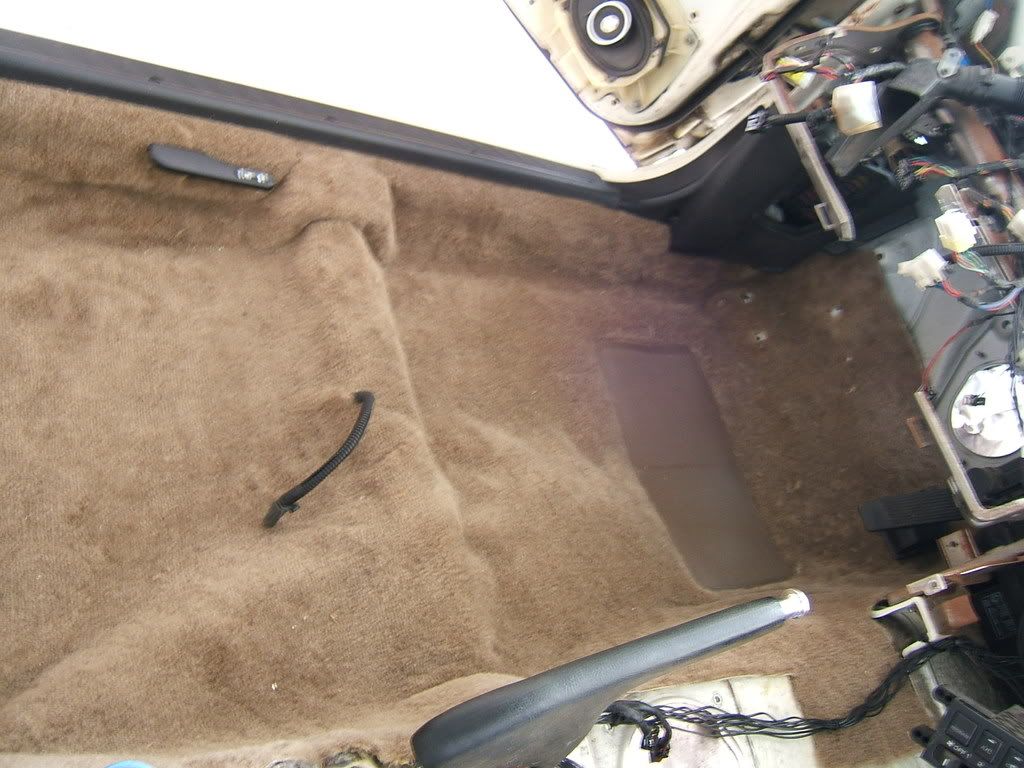 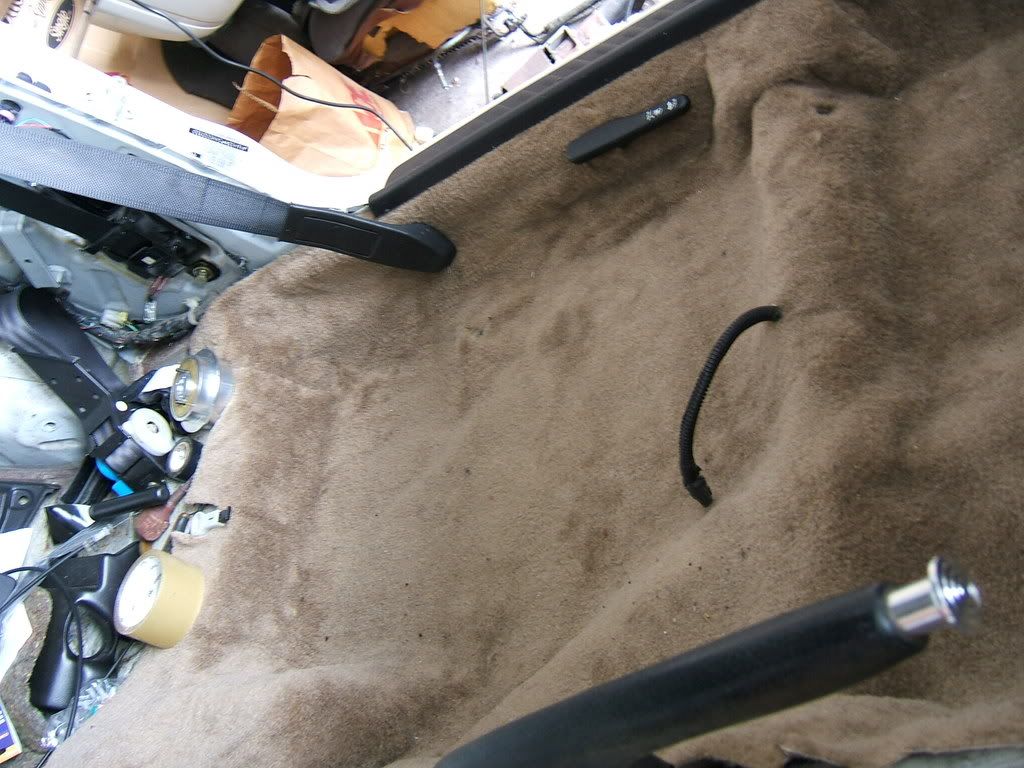 Also cleaned up the ac compressor, it was covered in grease. Everything seems to be alright, clutch seems to grab with pressure and compressor spins without noise or grinding. 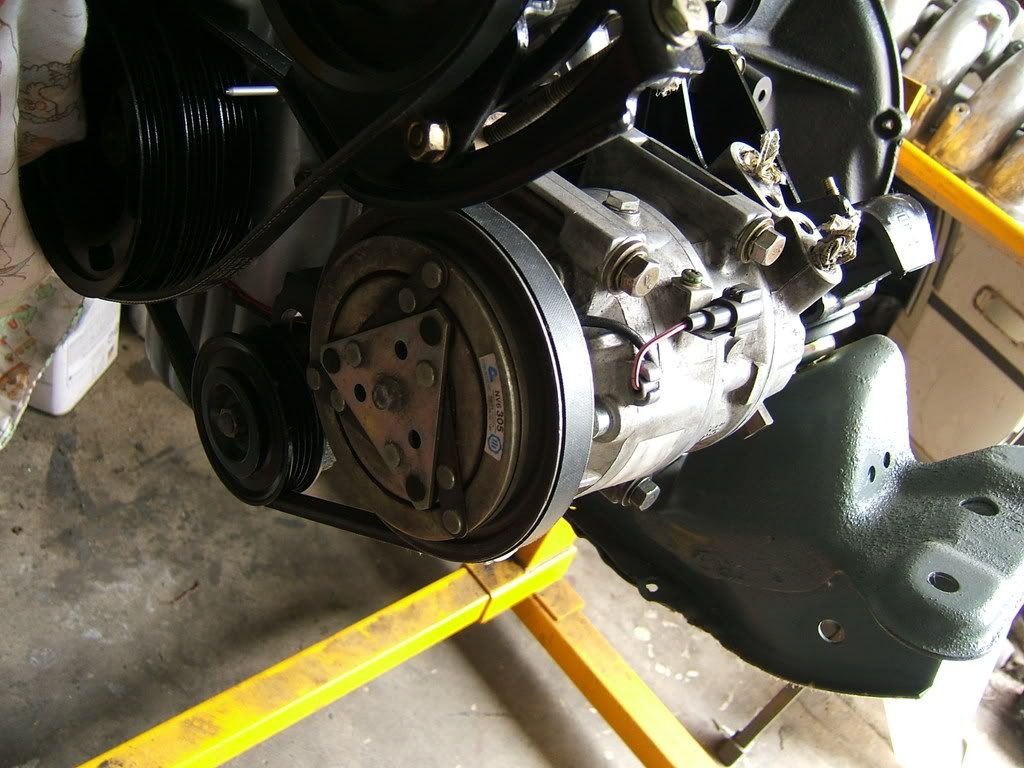 |
|
|
|
|
|
10-06-2008, 06:49 AM
|
#216 |
|
Zilvia Member
Join Date: Mar 2008
Location: Your mom's basement
Posts: 263
Trader Rating: (0)
Feedback Score: 0 reviews
|
Great work on the headliner! You can buy headliner material at a fabric store it should come foam backed already, and get some super 90 to attach it. Not to thread jack but heres mine refinished
 Where did you get your carpet from? It looks exactly like mine. I just got mine it fit pretty good but like you said its not perfect I guess no aftermarket is going to be but it looks 100x better than old beat up OEM carpet |
|
|
|
|
10-07-2008, 04:04 AM
|
#217 | |
|
Users Awaiting Email Confirmation
Join Date: Sep 2005
Location: hawaii
Age: 36
Posts: 213
Trader Rating: (4)
Feedback Score: 4 reviews
|
Quote:
So many things to do on this car, and I dont have enough time or money to do it all at once. I really want to finish by the end of this year, it really would be nice. I guess, its a goal to strive for :P |
|
|
|
|
|
10-11-2008, 09:48 AM
|
#218 |
|
Zilvia Junkie
 
Join Date: Dec 2007
Location: Chesapeake, VA
Age: 51
Posts: 517
Trader Rating: (17)
Feedback Score: 17 reviews
|
Sup Cuz!! We will be there next Friday brah!!
Car looks AWESOME! Can't wait to see THE PROJECT! Check your PM!
__________________
For Sale threads: http://zilvia.net/f/sale-items/33286...tons-pics.html Review Thread:  http://zilvia.net/f/private-sellers/...-chhheeee.html http://zilvia.net/f/private-sellers/...-chhheeee.htmlTRADER RATING: http://zilvia.net/f/traderratings.html?u=66301 |
|
|
|
|
10-11-2008, 10:00 AM
|
#220 |
|
Zilvia Junkie
Join Date: Dec 2007
Location: Chesapeake, VA
Age: 51
Posts: 517
Trader Rating: (17)
Feedback Score: 17 reviews
|
If you need anything from here thats not too heavy(airlines charge an a$$ ton for overweight luggage), just PM or call me!! We have GSC motorsports here in Charleston, SC, so I may be able to get some stuff from them.
THE FIRST THING I AM GOING TO DO IS BUY A POUND OF TAKO POKE FROM KTA AND EAT IT ALL!! Kden Kev
__________________
For Sale threads: http://zilvia.net/f/sale-items/33286...tons-pics.html Review Thread: http://zilvia.net/f/private-sellers/...-chhheeee.htmlTRADER RATING: http://zilvia.net/f/traderratings.html?u=66301 |
|
|
|
|
10-11-2008, 10:23 PM
|
#223 |
|
Users Awaiting Email Confirmation
Join Date: Sep 2005
Location: hawaii
Age: 36
Posts: 213
Trader Rating: (4)
Feedback Score: 4 reviews
|
Hah, thanks guys for the comments.
Well today i tried again at the carpet, im planning on finishing it tommorow at the latest. Also, started making a spacer for the alternator bracket, it was going smooth until the drill bit broke in the metal... now its even harder to drill through. Other than that today i retrofitted a mazda 6 LED third brake light into the car, lol. So heres the mazda 6 one compared to the 240sx housings 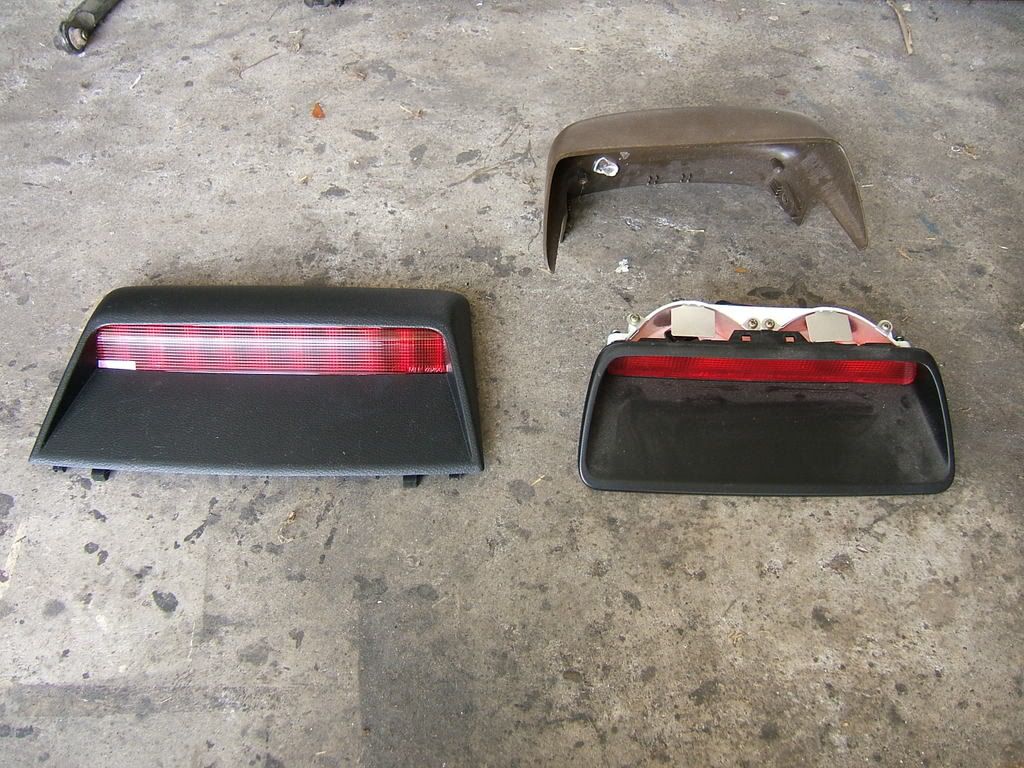 Yay, LEDs already set up to go 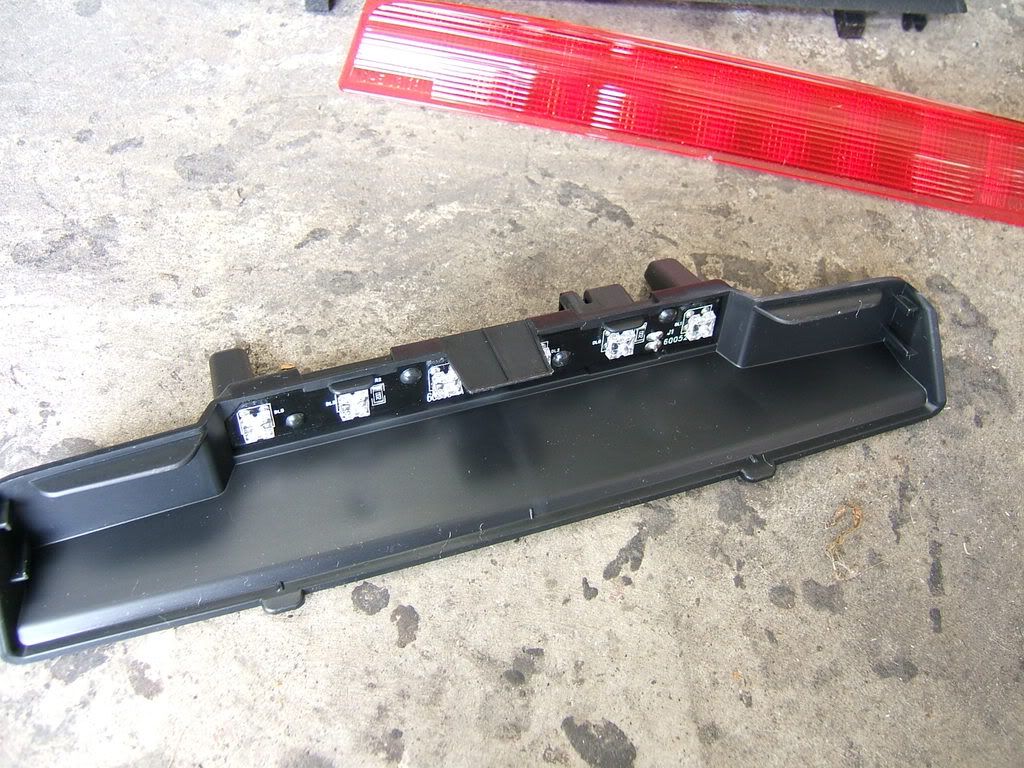 240sx Housing had been burnt through due to the old bulbs being melted down  Did a lot of cutting and just using a soldering iron to melt the plastics together. and then i wired it so i could use the stock connector. 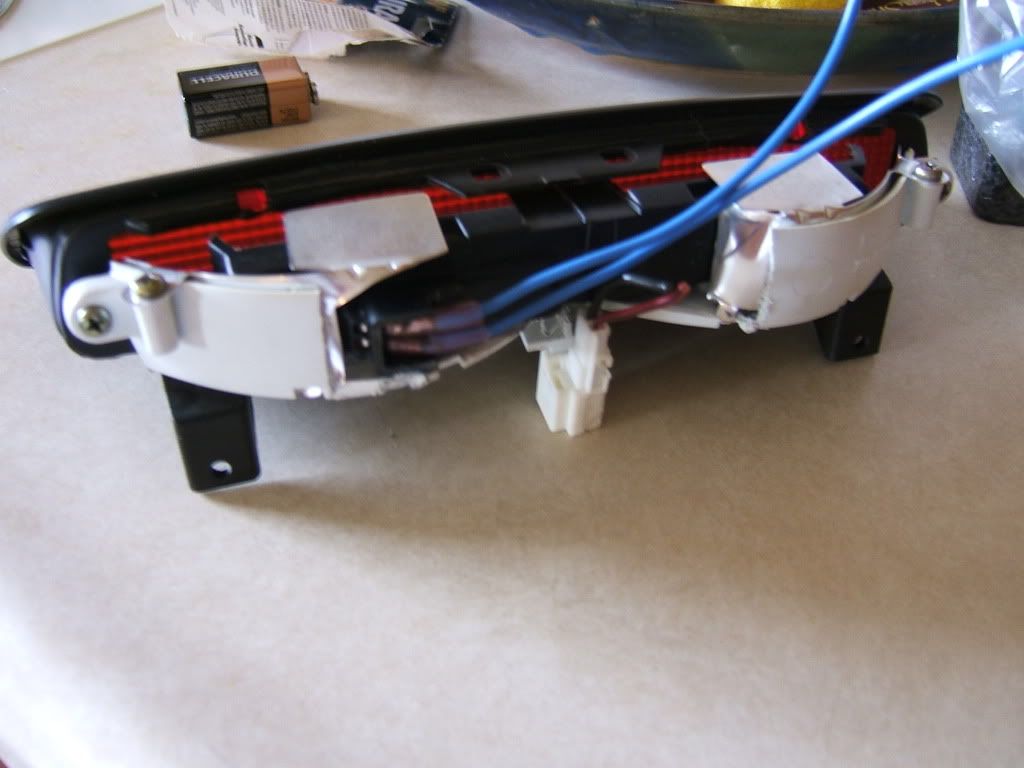 Heres the final product, pics really dont do it justice 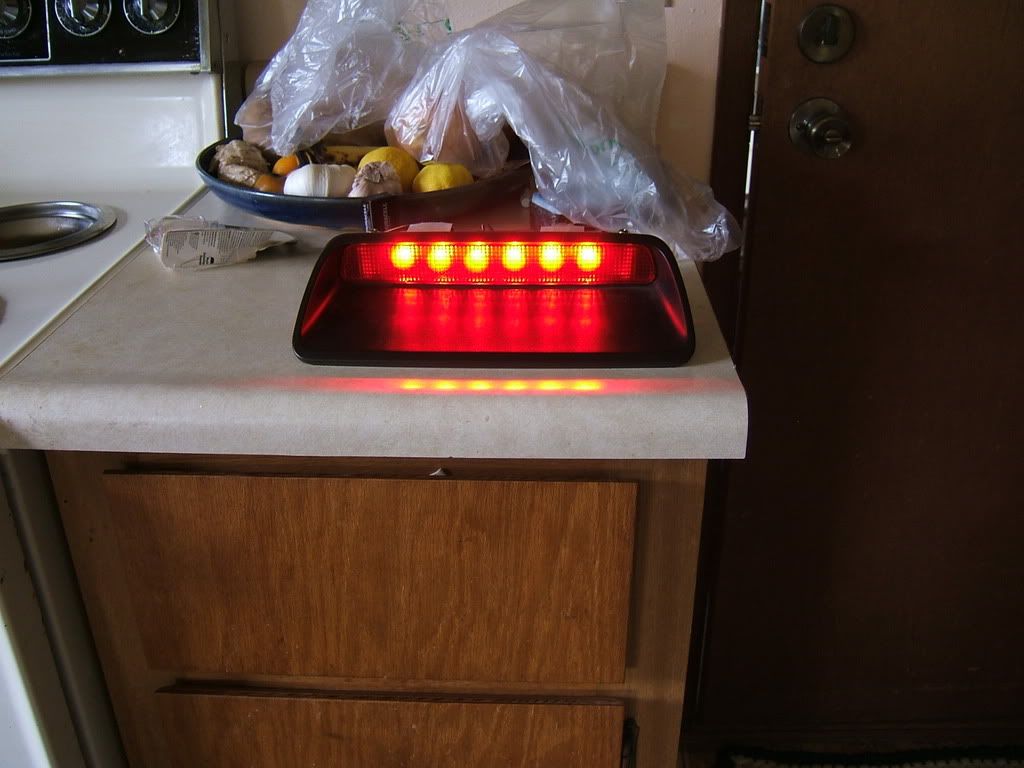  |
|
|
|
|
10-12-2008, 09:02 PM
|
#225 |
|
Users Awaiting Email Confirmation
Join Date: Sep 2005
Location: hawaii
Age: 36
Posts: 213
Trader Rating: (4)
Feedback Score: 4 reviews
|
man... that carpet really pissed me off. lol. i started to give up and just cutting and pasting, all over. oh well, most of the carpets not going to be seen anyways, so who gives... yeah... well, it really looks worst in person than on the camera... i guess in a way thats ok. hah!
   I really need to get this thing done with, its taking up garage space... 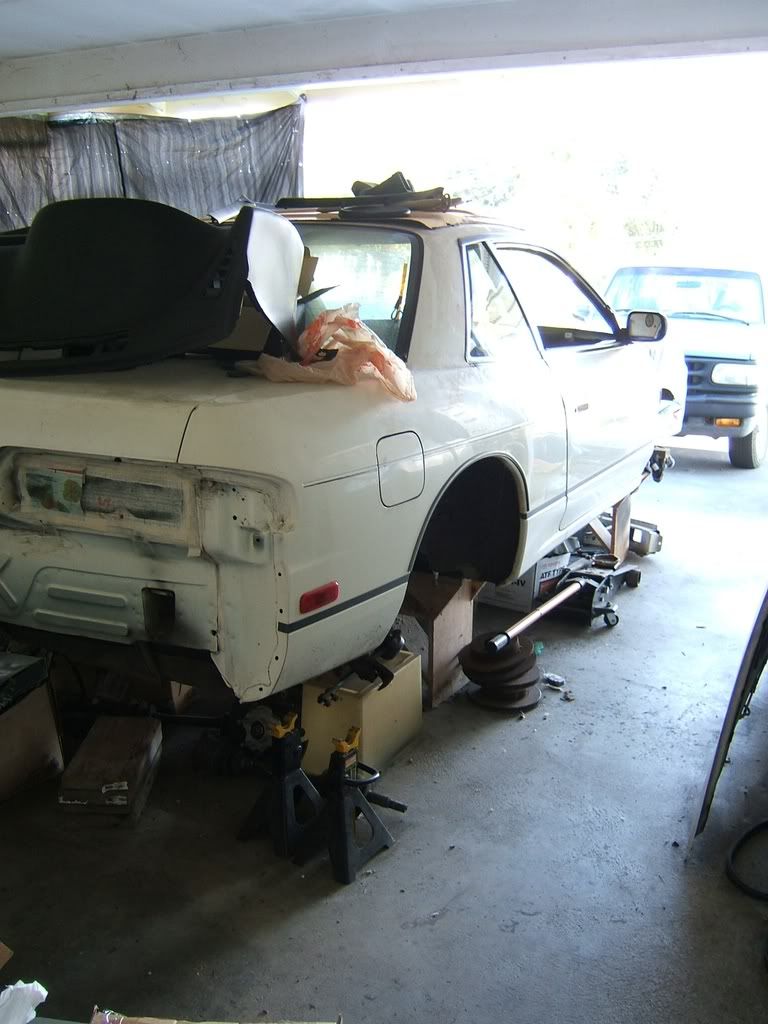 |
|
|
|
|
10-12-2008, 11:49 PM
|
#227 | |
|
Users Awaiting Email Confirmation
Join Date: Sep 2005
Location: hawaii
Age: 36
Posts: 213
Trader Rating: (4)
Feedback Score: 4 reviews
|
Quote:
|
|
|
|
|
|
10-19-2008, 08:06 PM
|
#228 |
|
Users Awaiting Email Confirmation
Join Date: Sep 2005
Location: hawaii
Age: 36
Posts: 213
Trader Rating: (4)
Feedback Score: 4 reviews
|
okay, so this weekend i had to organize things, i had all kines of stuff going on in the garage lately... it was a mess.
so once that was done, i really want to get the dash back on, so i pulled the evap core, one of the last things ill need to replace under the dash. it really is gross, not used to the older cars without a filter. found some bugs, leaves, all kines stuff. but i gotta replace it because i dont think it connects with the newer style ac lines... im just hoping the air con box didnt have a change and stuff like that... if not, i guess i could make some modification to make it work. 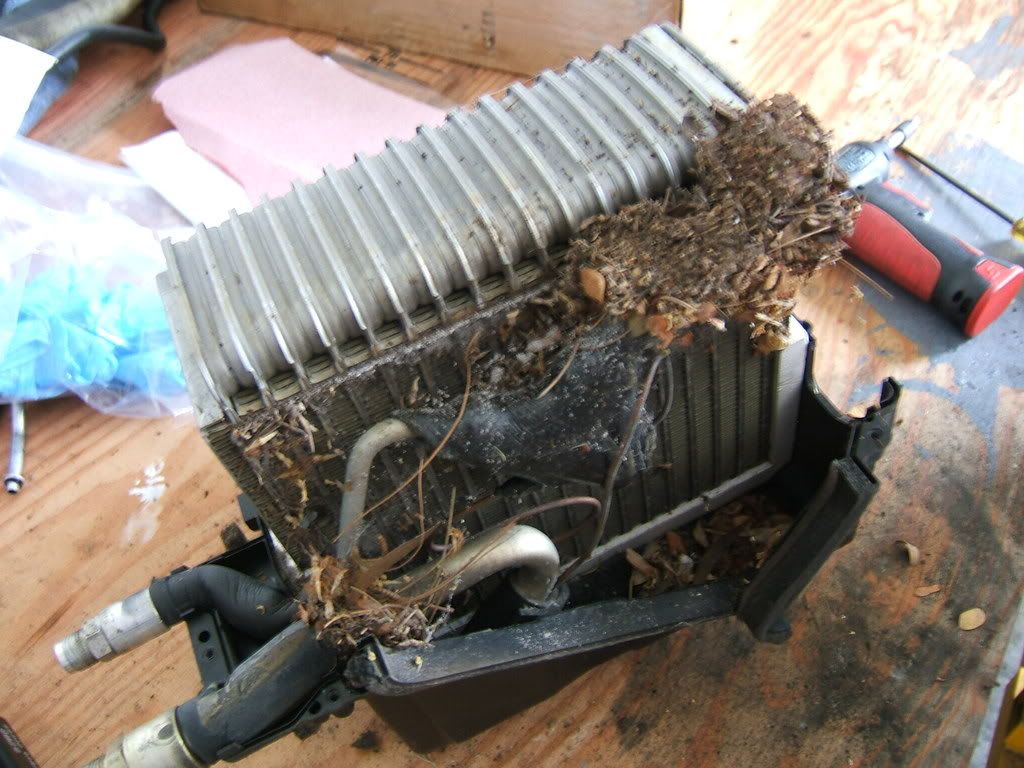 i also gotta make the holes for the radiator support, so i test fitted the radiator and it fits pretty well. maybe next weekend ill weld the brackets in and drill some holes. i might also weld supports for the tension rod brackets and lower control arms. 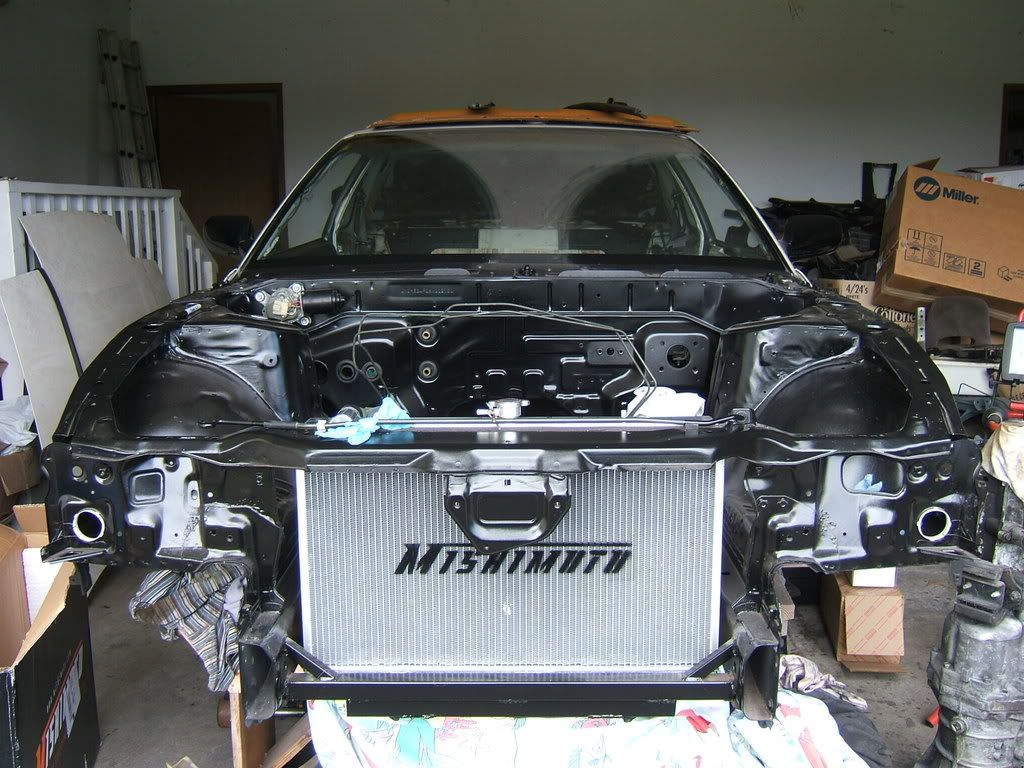 also, feeling kind of dumb because i wasted paint using spray can to paint the engine bay. im going to go back and do a 2 stage on the engine bay, underbody of vehicle, and trunk. and lastly, looks like im going to be getting some wheels/tires... so project might be a little longer than expected due to spending all my money on these, lol...  |
|
|
|
|
10-19-2008, 08:43 PM
|
#229 | |
|
Leaky Injector
Join Date: Dec 2005
Location: Hawaii (ha-vuh-e)
Posts: 148
Trader Rating: (3)
Feedback Score: 3 reviews
|
Quote:
thinking of doing that when i get my hands on another shell nice work by the way, really lovin it too bad im on oahu, woulda been great to see this thing in person |
|
|
|
|
|
10-27-2008, 12:56 AM
|
#231 |
|
Users Awaiting Email Confirmation
Join Date: Sep 2005
Location: hawaii
Age: 36
Posts: 213
Trader Rating: (4)
Feedback Score: 4 reviews
|
okay, saturday i did nothing all day. was being lazy...
so today, i figured id make up for it, lol. today i finally cut some metal and welded that front tension rod brace stuff. came out alright. 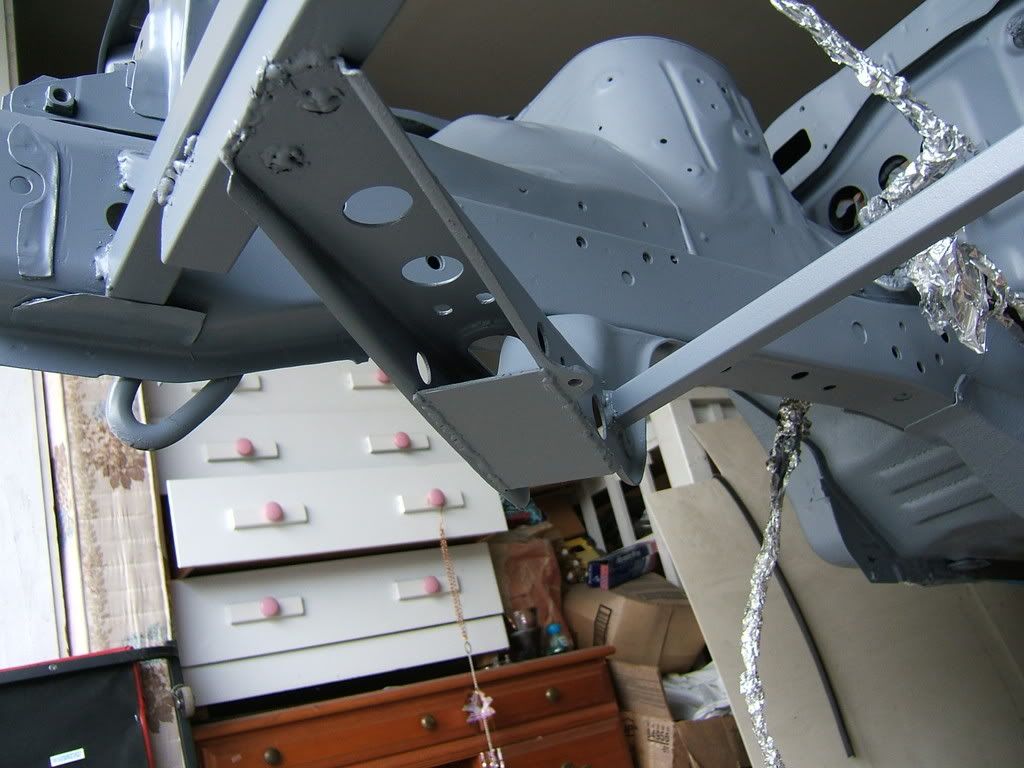 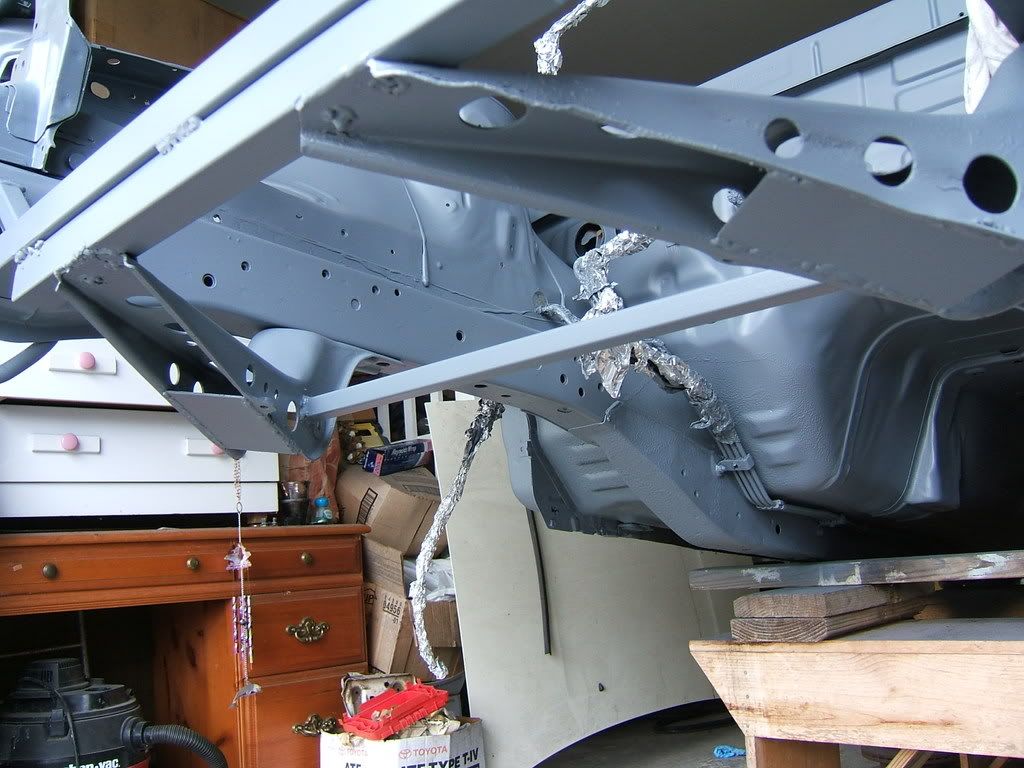 grinded away more rust, cleaned up some welds and re-sanded the whole engine bay and a little bit under the car. then prepped it with some grease/wax remover. primered the car, this time with the paint gun. 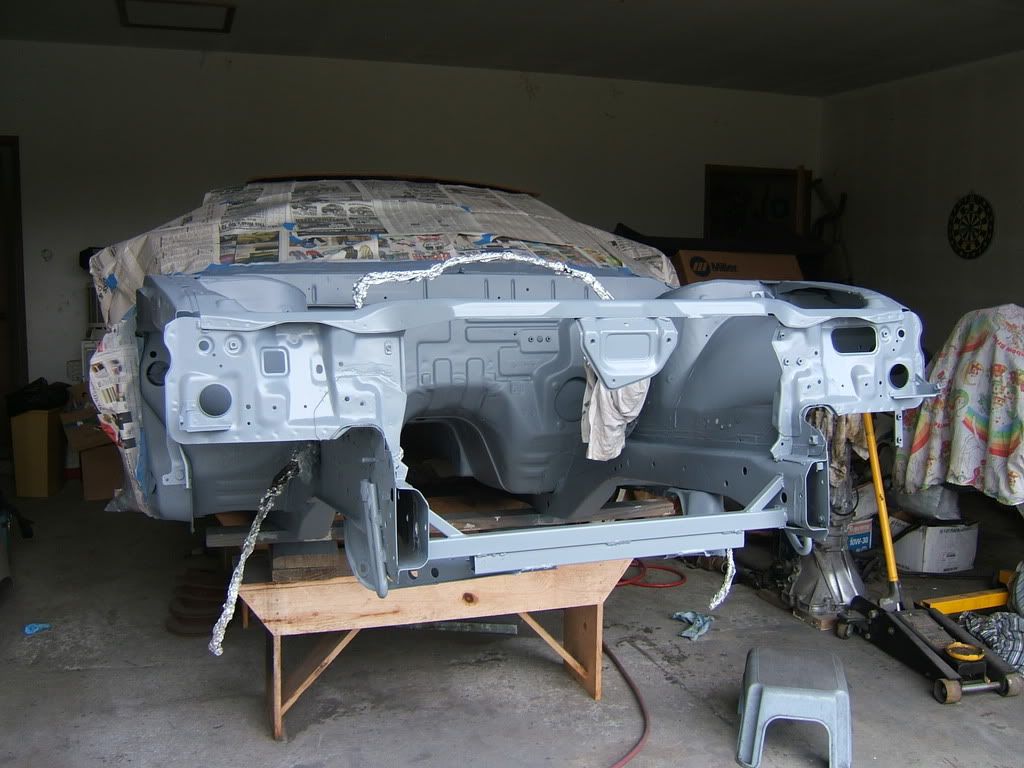 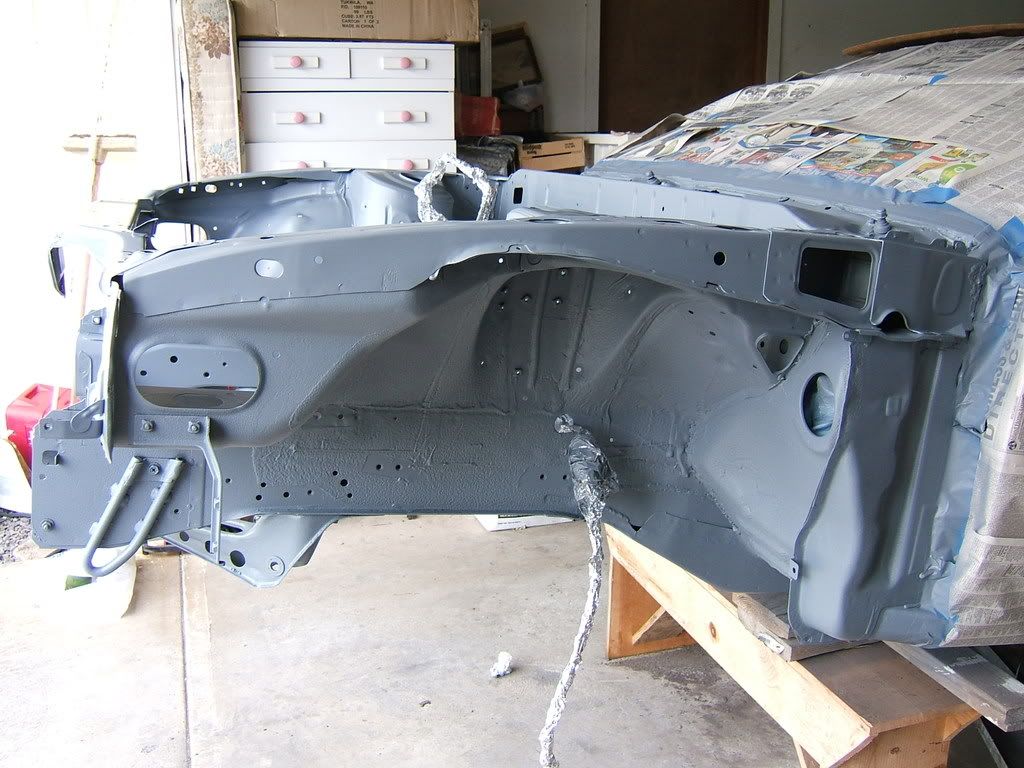 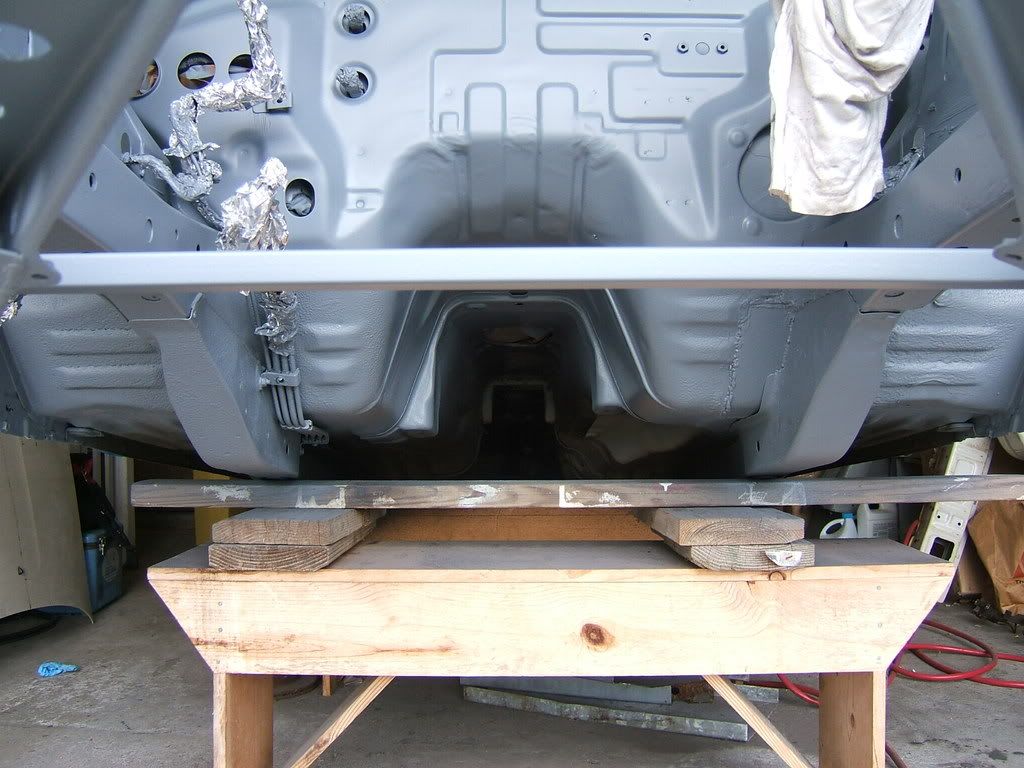 base coat, just some nissan black.  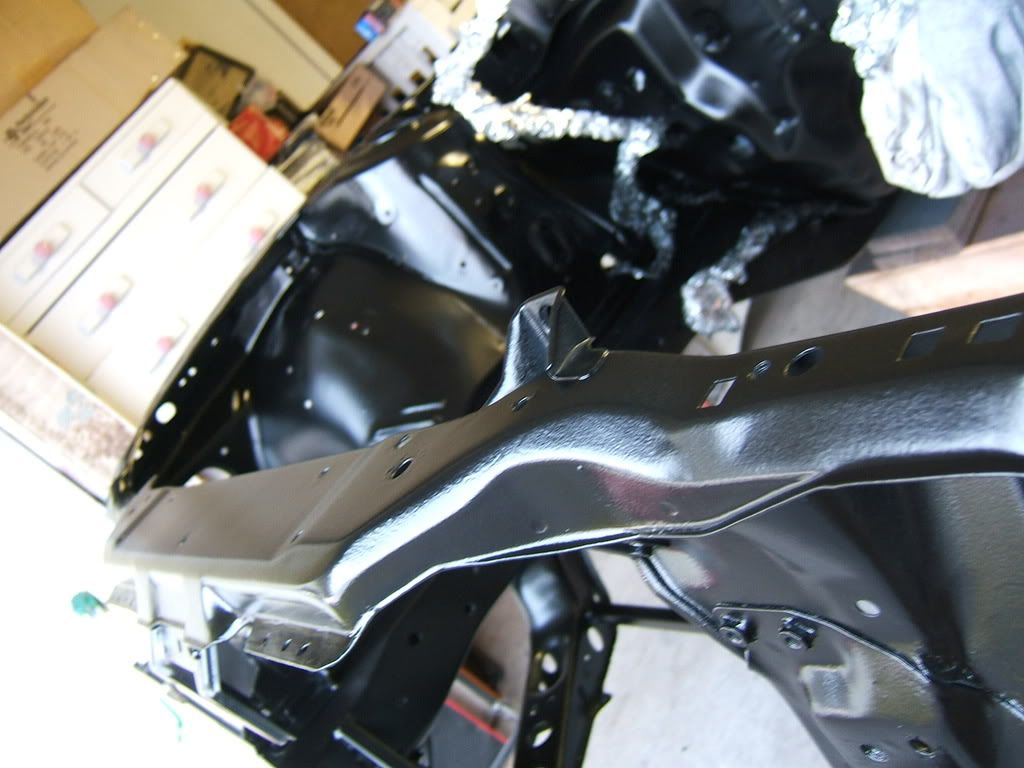 i like this pic  finally sprayed the clear... i had a hard time getting the settings good. although i wish i had more time, by the time i was getting done with the base coat, the sun was going down... found out later i missed some spots with the base (like behind the strut towers and under the front rad support and brace), but oh well... looks better than it did. so yeah, i sprayed the clear kinda thick, two coats. i wanted to spray more, but i couldnt see anymore so i stopped. i hope its enough so i dont wetsand through it. 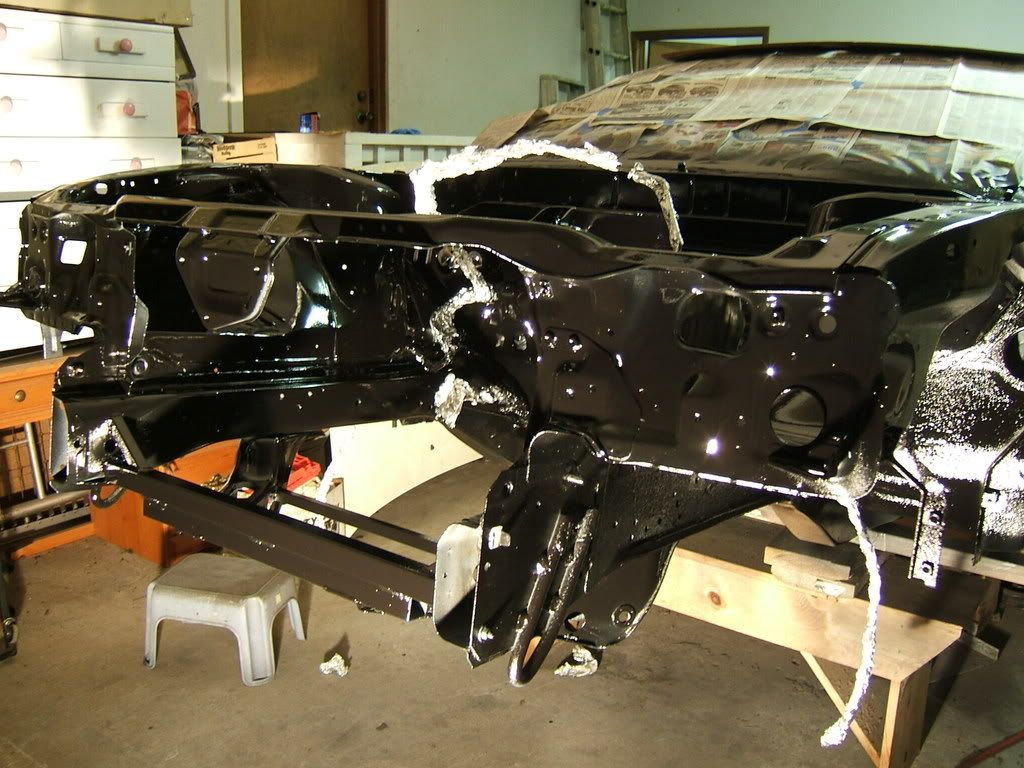 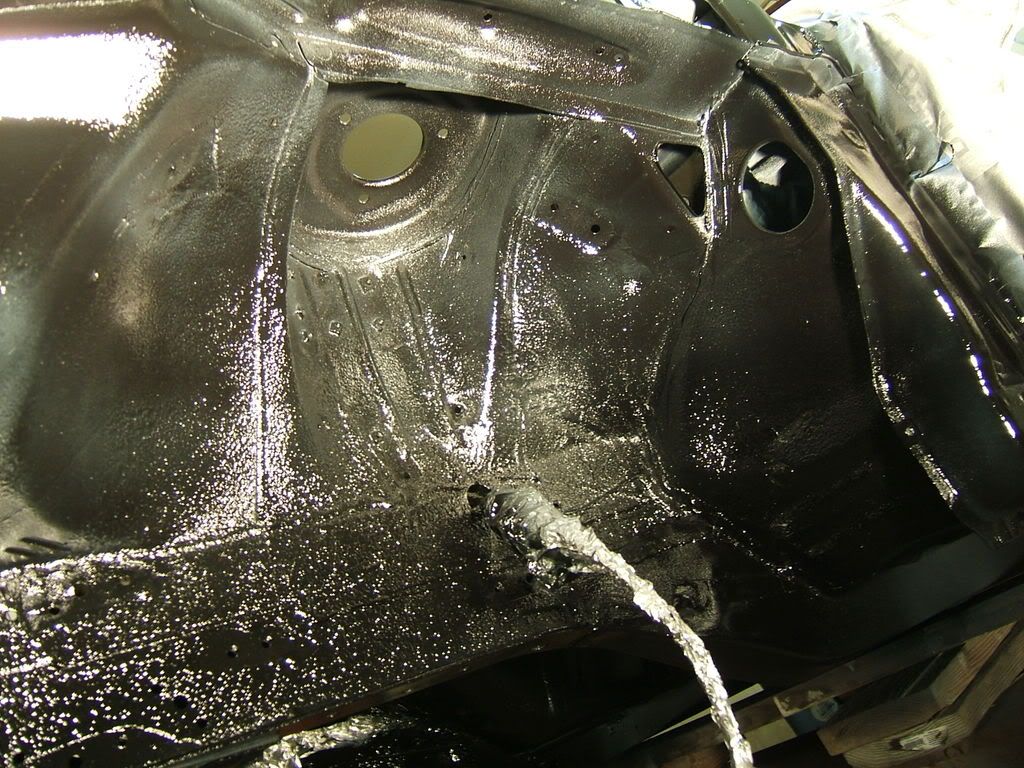 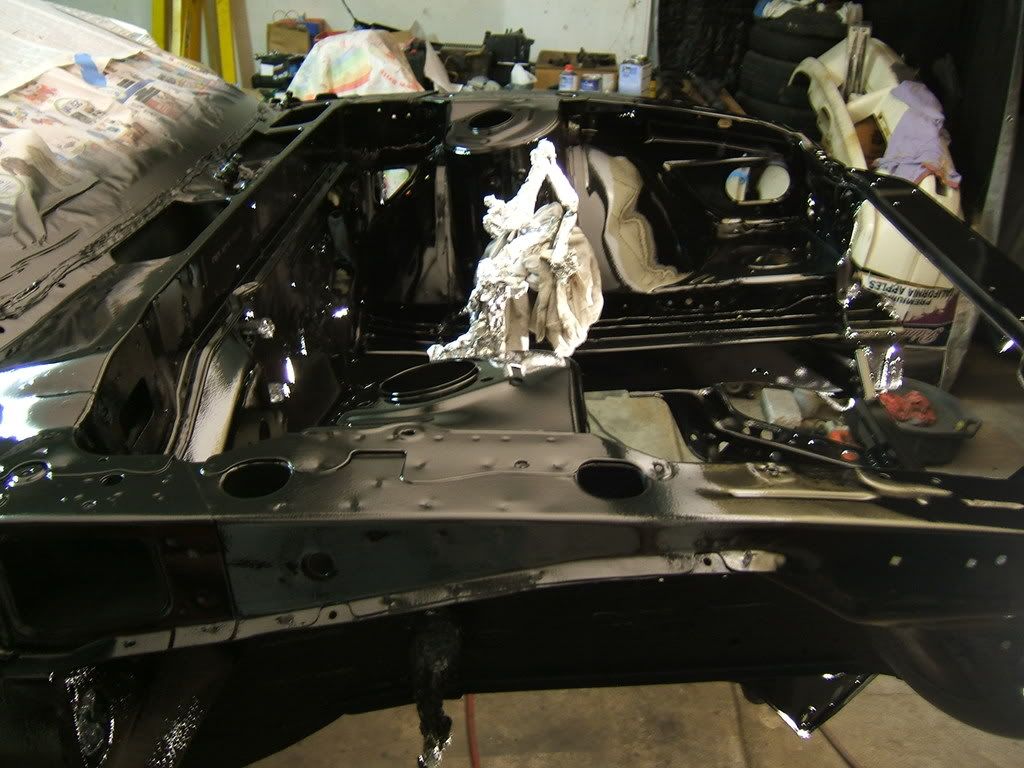 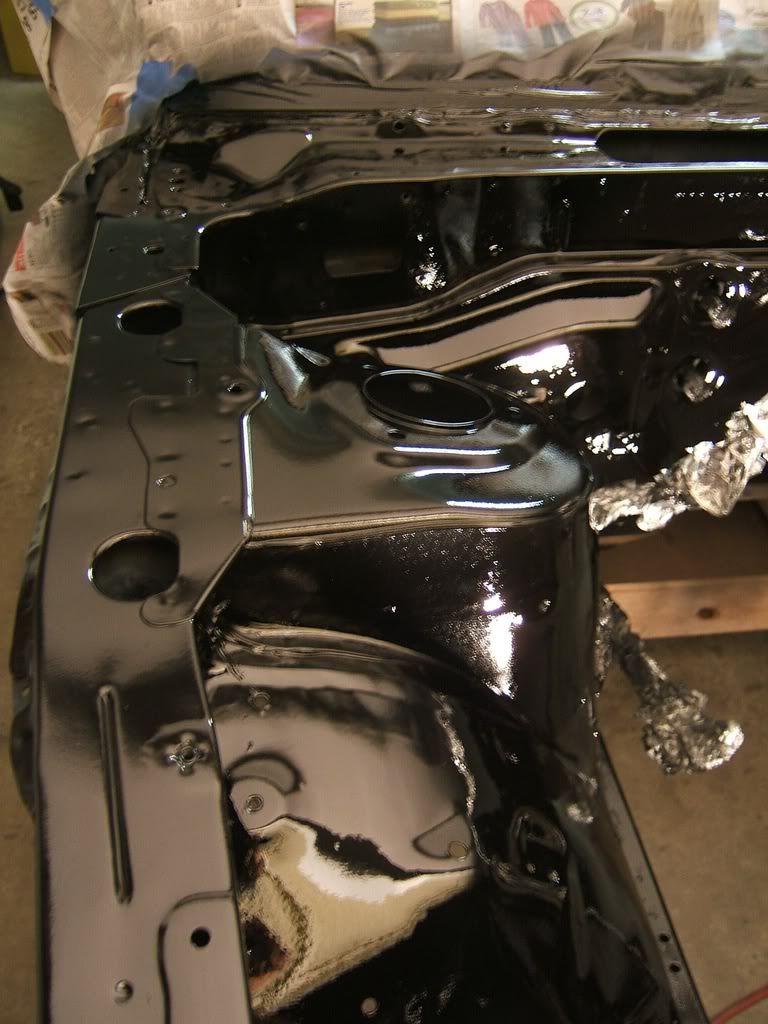 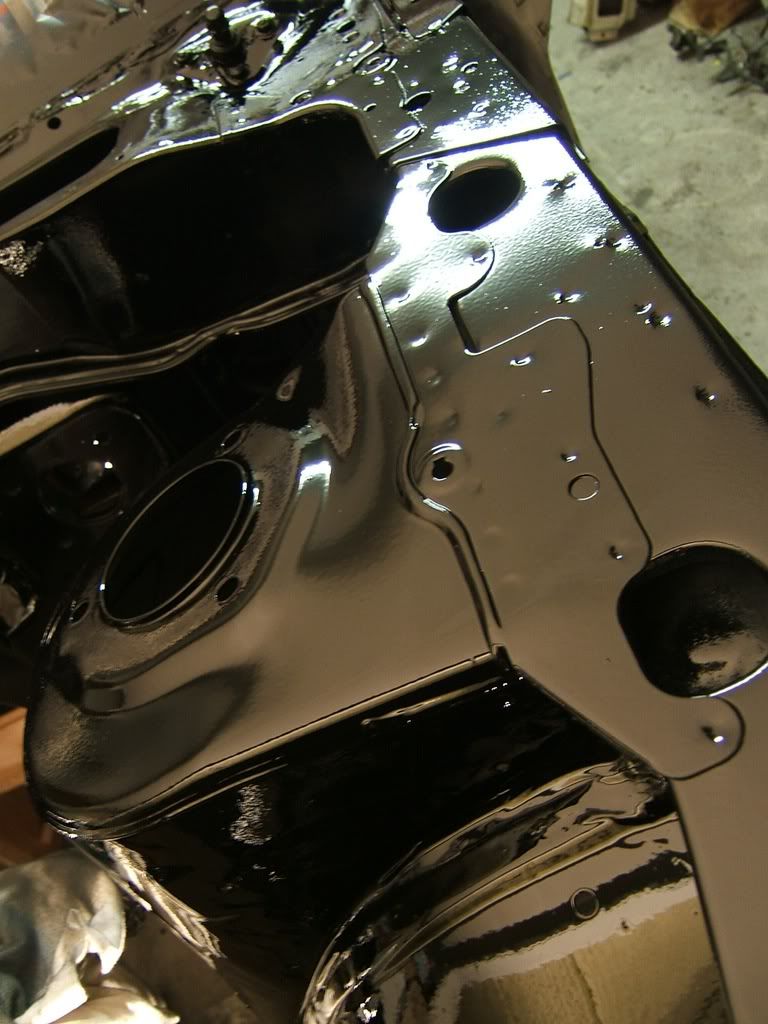 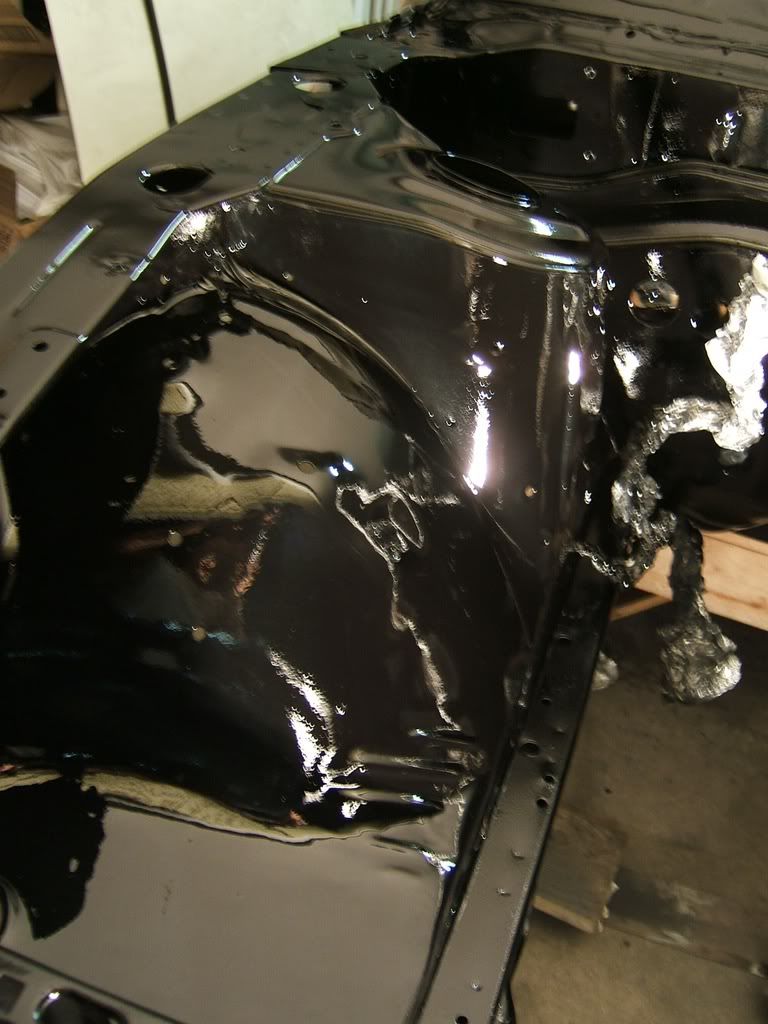  next week ill wet sand and buff. got a new makita buffer  |
|
|
|
|
10-27-2008, 06:14 AM
|
#233 |
|
Zilvia Junkie
Join Date: Nov 2006
Location: mt. juliet TN
Age: 33
Posts: 542
Trader Rating: (0)
Feedback Score: 0 reviews
 |
its looking gangster!!!! nice work.. but damn do these projects take long... ur doing a lot more then i did and it took me 1yr and 5weeks to finish mine.
__________________
the sig rules are gay!! |
|
|
|
|
10-30-2008, 09:21 PM
|
#237 | |
|
Users Awaiting Email Confirmation
Join Date: Sep 2005
Location: hawaii
Age: 36
Posts: 213
Trader Rating: (4)
Feedback Score: 4 reviews
|
Quote:
but yeah man, these projects are time consuming... wish i had the car at home though, then i could work on it every day when i felt like it instead of having to drive back to my hometown and work on it during my weekends. i think im at about 1 year and 3 months maybe? haha, so long already... also, just a quick question for you painters... i plan to do a few more coats of clear for the engine bay. how should i prep the surface of the old clear before i spray? do i have to wetsand to a uniform, unblemished surface? or can i lightly sand and scuff the surface, clean and paint? this has been my second time trying to paint, so yeah, any help would be appreciated! thanks in advance! Jon |
|
|
|
|
|
10-31-2008, 12:47 PM
|
#240 |
|
Join Date: Jun 2007
Location: porterville, ca
Age: 39
Posts: 29
Trader Rating: (0)
Feedback Score: 0 reviews
|
man you worked so hard on your 240sx and its really good, i cant wait to see how it turns out like...i give you props and you did a really good job being patiences with it and doing everything good...well here is a short picture story of how my project 240sx is too...i hope you like it and good luck on your coupe, i cant wait to see...
 |
|
|
|
|
| Bookmarks |
|
|


 Linear Mode

