|
|||||||
| Archive and FAQs Archives and Frequently Asked Questions about the 240SX are in here. |
|
|
Thread Tools | Display Modes |
 12-27-2006, 02:16 PM
|
#1 |
|
Zilvia FREAK!
 Join Date: Jan 2003
Location: Cincinnati OH
Age: 47
Posts: 1,033
Trader Rating: (9)
  Feedback Score: 9 reviews
|
I searched and searched for a writeup on this sort of thing with no results. Lots of folks talk about it but no one has taken the time to snap pictures and explain it. I hope this helps some of you.
This writeup details how to install a set of Hella H7 halogen projectors into S13 Silvia Tri-projector headlight housings, in place of the low-beam H1 projectors. Disclaimer: if you screw up your own car using this writeup, I claim no responsibility of any kind. Use at your own risk! There are a number of reasons for doing this conversion. I love the look of the Silvia front-end conversion on my car, and it's nice that it's lighter than the popup front and lets in more air to boot. My intercooler and radiator are hungry, after all  I've long been frustrated by the lousy headlights though, and tried two different kinds, the tri-projectors and the "brick" dual halogens. The driving lights on the halogens were great but of course blinded anyone going the other way. The low beams on any of them are barely worth mentioning. I looked into HID conversions, "drop-in" HID setups, and wasn't really keen on any of them. I've long been frustrated by the lousy headlights though, and tried two different kinds, the tri-projectors and the "brick" dual halogens. The driving lights on the halogens were great but of course blinded anyone going the other way. The low beams on any of them are barely worth mentioning. I looked into HID conversions, "drop-in" HID setups, and wasn't really keen on any of them.Primarily, the issue is the difference between right-hand-drive beam pattern and left-hand-drive beam pattern; this has been covered ad nauseum here and elsewhere so I won't get into it. The other, equally important reason for the conversion is light output. Anyone who's driven a car with ANY Silvia lights (dual, tri, or bricks) knows that the headlights are lousy. The H1 bulb pretty much sucks, and there are much newer/better developed projectors out there than the OEM Silvia low-beams. At one point last summer I took the projector headlights apart and fashioned new shields for the low-beam projectors that converted them to a LHD beam pattern. This was much nicer as I could now read street signs and no longer blinded oncoming cars, but the light output still left a lot to be desired. You could do this on tri-projectors and dual projectors; if you have dual-halogen Silvia lights you're on your own. The Hella projectors address BOTH of these problems (beam pattern and output) and have an added bonus: they're DOT-legal for road use. This isn't an issue for most of us but it's nice just the same. Note 1: all the pictures below are of the driver's side headlight. The only difference for the passenger's side is that you must flip the conversion bracket around the Y-axis. Note 2: forgive the living room and workbench clutter. Like your house is cleaner  Note 3: this may or may not work for the high beams. Frankly I think the high beams are fine and don't need to be messed with. Note 4: by now many of you are no doubt wondering why I didn't use HIDs. There are three reasons: One, this way I don't have to find places for ballasts and relays. Two, the brackets I found were for these projectors and no others. Three, this way was cheaper; the total came out to $300 or so, and to do HIDs properly would have been three times that. Supplies: -Hella H7 projectors ($90 each from www.clearcorners.com) -H7 bulbs (wherever, got mine also from clearcorners) -Conversion brackets ($80 shipped for the pair, from Derux here on the forum) - they come also with two small squares of metal, don't lose these! -Four male spade connectors -Four female spade connectors -Four short pieces of wire, shrinkwrap/tape/loom Tools: -10mm socket -8mm socket -Phillips screwdriver -Torx T15 bit Procedure: First, pull both headlights off the car (10mm socket), take off the four metal clips that hold the lens to the housing, and stick them in the oven. You need to soften the sealant around the lens so you can pull it off. I did them at 225 degrees for about 10 minutes. This will be familiar to anyone who's blacked out a headlight housing... Silvia tri-projector: 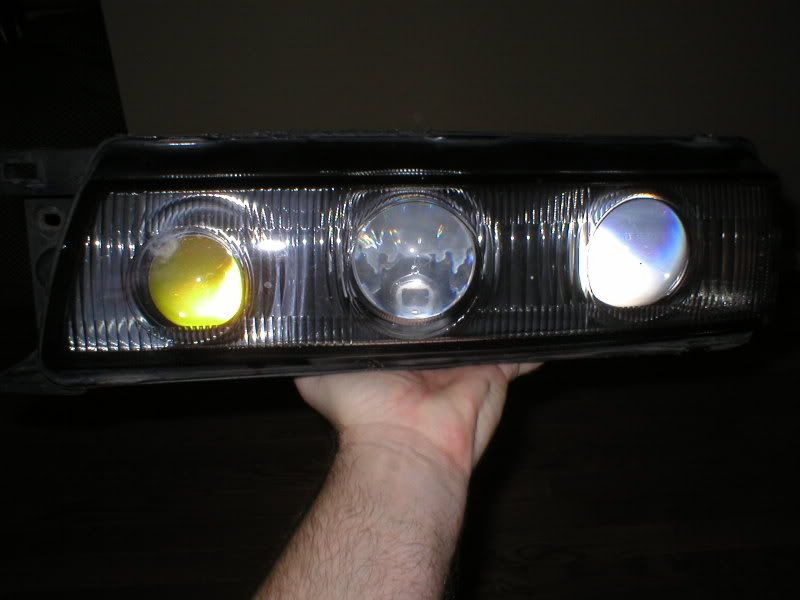 Without the lens: 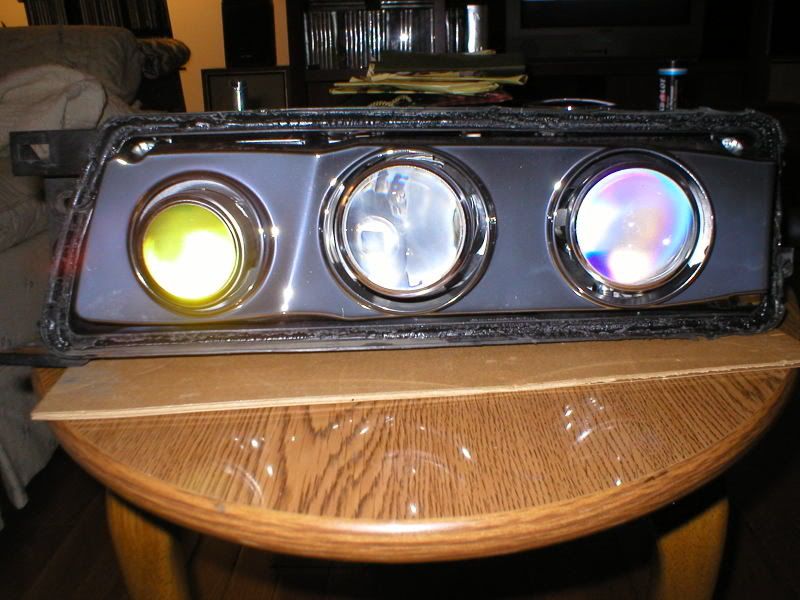 Next, remove the "chrome" plastic surround that covers the projector guts. Two small phillips screws at the top and pull it off the clips at the bottom: 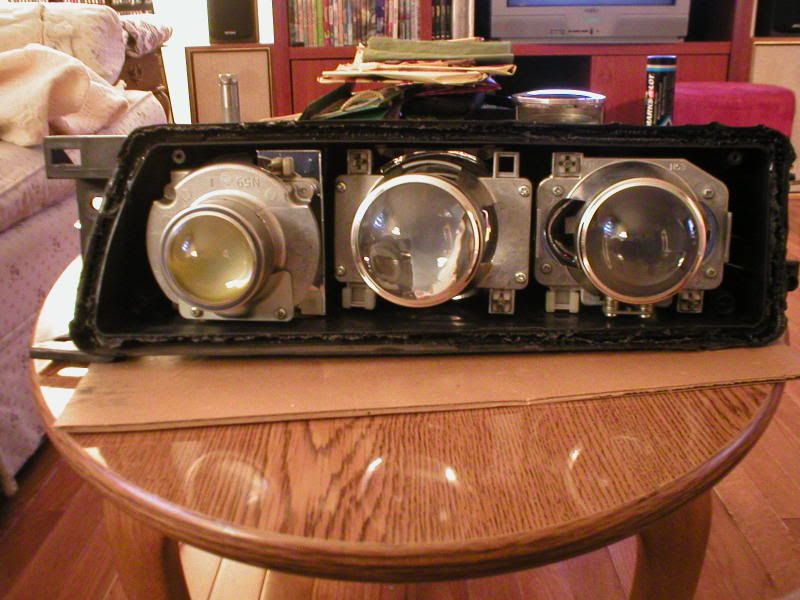 Now you must pull out the low-beam projector housing - it's the one closest to the fender. Simply turn both adjusting screws counterclockwise until they become detached from the housing, then "unsnap" it from the bulb on the lower corner. Now on to the good part. Here's the new Hella projector: 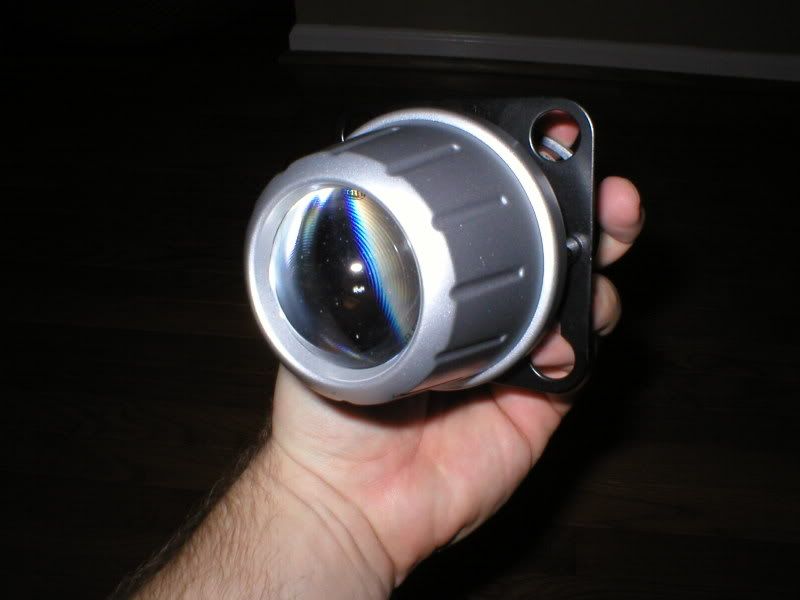 As you can see the bracket supplied with it has no hope of bolting up. It might be made to work but I think it would be very time consuming. This bracket will be replaced with the new conversion bracket. Brackets side by side (Conversion on the left, Hella-supplied on the right): 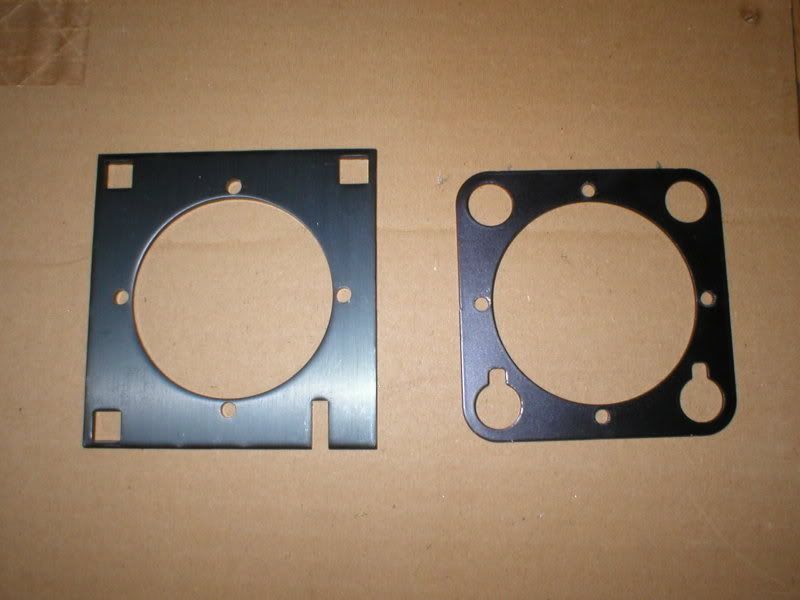 Both have four small holes by which they are mounted to the projector itself. Take the bulb out, remove the bulb holder from the back of the projector (three phillips screws). Now remove the bracket (Torx screws) and replace it with the new one. The new bracket has three corners with square holes, and the fourth has a slot. Make sure the slot is at the bottom, oriented so it will mount towards the car's grille. Next, you must take the plastic adjuster-screw-receivers (or whatever they're called) out of the stock projector and stick them into the square holes on the new bracket. Make sure they're in matching corners. The slot will accept the "snap" from the other corner, and it's wedged into place with that small aluminum square I told you to keep. Hope you didn't lose it. NOTE: the plastic things have been inside the headlight housing for years, exposed to alternating heat and cold. As a result, they're brittle and will crack. Be careful. Projectors side-by-side(the plastic parts have already been moved to the new bracket): 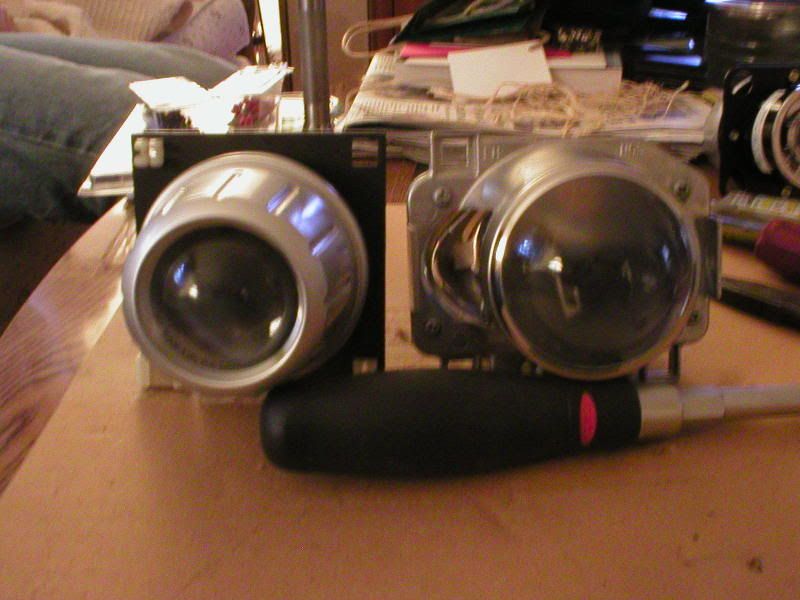 At this point, the new projector will screw into place, where the old one was: 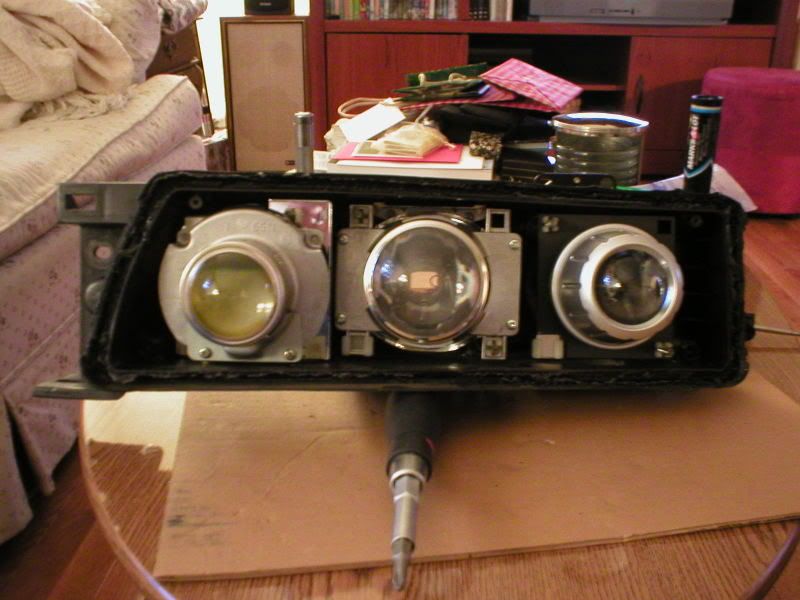 Now, re-attach that chrome plastic thing, and re-heat the housing and the glass lens and reassemble. Finished product, back on the car: 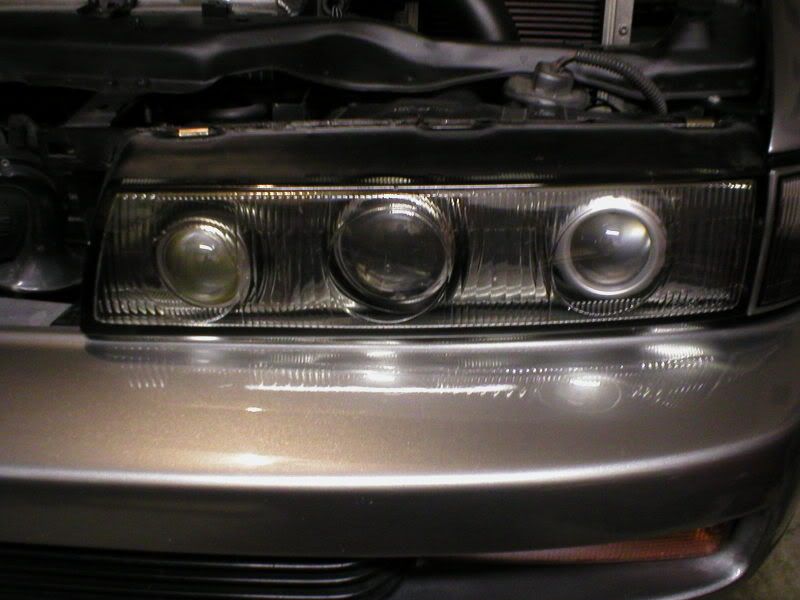 Wiring: I have no pictures here. For the low beam, coming from the pigtail that goes between the car and the bulb, there's a black wire and a green wire that originally plugged right into the back of the old H1 bulb. The connector on the H7 bulb is different and I just made two small wires, each with a male connector on one end (plug end) and a female on the other (matches the spade on the bulb). I plugged everything up and it works; eventually I'll get real H7 plugs but for now I'm good to go. Result (Driver's side is new H7, passenger's is OEM H1): 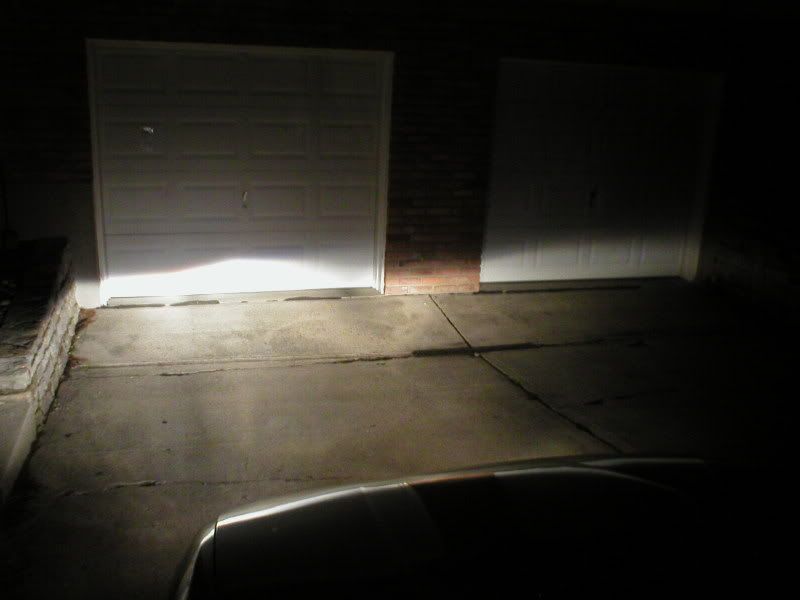 I'll get some better pictures, on a better wall or something, after getting the passenger side done. I think it's pretty obvious how much better the new H7 is than the old H1. Thanks go out to Mike at clearcorners.com; he was a great resource for this conversion, and put up with me on the phone for close to 45 minutes listening to my dumb questions about light output and other things. Also thanks to the guy who made the brackets, Reid Brown. If you want to get a set of his brackets get in touch with him via PM, his forum ID here is derux. TO BE CLEAR: Reid (and Mike as well) get the credit for the R&D, he designed the brackets, all I did was write it up.
__________________
E36 M3 - new project 1990 240SR - screamed down the road |

|
| Sponsored Links |
| Bookmarks |
|
|


 Threaded Mode