|
|||||||
| S Chassis Technical discussion related to the S Chassis such as the S12, S13, S14, and S15. |
|
|
Thread Tools | Display Modes |
 12-31-2011, 03:58 AM
|
#1 |

Join Date: Apr 2011
Location: Sydney, Australia
Posts: 40
Trader Rating: (0)
 Feedback Score: 0 reviews
|
I recently got a new cat-back exhaust, and after a lot of searching and finding no real help on how to install one I thought I'd give it a go and do a write up to help others.
Tools for the job: Trolley Jack Jack Stands - Safety First 10mm Socket - For the earthing wire 12mm Socket - For the 2x hanger bolts 14mm Socket - For the 4x exhaust bolts Breaker Bar PB Blaster or WD-40 Permatex Copper high temp exhaust silicon Torque Wrench if available Step 1: Jack the front of the car up and place jack stands under the frame rails, then do the same for the rear of the car. I left the jack under the diff as well just in case. 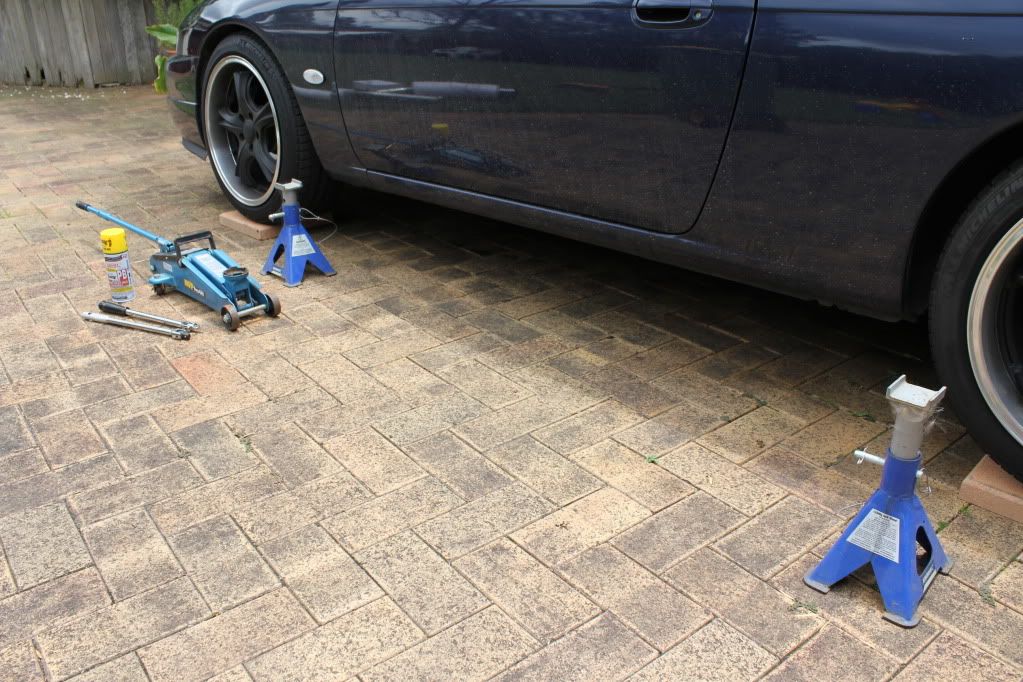 Step 2: Give the two nuts holding the exhaust onto the cat a good squirt of PB blaster to loosen them up, leave it to soak in for a couple of minutes so it can work it's magic. 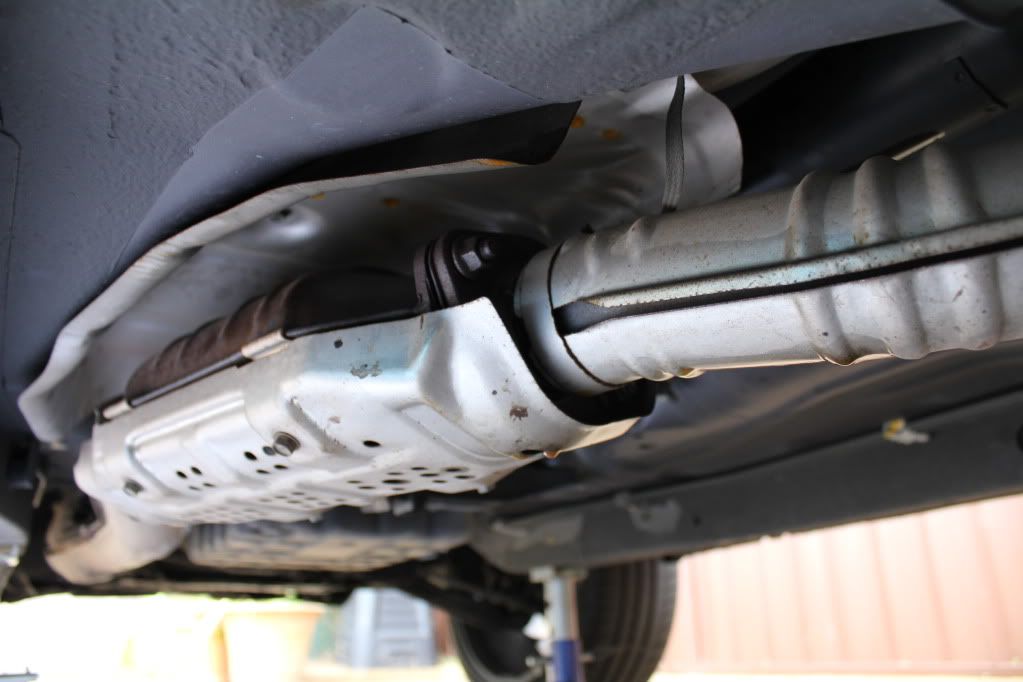 Step 3: While the PB blaster is working, you will need to undo the two hanger's that are held on by a bolt. There is one before and after the diff, they should be easy to see. They take the 12mm socket. Then it should be only the 2 hangers left at the muffler end. Step 4 : By now the PB blaster will have done it's job. Grab a breaker bar with the 14mm socket attached then crack both the nuts and undo them but leave them attached still because you will need to remove the earthing wire before you pull the exhaust off. Once you have removed the earthing wire completely, reattach it at the other end of the cat. 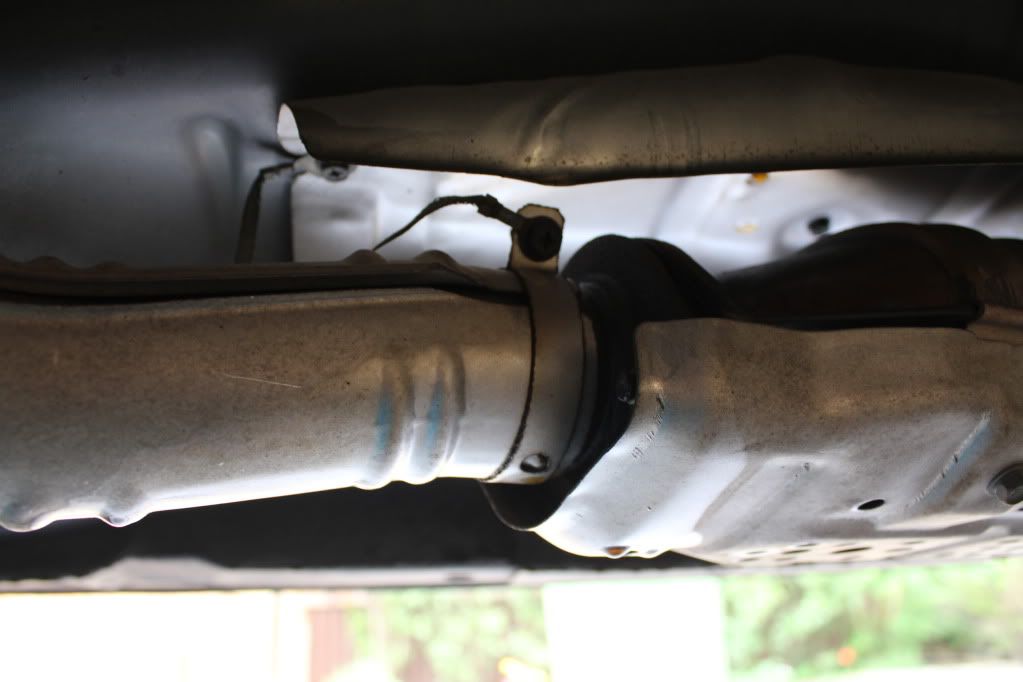 Step 5 : Now that you have moved the earthing wire you can pull the exhaust away from the cat, then go to the back of the car and slip the last remaining hangers of the car. WD-40 will make this a lot easier. Then you have fully removed the old exhaust. 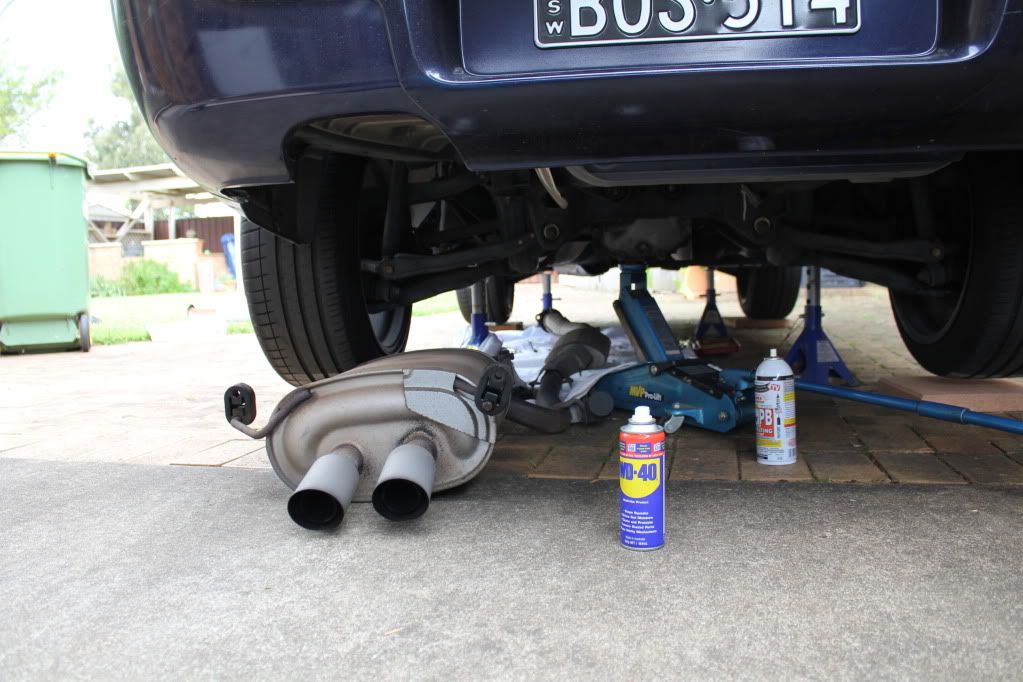 Step 6: Take the rubber hangers off the old exhaust and transfer them to the new exhaust, it will be easier to attach the two hangers with bolts onto the body of the car first. 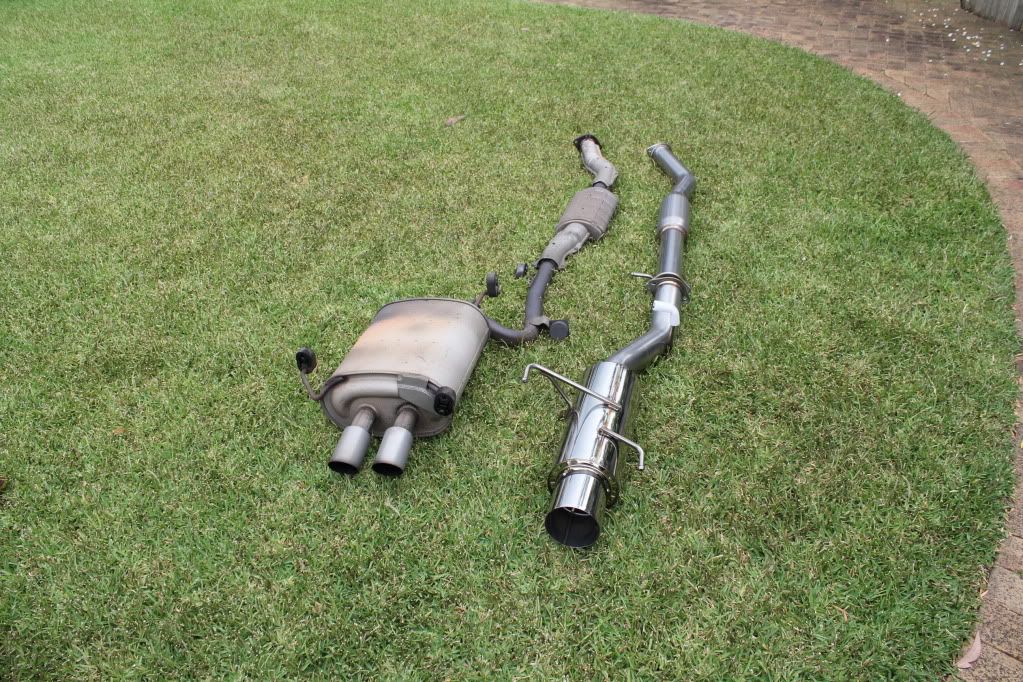 Step 7: With the old exhaust off, you will need to bend the protective shielding on the cat a little to accommodate for the larger exhaust piping. 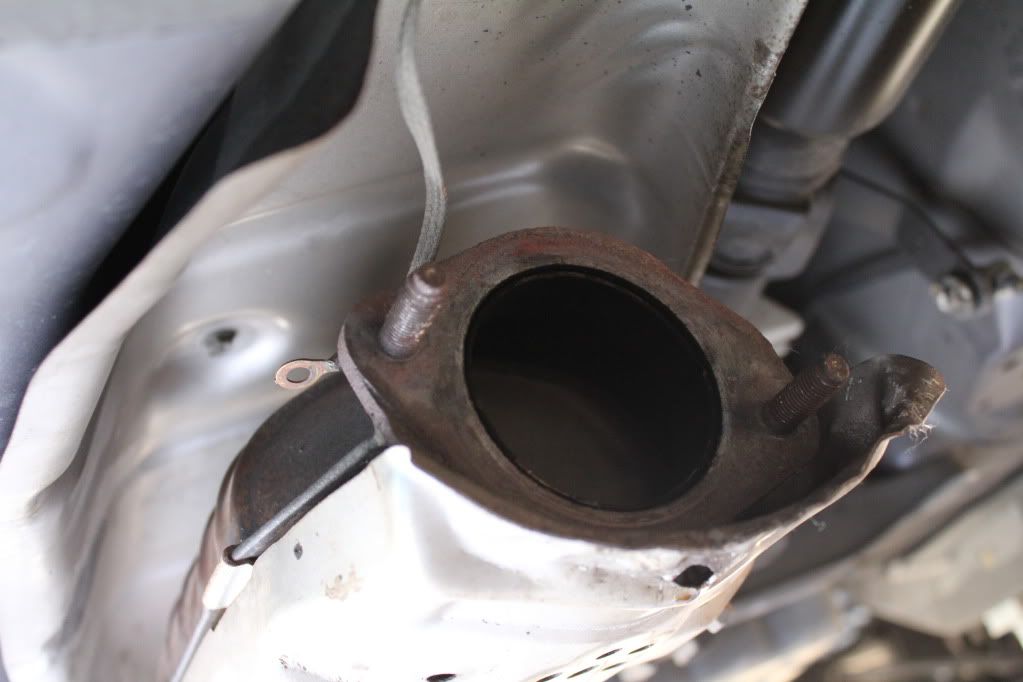 Step 8: Inspect the gasket from the cat to see if it's re-usable. Mine was in pretty good condition so I just cleaned it up and wiped away the remaining carbon from the gasket. I wasn't sure if the multi-layer gasket needed silicon but I used some anyway. Put a continuous ring of silicon onto the gasket then place it onto the cat, grab the middle section of the new exhaust and attach the hanger that has been bolted back onto the body. Then put another ring of silicon on to the other side of the gasket thats already on the cat and fit the new exhaust up to the cat. Put the two nuts back on finger tight. 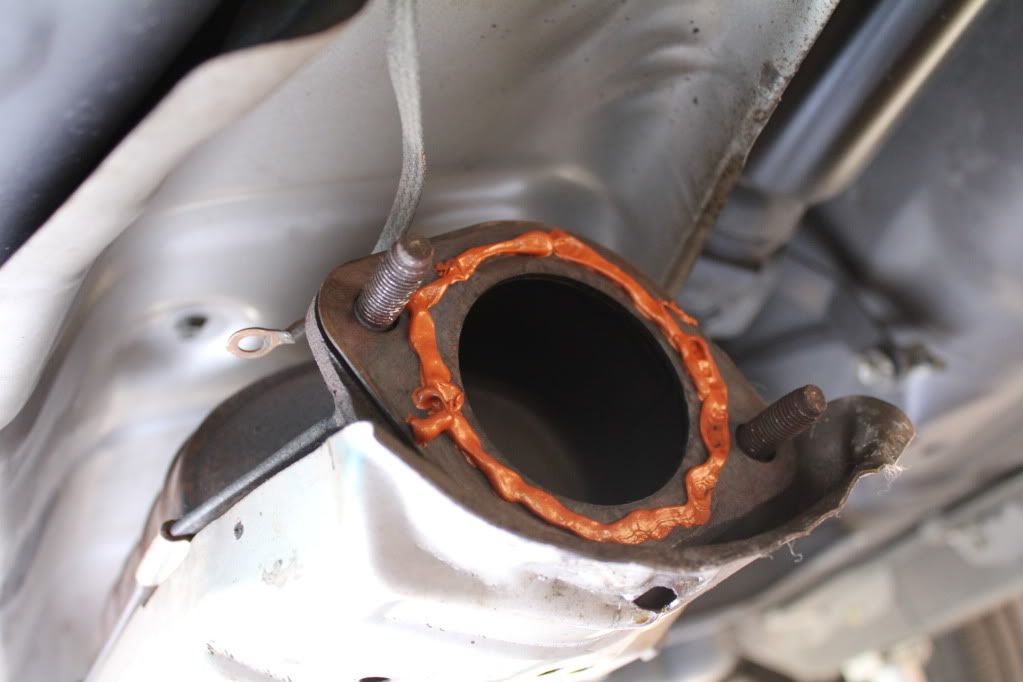 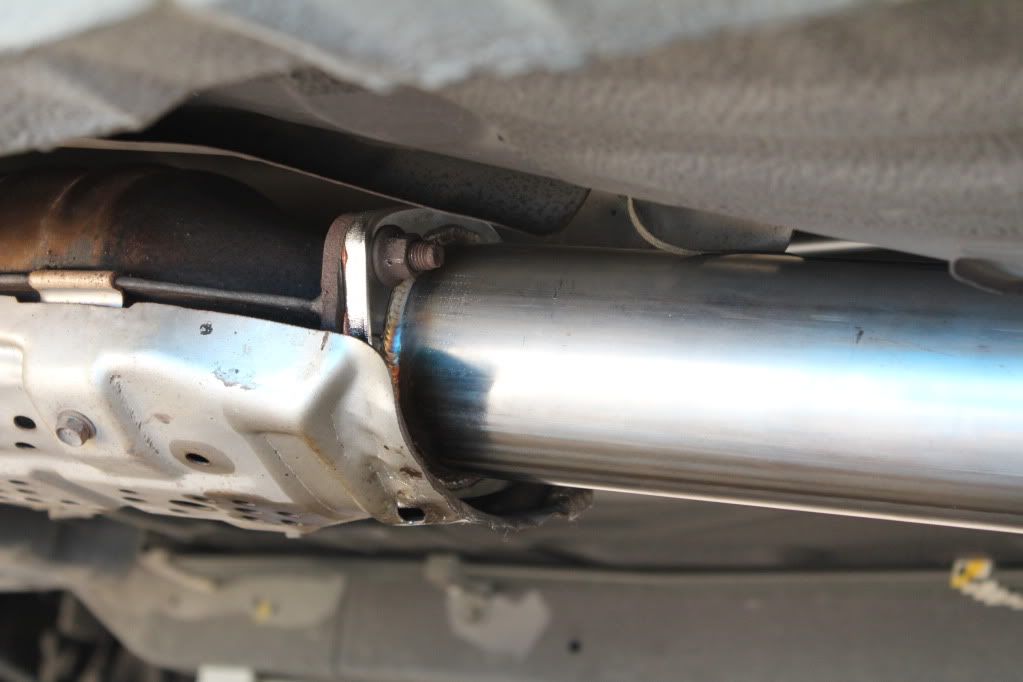 Step 9: Now for the rear section of the exhaust, attach the hangers to the muffler and to the hanger that is up behind the diff. For the next bit it will make it easier if you can have some pull the muffler back a little, so you can concentrate on putting a ring of silicon onto both sides of the new gasket and to give you a bit of gap to put the gasket into place. Once again tighten the bolts up finger tight. Now leave the silicon to dry for about an hour. 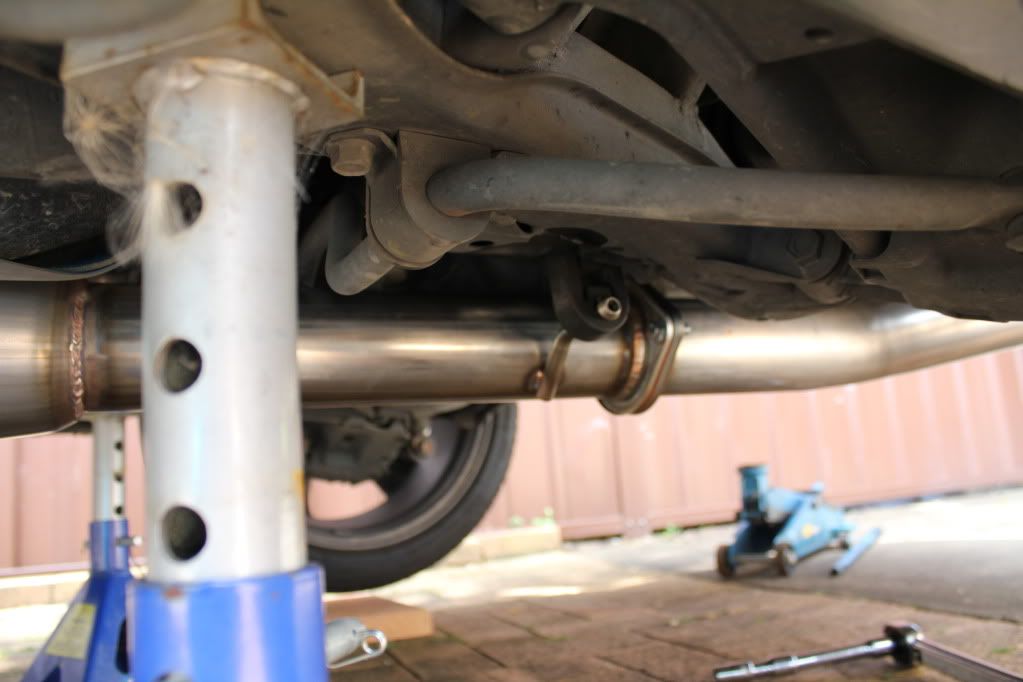 Step 10: I couldn't find a definite answer for the next bit. Now that you've given the silicon some time to dry, torque the bolts up nice and tight. I tried searching quite a bit for an answer to how tight they should be but I couldn't find an answer so I tightened them up to 30lb which should be enough. 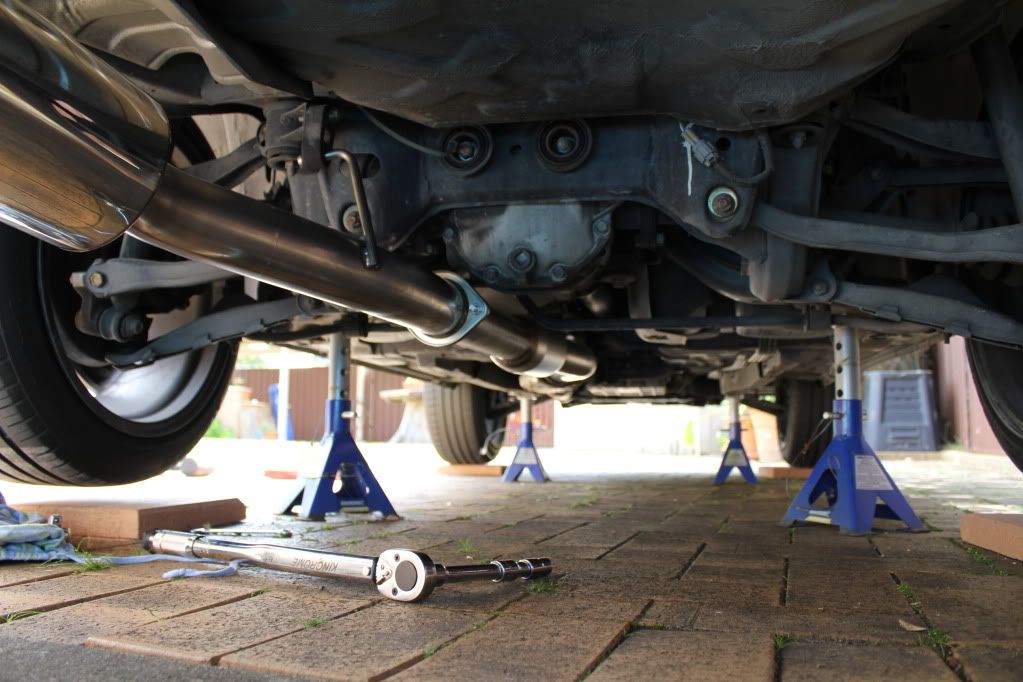 Then your all done  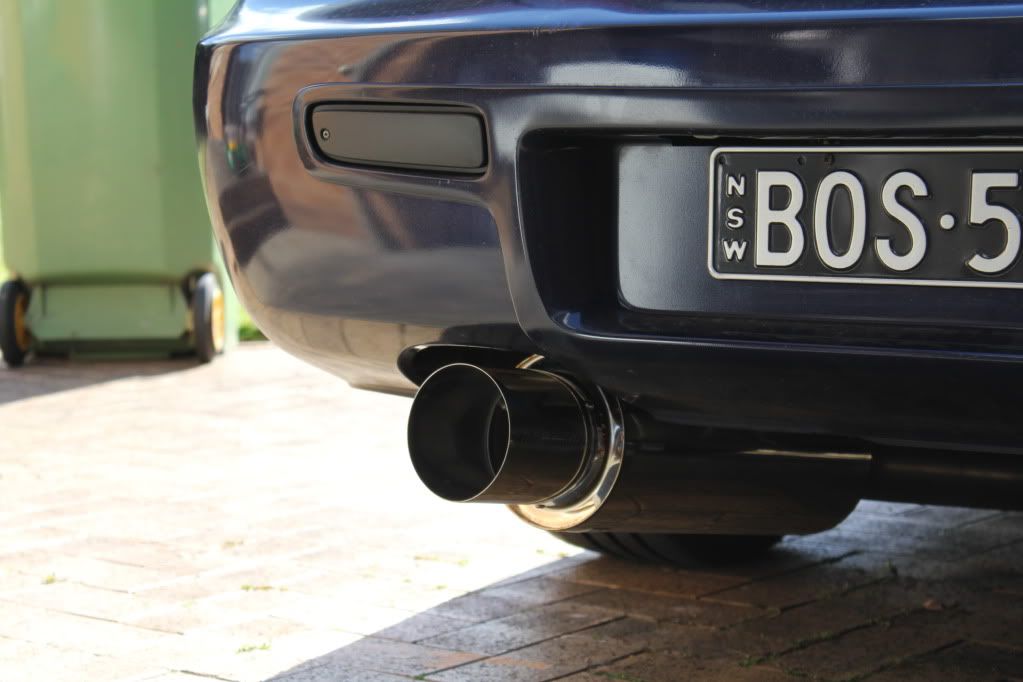 The shitty little jack I had didn't go very high so I didn't have much room under the car, But I had it all done in a couple of hours. |

|

|
| Sponsored Links |
| Bookmarks |
| Tags |
| exhaust, fitment |
|
|


 Threaded Mode