|
|||||||
| Builds (and builds only) Got a build thread? It goes here, build threads anywhere else on the forum will be locked and never moved. |
 |
|
|
Thread Tools | Display Modes |
 03-12-2011, 07:47 PM
|
#1 |
|
Nissanaholic!
 
Join Date: Oct 2006
Location: Cape Coral, FL
Posts: 2,485
Trader Rating: (33)
  Feedback Score: 33 reviews
|
Build and Review: 91 SE Hatch "Filthy" S13
Back in the fall my best friend Trevor (Magical Trevor) and I decided we would both build hatches. We talked about it and since I have the bigger shop and quite a big tool collection already, we decided it would take place at my shop. So Trevor brought his stuff down. The next step was to find cars. This will be the story of Trevor's car from start to end. Along the way we will review each part we get for the car, and each new tool we buy to complete the process.
The car is a 1991 240sx SE Hatchback 5spd. It is a rescued drift car from Chicago that spent most its life in Florida. The plan is to rebuild and restore the car to better than factory spec. The goal is to be able to have a street car that is comfortable and quiet to drive down the highway at 70mph and have a normal conversation without yelling at your passenger. Full interior build will include complete gutting the interior, removing all the OEM sound deadening material and sloppy glue jobs. Sanding the entire cabin for aftermarket rust proofing, sound deadening and a few other tricks that we're going to try to keep the noise level down and keep the car enjoyable. Full exterior build will include body work repair, full chassis respray (including the engine bay), OEM Type X kit, wheels (Volk, Work, SSR, etc.) and a few other minor custom things. Unsure of what color the car will be painted, but it will be something unique. Suspension, well we're looking at some comfortable options. Coilovers (opinions are welcome), new bushings, ball joints, tie rod ends, etc etc. Powertrain - we will be using the S13 SR that we pulled out of his S14. Lightly modded, all the bolt ons, Power FC and a few other odds and ends. We have it planned out pretty well. We have some excel sheets set up to track hours worked on the car, the parts installed, and several other aspects of building the car. I will have these up on a google document shared file shortly so anyone can check it out along with a blank one for anyone that wants to use it and download. So, on with the storyline. After searching around for a month or so we found a nice hatch in Chicago that had a engine "issue". We drove down and checked it out and it turns out it was in pretty good shape for what it was. One the way through Chicago. The traffic was horrible. 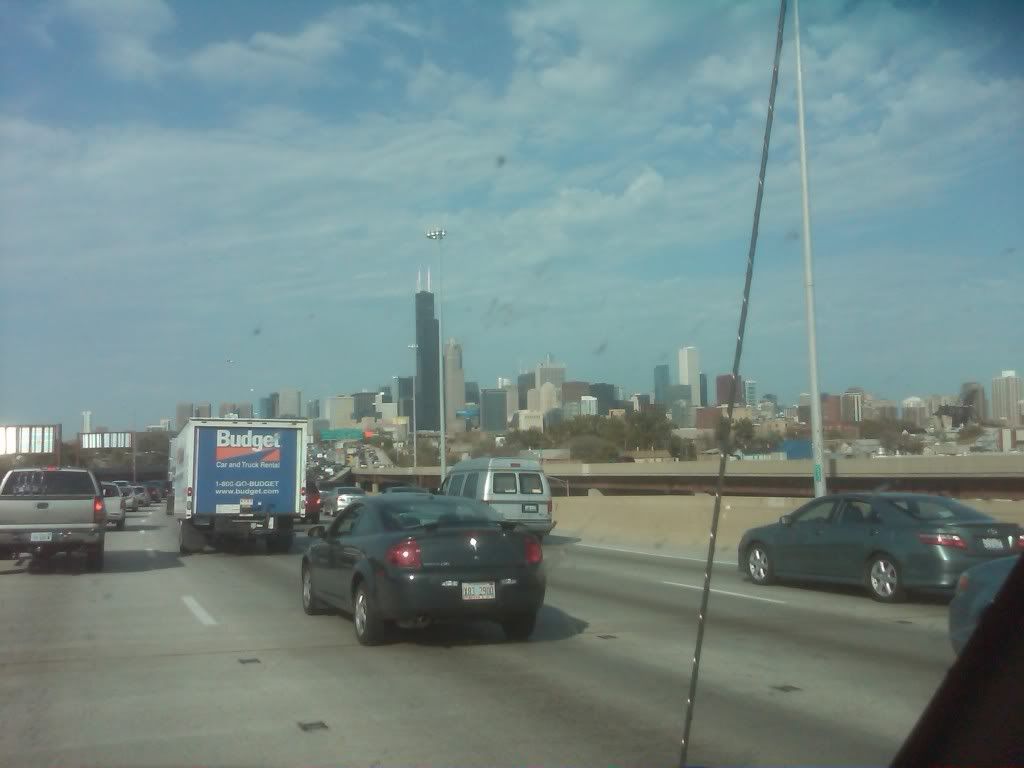 So after making the deal we loaded the car up on the trailer and headed back home. With the car FULL of extra parts. 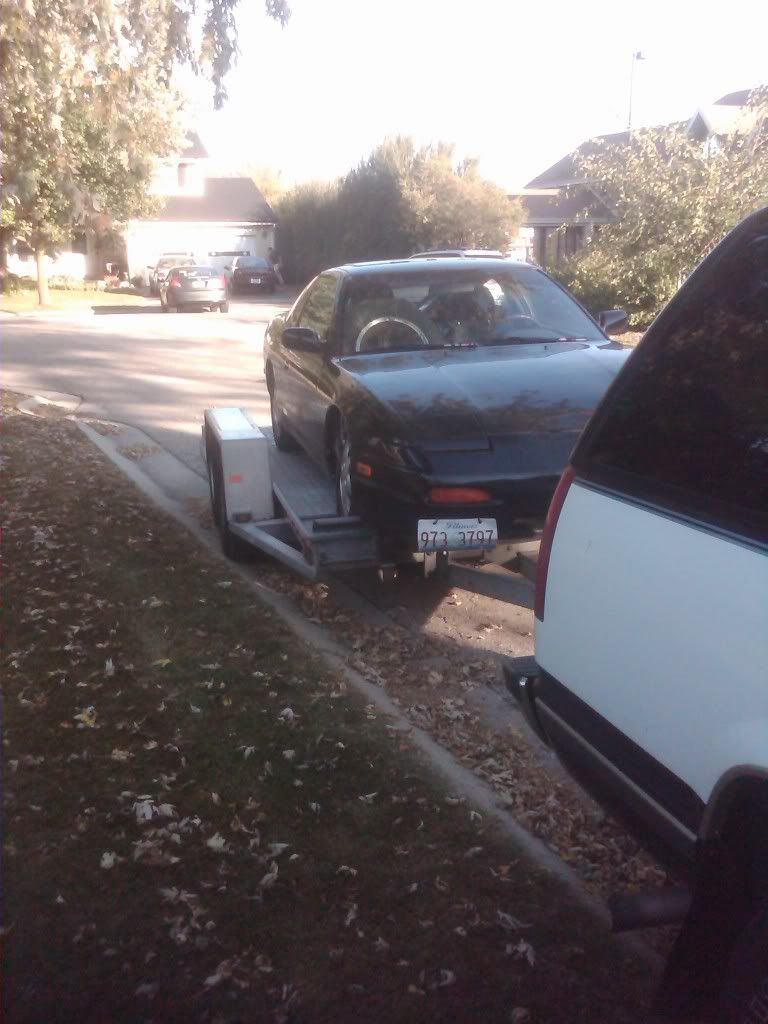 And after fighting back through Chicago traffic we had the car back home.  And the saga continues........
__________________
I had a cool signature |

|

|
| Sponsored Links |
|
03-12-2011, 08:18 PM
|
#2 |
|
Zilvia Addict
 
|
And so moving on with the saga.....
Seized KA that was leaking like a strainer is out along with the trans. 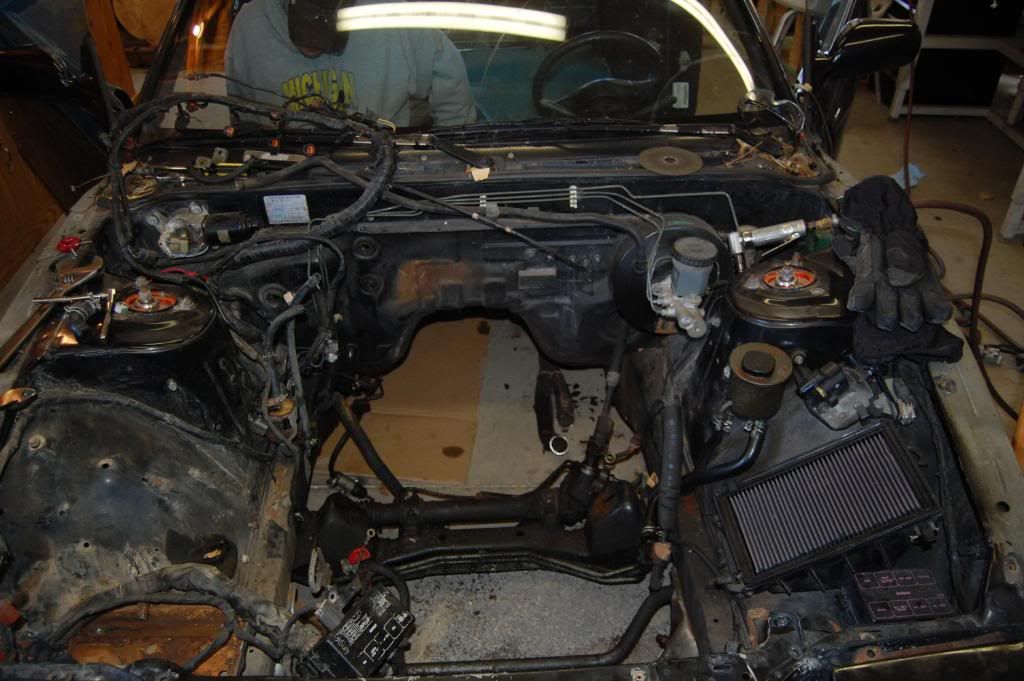 Worthless.....  Shane putting on the "Do Work" gloves.... Ish just got real. 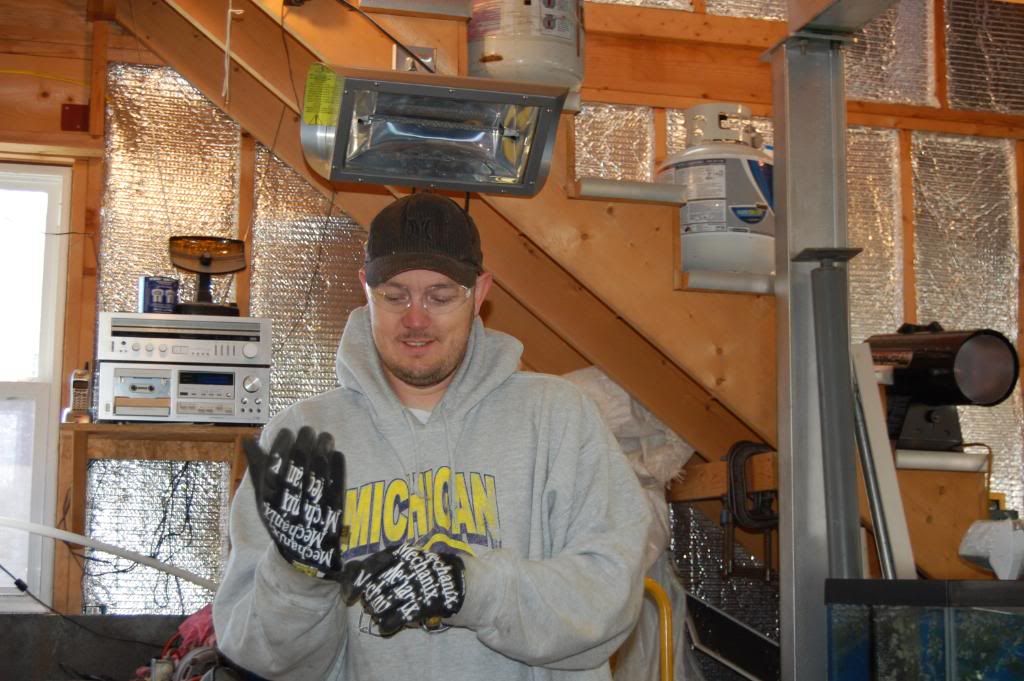 Battery tray, please make your way to the nearest exit. 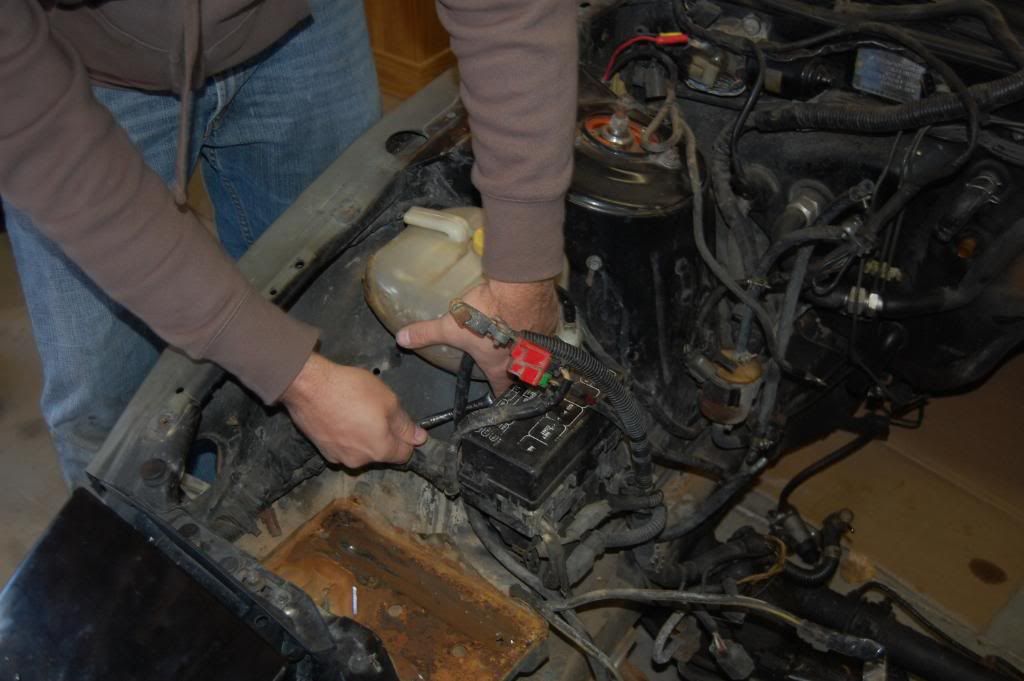 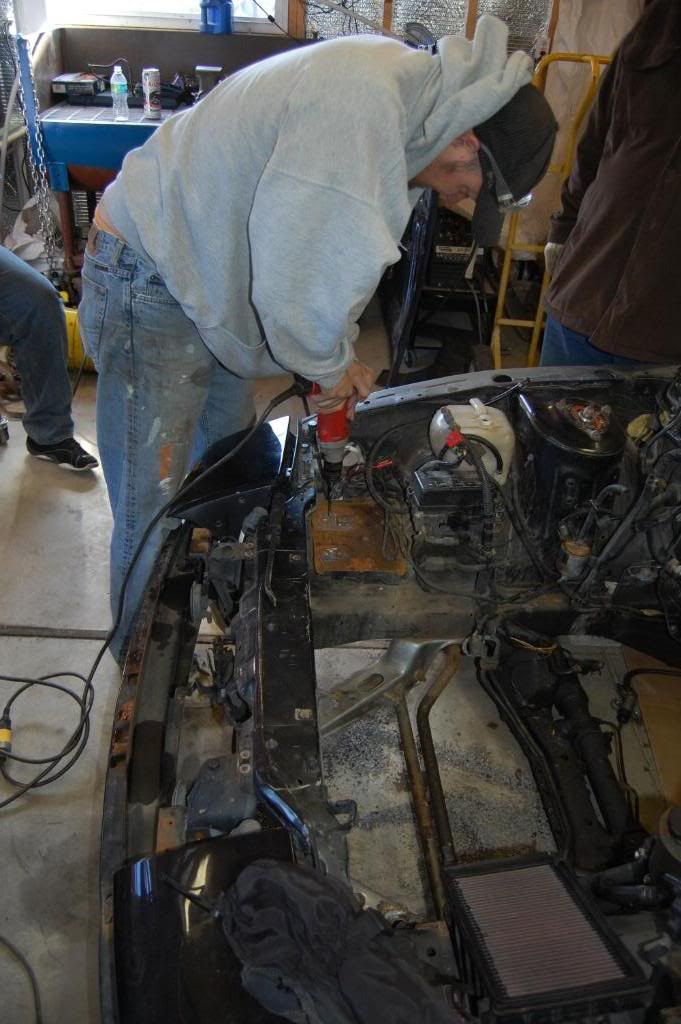 ... please 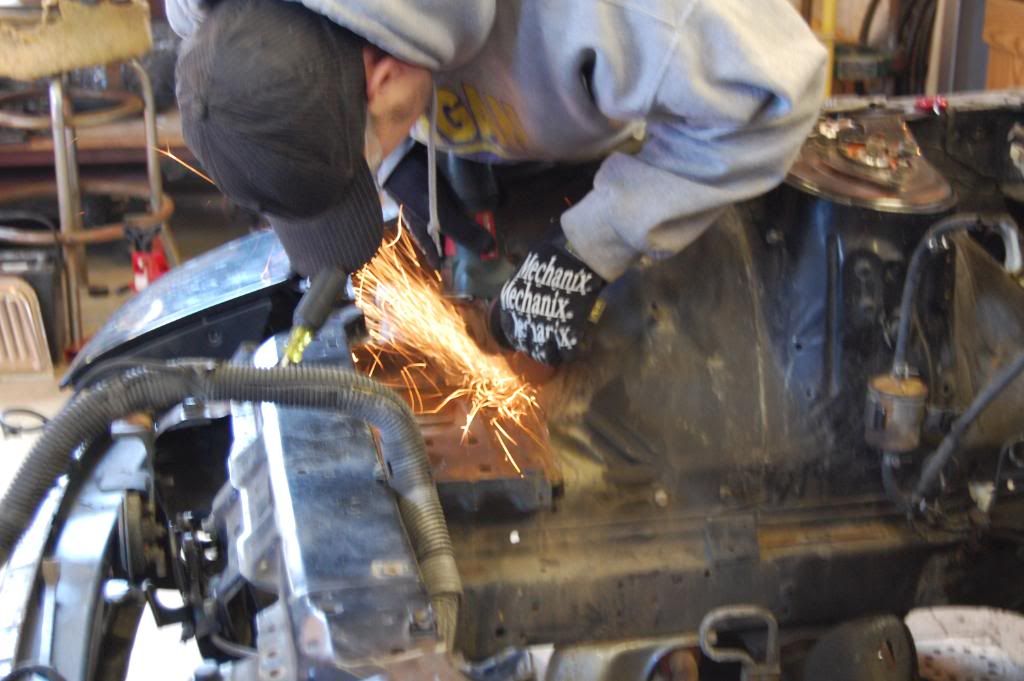 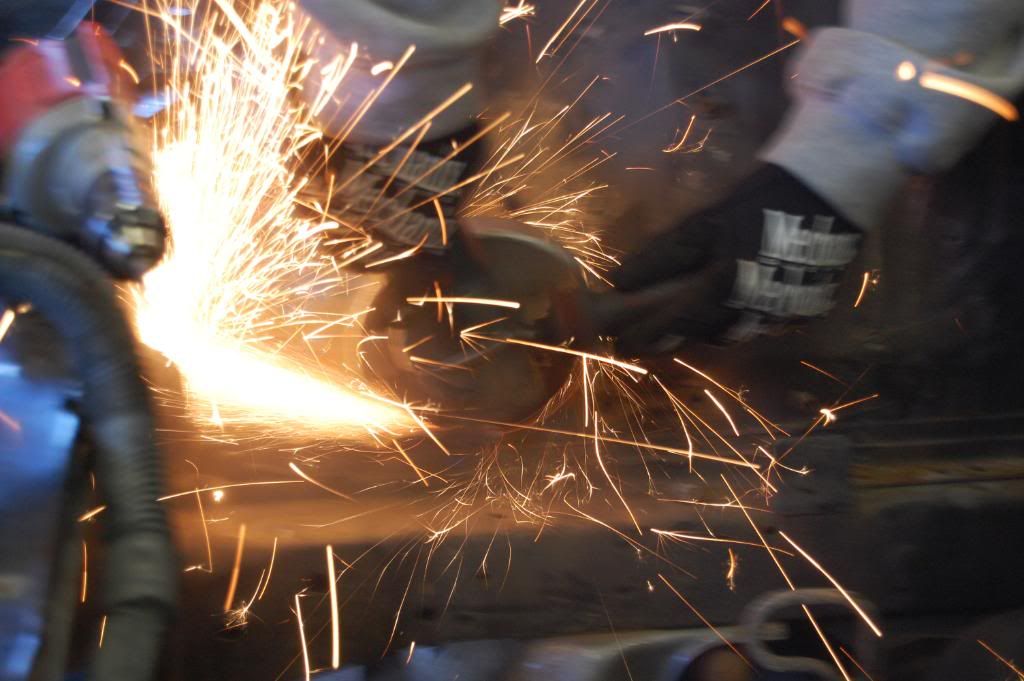 ..Gone 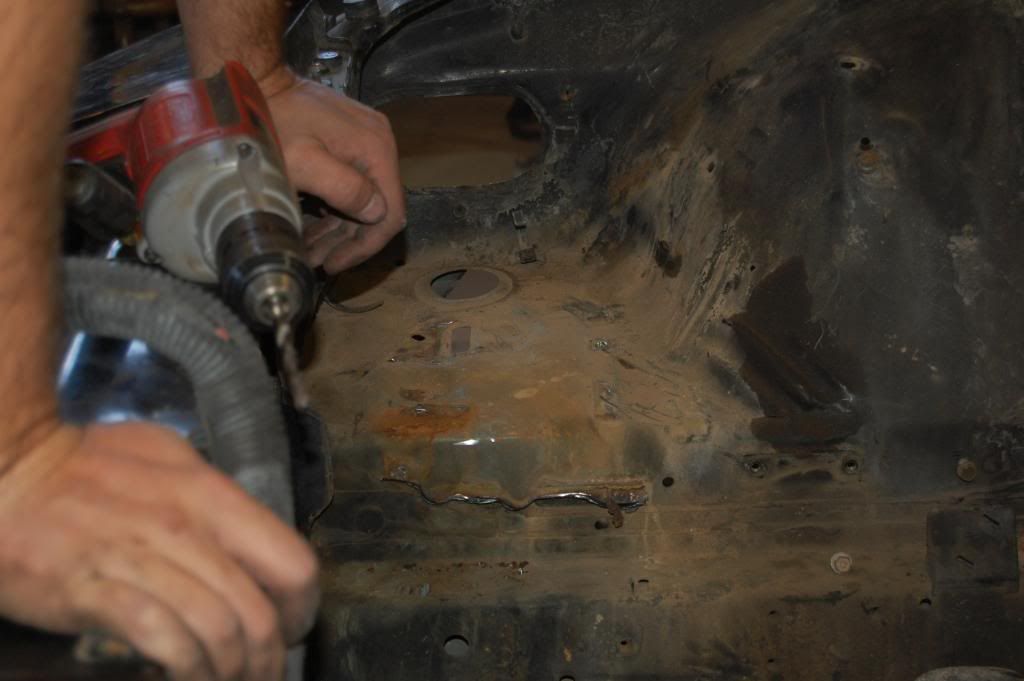 |
|
|
|
|
03-12-2011, 08:24 PM
|
#3 |
|
Zilvia Addict
|
Shane working on the interior, myself taking more front end parts off.
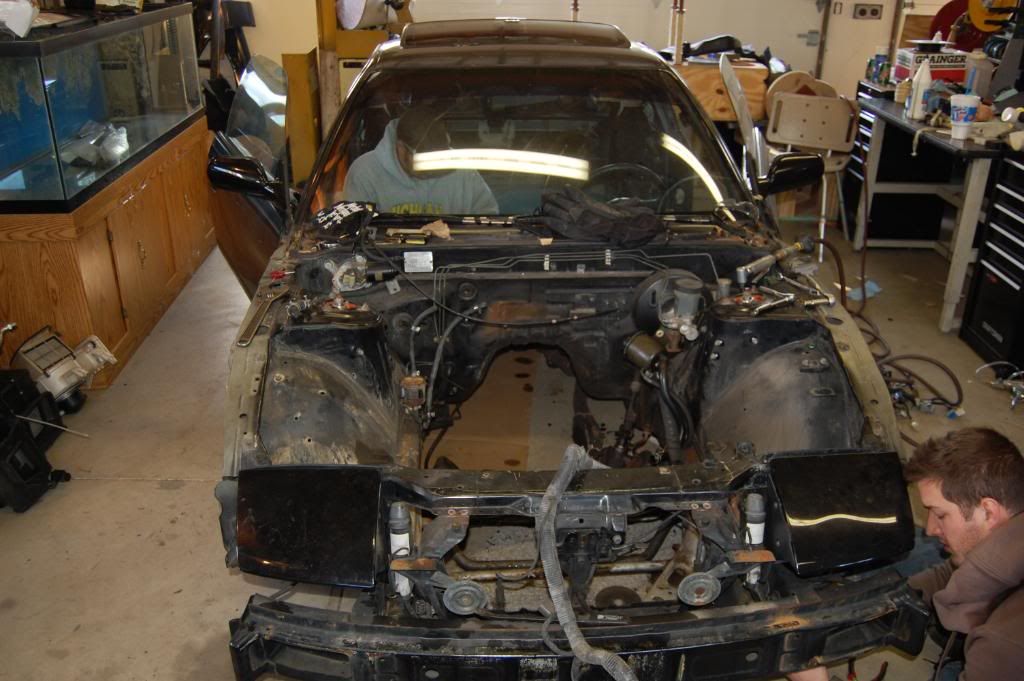 Master cylinder, clutch master, brake booster and a few other odds and ends coming off. 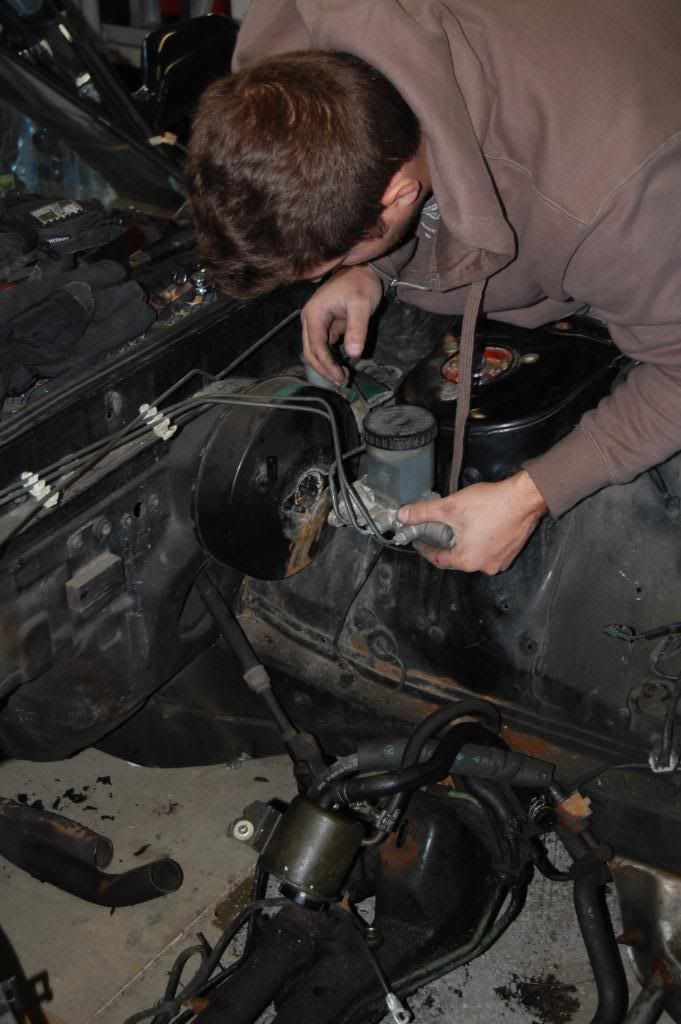 Dash is out, now on to pull the dash harness, pedals, cables.. etc etc 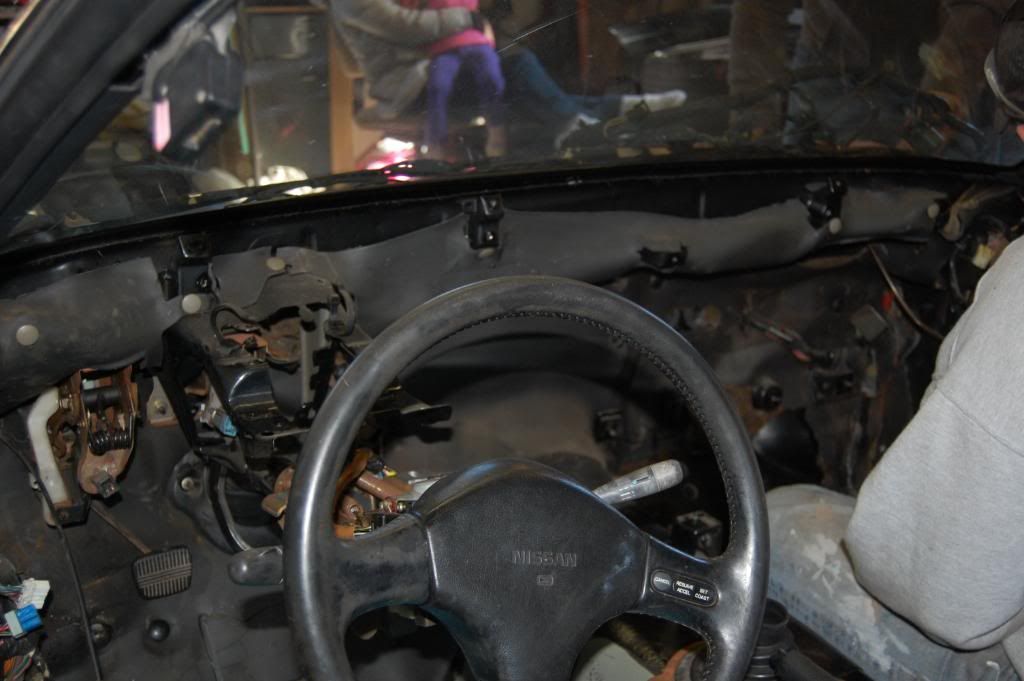 Shane doing his dash magic.... Where did you put the dash again? 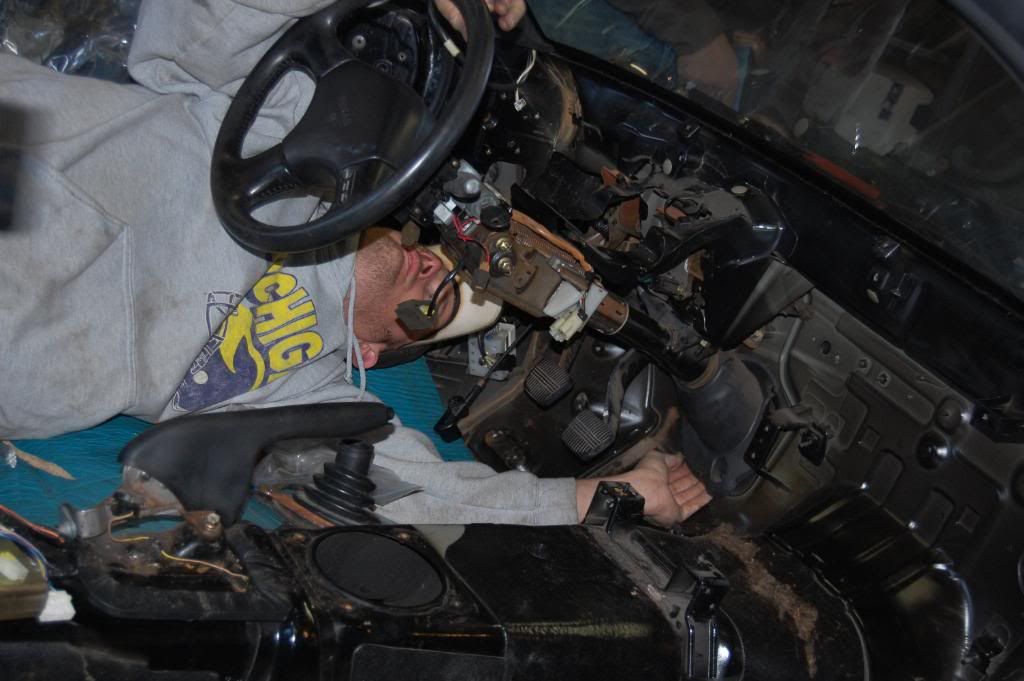 More under dash parts removal.. 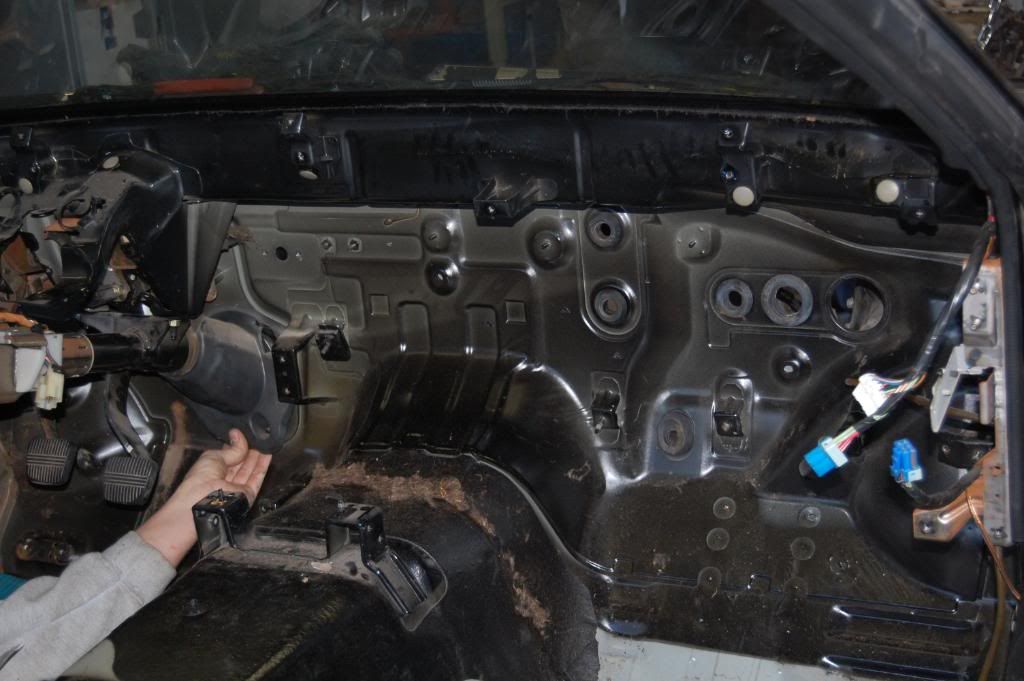 ..more updates and pictures to come later. Last edited by Magical Trevor; 03-13-2011 at 12:09 PM.. |
|
|
|
|
03-12-2011, 09:14 PM
|
#4 |
|
Nissanaholic!
Join Date: Oct 2006
Location: Cape Coral, FL
Posts: 2,485
Trader Rating: (33)
Feedback Score: 33 reviews
|
First Product Review: Tear-Down Table from Northern Tool
Northern Industrial Tear-Down Table & Parts Washer | Water-Based Parts Washers | Northern Tool + Equipment Picked this up on sale for a good price out of their sale catalog. It was delivered in about a week. The box was huge and this thing was in a lot of pieces. It took about 30-45 mins to put together and there were several steps in the directions where you would put parts of it together and then the next step would have you take it apart to install another part. So it was a little frustrating. Once the entire thing was together it was actually pretty nice. Very well built and for the price you really couldn't beat it. A tear down table with a parts washer on the side. It will only take pretty small parts but its all that I really needed. Over I would say it was a good value and would recommend it to anyone needing something like this. We left the wheels off it just to keep it from getting any higher and to keep it from moving around. Here are some pics of it in the shop. 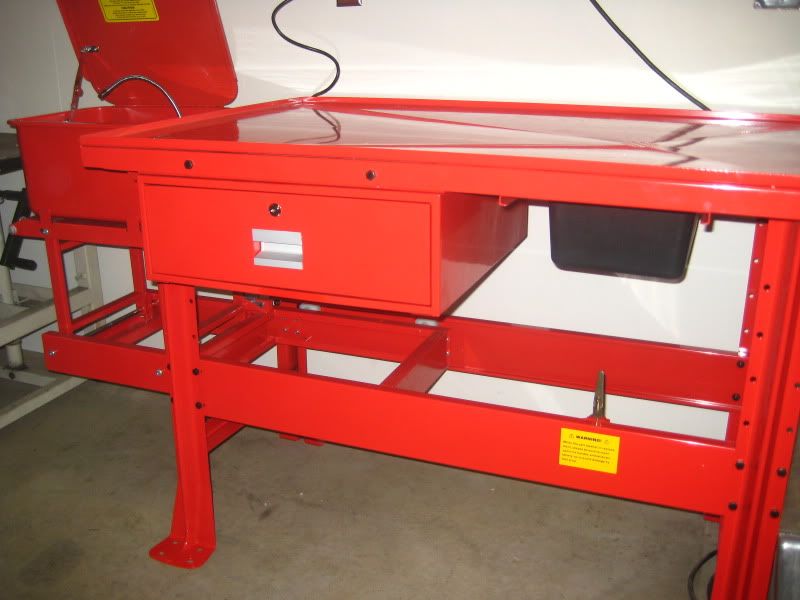 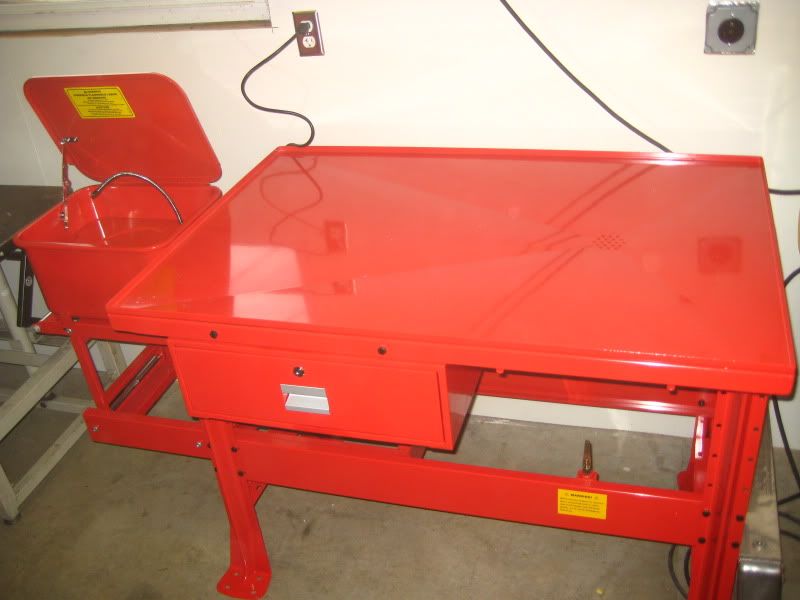 If you need something like this go for it.
__________________
I had a cool signature |
|
|
|
|
03-13-2011, 09:05 AM
|
#5 |
|
Nissanaholic!
Join Date: Oct 2006
Location: Cape Coral, FL
Posts: 2,485
Trader Rating: (33)
Feedback Score: 33 reviews
|
Decided we needed a few more things for the cars, including a small blasting cabinet. So looked around for a good deal, read some reviews of the Harbor Freight ones, they all seemed to be terrible, looked at the Northern Tools options, they didn't have a side opening bench top one. SO I went to the Grizzly catalog and found a decent bench top cabinet that both sides opened and it had a light for $149.99 plus $25 shipping. Its nice to have boxes show up. After getting this thing set up we have a few complaints about it. One there is NO material around the top window to seal it to the box, this allowed lots of sand to escape through the gaps. This was an easy fix, I took some 3M double sided tape I had and made a seal for around the window, adhering only the glass window down and allowing for the plastic protector covers to still be changed. Second is the doors aren't quite flat and true, so there are leaks around the door seals. This has been solved using some rubber trim bought at the local auto parts store. After doing these minor modifications the cabinet works pretty good. The gun system seems to be just small enough and the gloves, once you're use to them, are a nice size and get easier to use with time. I would give this thing a 7 out of 10 just based on price and value.
 Also keeping my eyes open for deals on other things that will be needed down the road I picked up some Dynapad to go under the new carpet that will come later. 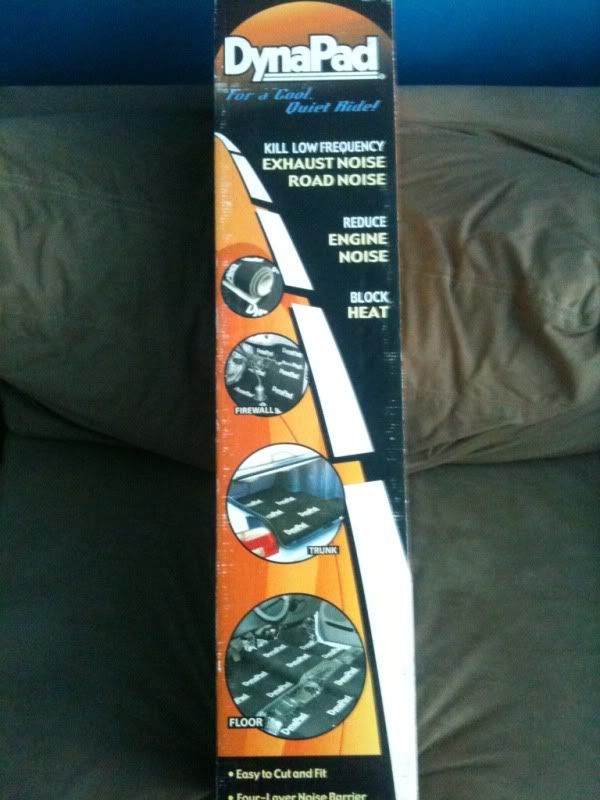 hmmmm good to have boxes showing up with stuff for the car. We took the time yesterday to get everything cleaned up and set up the blasting cabinet. Here is Trev starting on a lot of the little interior brackets and such that will be cleaned, blasted, primed and painted. I know they will never been seen again, but I will know they were done right and the car is perfect even under the interior panels. You can clearly see where the cabinet is leaking in this pic but it has all been resolved now. Also Trevor is a huge allergy baby, so I picked him up a nice mask off the clearance table at NAPA the other day. 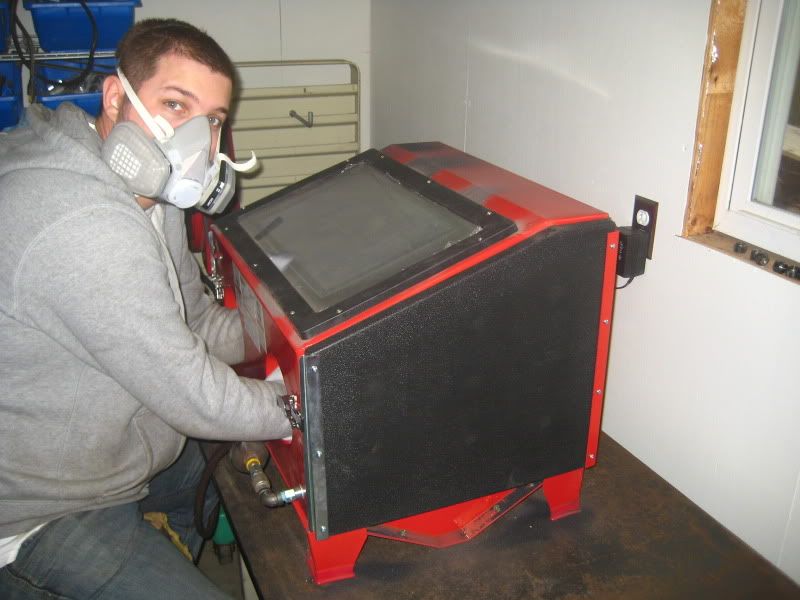 I'll have some more progress posted later today.
__________________
I had a cool signature |
|
|
|
|
03-13-2011, 12:48 PM
|
#8 |
|
Zilvia Addict
|
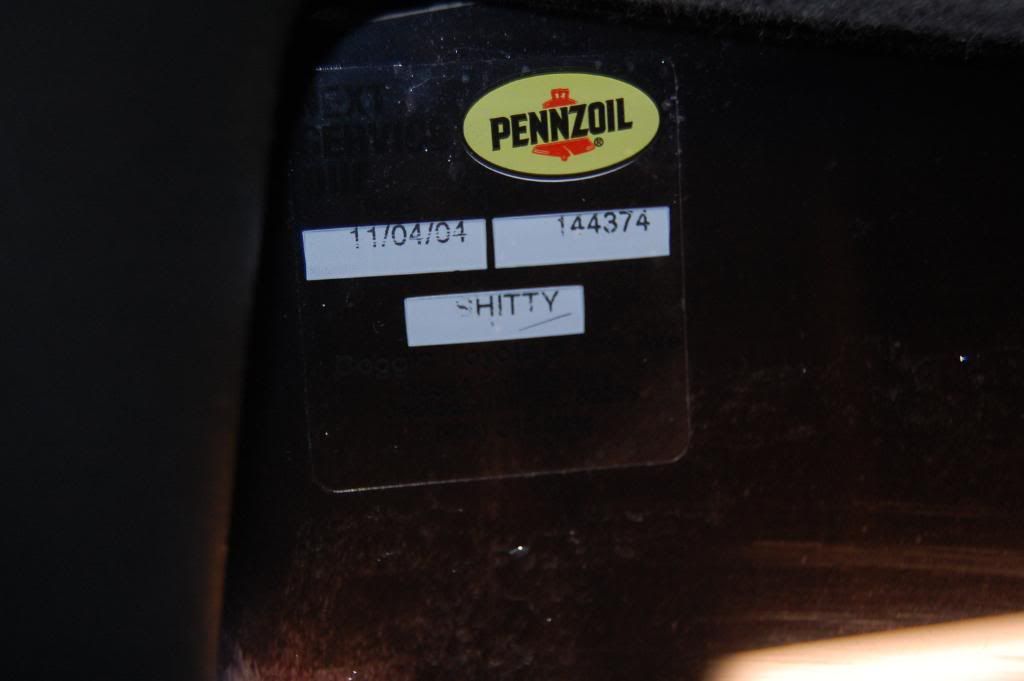
Thought this was pretty damn funny.... we happened to notice what oil the previous owner was running in the piss poor KA.
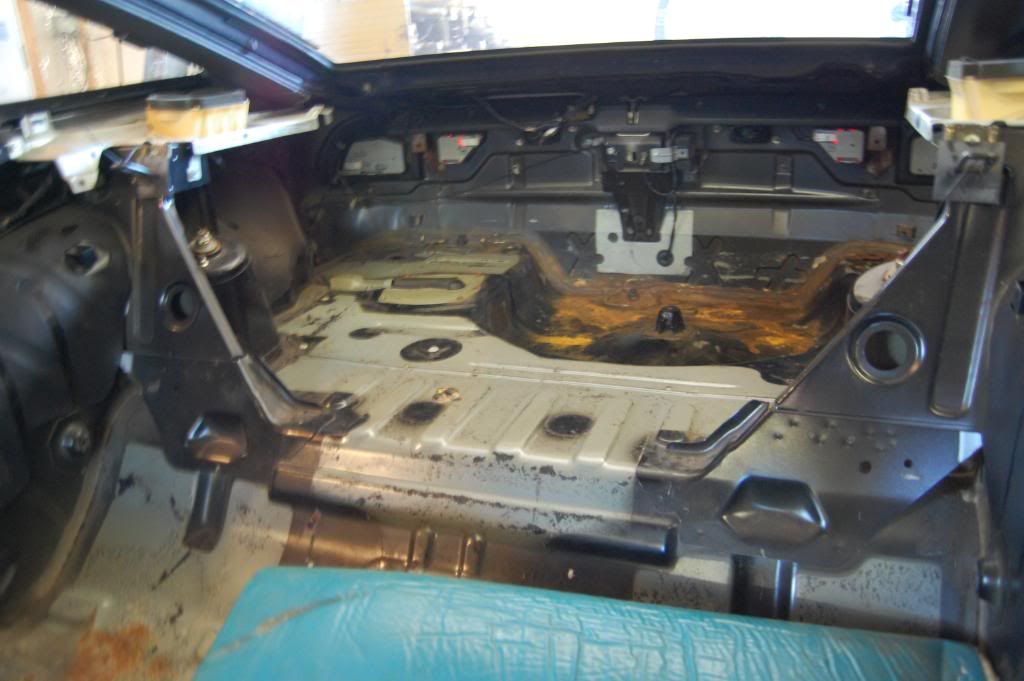
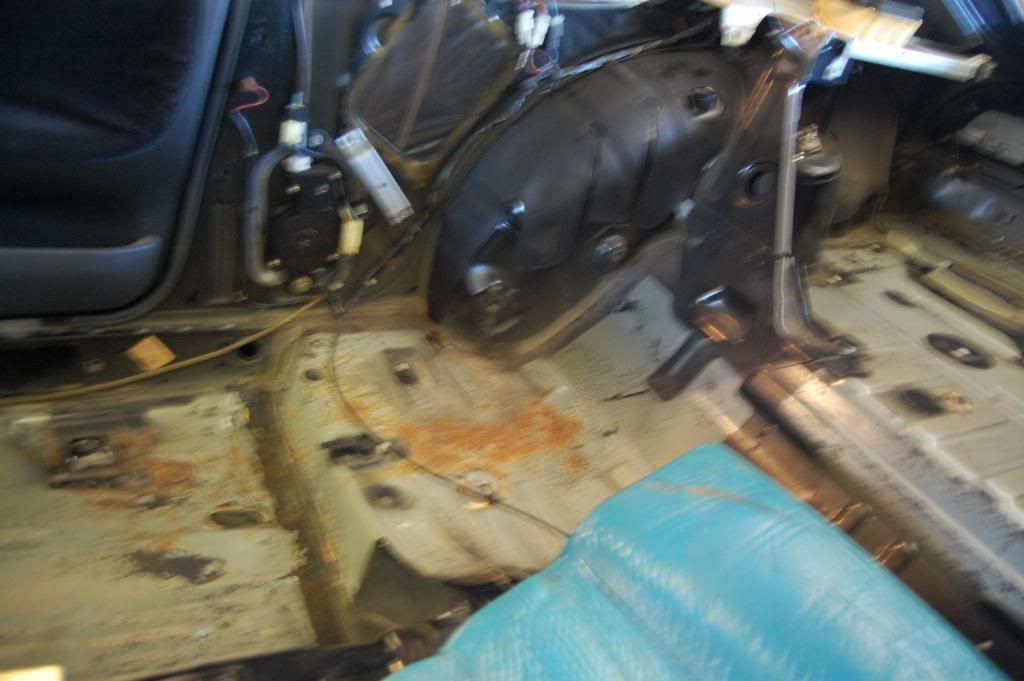
 On a more serious note, brake booster is out. Next comes the brake lines, fuel lines, clutch master, and wiper motor. The coilovers, power brace, sway bar and the power steering rack along with the cross member will also be pulled. 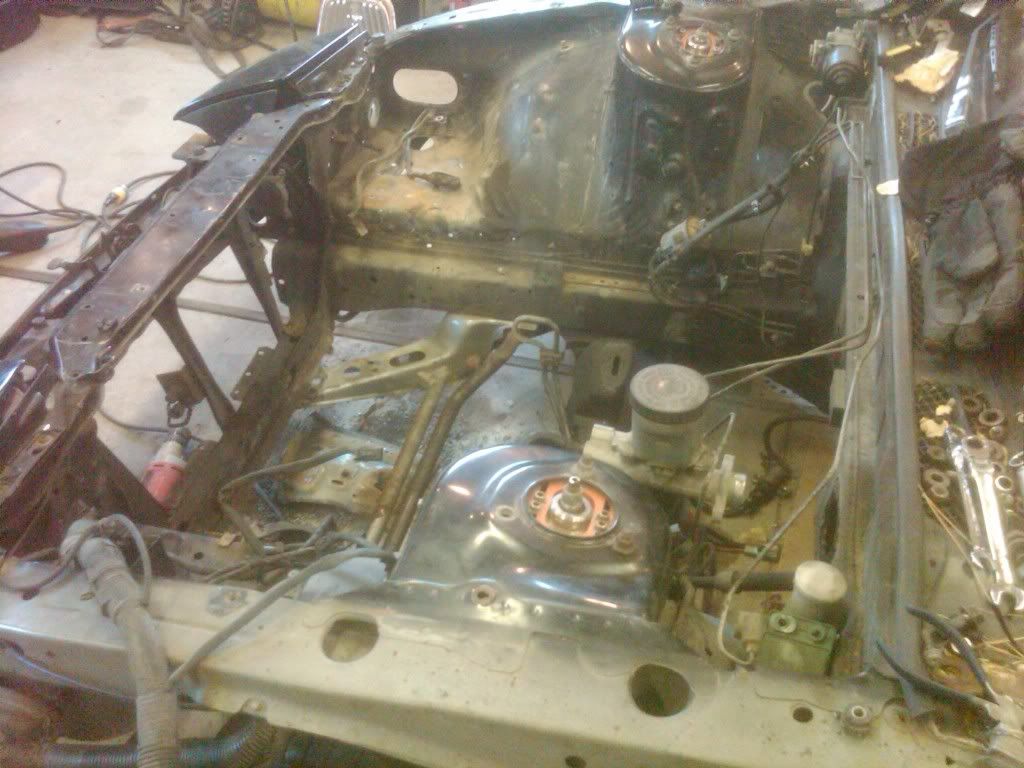 Back to the inside of the chassis. 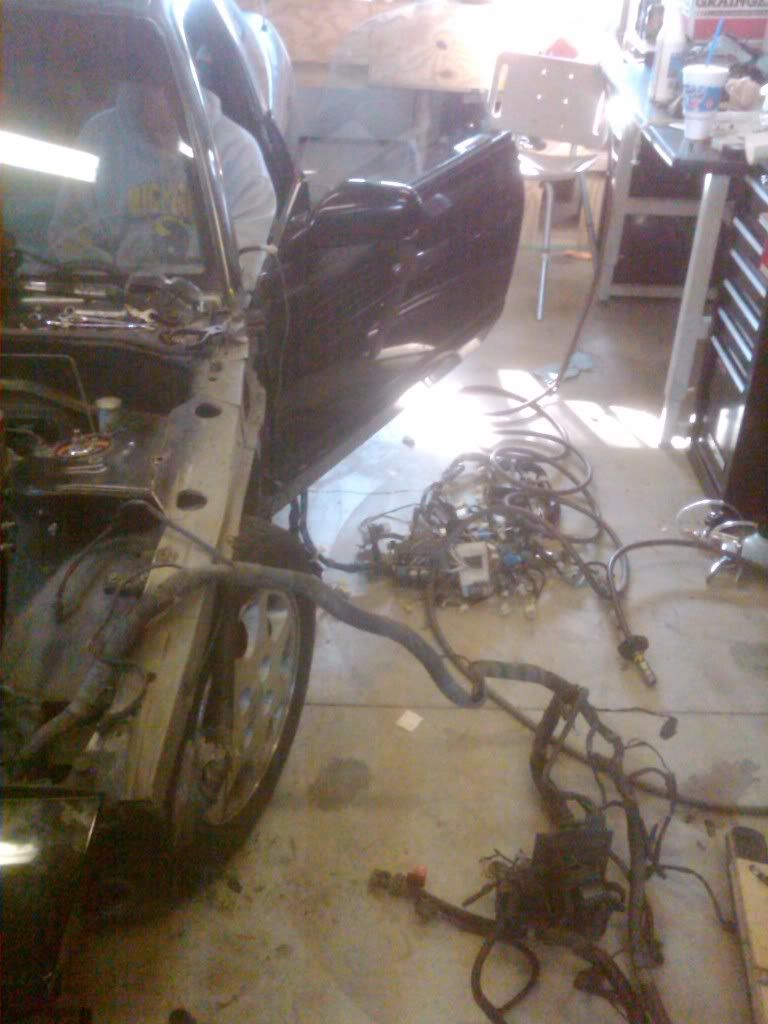 Carpet, sound deadening and sloppy glue from inside needs to come out. 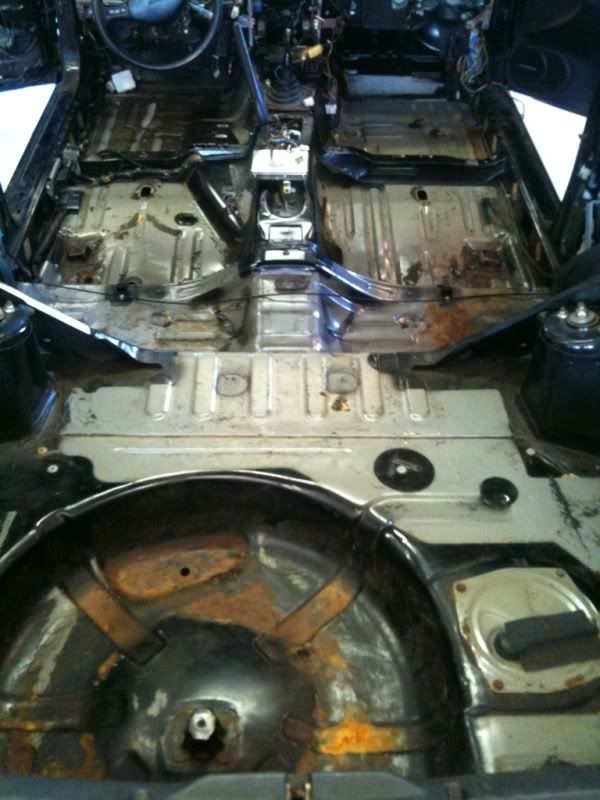 Passenger side floor and trans tunnel.  Driver side floor and trans tunnel. 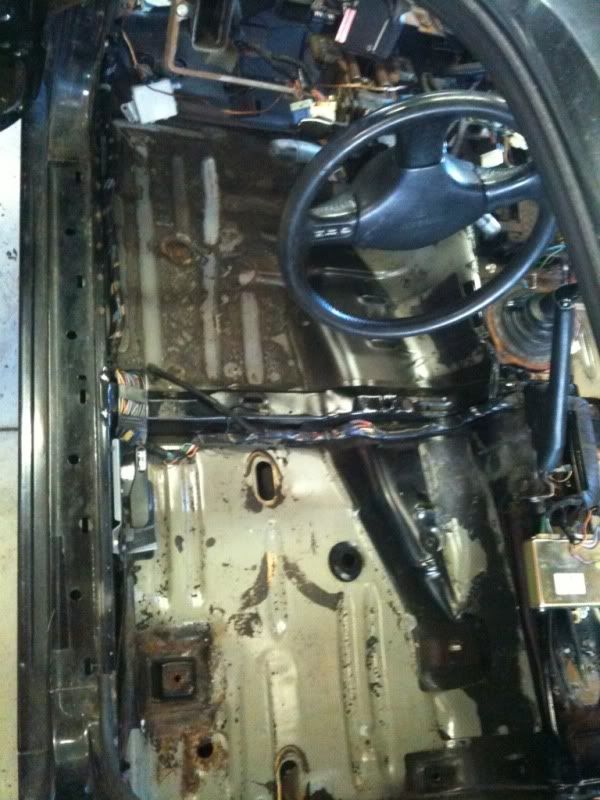 Driver side rear seat and fender area. 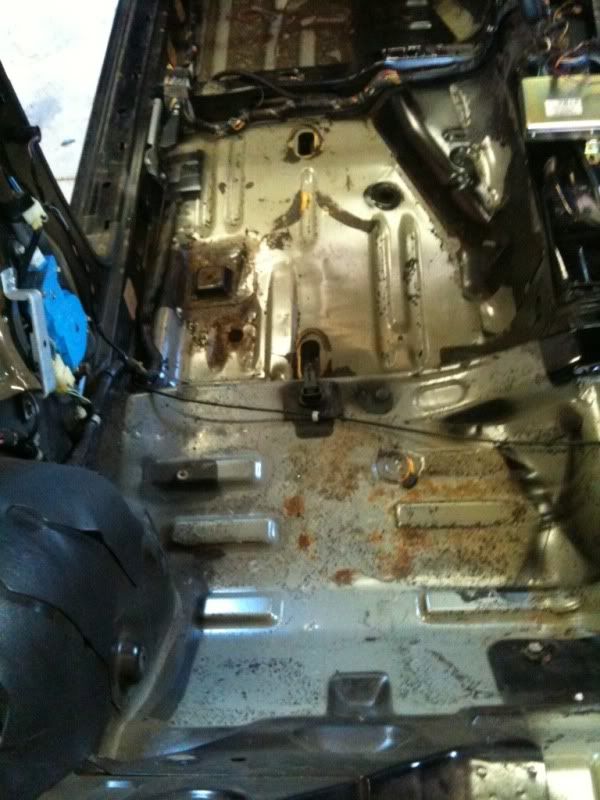 Passenger side rear seat and fender area. 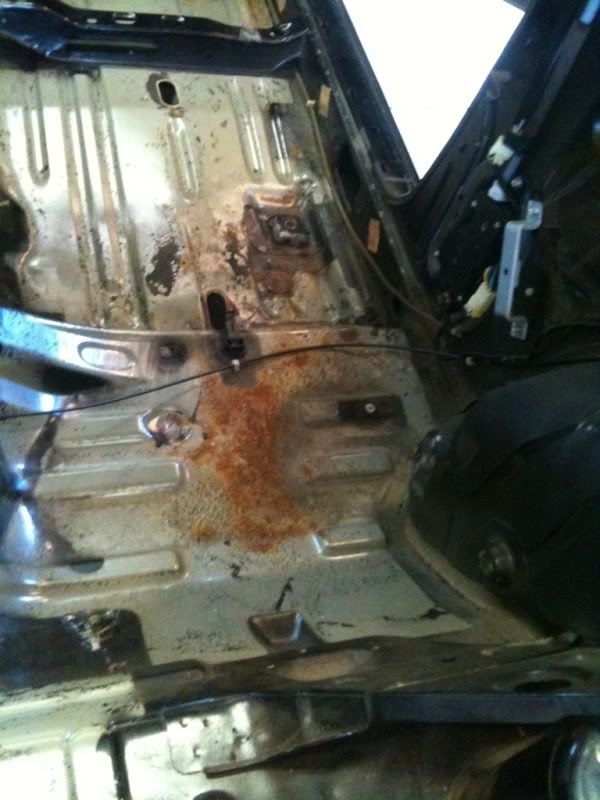 ... and finally the spare tire well and cargo area. This is going to need some serious loving after the interior is stripped. But we have some tricks to take care of this. 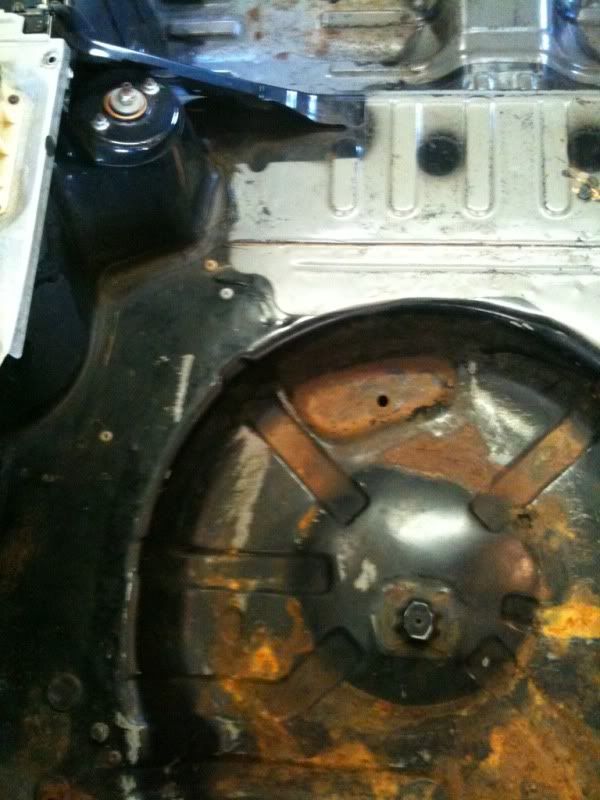 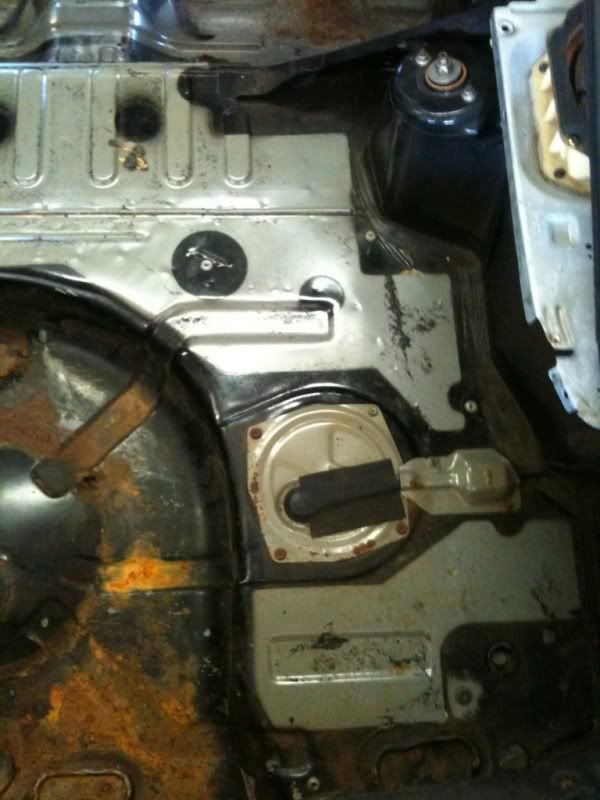 All the OEM sheets of tar... which Nissan likes to call sound deadening has been baked on from the heat of the exhaust and transmission. This stuff breaks apart in chunks... or it REFUSES to come off with a scraper. We will be using a few techniques, dry ice, a butane torch and a WHOLE lot of elbow grease. Hopefully these should make the removal process easy...er. |
|
|
|
|
03-14-2011, 02:38 PM
|
#10 |
|
Nissanaholic!
Join Date: Oct 2006
Location: Cape Coral, FL
Posts: 2,485
Trader Rating: (33)
Feedback Score: 33 reviews
|
Progress from the weekend:
Alright, after getting the interior stripped out, the sound deadening out, and then took the time to use scotch bright wheels on a small DA to rough up the surface and get any and all the excess tar and glue off the metal, it was time to do something to seal in the interior. We wanted to find something that would give a nice coat, go on well, and encapsulate any and all rust, stopping it from becoming more than surface rust. There were a few options out there for this so I took the time to read all the reviews for all the products out there that I could find. And it turns out one of the best ones on the market just happened to be one of the most expensive. Rust Bullet is something that has been used by many hotrod shops around the world and in lots of industrial applications. Plus it comes with a 10 year "stops rust" guarantee. There is also some nice research put behind this stuff vs. the equivalent at your local hardware store. If you read on the site you'll see all of the applications this has been tested on and the extreme conditions its been used in. I managed to find a box of 4 individual quarts on amazon from 4wd Off-Road supply for a pretty good deal so I snagged it up. My thoughts on Rust Bullet: Well we prepped the surface first with 320grit just like a paint job, but the instructions say it can be used with little to no surface prep. We laid it on with a brush much to my better judgment because I didn't want brush strokes. The side of the can said it could be reduced to be sprayed though a conventional HVLP gun but that it wasn't necessary and that no brush strokes would show once dry if a brush application was used. So we brushed it on, and after the first coat I was freaking out, it was showing brush strokes like crazy, it was almost impossible to spread it even, and the only way it looked good was if you laid it on really thick, which we didn't want to do. So we put on one nice even coat with a brush. Let that dry, and it got a little bit better, but not good by any means. Brush strokes showing everywhere, you could see everywhere we changed directions, it looked awful. I was ready to sand it all off, reduce it, tape off the car and spray it. But Trevor talked me into putting on the second coat just to see how it would look. Much to my surprise, the second coat went on smooth, and I mean REALLY smooth, it coated to perfection, and dried even better, the only spots that even remotely show the slighted brush strokes are my fault where I had to go back and touch up spots where it ran a little bit after the curing process had started. But even those places are unnoticeable to anyone but me because I did them. I can praise this stuff enough, its amazing. And it truly bonds to the metal, the test piece of metal I did can't be sanded through, I had to take the grinder to it to make metal show again. And I also got some on my finger nails and it almost melted through (hole in my gloves). Here are a few pics of the second coat going on. Sorry I didn't get pics after the first coat, I was kinda freaking out and didn't think to get pics. First pic as you can see its still wet (sorry for the celly pics) but you can definitely see some brush strokes.  And then a final pic from the next day once it had dried. Notice how well it cured. (once again cell phone pics, I'm sorry we ended up keeping a good camera at the shop after this.) 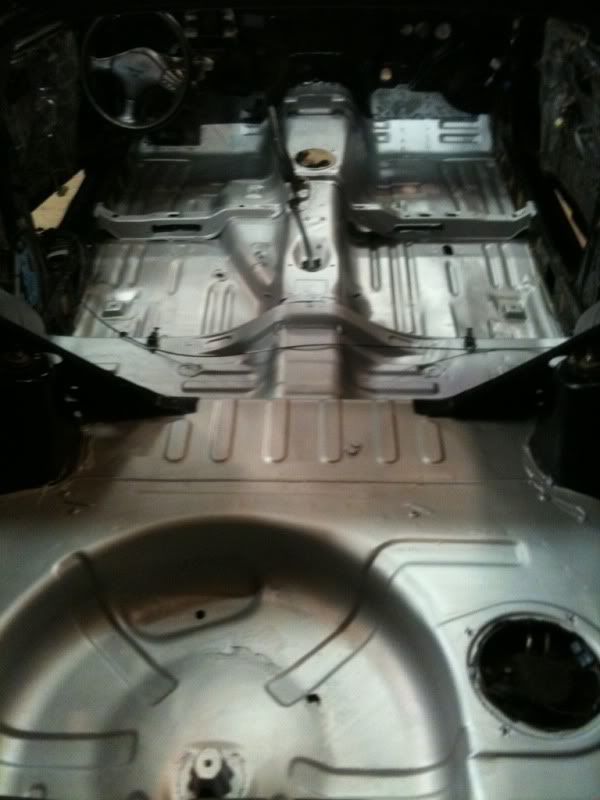 Over all I would HIGHLY recommend this stuff for anyone needing a rust preventative. They also make a Black Beauty 3rd coat for drive train parts for that factory black finish look but its not needed for the product to be effective and is purely aesthetic.
__________________
I had a cool signature |
|
|
|
|
03-14-2011, 02:50 PM
|
#11 |
|
Zilvia Addict
|
^^^
This Rust Bullet stuff is amazing and is an EXTREME penetrate. Wear gloves with this stuff people!!! I made the mistake of not wearing gloves and it MELTED into my skin and would not come off for about 8-9 days. Over all, it went on pretty easy and dried very very quickly. Easy to work with and coats pretty well, it's thick, but it will still cause run spots if you're not careful. Same, view but from my phone lol 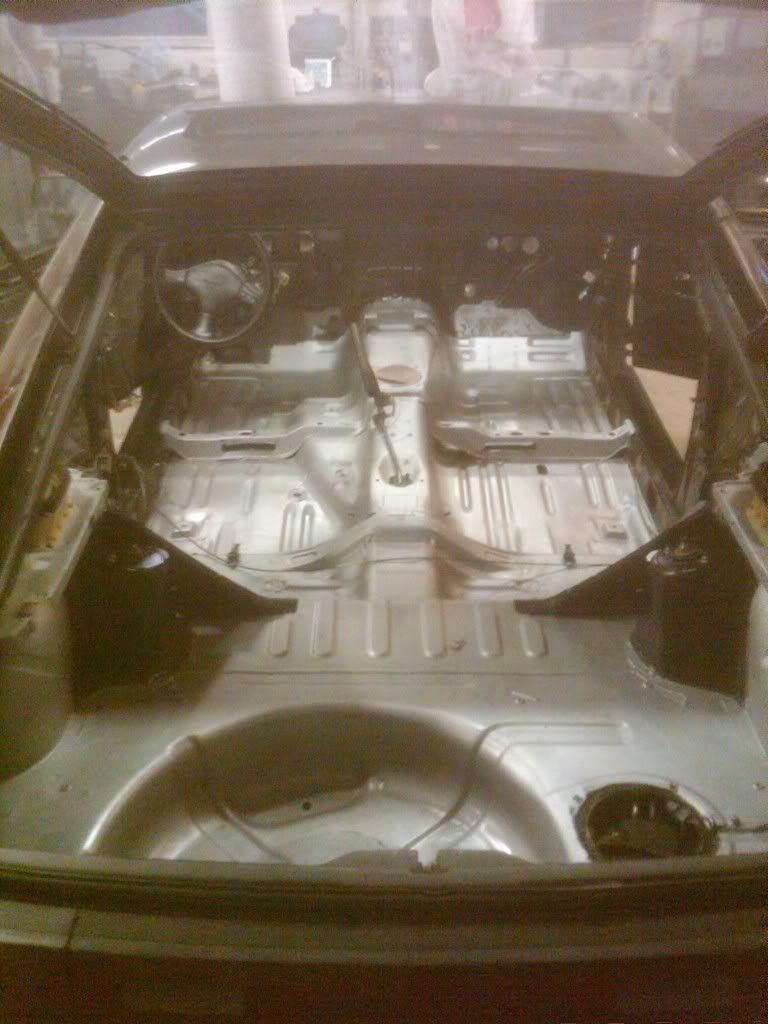 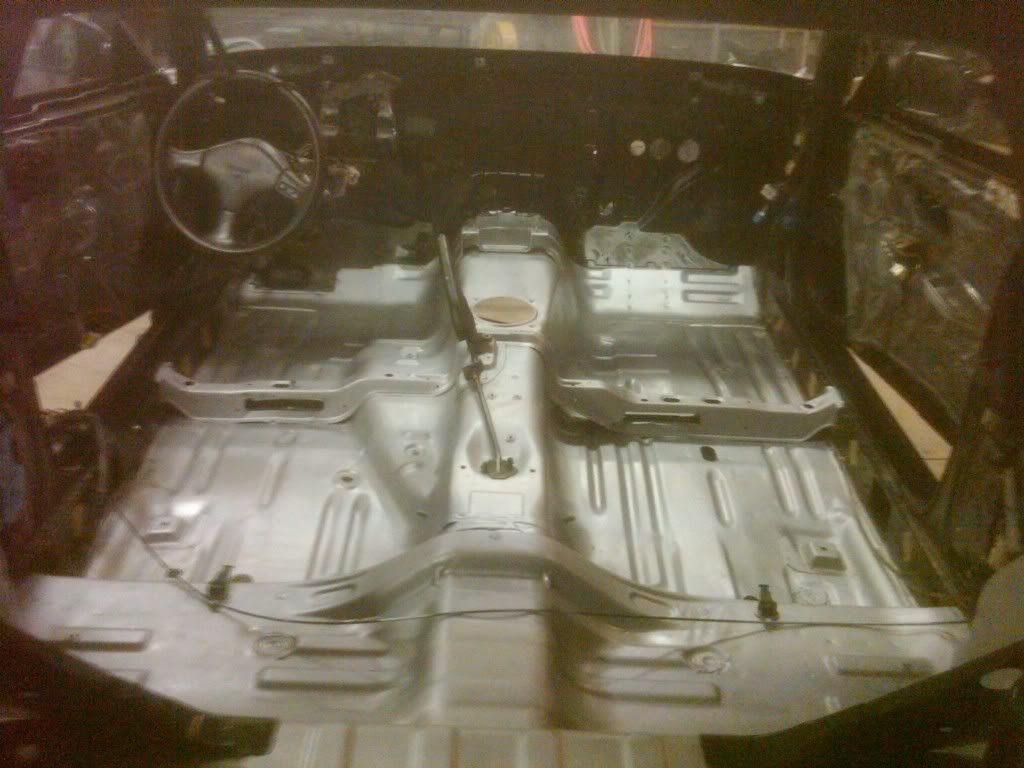 |
|
|
|
|
03-15-2011, 12:06 PM
|
#12 |
|
Nissanaholic!
Join Date: Oct 2006
Location: Cape Coral, FL
Posts: 2,485
Trader Rating: (33)
Feedback Score: 33 reviews
|
Monday morning shipment update: Sorry just more tools.
Chicago Electric Vibratory Bowl - got this thing to clean up the rust and stuff off of bolts and small brackets from harbor freight, not the best company, but I didn't need it to do anything heavy duty. I'll try to post up some pics of before and after on the bolts this week when I get a chance to try it. 18 Lb. Vibratory Bowl with Liquid Drain Hose 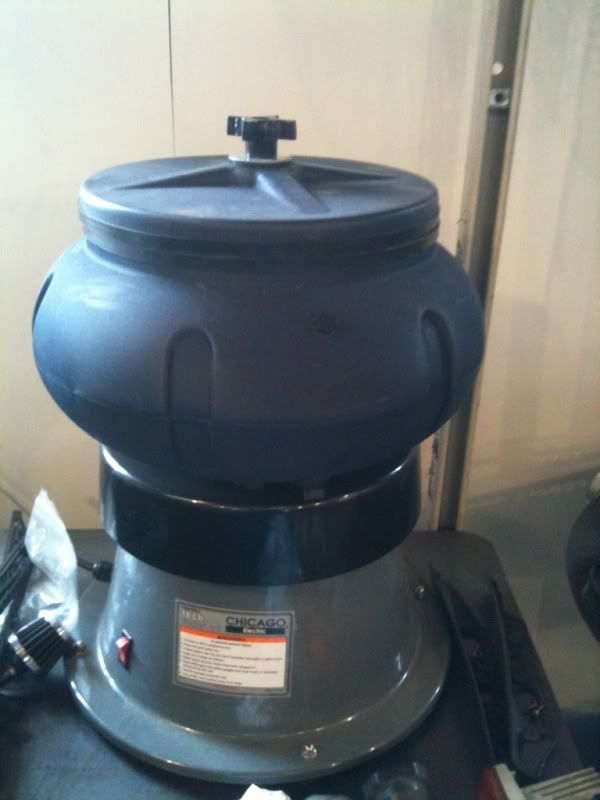 Over all it seems well made, and it was little to no assembly. I also got some media for it while I was there that was actually pretty cheap. 5 lbs. Rust-Cutting Resin Abrasive Media It was on sale for $9.99 per 5lb bottle, so I got four bottles. I also got a deal on black beauty sand while I was there. Next item of the day: Northern Tools Hoist. The one we used to get the motor out sucked balls, it was a huge 6 ton budget, its a really nice hoist, just way to big. So I picked this up from Northern on sale and adapted a trolley for it to be as close to the beam as possible. This thing is nice, it runs very smooth, nothing really quick or shaky, and has lots of power. If you have a beam in your garage, I recommend it. Northern Industrial Heavy-Duty Electric Hoist — 2000-Lb. Capacity | Electric Cable Hoists | Northern Tool + Equipment I'm upset we didn't get to use it on the way out, but it will be used to get the new motor back in. And here it is in its new home. 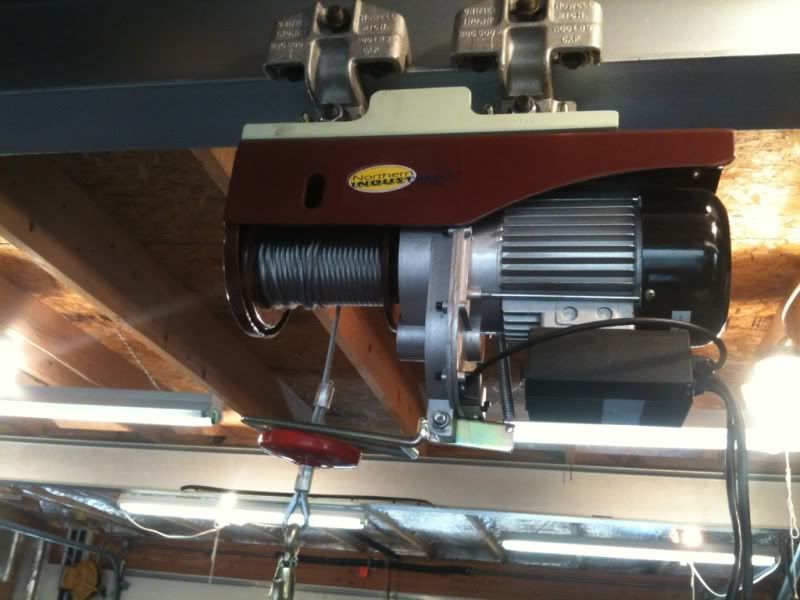 stay tuned, I have more......
__________________
I had a cool signature |
|
|
|
|
03-15-2011, 12:14 PM
|
#13 |
|
Zilvia Addict
|
Quick picture, got a break in the weather and we decided to wheel the car outside. Lots of degreaser and a power washer. Some scrubbing here and there and then we wheeled it back inside. I didn't take a whole bunch of pictures of this because we weren't really sure when it was supposed to start snowing again..... in fact the next day we got dumped on with 8 inches of snow.
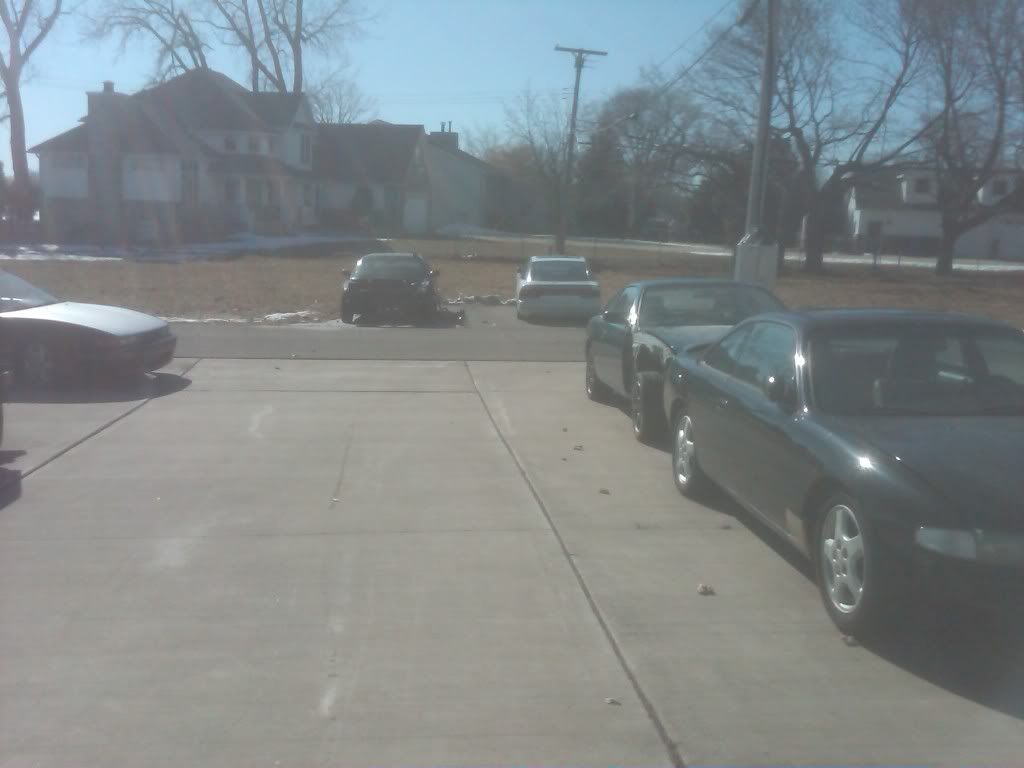 Don't mind the other S-chassis', they're spec'd out for winter status. |
|
|
|
|
03-15-2011, 12:48 PM
|
#15 |
|
Nissanaholic!
Join Date: Oct 2006
Location: Cape Coral, FL
Posts: 2,485
Trader Rating: (33)
Feedback Score: 33 reviews
|
Alright, after making plans for this build we decided a nicer welder would be needed than just my little Lincoln. So I started looking around for a nice welder that would Tig and I ran across a Millermatic Syncrowave 350LX. I called the dealer my dad uses and ordered one of these up. It seems this was the first time they had sold one of these to an individual and not a business haha. I ended up going with the complete package which was welder, stand, coolant system, torch, and a lot more. It just seemed like the better deal.
Miller - TIG Welders - Syncrowave® 350 LX I got it for a bit cheaper than that though. Anyway here it is, can't wait to use it, should be nicer than the stuff I had to learn on at school over the summer. 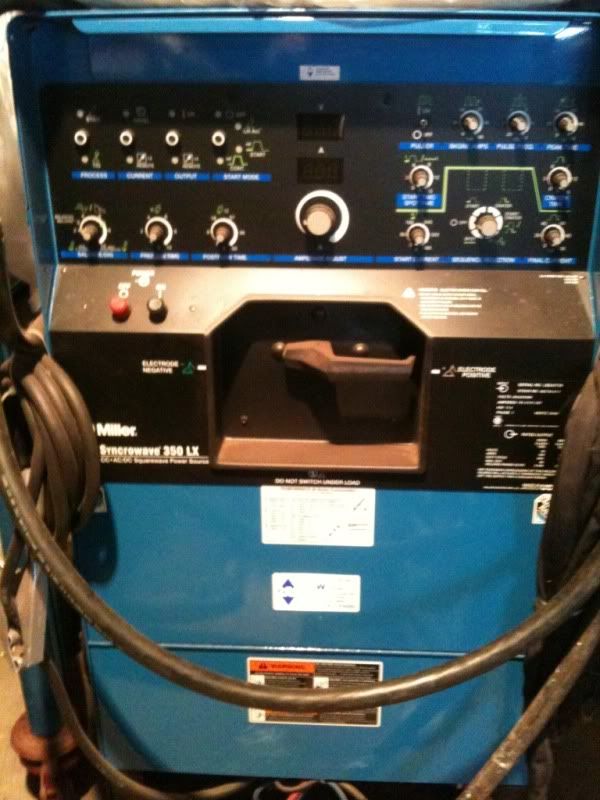 There are a few other things on their way to make the garage a nice place to build a car. After all I have several more to finish up once this one is done. Ready to DO WORK SON.
__________________
I had a cool signature |
|
|
|
|
03-17-2011, 04:20 PM
|
#16 |
|
Zilvia Addict
|
Parts update:
Circuit Sports S13 Aluminum Coolant Reserve Tank Circuit Sports S13 Aluminum Coolant Reserve Tank *HOT!* Big thanks to Howard at Phase2Mototrend! First impressions: Welds looks solid, no loose fittings and the cap fits nice and snug. Got a great price on it compared to some other vendors, and this will definitely look a hell of a lot better than the corroded, yellowed, cracked plastic OEM tank. If you're on the fence about getting one of these, just do it, it looks 10x better than the OEM piece. 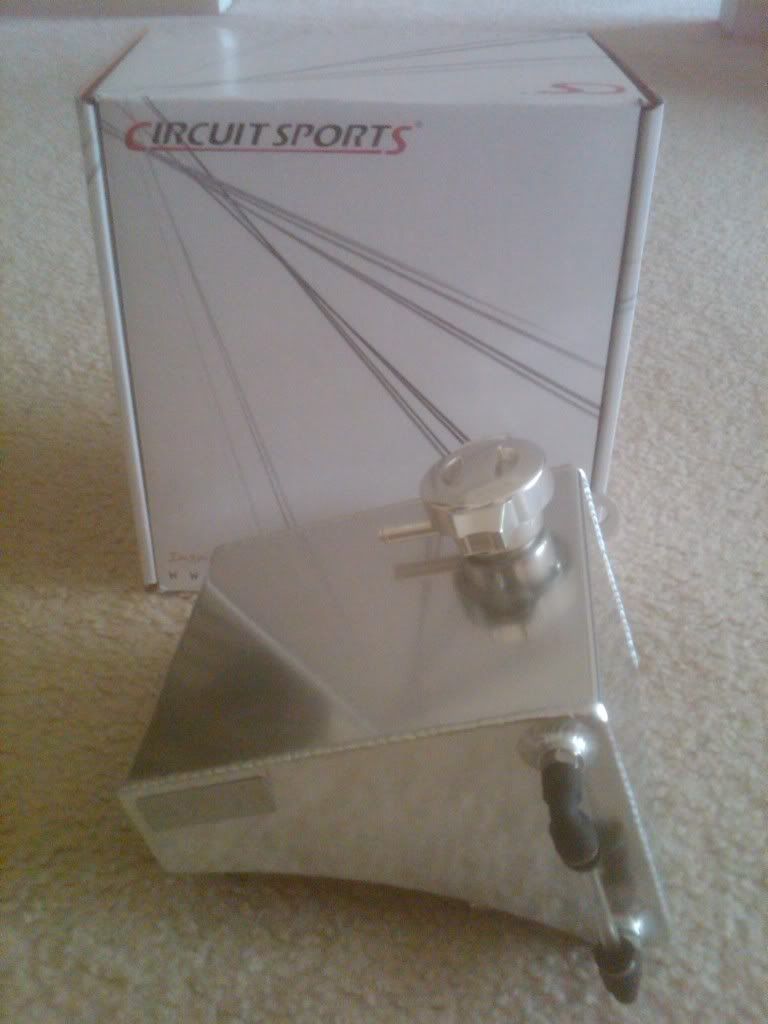 |
|
|
|
|
03-17-2011, 08:59 PM
|
#18 |
|
Post Whore!
 
Join Date: Oct 2008
Location: MI
Age: 38
Posts: 3,916
Trader Rating: (131)
Feedback Score: 131 reviews
 |
haha. The bolt holes didn't line up on mine at all and the badge fell of of it during the install. It was one of the first parts I bought for my car- I gotta say, I hate Circuit Sports with a passion, haha. But it does for sure look better than stock!!
|
|
|
|
|
03-19-2011, 11:52 PM
|
#20 |
|
Post Whore!
 
Join Date: Dec 2004
Location: Poconos, PA
Age: 39
Posts: 8,030
Trader Rating: (58)
Feedback Score: 58 reviews
|
I'm interested at how that vibebowl works out for ya
__________________
 Want Air Conditioning in your SR20 Swapped car? Check out www.sr20acbrackets.com for more information! Quest Alternator Conversions for SR20! Check my Group Buy! Tired of lousy internal gates? Go external wastegate with one of my manifolds, Check out my group buy |
|
|
|
|
03-20-2011, 06:05 PM
|
#22 | |||
|
Nissanaholic!
Join Date: Oct 2006
Location: Cape Coral, FL
Posts: 2,485
Trader Rating: (33)
Feedback Score: 33 reviews
|
Quote:
Quote:
Quote:
__________________
I had a cool signature |
|||
|
|
|
|
03-20-2011, 09:38 PM
|
#23 |
|
Zilvia Addict
|
Update from over the weekend.. I'll post pictures at the end of the post. We were on a time crunch and did everything with no pictures between projects... again.
Now that we're done with the Rust Bullet coating, it's time for some Durabak coating! Cote-L Distribution Company Durabak is a lot like bed liner, very porous, non slip and has some great sound deadening attributes. However, unlike a true bed liner (ie Rhinoliner) its polyurethane based, and doesn't get rock hard. We were worried that this stuff would not go on easy and even less with a brush. We were wrong... wrong wrong wrong. Applying the Durabak was easier done... than said. Absolutely no brush strokes and it didn't run like we though it would. It took awhile to dry, but that's the kicker to it not being rock solid. We put two coats on the firewall and the spare tire well/cargo area. Within 36 hours it set up really well. 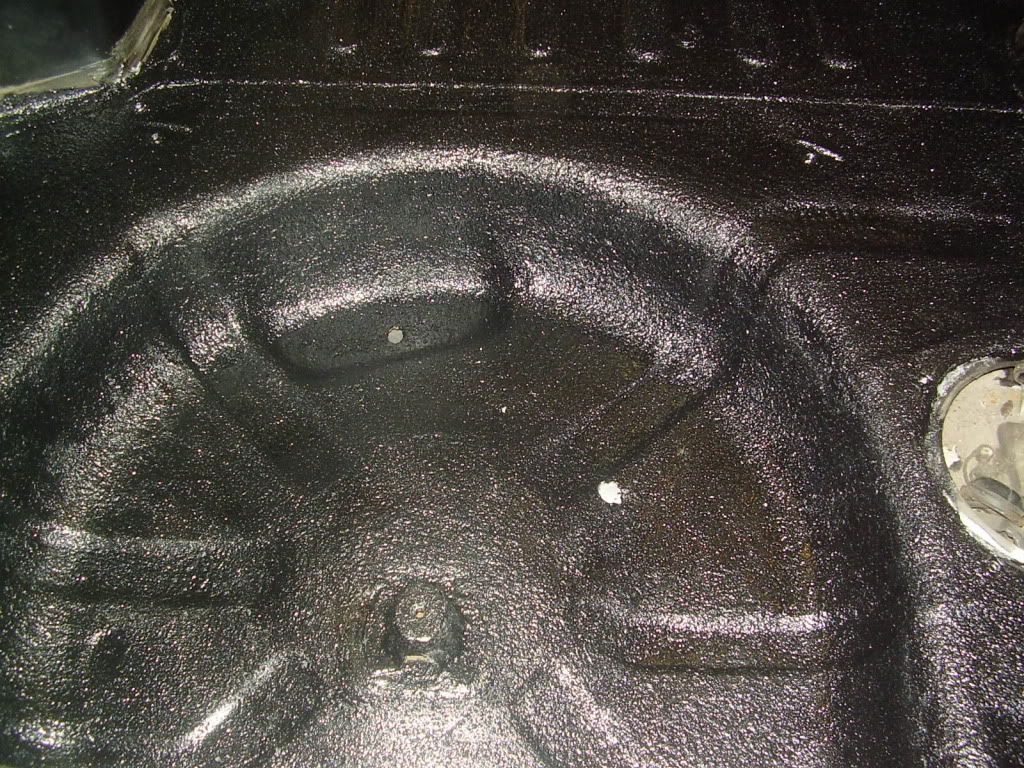 After the Durabak was dried enough to work with, we started laying down the Dynamat. The Official Dynamat Website We got the Dynamat Extreme bulk package. The package came with 9 - 18"x 32" sheets. Installation is pretty straight forward, however, I recommend a heat gun. The sheets are pretty pliable as is, but with all the bumps and dips of the S13 floor the heat makes it so much easier to work with. Razor blades are a must and it goes on easier with two people. One person working it onto the floor with a heat gun, while the other holds the sheet taught pulling off the backing tape. Doing small sections at a time is time consuming, but it's the only way to get the sheets on straight with no air bubbles. We also purchased the Dynapad to replace the nasty matted up recycled fabric on the underside of the carpet. Stuff is REALLY thick and easy to apply. Should help out a lot on top of the Dynamat! 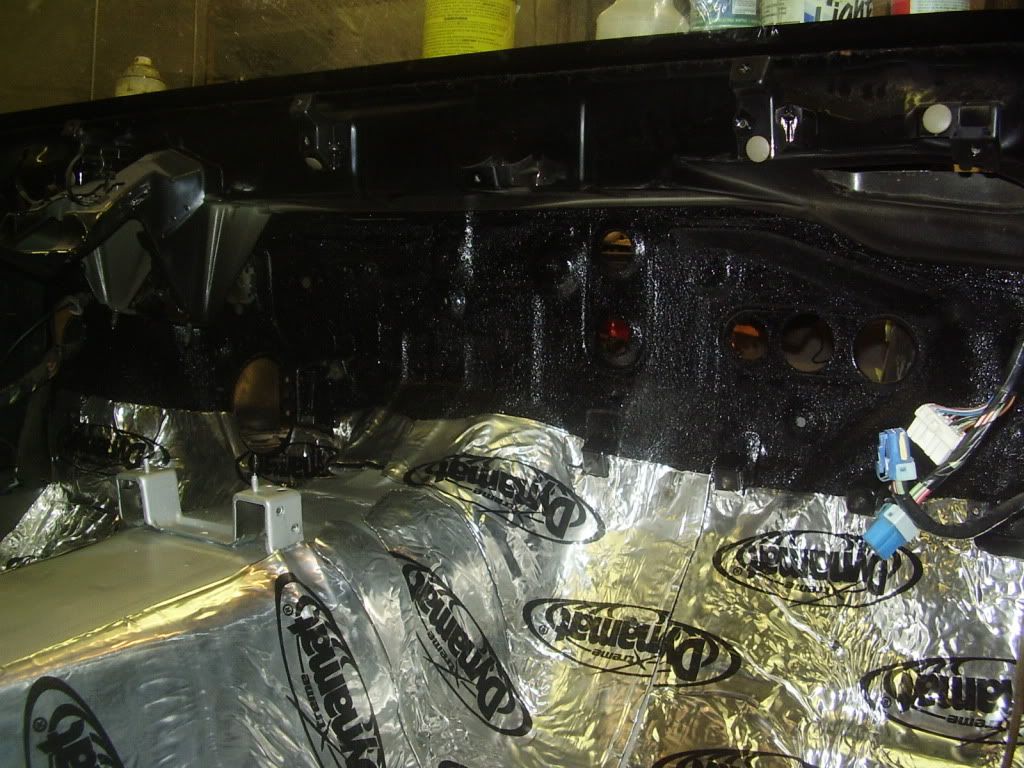 Shane (Holemilk00) working his way up the firewall.. 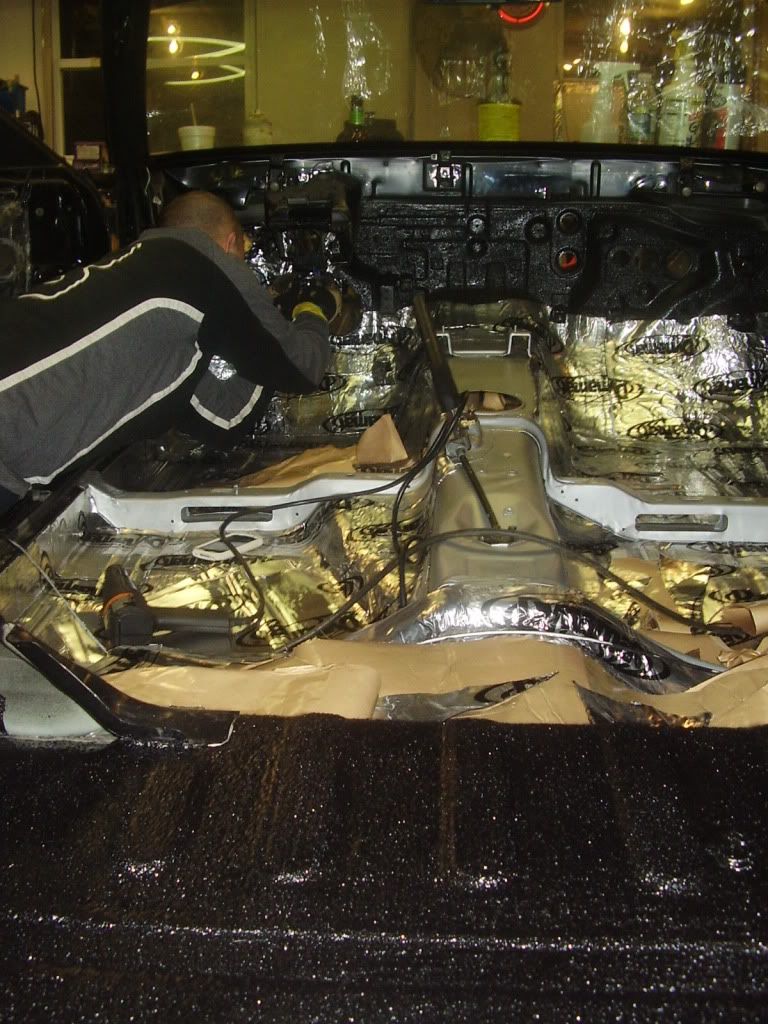 First sheet of Dynamat cut and mocked up. Still have the top of the trans tunnel to do and finish up the rear seat area and rear fenders with the Dynamat. 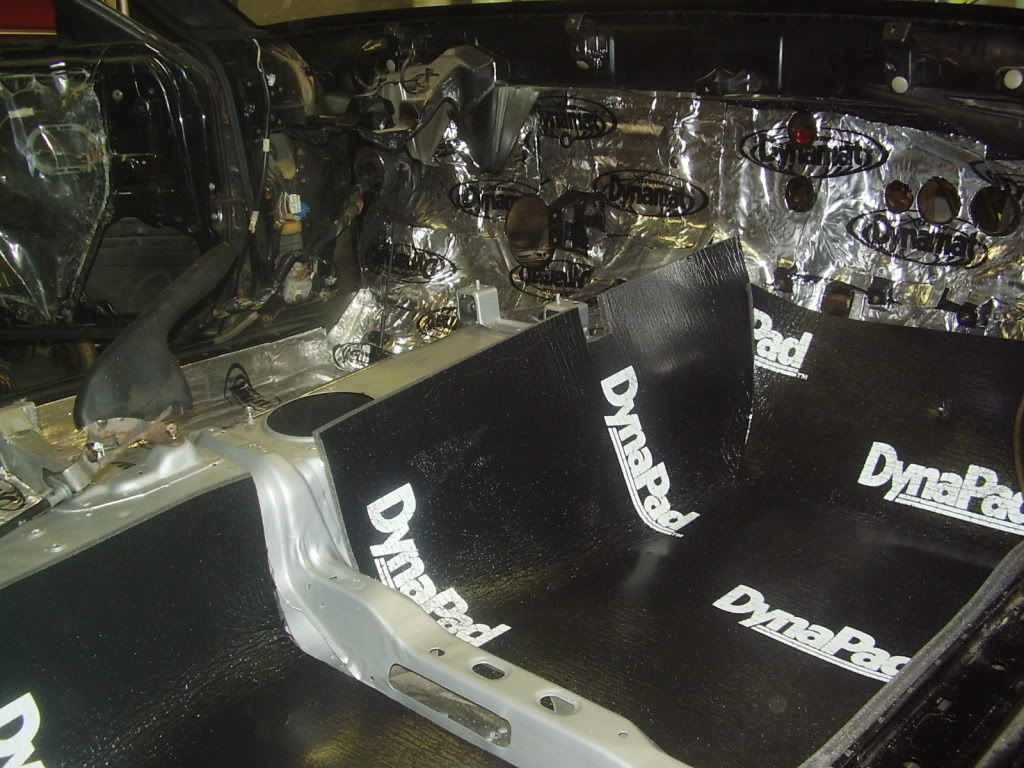 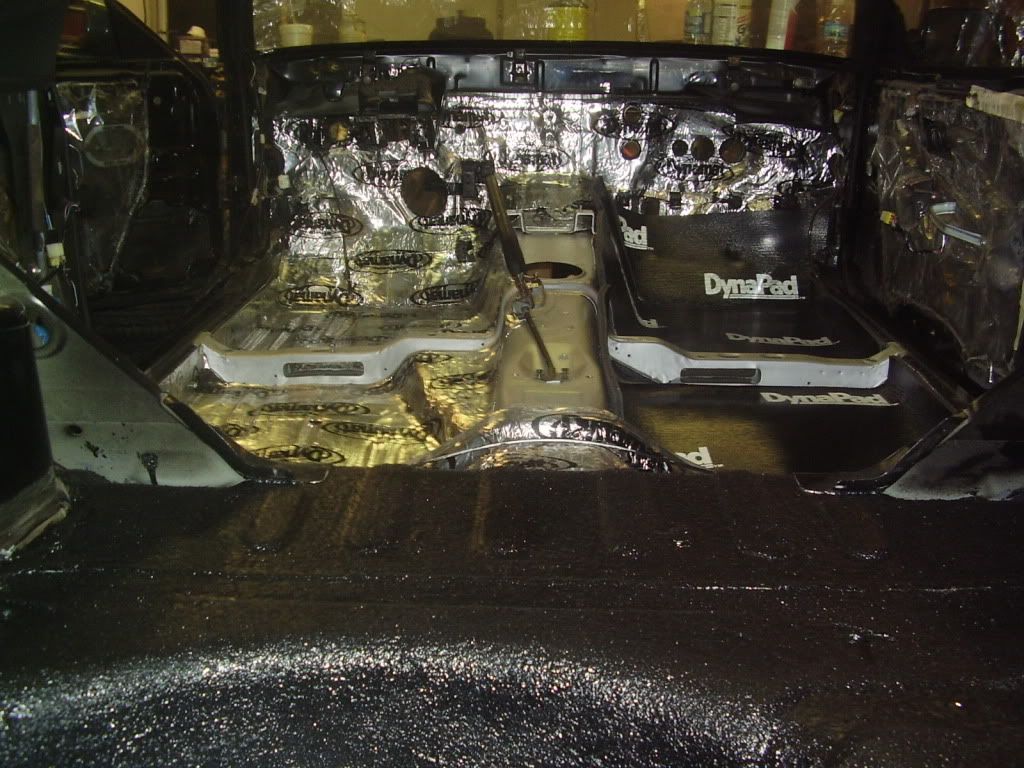 Coming up next week... prep the engine bay for paint. We did a quick scuff of the bay and put down tape (only got to one side) for holes to weld up. Lots of work still to come! 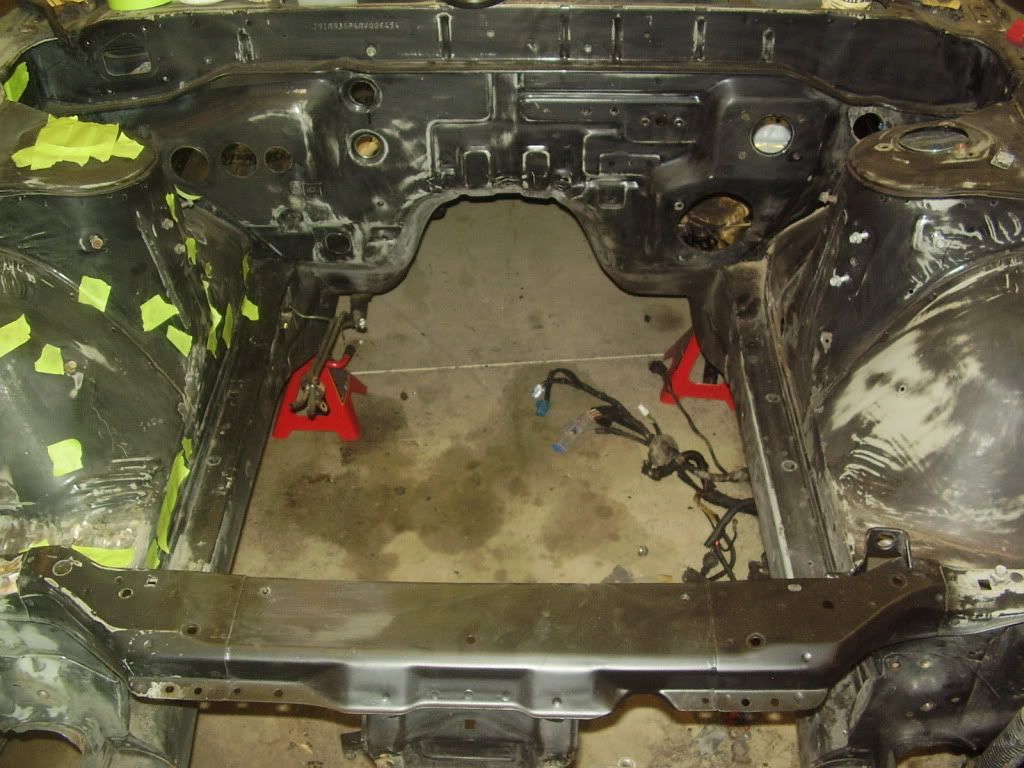 |
|
|
|
|
03-21-2011, 01:19 AM
|
#25 |
|
Premium Member

Join Date: Dec 2003
Location: Santa Cruz, ca
Age: 41
Posts: 6,699
Trader Rating: (8)
Feedback Score: 8 reviews
 |
LOVE seeing these types of builds.
This is exactly what I plan on doing to my coupe when I finally decide what color Im gonna paint it.
__________________
 S.P.P.S. Member #00 S.P.P.S. Member #00**CoUpe LOve** Member #00 |
|
|
|
|
03-21-2011, 03:02 PM
|
#27 |
|
Zilvia Addict
|
Parts galore!
Damon, your cat will be jealous. 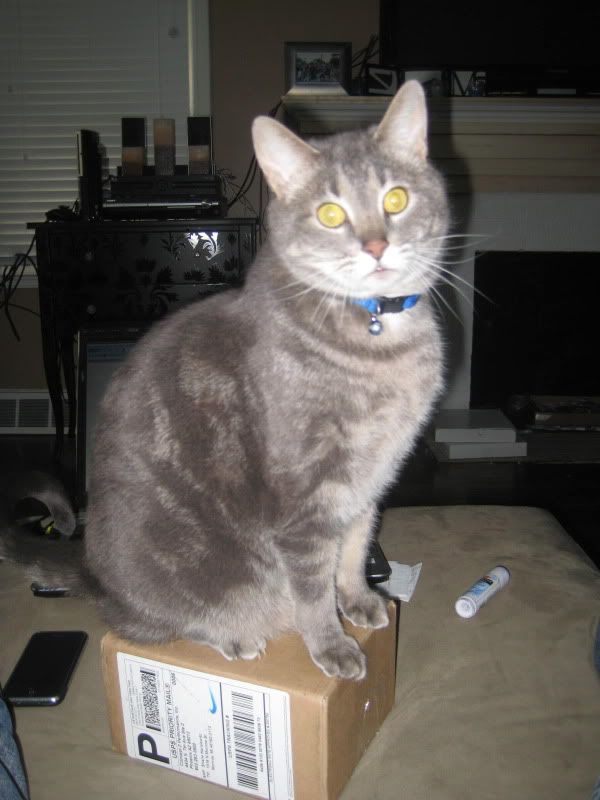 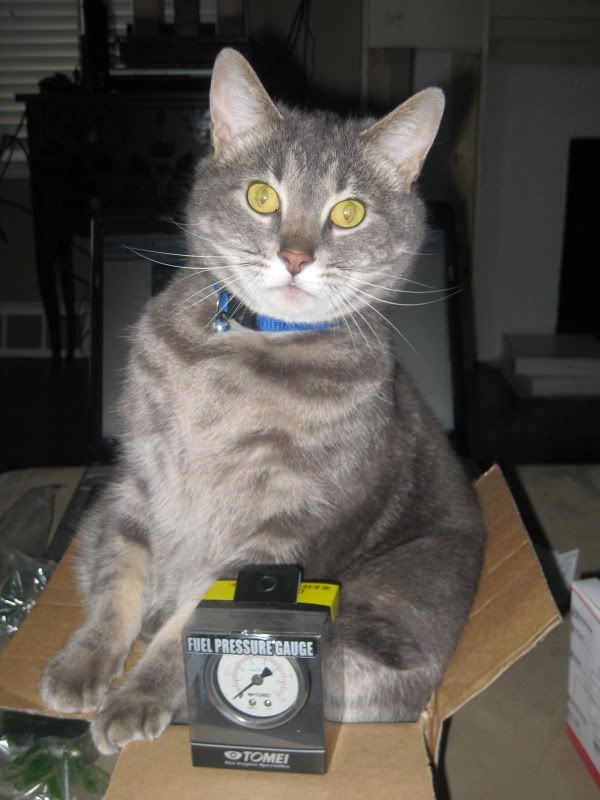 Tomei Tomei Tomei! Fuel pressure regulator (Type L) and the gauge. Picked them up here on Zilvia for a great price...Thanks Fizzle!!! Not really needed.... but had to have 'em! 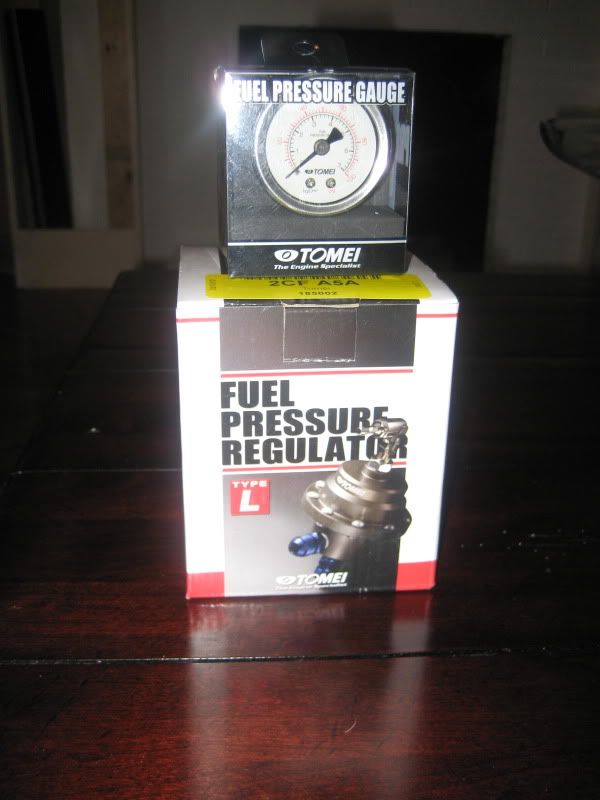 |
|
|
|
|
03-27-2011, 07:45 PM
|
#30 |
|
Nissanaholic!
Join Date: Oct 2006
Location: Cape Coral, FL
Posts: 2,485
Trader Rating: (33)
Feedback Score: 33 reviews
|
Lots got done this weekend. We got the holes welded up and smoothed with body filler. We also fixed where the previous owner had hit something small and knocked the lower driver side of the radiator core support loose from the frame. Got it all fixed and back better than factory and ready for the next step. Then we painted the bay with SEM etching primer and then a sand-able primer. Now we just have to find time to sand it all down with 400 grit and get it all smooth with multiple coats of primer and ready for paint. Here are some pics from the weekend.
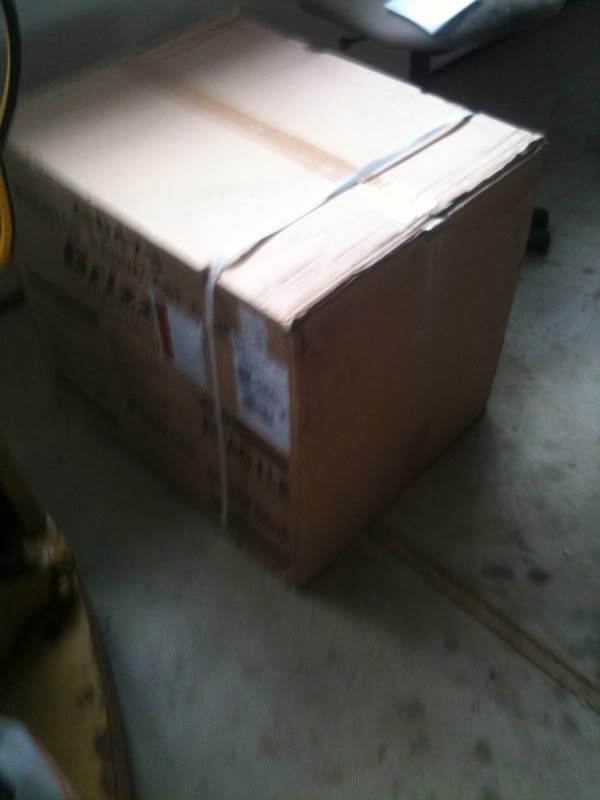
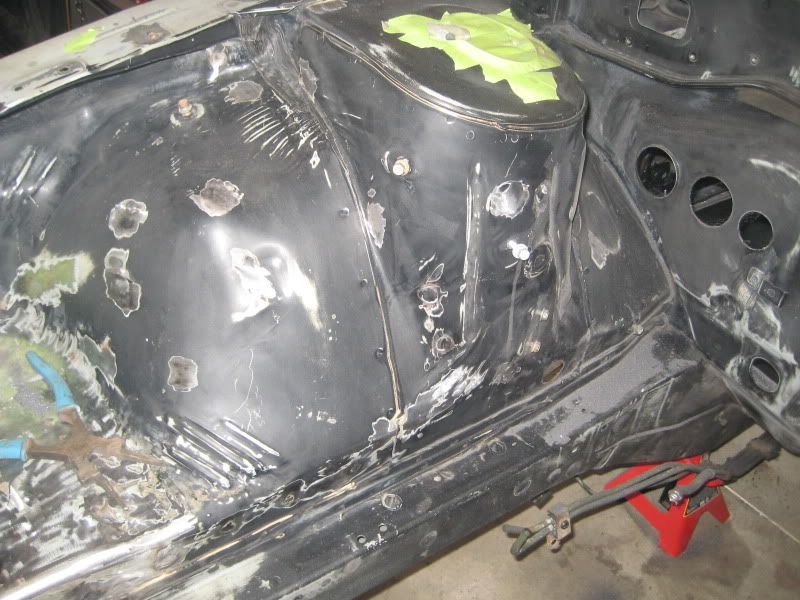 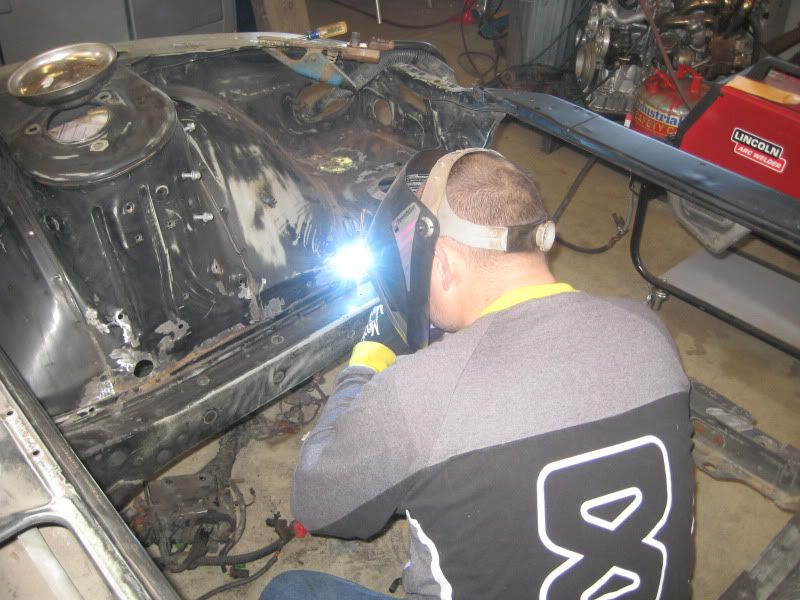  Fixing the core support 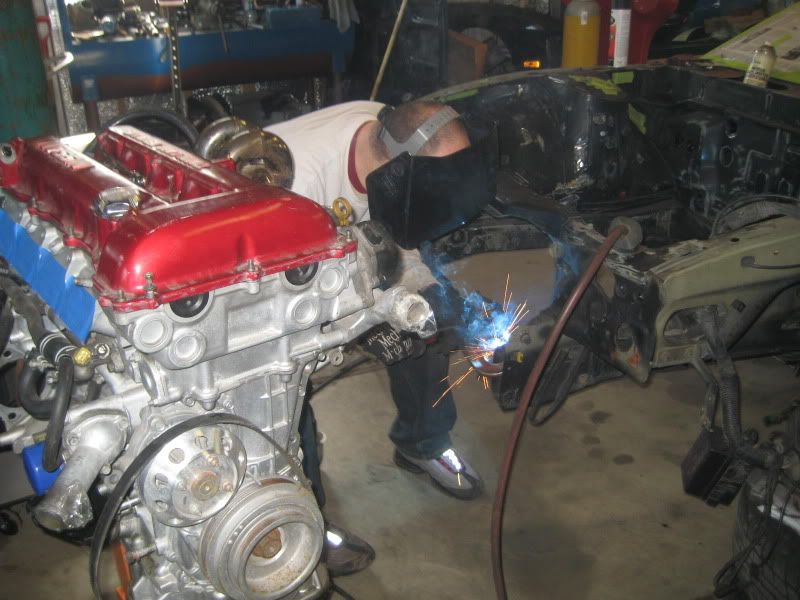 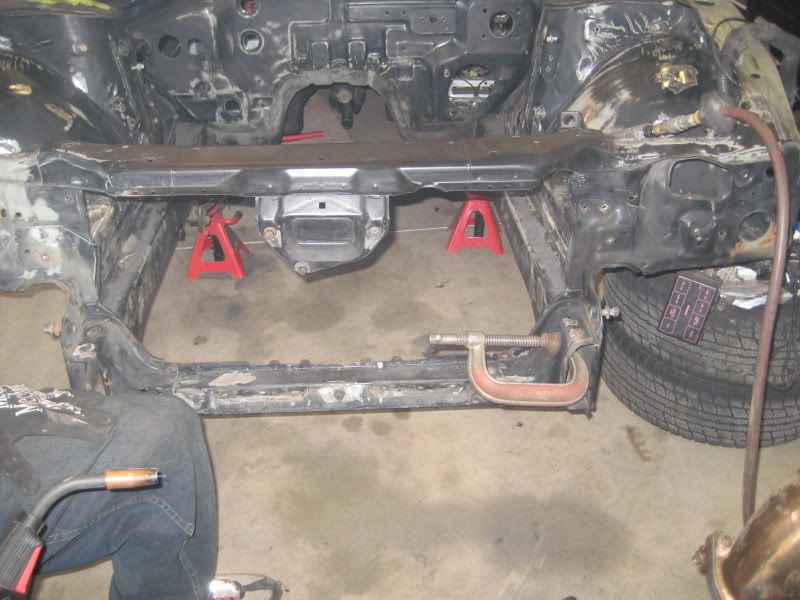 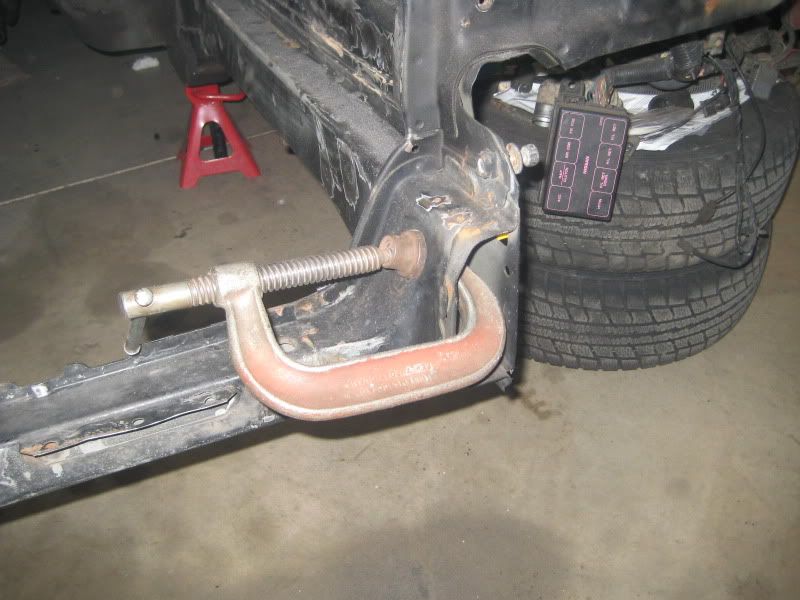 Getting every thing all ready. 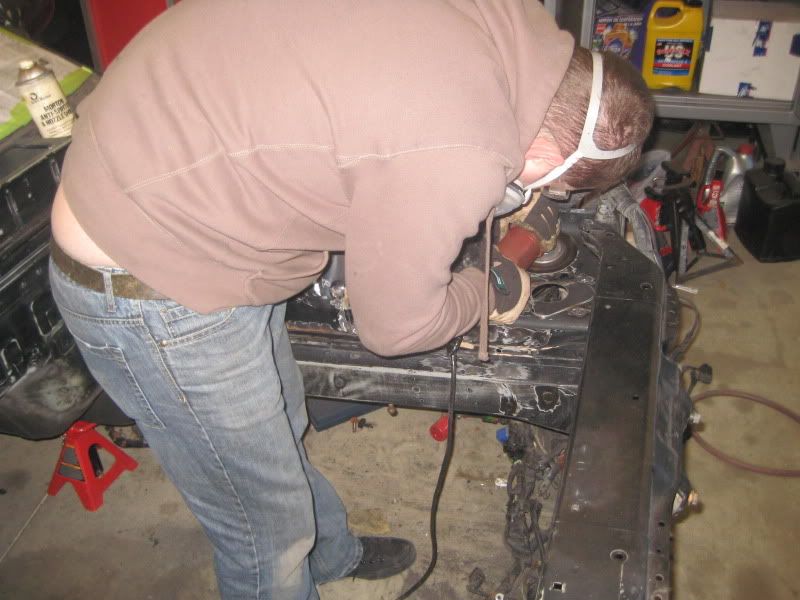 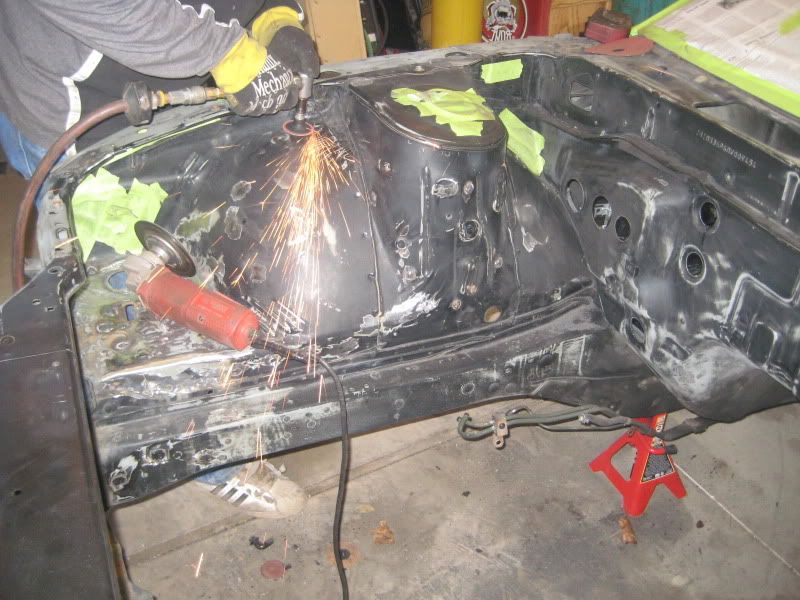 And then the first coat of SEM etching primer to see where we were at after the body filler and sanding. 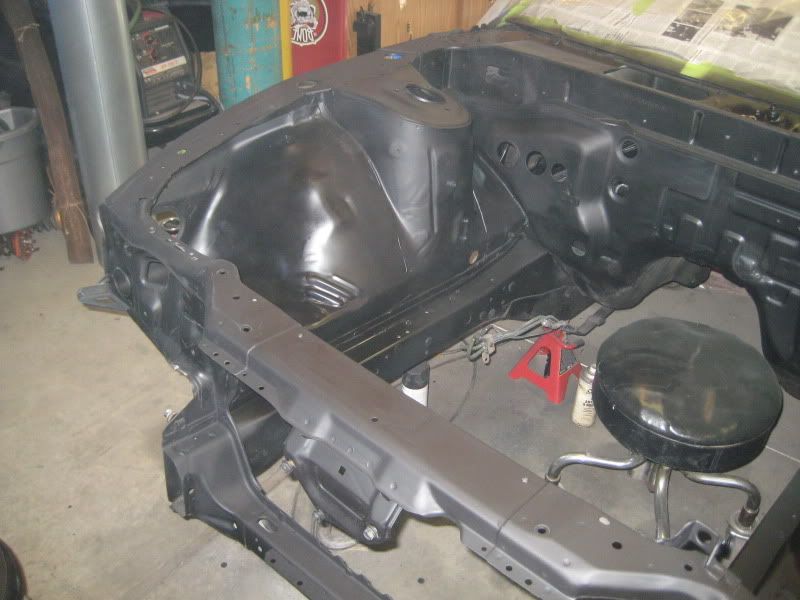 Radiator core support all fixed up, all rust removed, and back where it belongs. 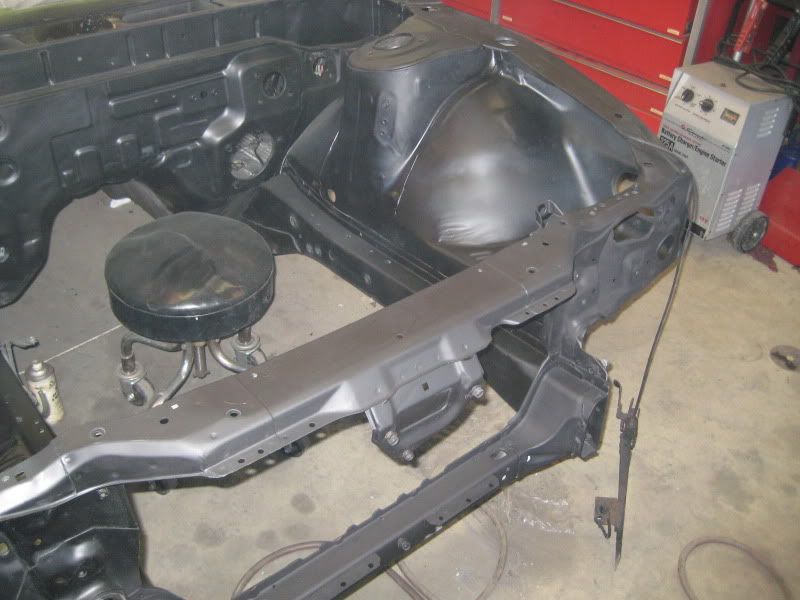 The pics don't do it justice, but it is actually smooth. I guess the primer makes it look bad in pics. 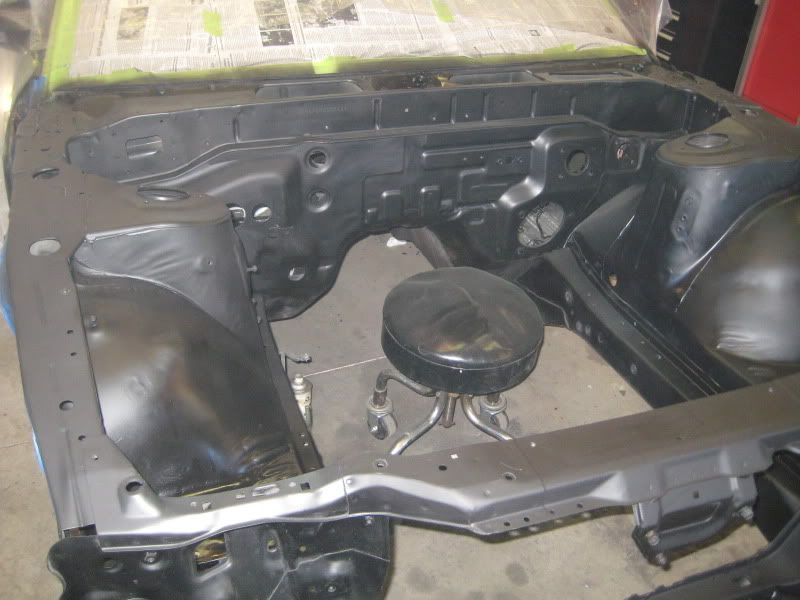 And finally a box of super secret awesome parts. 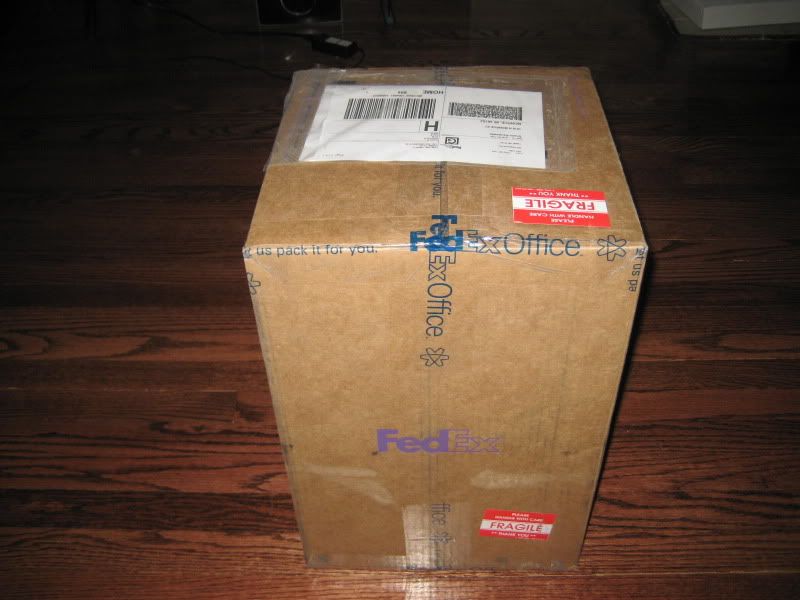
__________________
I had a cool signature |
|
|
|
|
| Bookmarks |
|
|


 Linear Mode

