|
|||||||
| Builds (and builds only) Got a build thread? It goes here, build threads anywhere else on the forum will be locked and never moved. |
 |
|
|
Thread Tools | Display Modes |
 08-31-2010, 07:03 PM
|
#1 |
|
Zilvia Junkie
 Join Date: Apr 2003
Location: Pleasanton
Age: 40
Posts: 451
Trader Rating: (32)
 Feedback Score: 32 reviews
 |
Xiaphin's Bye Bye NICO Hello Zilvia - S13 SR Forced Performance Big 28 DD Build
   Dyno Vids 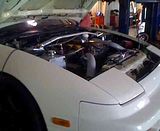 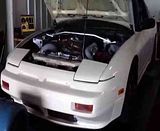 Current Build Specs Engine… SR20DET Redtop Stock Bottom End OEM Gasket Set Greddy Oil Pan Grex 1.2mm Headgasket 88mm Bore ARP HeadStuds Greddy Valve springs BC Titanium Retainers HKS Cams 264 intake 264 exhaust Greddy Rocker Arm Stoppers (Oil Baffle Removed) Circuit Sports Fuel Rail Nismo/Tomei 555cc Injectors Sard FPR AN-Type and Adapter Fitting Walbro Fuel Pump – 95 lb/min Deastch Works Fuel Pump HardWire Kit Z32 Fuel Filter New OEM Waterpump New OEM Coolant Temp Sensor New OEM Oil Temp Sending Unit New OEM PCV Valve New Heater and Intake Manifold Hoses – Thanks OM3GA All Mounts and brackets painted High Temp Warm Brown Valve Cover Powdercoated Sepia Brown Crank Pulley Powdercoated UPS Grey Circuit Sports Underdrive Pulleys – Silver Greddy Oil Catch Can Nismo Oil Filler Cap Turbo & Accessories… FP (Forced Performance) Big 28 Turbo – Flows 550 cfm Stock Cast Manifold HKS SSQV BOV with Recirculation Fitting 240sx Motoring Hotpipe with HKS SSQV Flange - Powdercoated UPS Grey CAREX Intercooler Piping – Powdercoated UPS Grey HKS Wastegate Actuator Circuit Sports Turbo Lines FMIC 24”x12”x3” SSAutocrap – Painted UPS Brown Intake & Exhaust… Z32 MAF Apexi Super Suction Kit for Z32 MAF PBM Max 304SS Flex Cobra Downpipe Megan Racing 80mm Test Pipe Apexi N1 Dual Cat Back Exhaust Nismo Exhaust Hangers Cooling… Koyo Aluminum Radiator Koyo Radiator Cap – 1.3 BAR ISIS E-Fans with Aluminum Shroud – 960 cfm each Circuit Sports Lower Radiator Bung Circuit Sports Overflow Tank Drivetrain… ACT XACT Prolite Flywheel – 10.5 lbs. ACT 6-Puck Sprung Hub Clutch – 463 ft/lbs B&M Short Throw Shifter Nismo Clutch Fork Pivot AGP Braided Clutch Line Megan Racing Motor and Trans Mount Ichiba 5-Lug Hubs Front NA Z32 Rear 5-Lug Hubs – Glass Beaded and Painted Chassis Black SPL Solid Subframe Bushings NA Z32 VLSD – Diff cover Powdercoated UPS Brown 93' J30 Axles 74,XXX miles - Thanks Zilvia Member krayzbigmac Solid Diff Bushings – E-bay user rdtuner318is JGY Aluminum Driveshaft Suspension and Brakes… Stance LX+ Coilovers Centric Z32 Brake Master Cylinder Z32 Master Cylinder - Thanks 300zxclub member Schepis Z32 Calipers Front and Rear – 30mm front - Powdercoated High Temp Flat Black Z31 Dust Shields - Drilled and tapped into spindle - Painted High Temp Warm Brown Z32 E-Brake Assembly - Thanks Zilvia member UNISA_JECS AGP Brake Lines Energy Hyperflex Bushings – Red PBM Tension Rods Circuit Sports Rear Toe Rods Circuit Sports RUCA’s PBM Rear Traction Rods Circuit Sports Tie Rods – Inner and Outer Circuit Sports Aluminum Steering Bushing New OEM Tie Rod Dust Boots Moog Ball Joints – Front (K9509) and Rear (K9633) Suspension Techniques Swaybars – Painted Black Circuit Sports Strut Bars - Front and Rear Brembo Factory Replacement Rotors Hawk HPS Pads Z32 Rims – Painted UPS Brown the REAL UPS Brown- (Powdercoated UPS Brown - cant get right brown in PC) 225/50/16 BFG g-Force Sport 2 PBM 15mm Hubcentric spacers Front and Rear +3mm PBM Splined Lugnuts Subframe Powdercoated Chassis Black 50% Gloss Engine Cross member Powdercoated Chassis Black 50% Gloss All other suspension components that weren’t replaced were glass beaded and painted Chassis Black (FLCA’s, RLCA’s, Rear Knuckles, Front Spindles) Z31 Dust Shields - Front Electronics… Odyssey PC925-A battery Wiring Specialties Harness Conversion – Auto to Manual, Z32 MAF, Z32 Ignitor Chip Apexi Power FC and New Hand Commander Power FC Datalogit with Serial to USB Adapter Greddy Profec B II Boost Controller – Black Greddy Turbo Timer Circuit Sport Turbo Timer Harness Innovate Motorsports LC-1 Wideband with XD-16 Gauge 60mm Defi Imperial BF Series Boost Gauge – White 60mm Defi Imperial BF Series Oil Pressure Gauge - White 60mm Defi Imperial BF Series Fuel Pressure Gauge - White 60mm Defi Imperial BF Series Water Temp Gauge – White 60mm Defi Link Control Unit II V2 DIF Dual Electric Fan Controller Ver. D Body… Wing Removed POR 15 all rusted areas Filled all seams effected by rust POR Fuel Tank Restoration Kit Trans Tunnel Cleaned and Undercoated Engine Bay and all Fender Wells Cleaned and Painted with SEM RustShield Black Floor Pans and Trunk Undercoated Interior… Panels Painted UPS Brown accented UPS Grey Grey Suede Front Door Panel Inserts Grey Suede Headliner S14 Seats - Thanks zilvia member lilrussion S14 Seatbelt conversion S14 Front Seats Thanks zilvia member lilrussian Front and rear seats recovered - light grey NRG Short Hub - Black NRG Quick Release Ver 2.0 - Black NRG Hub Lock – Black Sound and Security... Alpine IDA-X305S Digital Media Receiver mjmautoinnovations 6½" Speaker Adapters - Front and Rear Infinity Kappa Perfect 6.1 6½" 2-Way Component Speakers- Front and Rear Infinity Kappa 1200W 4-channel Amplifier Kicker 4 channel Amp Install Kit Clifford 50.7x with Glass Break, Tilt, Dual Shock, Proximity Sensors
__________________
2018 Audi RS 3 | Unitronic Stage 1 ECU and Stage 2 TCU tune Last edited by xiaphin; 06-06-2013 at 04:17 PM.. Reason: added specs |

|

|
| Sponsored Links |
|
08-31-2010, 07:13 PM
|
#3 |
|
Zilvia Junkie
Join Date: Apr 2003
Location: Pleasanton
Age: 40
Posts: 451
Trader Rating: (32)
Feedback Score: 32 reviews
|
How I ended up with a white pig
After many years of owning a 2 S14's, 1 S13, 260z, and a 510 I've finally started my SR swap. Bought a white pignose fastback with 150,000 on body for $450 that has a blown headgasket or fried piston. Don't know which one and don't care. Basically rust free and has new (Looks good from 10 feet) type paint job.
Link to my Photobucket where all my pics of car and engine rebuild are/will be.My S13 Build Project Pics So heres the lowdown on how I decided to Finally do my SR swap. Had this 95 S14 stolen before I did my engine swap. While I had this S14 I came across a deal where I spent $2000 nd got a SR20, 1991 Fastback, Body-Kit, Racing seats, 2 KA24DE engines and trans and some other crap. Gave the S13 to a buddy of mine whos SR20 powered S14 just got totaled. He gave me some of the parts listed below. Was building my SR while I had the S14 which was back in 2003-04. Just been fully repainted, painted all interior to match exterior color with black highlights. 18x8 and 18x9 SSR Integral A2's. Stillen bars front and rear, Eibach drop springs, Suspension Techniques Sways, Black leather rear seats, alpine interior speakers-tweeters, nd Kicker Solobaric 15" Sub. Car was stolen with SSR's on the front and some 18x10 rims in the back. 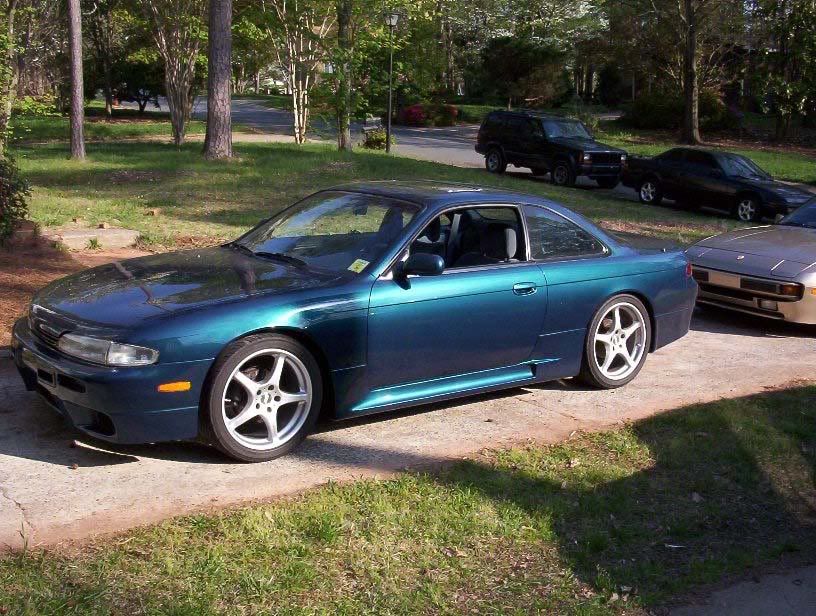   Got raped by insurance company eventhough had all receipts Got a 260z for $600 bucks drove it for a while before it blew up. Went to Japan for 6 weeks and bought another 95 240sx when I got back with my insurance money. Traded the 240sx for a 2-Door 1971 Datsun 510. Some pics of it 20 yrs before I got it, how i remember seeing it as a young kid. Drove it for a while then got it soda blasted and primered, sitting in garage still.  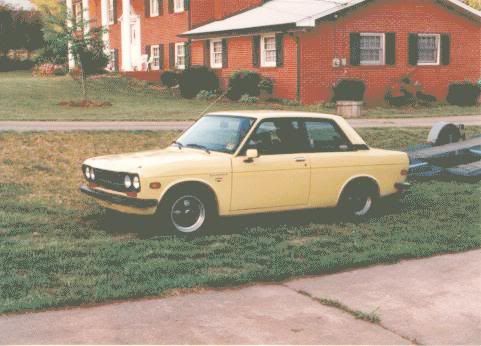  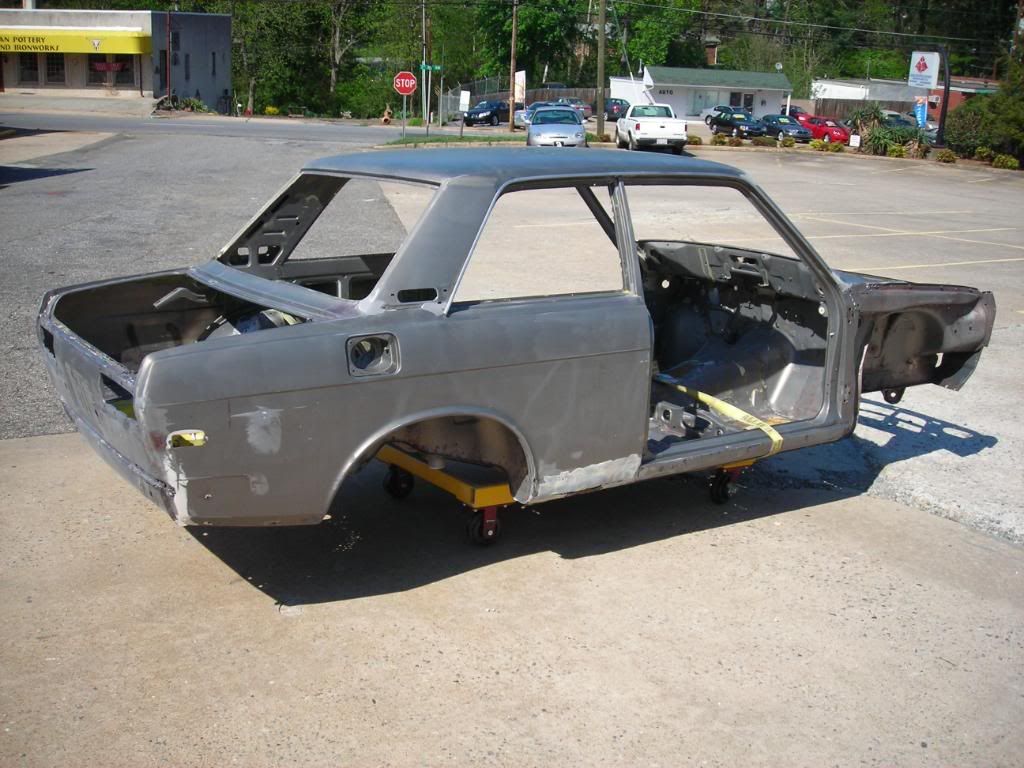 Got a call from my friend that I traded my 240sx for the 510 saying he knew about a S13 that could be have pretty cheap. So I ended up buying it for $450. Thats about it in a nutshell. Now thats out of the way I'll be updating this frequently in the beginning cause I've had my SR since 2003.
__________________
2018 Audi RS 3 | Unitronic Stage 1 ECU and Stage 2 TCU tune |
|
|
|
|
08-31-2010, 07:18 PM
|
#4 |
|
Zilvia Junkie
Join Date: Apr 2003
Location: Pleasanton
Age: 40
Posts: 451
Trader Rating: (32)
Feedback Score: 32 reviews
|
Breaking down and cleaning up the engine
So like I said before Ive had this SR since 2003. First thing I did was buy drifting.com SR20DET rebuild DVD. Broke it all down, layed out everything nice and neat then cleaned it up. No pics of it before I cleaned all the nasty oil and dirt off. It cleaned up really well. \
Planned on installing forged pistons and rods until I saw that the factory hone marks were still visible in all four cylinder walls. Grit in bottom is from scraping off hold head gasket.  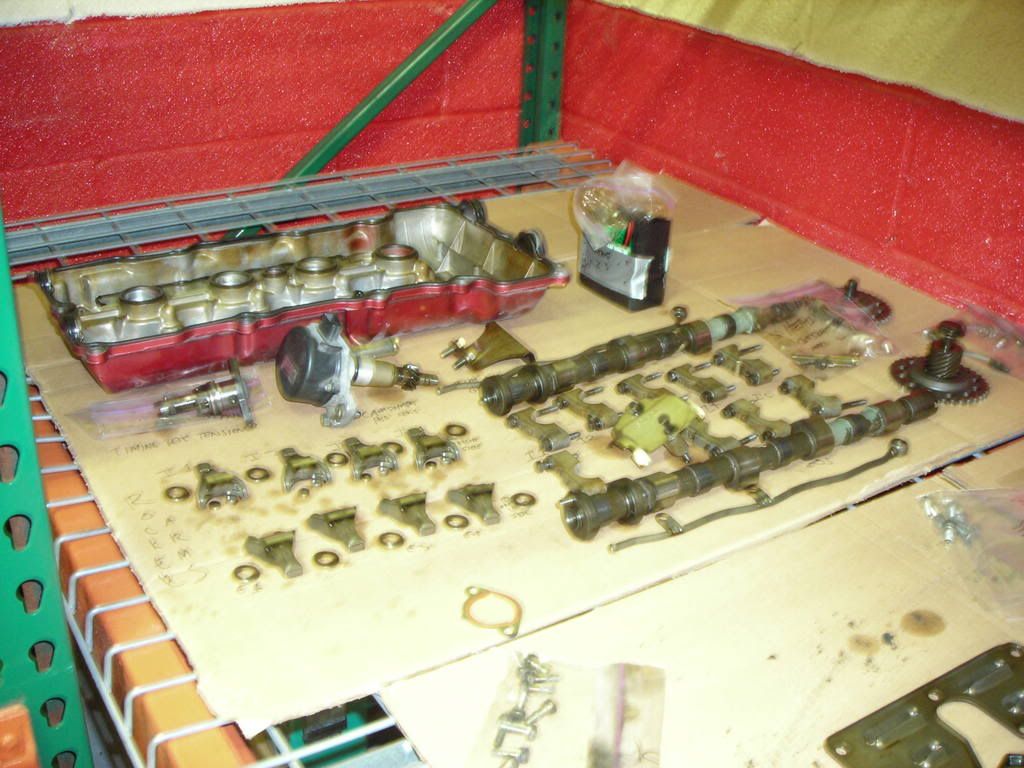      More things to come tomorrow.
__________________
2018 Audi RS 3 | Unitronic Stage 1 ECU and Stage 2 TCU tune |
|
|
|
|
08-31-2010, 07:21 PM
|
#5 |
|
Zilvia Junkie
Join Date: Apr 2003
Location: Pleasanton
Age: 40
Posts: 451
Trader Rating: (32)
Feedback Score: 32 reviews
|
More engine work
Adding to the photos I posted yesterday. Ordered a full gasket set, ARP head studs, BC valvesprings and titanium retainers from phase2motorsports. Couple months before that I got a great deal on ebay for $600. GREX headgasket, Greddy valvesprings, rocker arm stoppers, oil pan, and turbo elbow. The valvesprings used were the Greddy with the BC retainers.
Installed new front and rear main seals along with front cover.  Next cleaned up the head best I could. Lapped all intake and exhaust valves by applying lapping compound then simply rotating valve creating contact between its seat. Inexpensive way to clean up the contact surface of valve and head. Replaced all the valve stem seals.  Now it was time to install the valvesprings and retainers. Didnt have a spring compressor and didnt want to rent/buy one so guess what. I made one out of some casters and scrap materials laying around. Used some holes in the head to bolt my apparatus to and also clamped it to the workbench so it wouldnt move. Takes alot of force to compress these bad boys. Worked really well. Little tricky to get the clips that hold valve in place so an extra hand helps.     Cant wait till my Forced Performance Big 28 is here instead of this stocker
__________________
2018 Audi RS 3 | Unitronic Stage 1 ECU and Stage 2 TCU tune |
|
|
|
|
08-31-2010, 07:26 PM
|
#6 |
|
Zilvia Junkie
Join Date: Apr 2003
Location: Pleasanton
Age: 40
Posts: 451
Trader Rating: (32)
Feedback Score: 32 reviews
|
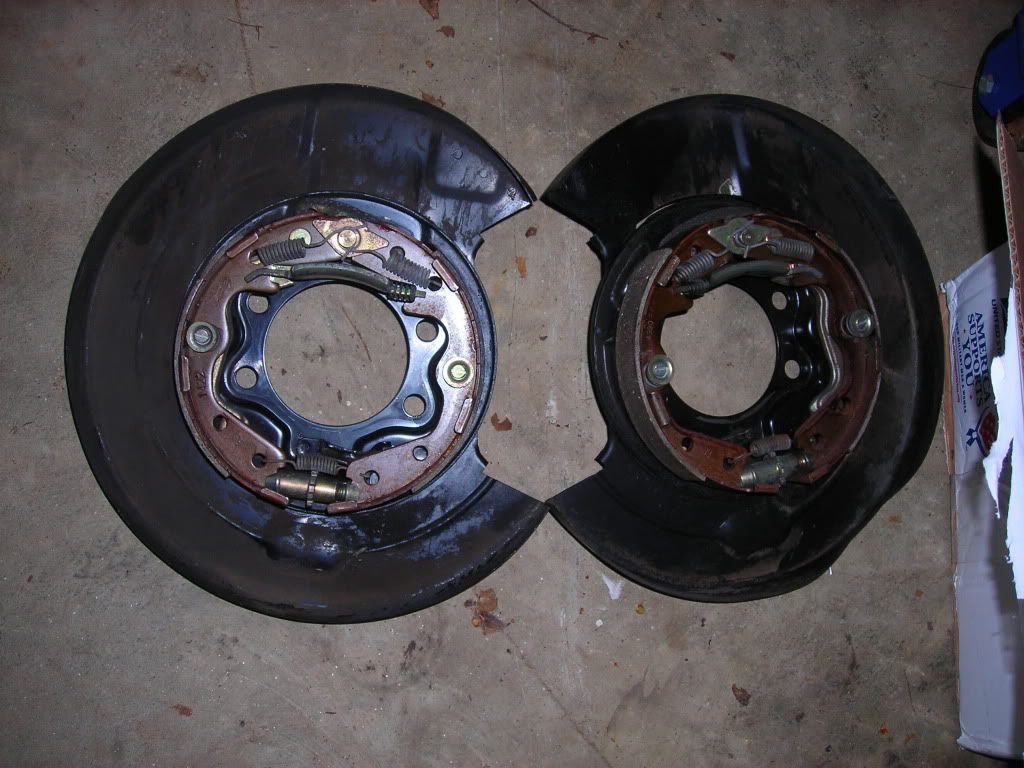
Brakes and such
Heres some photos of the Z32 brakes I'll be putting on the car, came off a 1990 parts car I had several years back. Glass beaded them and powdercoated them flat black almost a year ago. Rebuilt all 4 calipers, with Nissan rebuild kits. Could only get rear caliper rebuild kit from RHD Japan.
      Did finally weld in cover for IC cutout in bumper support, picked up stuff from powder coat, got my solid diff bushings and NA 300zx rear hubs in mail.   Color scheme is going to be UPS Brown and UPS grey, subtle nothing over the top. Looks better in sunlight... i guess it was camera shy. Gonna have to get some samples of the brown with gloss killer before getting my wheels and valve cover done. Plan on carrying scheme into interior with dash and main panels being brown accented by the dark grey. Should look good since carpet is already light grey. Maybe grey suede inserts in the door panels? 
__________________
2018 Audi RS 3 | Unitronic Stage 1 ECU and Stage 2 TCU tune |
|
|
|
|
08-31-2010, 07:27 PM
|
#7 |
|
Zilvia Junkie
Join Date: Apr 2003
Location: Pleasanton
Age: 40
Posts: 451
Trader Rating: (32)
Feedback Score: 32 reviews
|
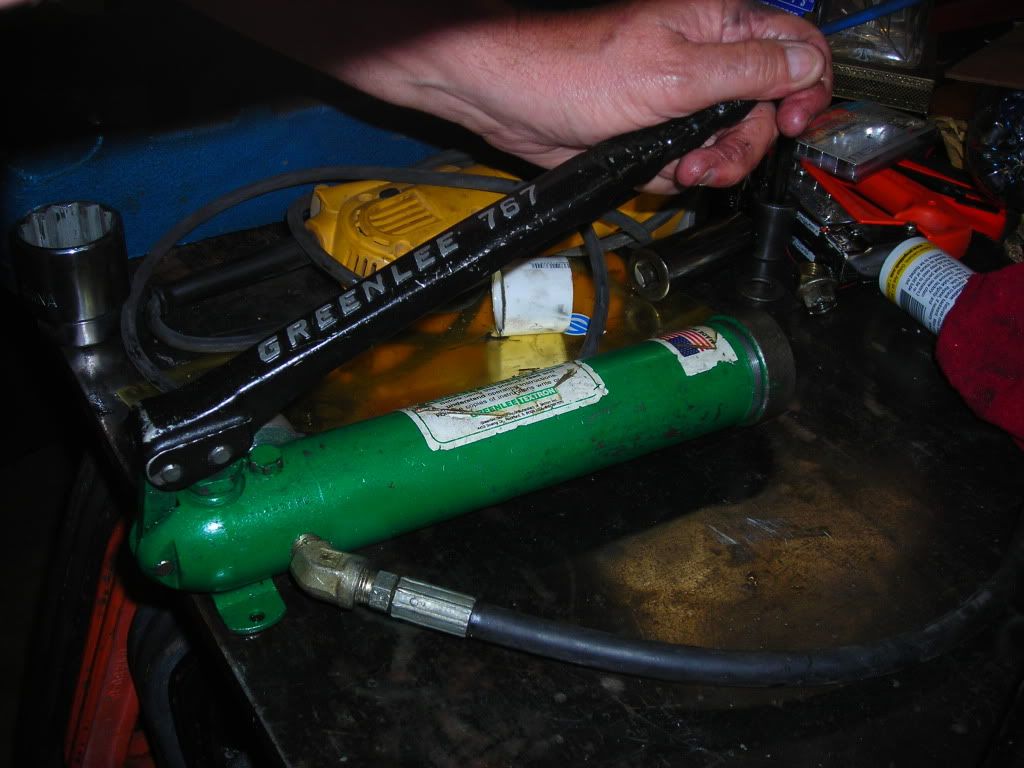
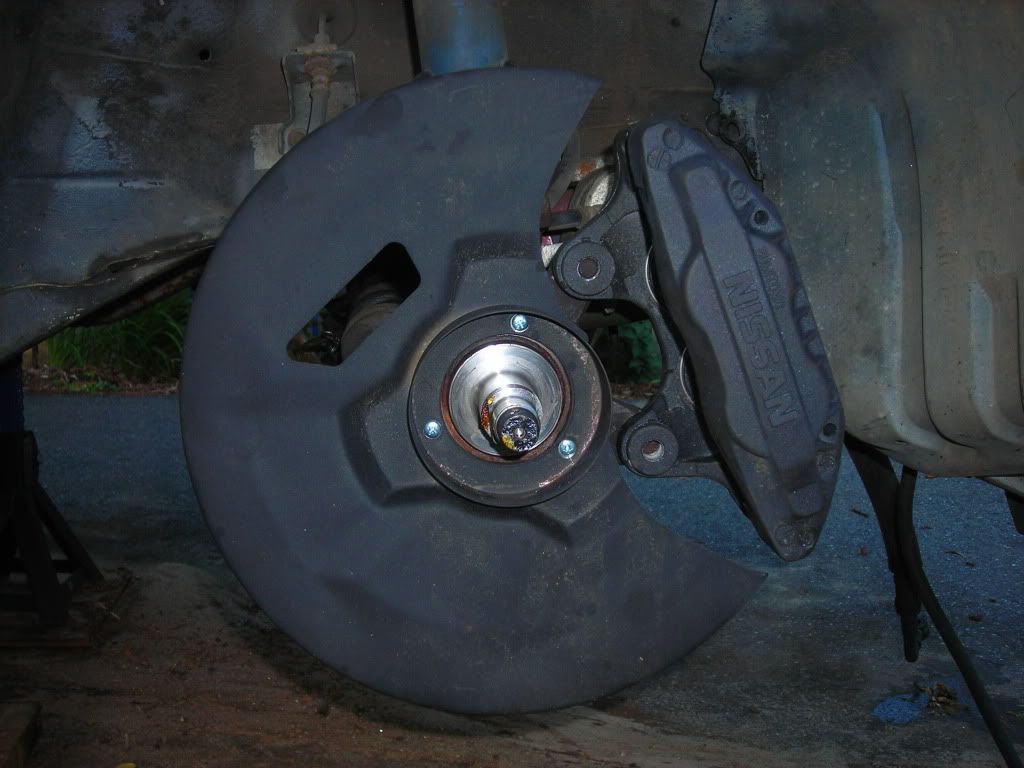
Ichiba front hub install, more like encounter
Installed Ichiba front hubs as well, not a direct replacement. Mounted Z32 calipers and confirmed they are the 30mm type, but caliper needs to be stepped out like an 1/8 inch or so. Also test fit my Z32 rims and Theres not enough clearance, its about a 1/4 inch away from the strut. Definitely will hit with tires on so I need to put on some wheel spacers to remedy this issue. 1/2" max and wheel will be flush with fender. Here is my encounter with the Ichiba front hubs, not that impressed.
So I got the Ichiba front hubs for my S13 and tried installing them yesterday. From what I understand they are a direct replacement with no modding necessary. Well... cleaned up the spindle put them on tightened the nut and guess what, hard as hell to spin almost impossible really. Looked at the stackup of the Ichiba compared to OEM and noticed two things. One the difference in snap rings that this 3 YEAR OLD thread on Zilvia.net discusses (cant see the pics to see if mine prchased last week still has the snap ring in question), also the bearing seal wasnt seated enough, not allowing the hub to pull up all the way. Searched net on this problem found that thread (only thread annywhere). So i swapped the rings, tried putting it on and still no good. Found a 1-7/8 socket and pressed the seal below the bearing surface that makes contact with the spindle. And woila they went on like they should have out of the box. Heres pics of my encounter. If those who have installed these on their car could confirm the snap ring that would be great. In my mind I find it hard to believe a company would still be using incorrect parts after 3 YEARS!!! OEM on left Ichiba on right  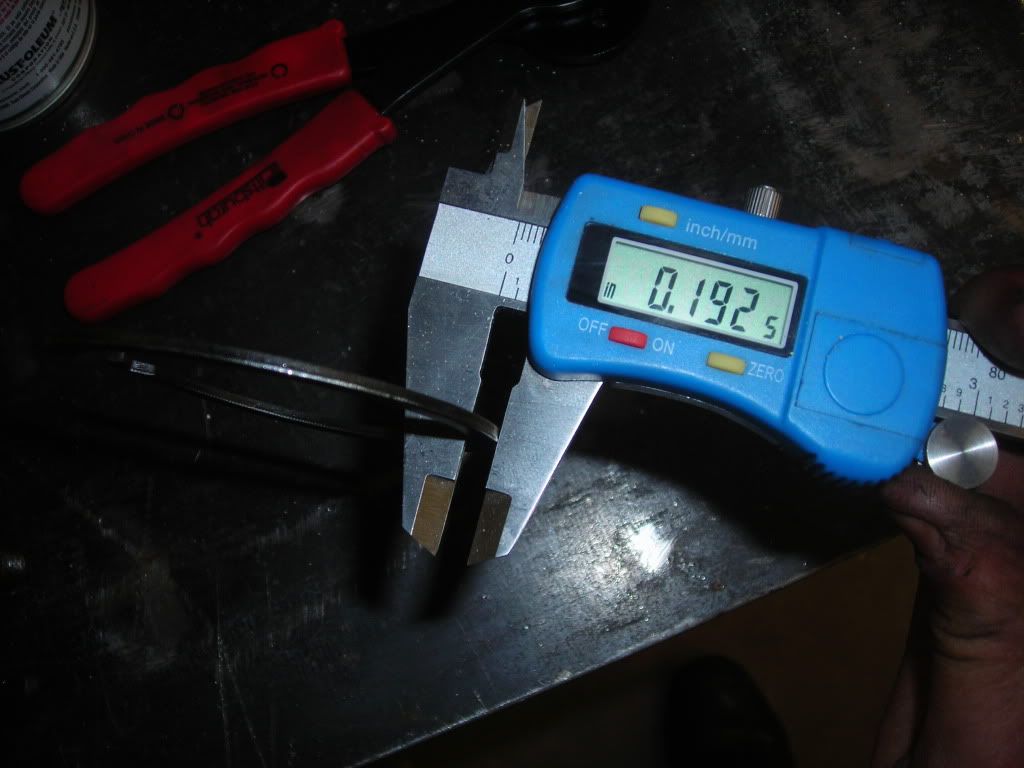  OEM bearing seal clearance No clearance with the Ichiba seal - like 1/64 - 1/32 too high 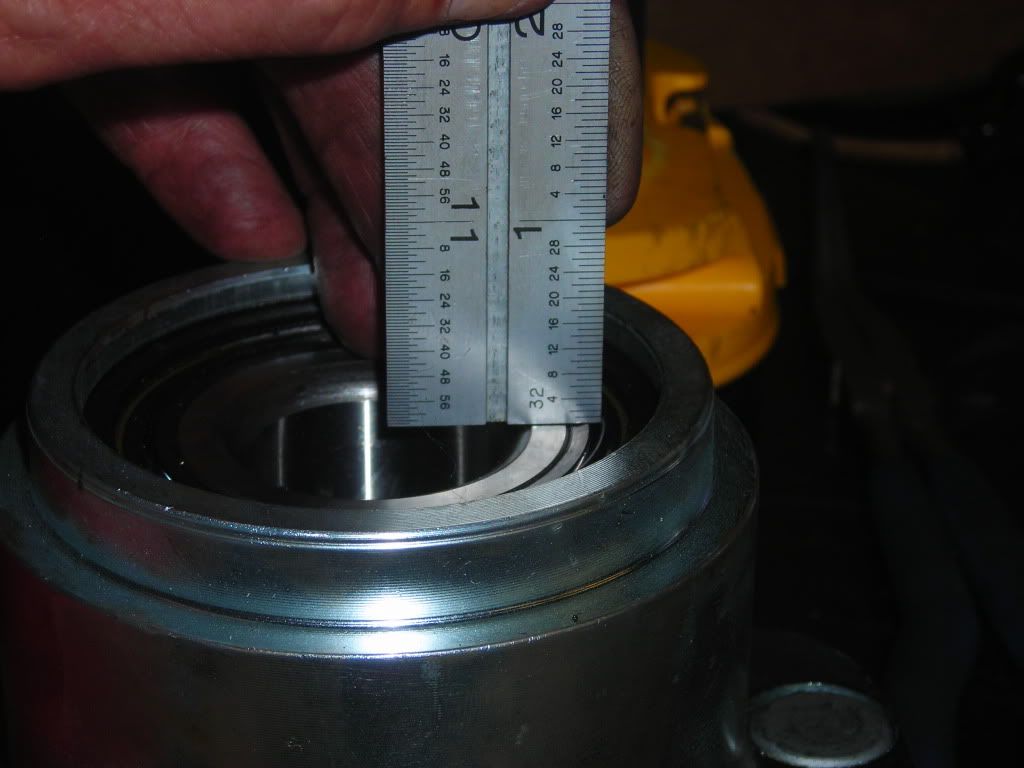 Socket used to press seal in further 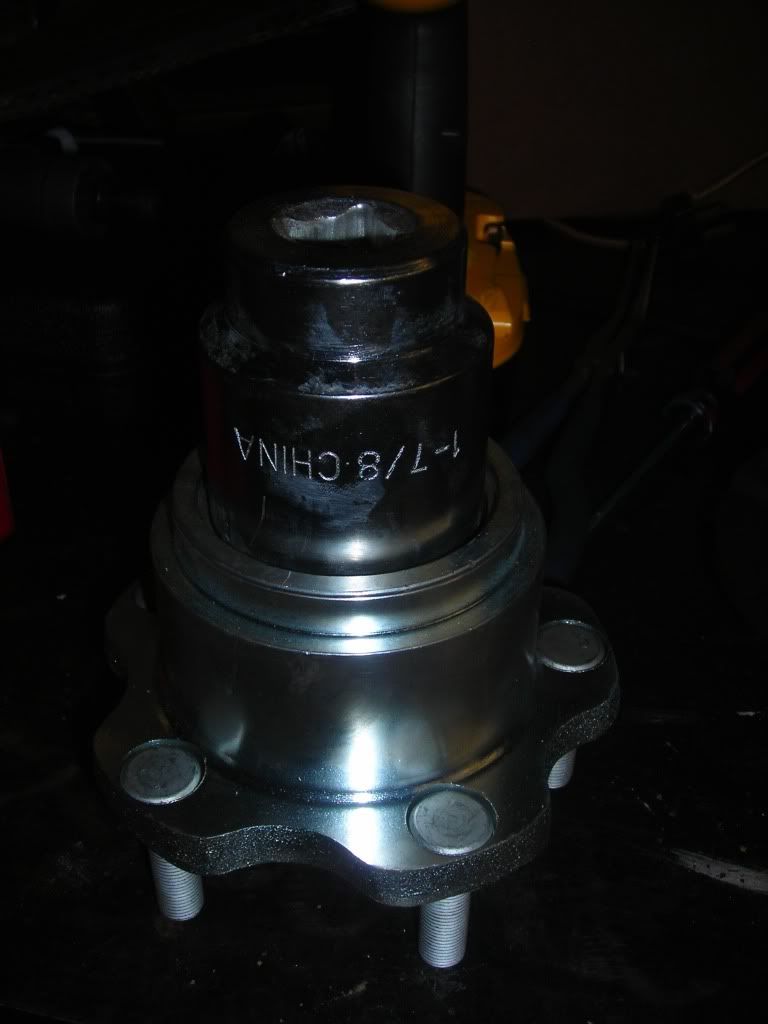 After pressing Installed finally with my old rotors and 300zx caliper 
__________________
2018 Audi RS 3 | Unitronic Stage 1 ECU and Stage 2 TCU tune |
|
|
|
|
08-31-2010, 07:31 PM
|
#8 |
|
Zilvia Junkie
Join Date: Apr 2003
Location: Pleasanton
Age: 40
Posts: 451
Trader Rating: (32)
Feedback Score: 32 reviews
|
Bushings and ball joints
Pulled the subframe out other day along with rear suspension. Used about a half gallon of PB Blaster soaked down then pressure washed trans tunnel, fender wells, undercarriage, and subframe / rear suspension. Removed all of the OEM bushings in the rear and subframe with the help of my small Oxy-Acetylene torch. Still have to clean out all the rubber that wasn't burned out. There are some rust spots on the subframe and in the engine bay and will be fixed with POR 15. Added full build specs to first post.
__________________
2018 Audi RS 3 | Unitronic Stage 1 ECU and Stage 2 TCU tune |
|
|
|
|
08-31-2010, 07:34 PM
|
#9 |
|
Zilvia Junkie
Join Date: Apr 2003
Location: Pleasanton
Age: 40
Posts: 451
Trader Rating: (32)
Feedback Score: 32 reviews
|
Failed hybrid CV attempt
Rained all day but this did give me a chance to confirm my suspicions about Nissan CV axles. Since I cant find J30 axles or slide flanges I thought about combining the S13 and Z32 rear axles, this would give me the correct length and correct flange (5 bolt). BUT You cannot swap the inboard part of a Z32 CV Axle onto the S13. Splines are the same, 27, but OD is different. 1.1560" for the Z32 and 1.0835" for the S13. Z32 uses a cage, race, and ball where the S13 uses a tripod design. Also the overall flange lengths are different. 3.205" for Z32 and 2.961" for S13. Thought I might be able to swap the guts off another Nissan CV but Nissan only uses 2 different ends in their RWD and 4WD vehicles. Guess I'll just have to get lucky with the J30 stuff or break down and get some S14 VLSD w/ABS Slide Flanges from courtesynissan. Pics and chart below.
     
__________________
2018 Audi RS 3 | Unitronic Stage 1 ECU and Stage 2 TCU tune |
|
|
|
|
08-31-2010, 07:35 PM
|
#10 |
|
Zilvia Junkie
Join Date: Apr 2003
Location: Pleasanton
Age: 40
Posts: 451
Trader Rating: (32)
Feedback Score: 32 reviews
|
More suspension work completed
Removed all front suspension. Cleaned engine cross member and took to powdercoat, along with engine pulleys and hotpipe. Hotpipe has to be redone, weird pools and splotches on it. Glass beaded front spindles and FLCA's painted them Chassis Black. Glass beaded Z31 dust shields and painted them High Temp Warm Brown. Installed bushings and Moog ball joints (K9633) into RLCA's. Removed ball joints and Installed bushings into FLCA's, still waiting on new ball joints to install. Oh yeah stabbed myself with a screwdriver, first time for me. Pic Dump.
       
__________________
2018 Audi RS 3 | Unitronic Stage 1 ECU and Stage 2 TCU tune |
|
|
|
|
08-31-2010, 07:39 PM
|
#11 |
|
Zilvia Junkie
Join Date: Apr 2003
Location: Pleasanton
Age: 40
Posts: 451
Trader Rating: (32)
Feedback Score: 32 reviews
|
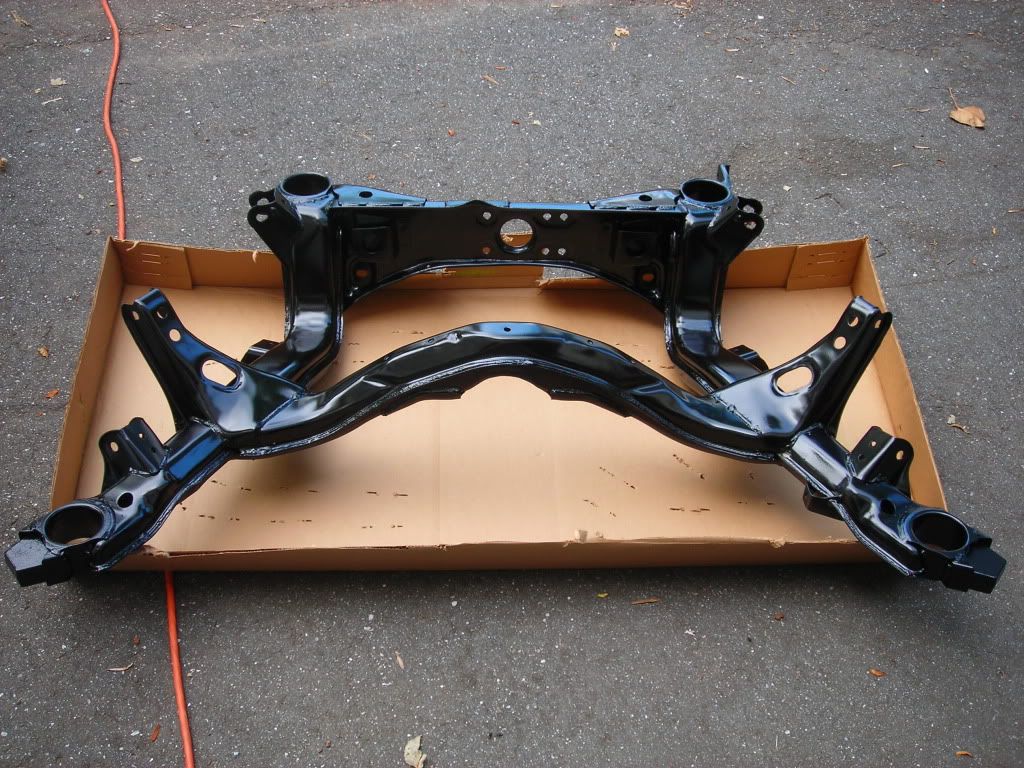
Parts and more parts
Cant wait to finish what I'm doing now... killing rust with POR 15 and painting undercarriage, fender wells, and engine bay. I'm ready for the fun stuff. Received some more suspension parts, picked up subframe and engine crossmember from powdercoat (They look great!!) Was not impressed with the paint quality of the Suspension Techniques sway bars. Called Ant at Enjuku and he said since they switched over to the green its typical. Definitely gonna sandblast and paint those ugly things. I don't own a Honda. Weather permitting, hopefully have rear suspension and maybe front on car by Sunday. Post pics of rust killing and painting when finished...
__________________
2018 Audi RS 3 | Unitronic Stage 1 ECU and Stage 2 TCU tune |
|
|
|
|
08-31-2010, 07:40 PM
|
#12 |
|
Zilvia Junkie
Join Date: Apr 2003
Location: Pleasanton
Age: 40
Posts: 451
Trader Rating: (32)
Feedback Score: 32 reviews
|
Welding, sanding, cleaning, and almost catching car on fire!
Got everything out of engine bay, washed it, cleaned rusted areas, applied POR 15 (twice), skin now stained for a week, scruffed it with 220 grit, cleaned it and all fender wells with 91% isopropyl alcohol, filled seams that were sanded/scraped away with 3M Allaround Auto Body Sealant, covered rest of car so I could paint, but it decided to rain so I put hood and car cover back on. Also fixed rusted spots in the rear and welded in some 11 GA steel pieces cut to fill in the badly rusted areas. Oh yeah also figured out why the driver side rear quarter panel has some rust on it, you'll know why too when you see the pic
 . The pics... . The pics...            Had a hard time welding here. Metal was super thin and would blow through on thinnest metal setting so I had to bump the wire feed speed up to 90!! Got this area pretty hot, the crapet wrapping around the strut tower started to smoke  hno: but didnt catch on fire. Close one. hno: but didnt catch on fire. Close one.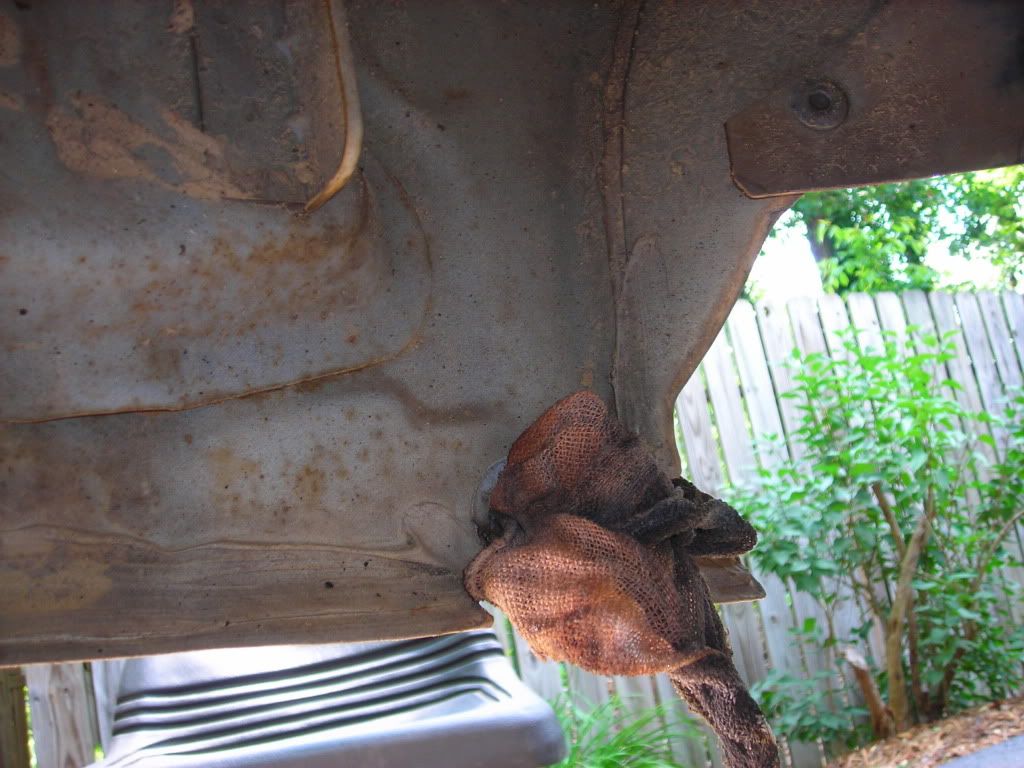 WTF is that doing in there??? Not sure but I pulled it out of the drain plug.
__________________
2018 Audi RS 3 | Unitronic Stage 1 ECU and Stage 2 TCU tune |
|
|
|
|
08-31-2010, 07:42 PM
|
#13 |
|
Zilvia Junkie
Join Date: Apr 2003
Location: Pleasanton
Age: 40
Posts: 451
Trader Rating: (32)
Feedback Score: 32 reviews
|
Engine bay and front fender well are done
Used almost a whole quart of SEM Rust sheild black. Decided to use that instead of the chassis black since it can be sprayed out of an HVLP gun. Added hardener and 3-4 coats later heres what she looks like. Sorry about image quality, broke my crappy camera and havent figured out this other quite yet. Also pic of welded spots with a coat of POR 15.
 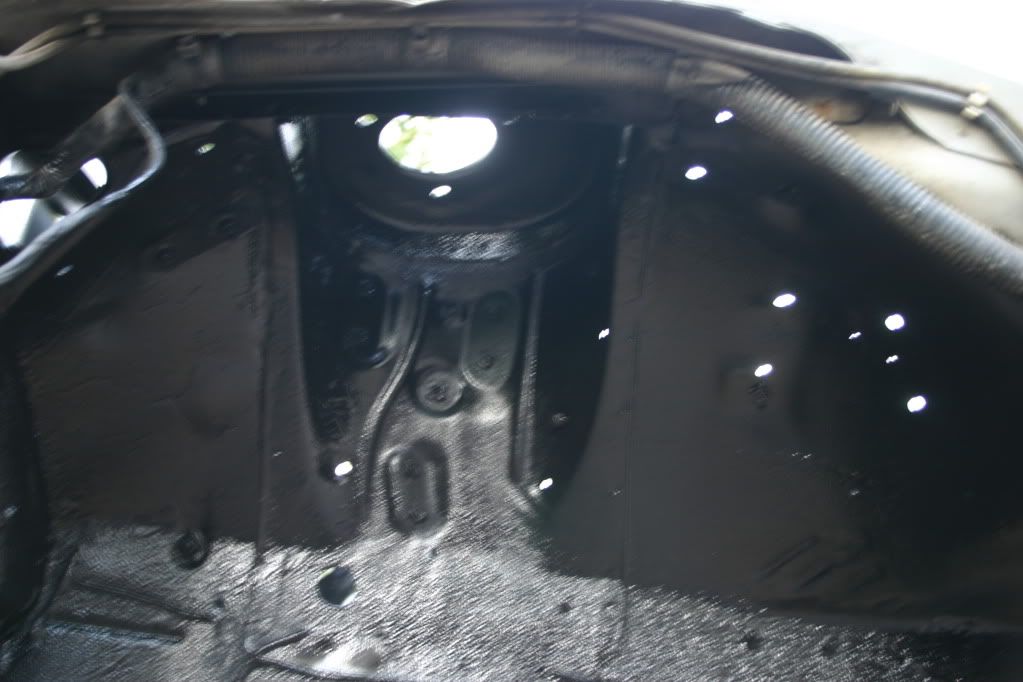    Painted rear fenderwells and body using SEM Rust sheild black. Undercoated the trans tunnel SEM Rubberized undercoat. Might do another coat on the tunnel, looks a little light even though there are 2-3 coats.     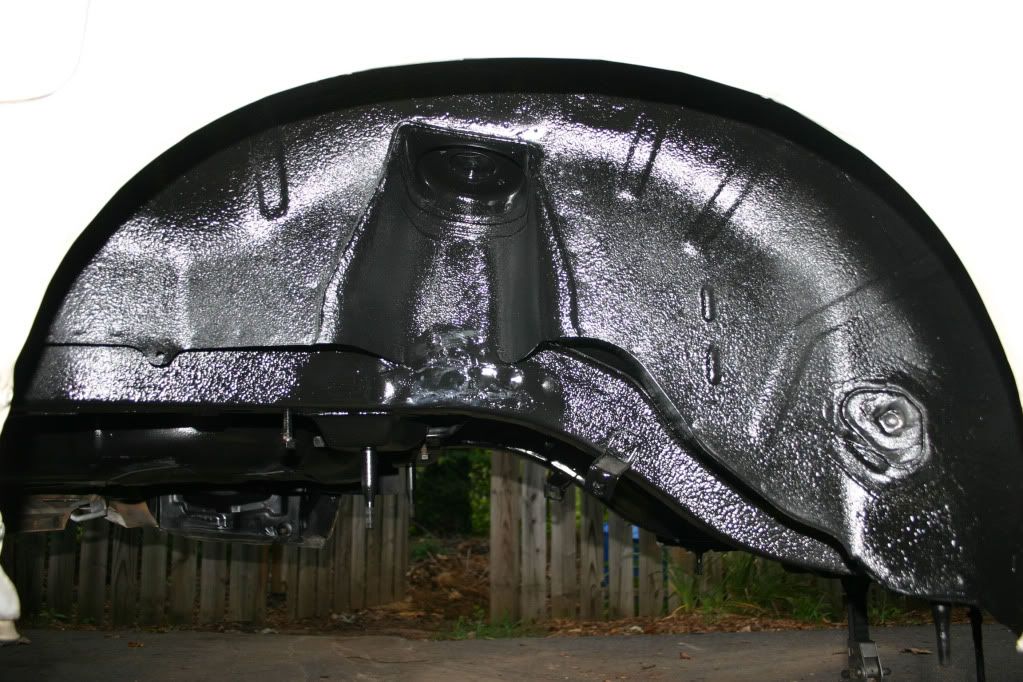  
__________________
2018 Audi RS 3 | Unitronic Stage 1 ECU and Stage 2 TCU tune |
|
|
|
|
08-31-2010, 07:44 PM
|
#14 |
|
Zilvia Junkie
Join Date: Apr 2003
Location: Pleasanton
Age: 40
Posts: 451
Trader Rating: (32)
Feedback Score: 32 reviews
|
i'm a post whore but it had to be done
Think thats enough for now. Read it, let it settle, digest it. Another big post dump in a couple days.
__________________
2018 Audi RS 3 | Unitronic Stage 1 ECU and Stage 2 TCU tune |
|
|
|
|
08-31-2010, 11:37 PM
|
#16 |
|
Zilvia Addict
 |
Hey great build.....lots of work....but great pics...with great writing on the "how to stuff"...this will help out alot of noobs on here.
Your work will pay off.....when you go down the road.....  |
|
|
|
|
09-01-2010, 08:12 AM
|
#18 | ||
|
Zilvia Junkie
Join Date: Apr 2003
Location: Pleasanton
Age: 40
Posts: 451
Trader Rating: (32)
Feedback Score: 32 reviews
|
Feedback
Quote:
Quote:
__________________
2018 Audi RS 3 | Unitronic Stage 1 ECU and Stage 2 TCU tune |
||
|
|
|
|
09-01-2010, 12:51 PM
|
#19 |
|
Post Whore!
 
|
One thing I suggest with those ES poly bushings in the uprights and LCAs is to trim the bushings slightly or put washers on the ends of the sleeves so the suspension can travel without binding against the brackets.
I didn't do this when I first got my ES bushings and it made the cars suspension bind horribly. Zerk fittings would have been nice as well since the grease wears out after only like a month of driving and everything squeeks and binds. Zerks allow you to quickly re-lube. |
|
|
|
|
09-04-2010, 05:56 AM
|
#21 |
|
Zilvia Addict

Join Date: Sep 2007
Location: Alachua, FL
Age: 37
Posts: 969
Trader Rating: (32)
Feedback Score: 32 reviews
|
So you left Nico because people didn't feel like commenting on the millionth build thread posted?
 See one build thread, you've seen em' all, I really wish there was a different section just for build threads so that these wouldn't clutter up the thread list.. |
|
|
|
|
09-04-2010, 01:07 PM
|
#22 | |
|
Zilvia Junkie
Join Date: Apr 2003
Location: Pleasanton
Age: 40
Posts: 451
Trader Rating: (32)
Feedback Score: 32 reviews
|
yep
Quote:
__________________
2018 Audi RS 3 | Unitronic Stage 1 ECU and Stage 2 TCU tune |
|
|
|
|
|
09-04-2010, 01:18 PM
|
#23 |
|
Zilvia Junkie
Join Date: Apr 2003
Location: Pleasanton
Age: 40
Posts: 451
Trader Rating: (32)
Feedback Score: 32 reviews
|
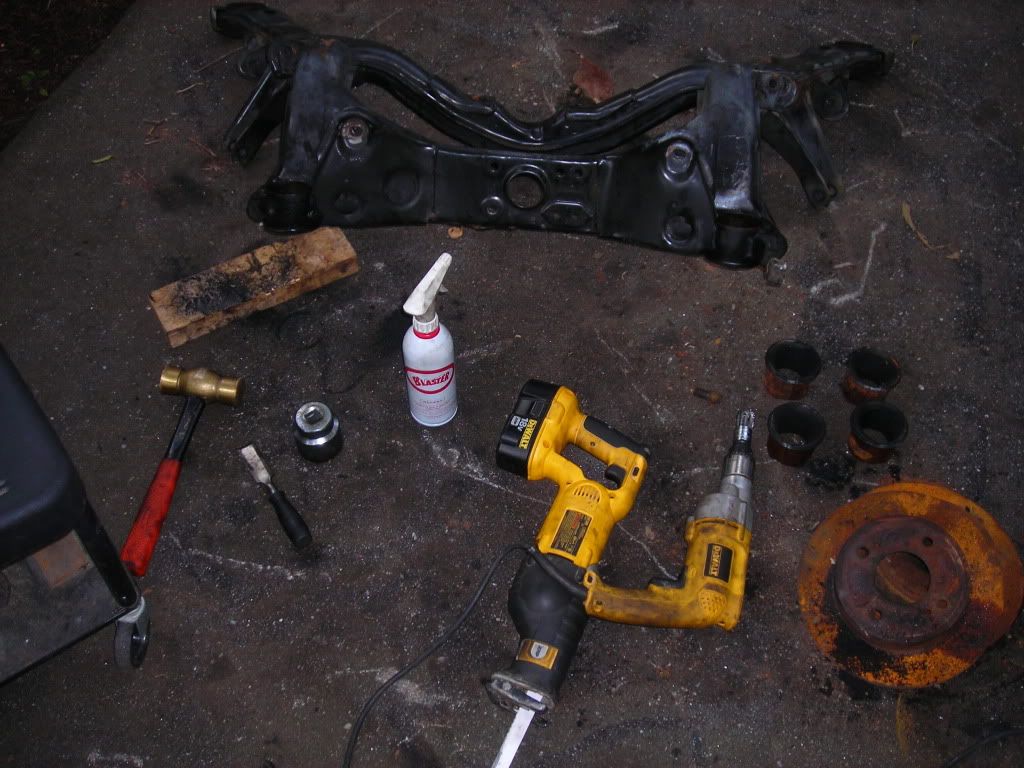
Stop Hammertime, Subframe Install
SPL Subframe bushings installed. Freezer, grease, wood, hammer, sweat, bigger hammer, bigger piece of wood, more sweat, maul, and done.
  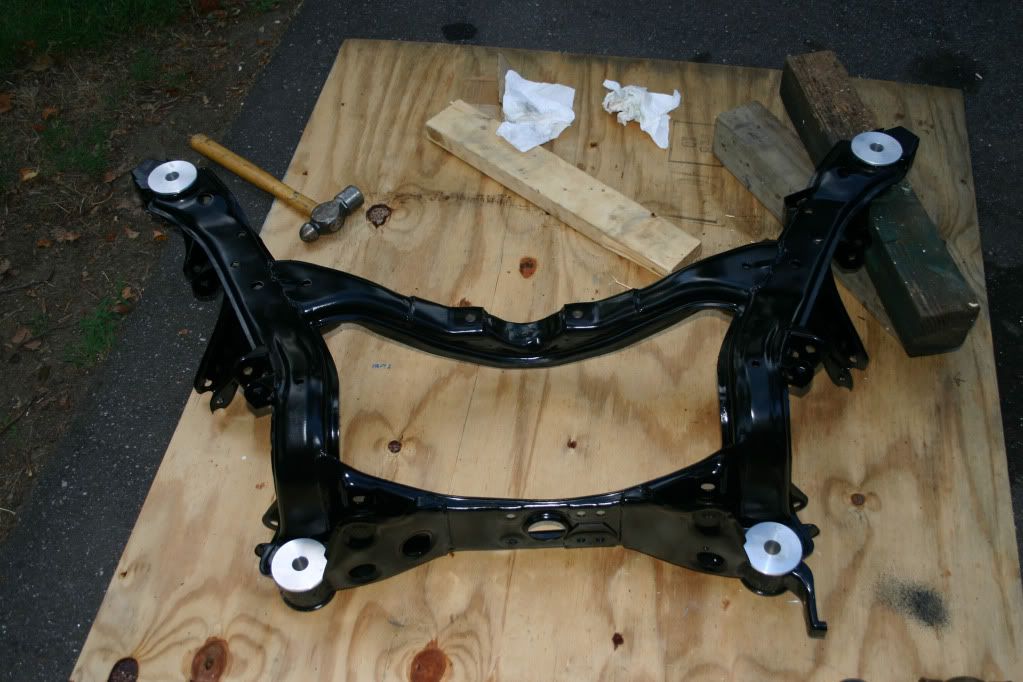 Subframe installed onto car. Rubber isolator and one collar used above subframe.   Removed bushings from Diff. Checked stackup of solid bushings bought off E-bay. Bushings are .026" too thick and will need to be sanded in order for the diff to sit flush.  
__________________
2018 Audi RS 3 | Unitronic Stage 1 ECU and Stage 2 TCU tune |
|
|
|
|
09-05-2010, 12:46 PM
|
#25 | |
|
Zilvia Junkie
Join Date: Apr 2003
Location: Pleasanton
Age: 40
Posts: 451
Trader Rating: (32)
Feedback Score: 32 reviews
|
Bushings
Quote:
__________________
2018 Audi RS 3 | Unitronic Stage 1 ECU and Stage 2 TCU tune |
|
|
|
|
|
09-05-2010, 07:21 PM
|
#26 |
|
Zilvia Junkie
Join Date: Apr 2003
Location: Pleasanton
Age: 40
Posts: 451
Trader Rating: (32)
Feedback Score: 32 reviews
|
Rear Suspension and such
Got all of the rear arms installed both sides, next comes the Z32 drum ebrake, hubs, axles and diff.
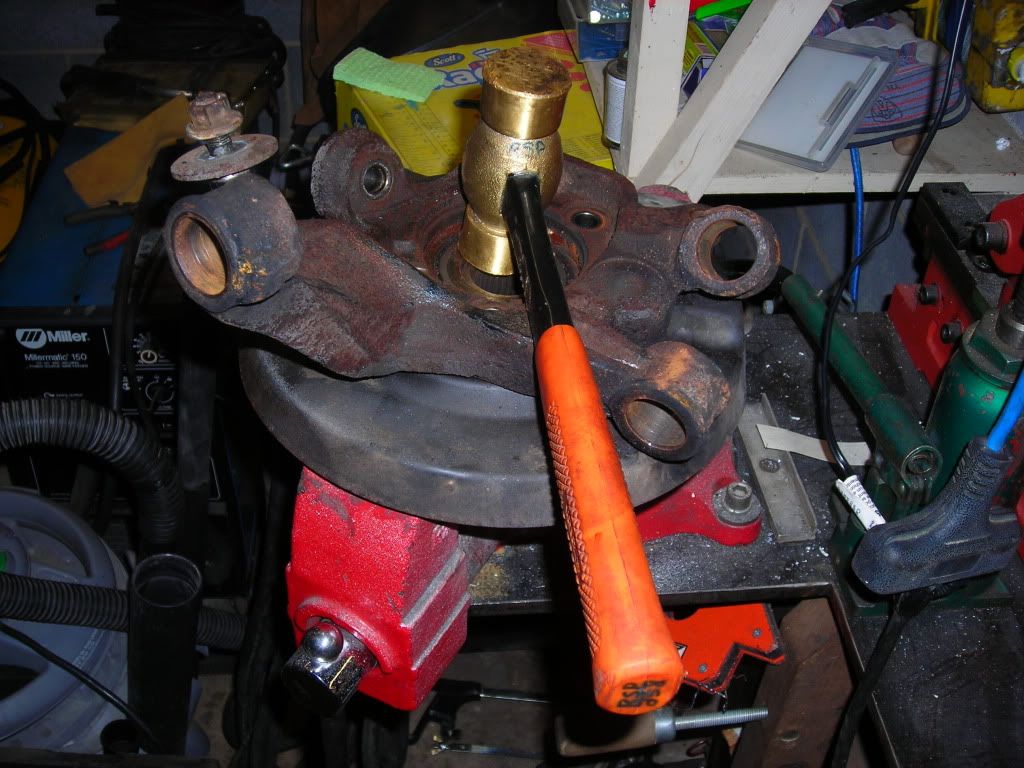
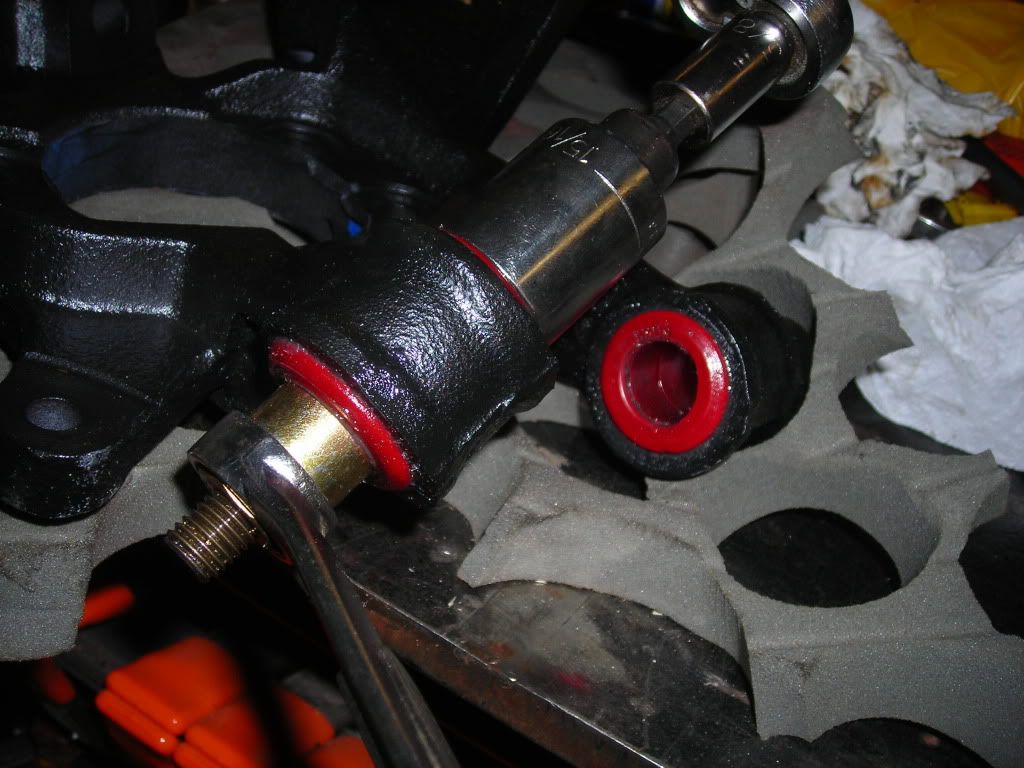
    Tried installing the hub and drum e-brake while on the car, bad idea. The anchor pin for the drum e-brake is a b*itch to install. After using a cutoff wheel to remove the nut from the bolt connecting the RUCA to the rear spindle, somehow the nylon lock nut stripped a thread and got stuck. I bent the bolt trying to remove the nut, it was not cross threaded so don't go there, and its a grade 8 bolt not some low grade BS. Luckily other side came right off. Once off the car I knocked the anchor pin out with a brass hammer, slightly greased the anchor pin bore after a light sanding to remove some 20+ year corrosion. Lined everything up and used an impact gun, cycling between the 4 hub bolts and the anchor pin nut. Had to jam a wrench in between the side of anchor pin to prevent it from rotating while hitting it with the impact gun. Z32 FSM wants this bad boy torqued from 159-224 ft. lbs. which is slightly more than the wheel bearing nut, 152-203. Seems a bit overkill to me but the FSM is the FSM. Gonna be fun getting a torque wrench on this on the car.    Decided to turn the bushings down in the lathe instead of grinding them. Pic of all 4 is after adding a chamfer. Installed slide flange with new cir-clip, cleaned cover, installed with new gasket, installed diff and J30 axles onto car.   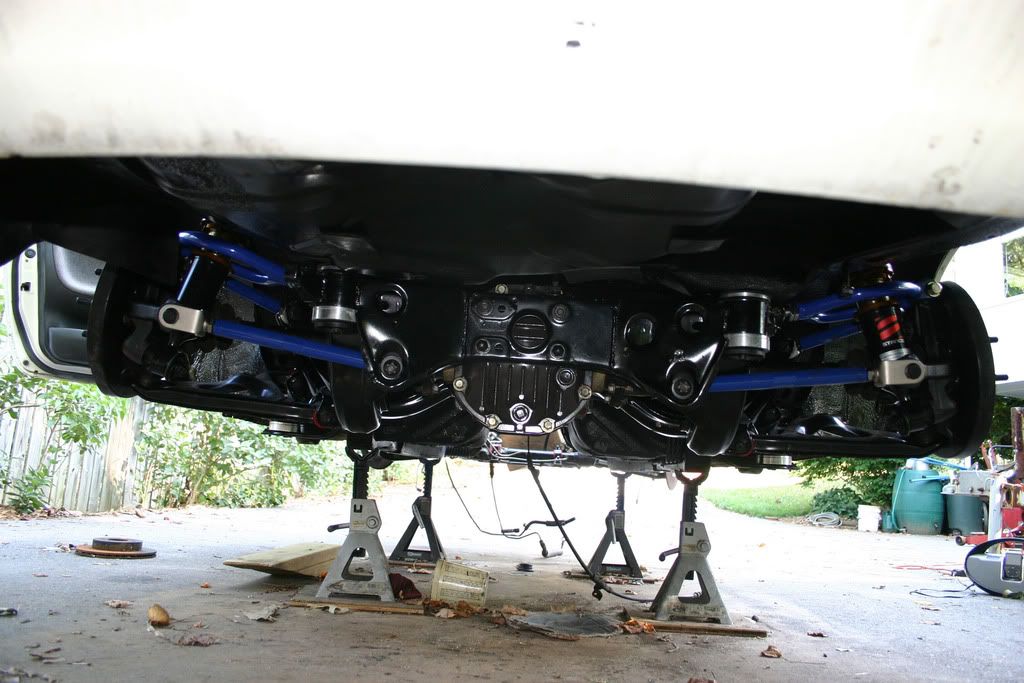 
__________________
2018 Audi RS 3 | Unitronic Stage 1 ECU and Stage 2 TCU tune |
|
|
|
|
09-06-2010, 09:10 AM
|
#28 | |
|
Zilvia Junkie
Join Date: Apr 2003
Location: Pleasanton
Age: 40
Posts: 451
Trader Rating: (32)
Feedback Score: 32 reviews
|
Quote:
__________________
2018 Audi RS 3 | Unitronic Stage 1 ECU and Stage 2 TCU tune |
|
|
|
|
|
09-06-2010, 09:24 AM
|
#29 |
|
Zilvia Junkie
Join Date: Apr 2003
Location: Pleasanton
Age: 40
Posts: 451
Trader Rating: (32)
Feedback Score: 32 reviews
|
Pressure plate, clutch, and engine install
Put these on today. Also installed new throw out bearing and nismo clutch fork pivot. Didnt take pic of clutch disc but its the ACT 6 puck sprung hub. Some thing was missing when I took these picks and had to reinstall it all again. No one at NICO noticed. First one to notice gets a gold star.
   Hottest day of the year when we installed this thing. Stuff on upside down/backwards, do things twice, put things on take things off put back on again. Car gods hate me. Not my glasses by the way.  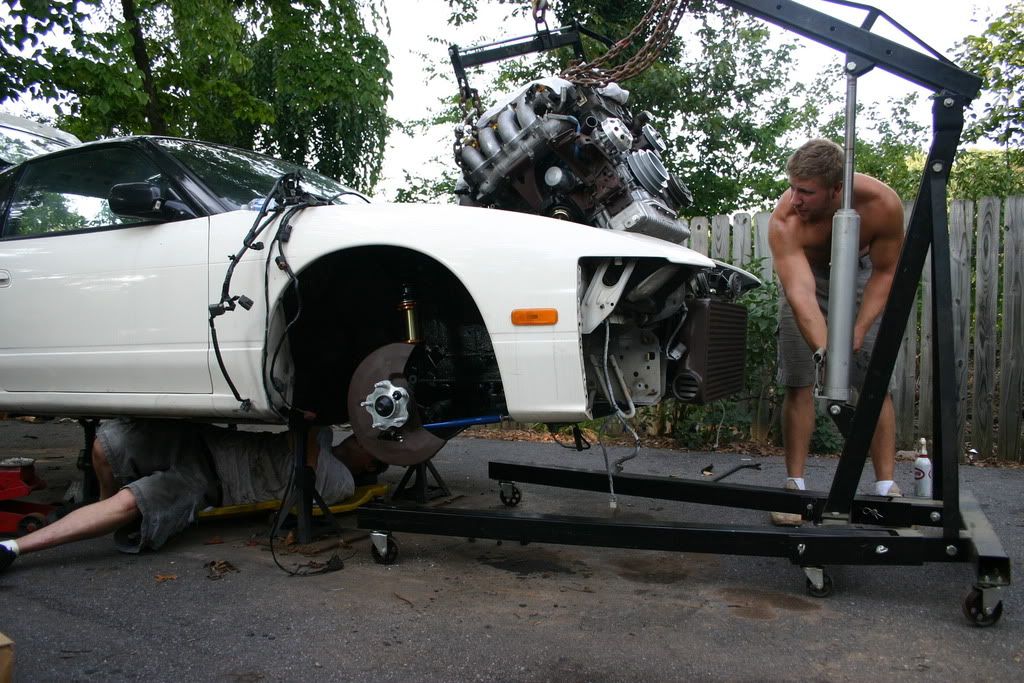   
__________________
2018 Audi RS 3 | Unitronic Stage 1 ECU and Stage 2 TCU tune Last edited by xiaphin; 03-10-2015 at 10:52 AM.. |
|
|
|
|
09-06-2010, 12:04 PM
|
#30 |
|
Zilvia Junkie
Join Date: Apr 2003
Location: Pleasanton
Age: 40
Posts: 451
Trader Rating: (32)
Feedback Score: 32 reviews
|
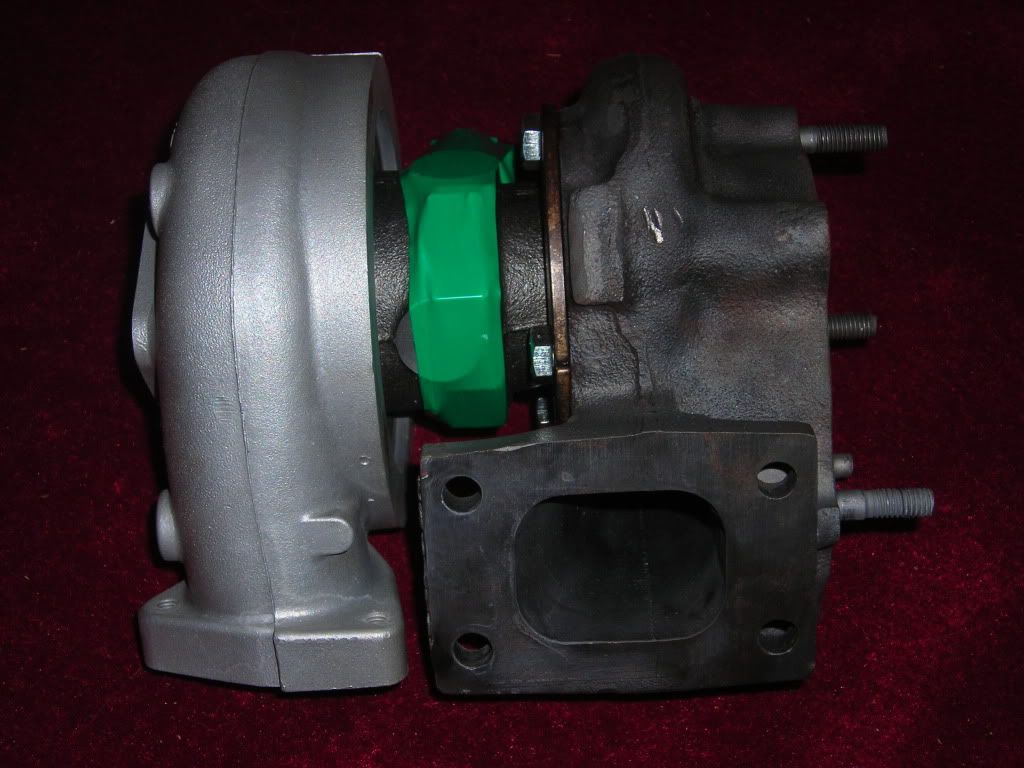
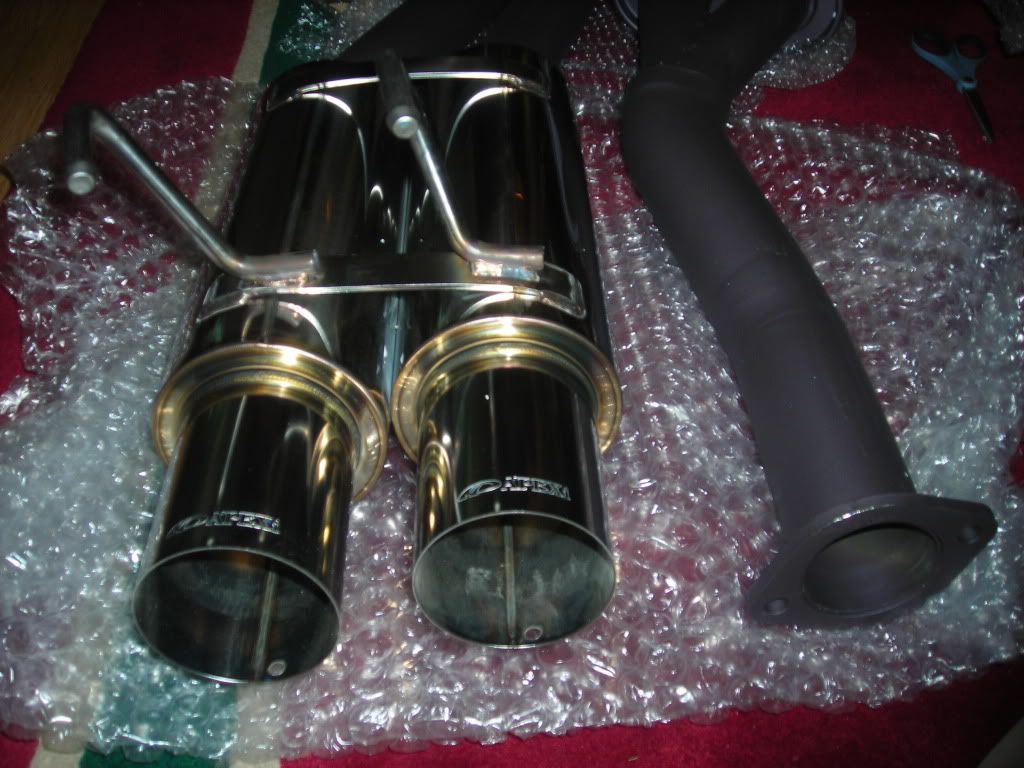
PBM downpipe install - well not quite - and Exhaust install
Had problems with manifold and PBMand posted it earlier, so just a link to it - http://zilvia.net/f/s-chassis/338849...l-problem.html
Went with the stock manifold and the PBM Flex, Megan straight pipe and Apexi N1 Dual bolted up just fine. Had the insulator mounted to the PBM with both bolts but it was so twisted that I went with one instead. Lowered it a little more than an inch. Undercoated that bottom of my gas tank after these were taken, getting rid of that white overspray. Gas tank was resto'd with POR 15 Fuel Repair Kit and Walbro fuel pump. All hoses replaced. No pics of that.    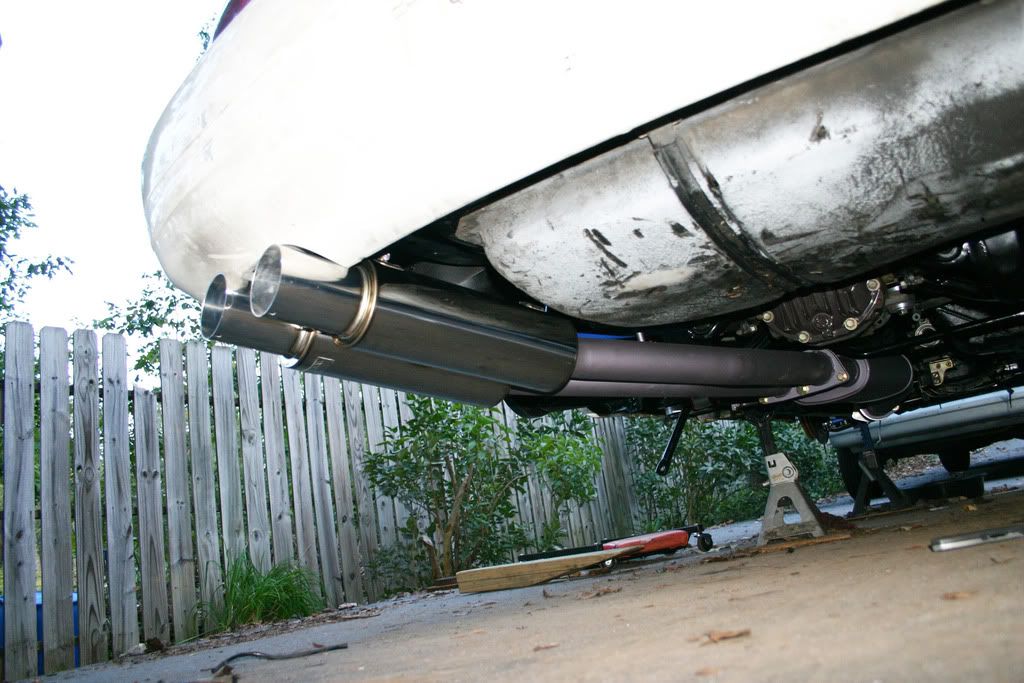
__________________
2018 Audi RS 3 | Unitronic Stage 1 ECU and Stage 2 TCU tune |
|
|
|
|
| Bookmarks |
|
|


 Turn and Burn!


 Linear Mode

