|
|||||||
| Tech Talk Technical Discussion About The Nissan 240SX and Nissan Z Cars |
 |
|
|
Thread Tools | Display Modes |
 08-20-2010, 01:25 PM
|
#33 | |
|
Zilvia Addict
 Join Date: Sep 2009
Location: Nor Cal
Age: 37
Posts: 720
Trader Rating: (10)
 Feedback Score: 10 reviews
|
nice cheecks on freshalloy
 hahaha lol jk. This build is sick keep up the great work & cant wait to see this beast finished. hahaha lol jk. This build is sick keep up the great work & cant wait to see this beast finished.
__________________
Quote:
|
|

|

|
|
08-20-2010, 02:57 PM
|
#34 | |
|
Post Whore!
 
Join Date: Sep 2004
Location: Granada Hills, CA
Age: 43
Posts: 6,990
Trader Rating: (15)
 Feedback Score: 15 reviews
|
Quote:
|
|
|
|
|
|
09-22-2010, 11:01 PM
|
#36 | |
|
Zilvia Addict

|
Quote:
Seriously. It almost doesn't look real lol.
__________________
Almost there. |
|
|
|
|
|
11-27-2010, 10:17 AM
|
#38 | |
|
Zilvia Member
 |
Over the past few monthes a lot has happened with the car. Here is just a little that I can post up and the moment.
The car originally had a sunroof and I went over a few ideas of what to do since the car was now gutted and caged. I looked at a few companies that could make a carbon fiber plug but got very aggrevated with that whole deal. Either company would make a custom plug however they attach by riveting to weld on tabs or being glued directly to the roof skin.. not at all worth the money in my opinion. I decided to just look for a wrecked non sunroof car and transfer the skins. First started by drilling all the spot welds and cutting the skin off where it was brazed at the posts. 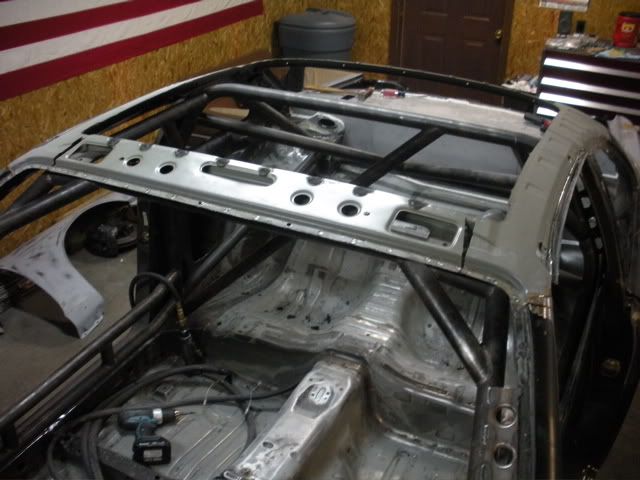 Removed the old skin. 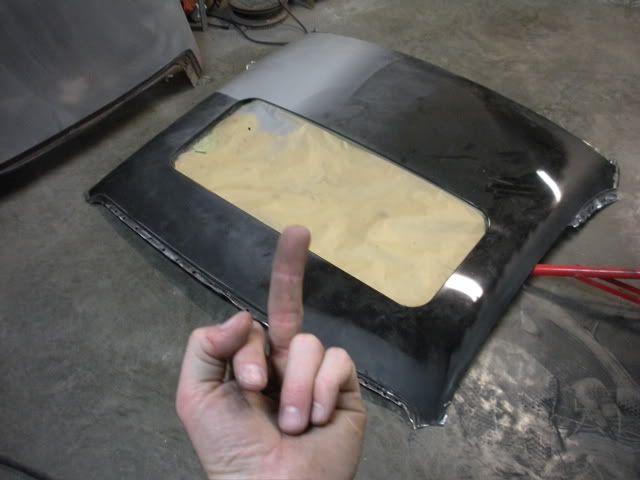 Here is the new roof. I found a zenki sitting in a field about an hour from here. it was wrecked, rusted, and parted out... left with sit in a field forever, perfect! The owner was more than happy to get some cash for the roof. I brought it home and chemically stripped off all of the old paint, primer, and any filler. There were a few little dings, but i was able to hammer them out from the inside. 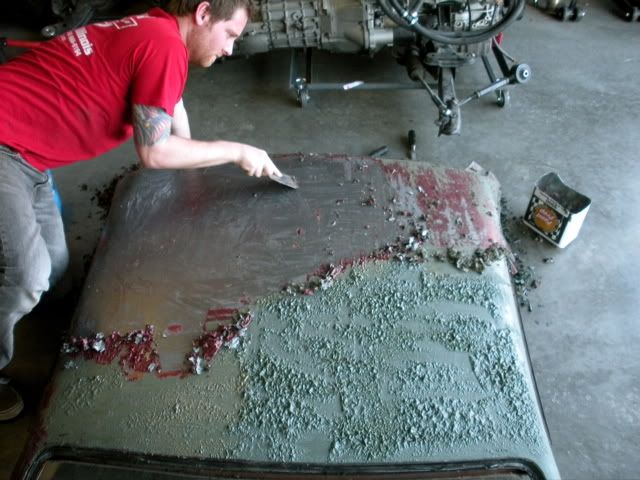 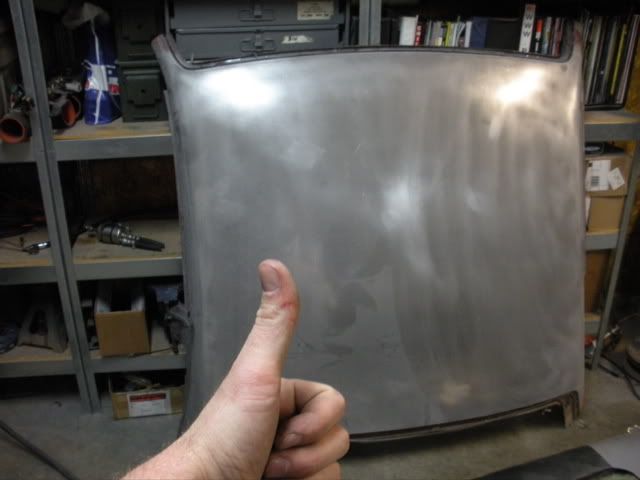 Here is the skin all cut off and ready to be welded on. 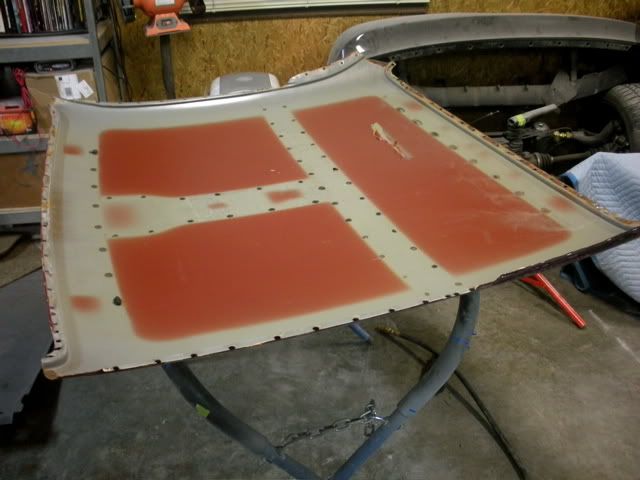 In this you can see the braces I had to transfer over from the doner roof. Since I used to have a sunroof, neither of these existed in my car. Without the braces, your roof skin would vibrated and wobble with the windows down. 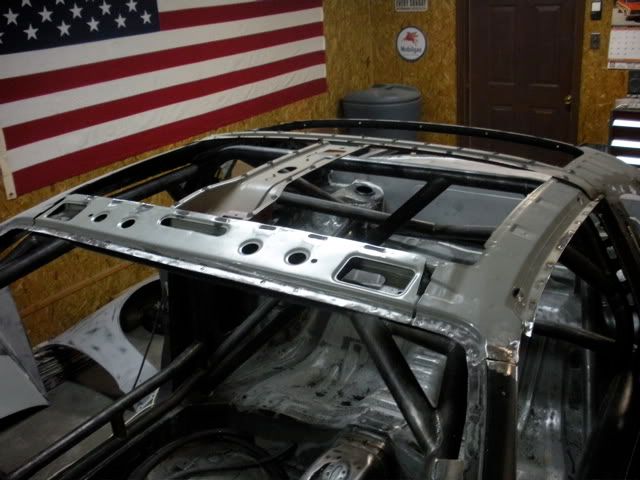 Here it is all welded in place and some filler on the posts. It was welded in all of the original spot weld holes. Notice a little POR15 in the windshield and back glass frames. Water can run off the roof and get in there, rusting this area over time. 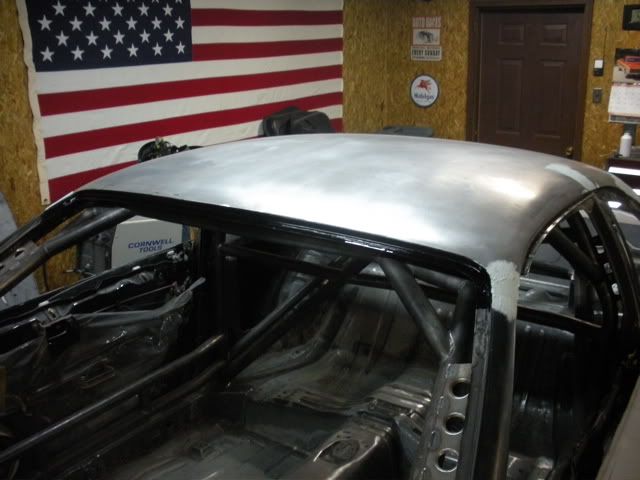 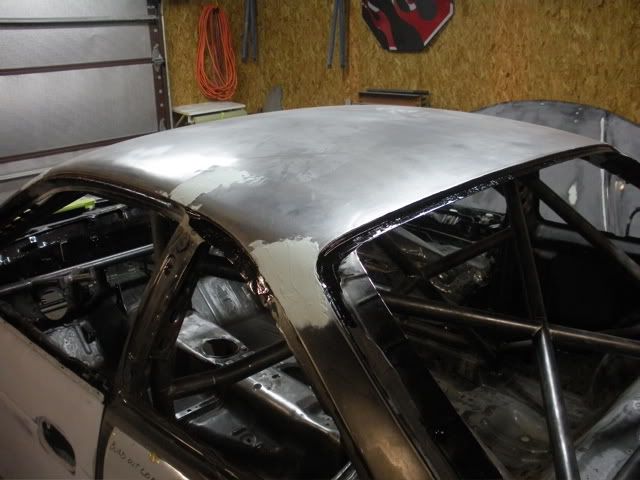 The roof is in primer now and ready to be painted.. just need to get the rest of the car to that point. Thanks for looking.
__________________
Quote:
|
|
|
|
|
|
11-27-2010, 02:42 PM
|
#41 |
|
Leaky Injector
Join Date: Aug 2006
Location: Conway AR/ Toms River NJ
Age: 38
Posts: 94
Trader Rating: (1)
Feedback Score: 1 reviews
|
never seen an s14 with this much love, care, and attention go into its build. please keep moving ahead with this. u are inspiring me to keep building mine!
__________________
S14-vlsd/coilovers. L33 swap, ENGAGE! www.arnaturalselection.blogspot.com |
|
|
|
|
11-28-2010, 05:24 PM
|
#43 | |
|
Zilvia Member
|
spent some time over the weekend prepping the underside of the car.
Mechanically stripped all of the factory undercoating and seam sealer. I Went over any surface rust with an angle grinder. I used Eastwood's Metal Etch to get to any of the areas i wasnt able to grind or skuff. After the Metal Etch set wet for about 30 min, I cleaned it all with a wax and grease remover. Once it was all clean I brushed on a good coat of POR15. Turned out really well. I will be able to paint or undercoat the underside now with no worries or rust again. 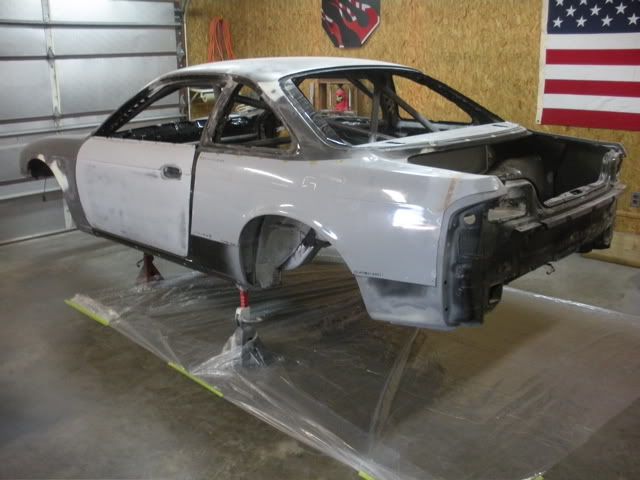 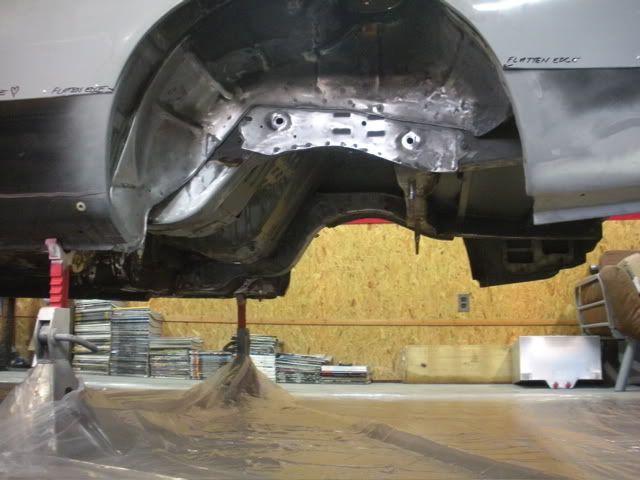 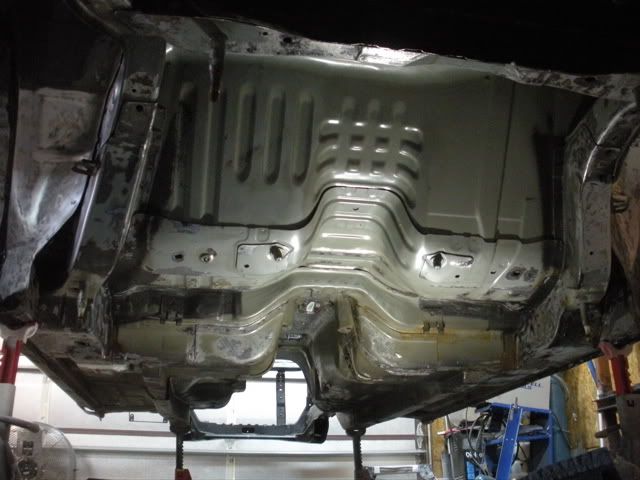 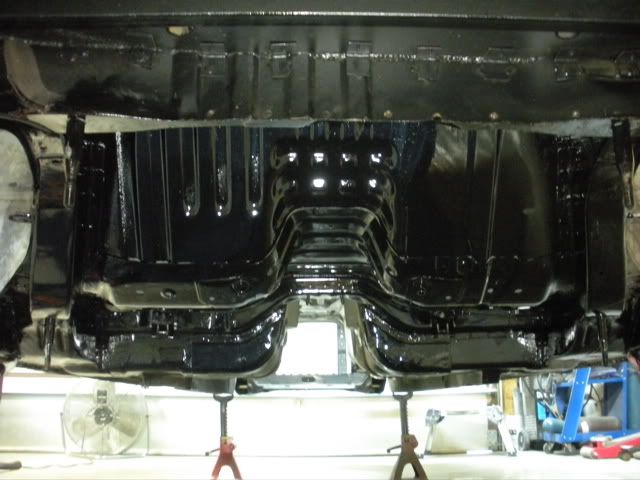
__________________
Quote:
|
|
|
|
|
|
11-29-2010, 04:55 PM
|
#45 | |
|
Zilvia Member
|
Moving on...
I got my breather box in a couple weeks ago from Suja 1. Everything in my engine bay is now going to be satin black, including the radiator, expansion tank, breather box, etc. As soon as i opened this thing up I went to work powder coating it to match. Here is the Suja 1 custom breather box all sanded down. Two air filters sit on top and there are provisions for -10an lines on the side. 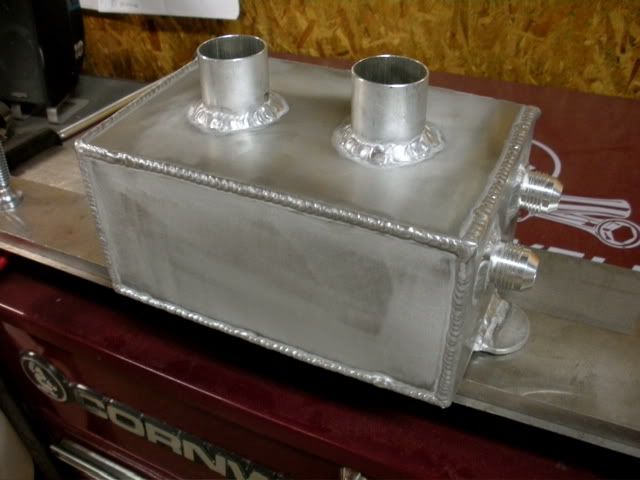 Here it is powdered, before baking. 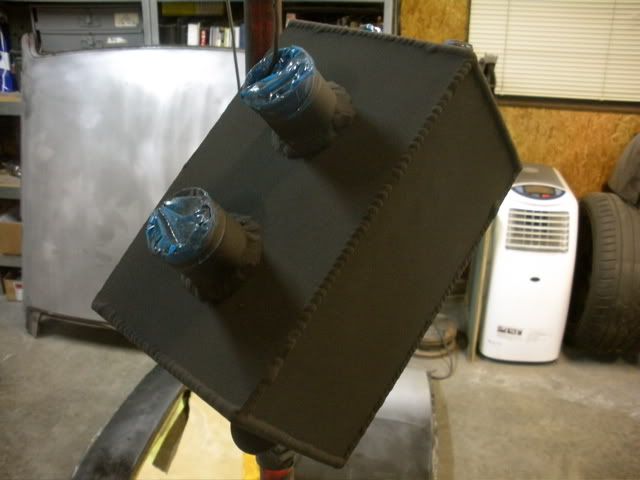 Turned out great. 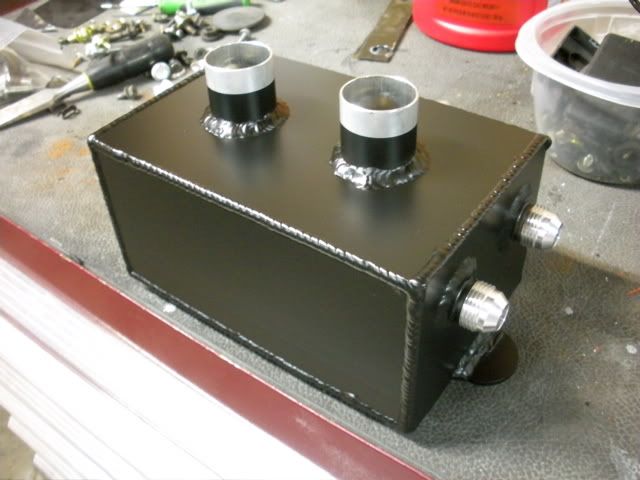 Cant wait to see it with the filters on.
__________________
Quote:
|
|
|
|
|
|
12-02-2010, 08:01 AM
|
#57 |
|
Zilvia FREAK!
 |
awesome!
i knew you were still around!!!!! ...just patiently waiting for updates! 
__________________
cONtRol FReAkS |
|
|
|
|
| Bookmarks |
|
|


 zenki for life


 Linear Mode

