|
|||||||
| Tech Talk Technical Discussion About The Nissan 240SX and Nissan Z Cars |
 |
|
|
Thread Tools | Display Modes |
|
|
 01-13-2012, 02:44 PM
|
#1 | |
|
Zilvia Junkie
 
Join Date: Mar 2010
Location: Goodyear AZ
Age: 38
Posts: 480
Trader Rating: (6)
 Feedback Score: 6 reviews
|
Quote:
|
|

|

|
| Sponsored Links |
|
01-13-2012, 07:21 PM
|
#3 |
|
Zilvia Addict
 Join Date: Sep 2009
Location: tampa
Age: 36
Posts: 819
Trader Rating: (26)
Feedback Score: 26 reviews
|
For the most part I agree with your methods.
I do tinting differently. I use a base black and reduce it to desired shade spray on. Just be careful not to reduce it to much or it will react, then clear. A lot easier to do different shades.1 Because if you keep spraying it the way you said to make it darker the clear will eventually run. 2. If you do it my way you can reduce it pretty light and recoat until you get the shade you want (paint dries faster so u can recoat quicker and save clear) 3. They wont look as shiny because you have paint mixed in the clear. ( If you have foggy headlights wet sand outside good with 1000 grit then clear, they will look almost brand new) Also want to add, there are clears you reduce and clears you do not reduce. I always wet sand final coat in this order (nice cars) 1000,1500,2000,3000. Then hit it with compound and polish. In addition I use 2k primer over body work mostly (thicker) helps give it an even surface, I always wetsand 2k primer with 600 then 800. Another thing to note is they make different hardeners for clears depending on temps. Slow, Medium, Spot and Panel which is fast. I know prices vary in different areas but around my area I can get 1 gallon matrix clear with medium hardener for $100 and a 1gallon of Martin Senour Paint for $80(napa) just get a vin with the color you like call dealer get paint code. If you are on a budget that is your best bet. I work for a body shop and that is what we use on our cheaper jobs and to be honest they look amazing. I have done side jobs with that clear/paint/ and a harbor freight gun and people didnt believe me because it looked so damn good. I will post up pictures when I get a chance. For the most part its all about getting the clear down good and then a nice wetsand and buff. A few final notes. Never use enamel. When using metallic paint stir bottom of can VERY GOOD so it mixes evenly and shake, shaking the can alone will not cut it a good portion of the flakes stick to the bottom. 3M products are very good and reasonably priced. That is all for now. |
|
|
|
|
01-13-2012, 08:07 PM
|
#4 | |
|
Zilvia Junkie
Join Date: Mar 2010
Location: Goodyear AZ
Age: 38
Posts: 480
Trader Rating: (6)
Feedback Score: 6 reviews
|
Quote:
 |
|
|
|
|
|
01-14-2012, 12:31 AM
|
#5 | |
|
Zilvia Addict
Join Date: Sep 2009
Location: tampa
Age: 36
Posts: 819
Trader Rating: (26)
Feedback Score: 26 reviews
|
Quote:
Here are some random pics from my cell: Friends SRT 8: Painted a lot of stuff black. 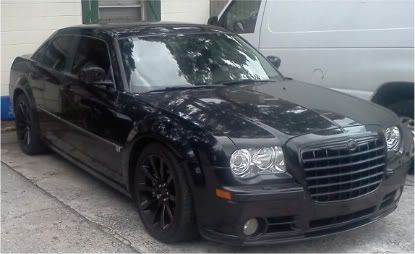 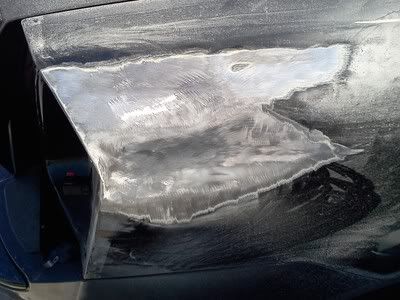   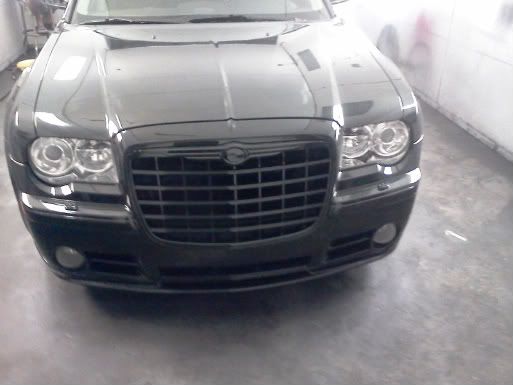 Tinted tails, dirty in pic. 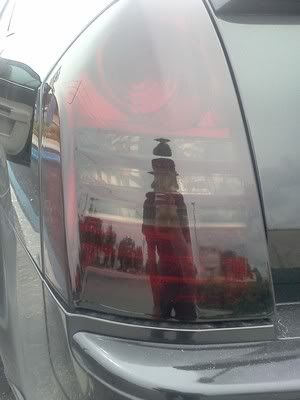 Supra I helped with: 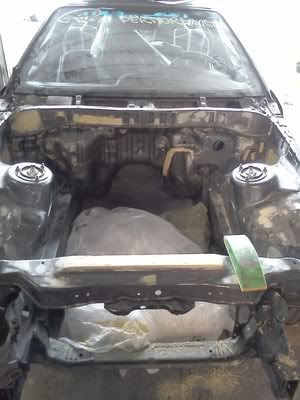 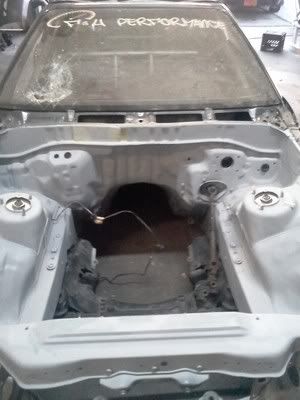 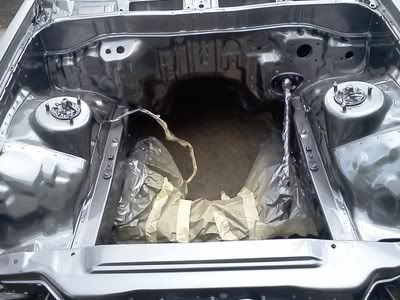 Not streaks in the hood. Beams on roof. 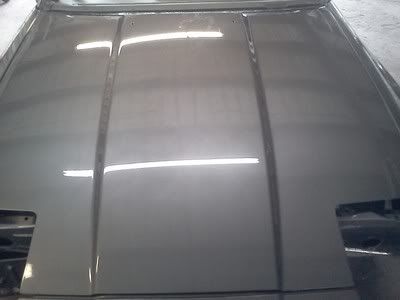 350Z 350th Anniversary rims: 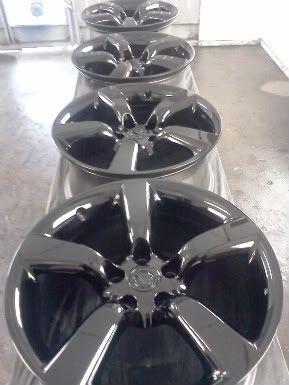 Civic engine bay: 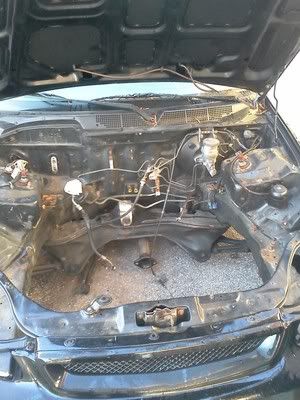 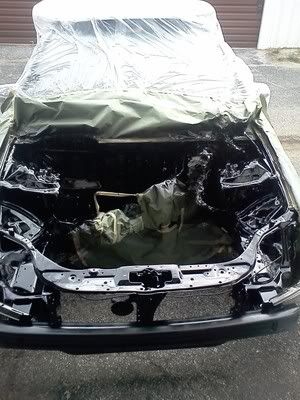 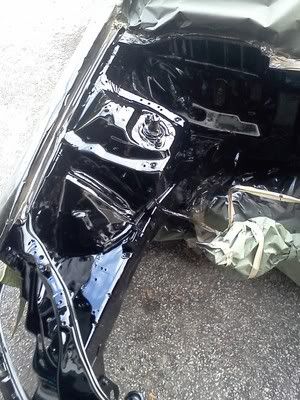 My ZX10R:    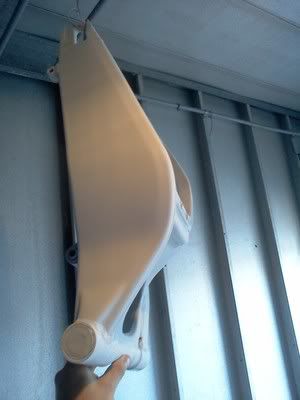 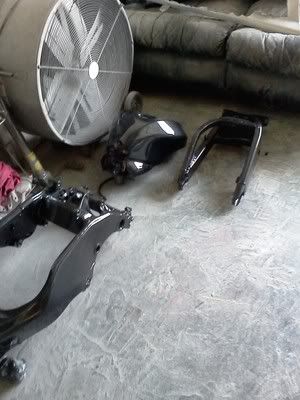 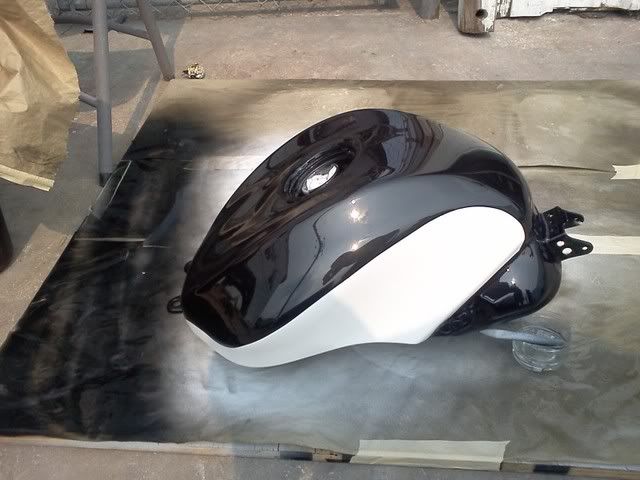 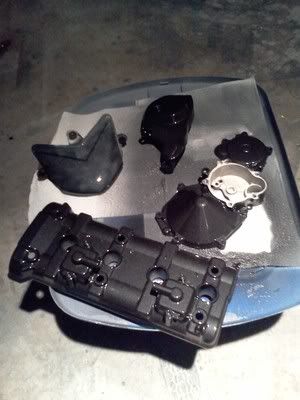 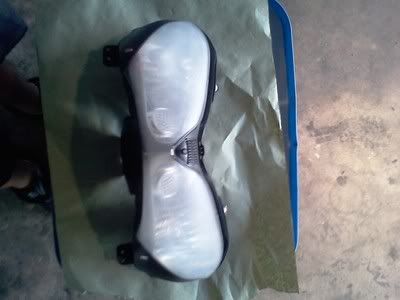 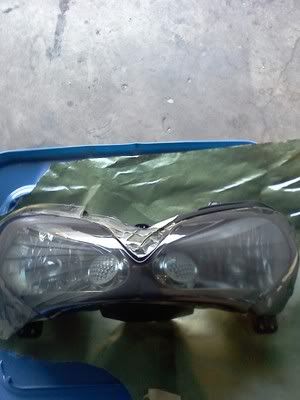 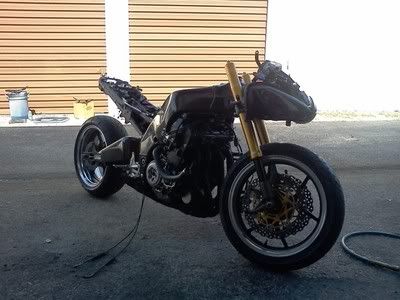 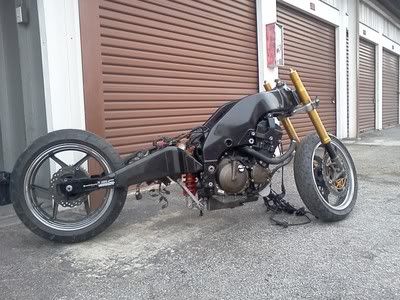 Jet SKI's: Before 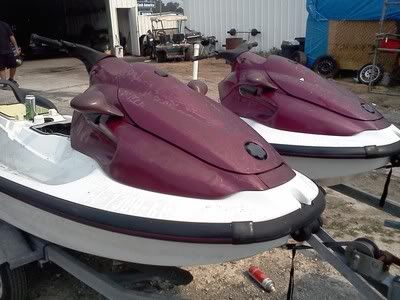 After 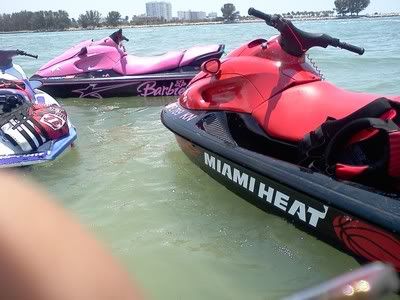 My GSXR: Pearl really doesnt show in crappy pics. Looked super nice in person. 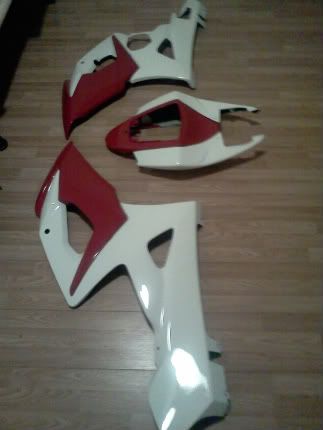 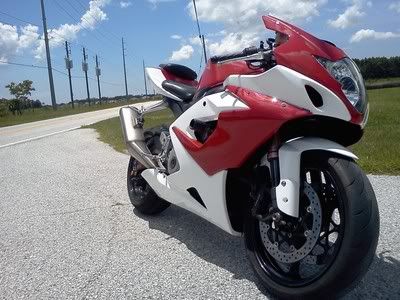 Not my style but hey money is money:  |
|
|
|
|
|
01-17-2012, 09:59 PM
|
#7 |
|
Zilvia Addict

|
ok i have a couple questions.
1. are some colors easier to spray than others 2. is there a change in method for metallic and candy paints 3. have you ever used a prism clear 4. and finally when you use metal flake is that sprayed with the clear. thanks in advance i plan on painting my car here in the next 2-3 weeks. |
|
|
|
|
01-18-2012, 03:39 AM
|
#8 | |
|
Zilvia Junkie
Join Date: Mar 2010
Location: Goodyear AZ
Age: 38
Posts: 480
Trader Rating: (6)
Feedback Score: 6 reviews
|
Quote:
2 yes candy and metallics are hard to spray it takes skill and practice. When spraying metallics they tend to streak or blotch on the surface, to fix this go back over the areas but back your distance from the surface off a few inches more, it should look a bit lighter when your spraying it. When I spray candies I'll do a few coats at different angles on the car because candies will streak and look like crap when your spray clear so this helps make sure there are no streaks. 3 never heard of a prism clear 4 if you spray it with the clear I would do only one coat and then do two coats of normal clear over that. Most of the time you end up sanding and buffing and the last thing you want is metallics in your surface while polishing. Or you can spray it using a clear base coat and then spray clear over it Last edited by buentellomma; 01-18-2012 at 06:30 PM.. |
|
|
|
|
|
01-18-2012, 03:50 PM
|
#10 | |
|
Zilvia Junkie
Join Date: Mar 2010
Location: Goodyear AZ
Age: 38
Posts: 480
Trader Rating: (6)
Feedback Score: 6 reviews
|
Quote:
|
|
|
|
|
|
01-30-2012, 03:53 PM
|
#14 | |
|
Zilvia Junkie
Join Date: Mar 2010
Location: Goodyear AZ
Age: 38
Posts: 480
Trader Rating: (6)
Feedback Score: 6 reviews
|
Quote:
|
|
|
|
|
|
02-19-2012, 12:33 PM
|
#15 |
|
Zilvia Junkie
Join Date: Mar 2010
Location: Goodyear AZ
Age: 38
Posts: 480
Trader Rating: (6)
Feedback Score: 6 reviews
|
How To: Paint JDM AE86 Front and Rear bumpers in your garage
Step 1: Scuff sand the raw plastic bumpers with 320 grit or a red scotch brite pad. Use soap and water to clean the bumpers before hanging them to be painted. After drying the bumpers and hanging them for paint, wipe them with wax and grease remover to clean off any residue.   Step 2: Use a tack rag to remove any dust that may have settled on the plastic( as you wipe them static will built up and attract dust). the bumpers are now ready to be sprayed with a primer sealer. Apply two light coats if you spray it too wet it will run.  Step 3: after allowing the sealer to dry for 20-30 mins, spray the first base coat color on the areas that require ( these bumpers have paint lines already in the plastic) also apply the base coat in light to medium wet coats or it will run or wrinkle.    Step 4: after allowing the base coat to dry for at least an hour ( warmer temp will take less time an hour is a safe timeline) use masking tape to mask off the paint lines in the plastic.   Step 5: spray the black base coat on the rest of the bumper, apply light to medium wet coats. after the black is fully covered, allow the base coat to dry for 20-30mins and then remove the masked areas. once all the masking is removed, it is now ready for clear coat. apply 2-3 coats of clear coat.   |
|
|
|
|
02-19-2012, 12:44 PM
|
#16 |
|
Post Whore!
 
Join Date: Apr 2009
Location: Fontana (the good part)
Posts: 2,721
Trader Rating: (46)
Feedback Score: 46 reviews
|
I've had to remove large amounts of filler from both quarter panels, and my front fender. should i cover the bare metal with primer first then use filler?
or use filler on the bare metal then primer? i was thinking of using etching primer first just b ecause i don't want to have any problems with the metal rusting. |
|
|
|
|
02-19-2012, 01:25 PM
|
#17 | |
|
Zilvia Junkie
Join Date: Mar 2010
Location: Goodyear AZ
Age: 38
Posts: 480
Trader Rating: (6)
Feedback Score: 6 reviews
|
Quote:
|
|
|
|
|
|
02-19-2012, 01:44 PM
|
#18 |
|
Post Whore!
Join Date: Apr 2009
Location: Fontana (the good part)
Posts: 2,721
Trader Rating: (46)
Feedback Score: 46 reviews
|
with respect to primer, i was planning to wait a few days for the primer to properly cure and shrink before doing color (found this tip on one of the auto body forums).
so should i go with a regular 2k primer or the thicker primer to help fill the low spots? i want to use as little filler as possible. |
|
|
|
|
02-19-2012, 01:55 PM
|
#19 | |
|
Zilvia Junkie
Join Date: Mar 2010
Location: Goodyear AZ
Age: 38
Posts: 480
Trader Rating: (6)
Feedback Score: 6 reviews
|
Quote:
|
|
|
|
|
|
02-19-2012, 02:09 PM
|
#20 |
|
Post Whore!
Join Date: Apr 2009
Location: Fontana (the good part)
Posts: 2,721
Trader Rating: (46)
Feedback Score: 46 reviews
|
ok thanks! yeah the filler was about 1/2 inch thick
 i should get some pics but there were holes near the edge of the qp where it meets with the door-you could tell someone used a slide hammer try to pull the dent out. it's in a spot that i won't be able to get with a dolly (first time doing bodywork btw wish me luck lol). at one point i was going to just put an over fender but i'll -try- save the stock metal first |
|
|
|
|
02-19-2012, 02:16 PM
|
#21 | |
|
Zilvia Junkie
Join Date: Mar 2010
Location: Goodyear AZ
Age: 38
Posts: 480
Trader Rating: (6)
Feedback Score: 6 reviews
|
Quote:
Motor Guard JO1000 Magna-Spot 1000 Kit |
|
|
|
|
|
02-19-2012, 08:52 PM
|
#22 |
|
Post Whore!
Join Date: Apr 2009
Location: Fontana (the good part)
Posts: 2,721
Trader Rating: (46)
Feedback Score: 46 reviews
|
ok thanks for the tip. that's the thing that gets me the most though. finding all this hidden damage makes me want to just part what i have and look for a cleaner platform to start over on. i don't want to start spending a bunch of money on tools and stuff that i'm only going to use once. here's what i'm working with:
   and when you run your hand over that area it's very dimply :P |
|
|
|
|
02-20-2012, 06:29 AM
|
#23 |
|
Zilvia Junkie
Join Date: Mar 2010
Location: Goodyear AZ
Age: 38
Posts: 480
Trader Rating: (6)
Feedback Score: 6 reviews
|
That's a pretty tuff repair for someone inexperienced.... Looks like it was hit pretty hard. That really low spot around the door jam is going to have to be pulled back out. Does the door jam have a kink or buldge in it? If you push on. The metal does it pop?
|
|
|
|
|
03-27-2012, 08:14 AM
|
#25 |
|
Leaky Injector

|
i really want to attempt to spray my bumper (since its black and dosnt match my red car) so can someone give me an idea of exactly what i need to pain the bumper? it would be nice to just walk into napa and ask for everything line by line and get a quote.
|
|
|
|
|
04-05-2012, 10:02 AM
|
#26 | |
|
Zilvia Junkie
Join Date: Mar 2010
Location: Goodyear AZ
Age: 38
Posts: 480
Trader Rating: (6)
Feedback Score: 6 reviews
|
Quote:
pint of the color you need( base coat) pint of sealer half gal of clear coat mixing sticks and strainers mixing cups 320grit sand paper wax and grease remover tack rag automotive wipes air compressor spray gun respirator  |
|
|
|
|
|
04-10-2012, 04:36 PM
|
#28 |
|
Zilvia Addict

Join Date: Jan 2011
Location: SoCAL San Fernando valley
Age: 37
Posts: 648
Trader Rating: (3)
Feedback Score: 3 reviews
|
Awesome thread, I'll be painting my car in the garage soon and I've never painted a car before your step by stop DIY will definitely come in handy.
|
|
|
|
|
04-11-2012, 10:04 PM
|
#29 |
|
Man w/ CTSV & a Car Seat
 
|
I cant remember if I asked you this on Sumospeed already but, do you paint other peoples cars on the side or you only do your own cars? Sucks when you live in an apt.
|
|
|
|
|
04-12-2012, 03:05 AM
|
#30 | |
|
Zilvia Junkie
Join Date: Mar 2010
Location: Goodyear AZ
Age: 38
Posts: 480
Trader Rating: (6)
Feedback Score: 6 reviews
|
Quote:
|
|
|
|
|
|
| Bookmarks |
|
|


 Hybrid Mode
