|
|||||||
| Home | Rules & Guidelines | Register | Member Rides | FAQ | Members List | Social Groups | Calendar | Mark Forums Read |
| Tech Talk Technical Discussion About The Nissan 240SX and Nissan Z Cars |
 |
|
|
Thread Tools | Display Modes |
|
|
 12-18-2012, 10:46 AM
|
#1 |
|
Post Whore!
 |
How To: Half Manual / Half Power Window
Ok. This is THE guide to a simple modifcation that I like to do to my S13's. Half manual / half power window. I have always loved the ability to roll up the window, but hated to have to lean over to roll down the passenger side window. This is the solution.
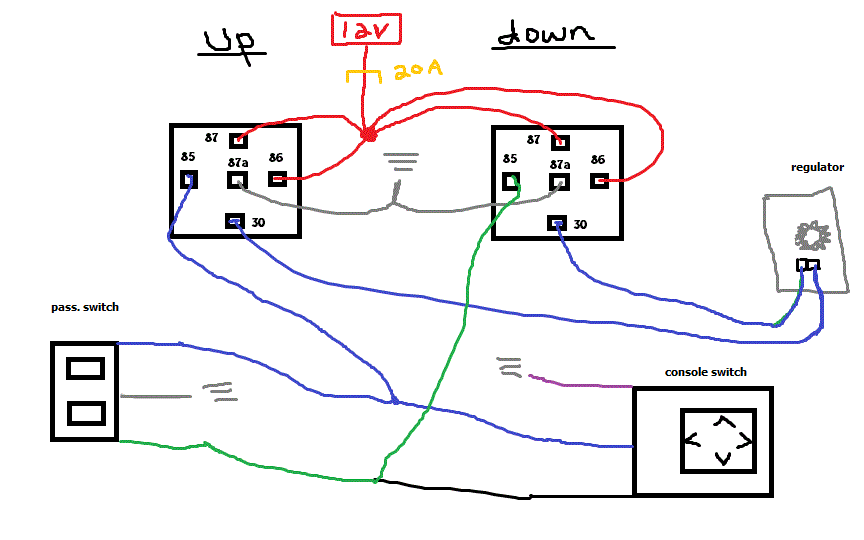
Supplies needed: Power window regulator. Power window door panel. Power window switch. Power folding mirror switch. 2 bosch relays. 12ga wire. 18ga wire. Soldering iron. 20A fuse. 30A fuse holder. Electrical tape (or heat shrink).  I'll try to make this as simple as possible. First thing is first. DISCONNECT THE BATTERY!!! Make sure you have all the supplies you need to make solid electrical connections. Here is the diagram we will be working with:  Thanks to zooopreme for the optimization. Bosch Relay guide: 85 = ground switch signal 86 = constant 12V 87 = constant 12V 87a = ground 30 = to window regulator (up/down) Here is the list of connections to make amongst the relays and both switches: I will label the relay that controls the window up function as UP and window down function as DOWN. [UP][87] ==> 12v [UP][86] ==> 12V [DOWN][87] ==> 12v [DOWN][86] ==> 12v Join all these wires together with a 12gauge wire. You will be running this directly up the firewall into the engine bay to the battery. You will join this wire to a fuse holder, which will be holding a 20A fuse. The other end of the fuse holder will be the connection to the battery. Do this as you see fit for your application. [UP][87a] ==> Ground [DOWN][87a] ==> Ground Join these together with 12gauge wire and ground them onto the door somewhere. [UP][85] ==> Green wire of pass. switch + black wire of console switch. You will join the green wire from the passenger switch with the black wire of the power folding mirror switch together with 18gauge wire and then join those two together to the UP relay's [85] position. [DOWN][85] ==> Blue wire of pass. switch + blue w/ white stripe wire of console switch. You will join the blue wire from the passenger switch with the blue w/white stripe wire of the power folding mirror switch together with 18gauge wire and then join those two together to the DOWN relay's [85] position. You will shortly see how you need to route these wires from plain sight. Removing the glove box is a must! [UP][30] ==> Green wire of regulator [DOWN][30] ==> Blue wire of regulator Now, if you don't have the pigtail for the power window regulator. You will need to figure out which wire does what based on polarity. I don't remember off hand. You can do this by directly applying power and ground to the regulator's plug but be careful not to touch them together! The only other connections left to make are the actual ground sources for the switches. At this point you will need the center console off and the glove box as well. For the power folding mirror switch, take the purple w/ white stripe wire and ground it somewhere to the chassis in the ebrake area. You will see a few locations to do this. Choose one that suits your needs. For the passenger side switch, take the white w/ black stripe wire and ground it to the passenger door somewhere. Thats it! Before putting everything back together, plug the battery in and make sure both switches as well as the relays are functioning as they should. Here are some pictures to go along with this process to better help... 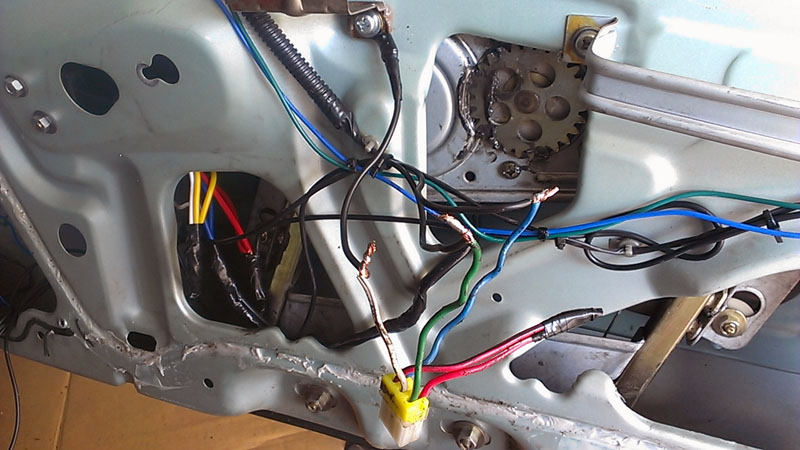 As you can see, these are the connections for the pass. window switch pigtail. 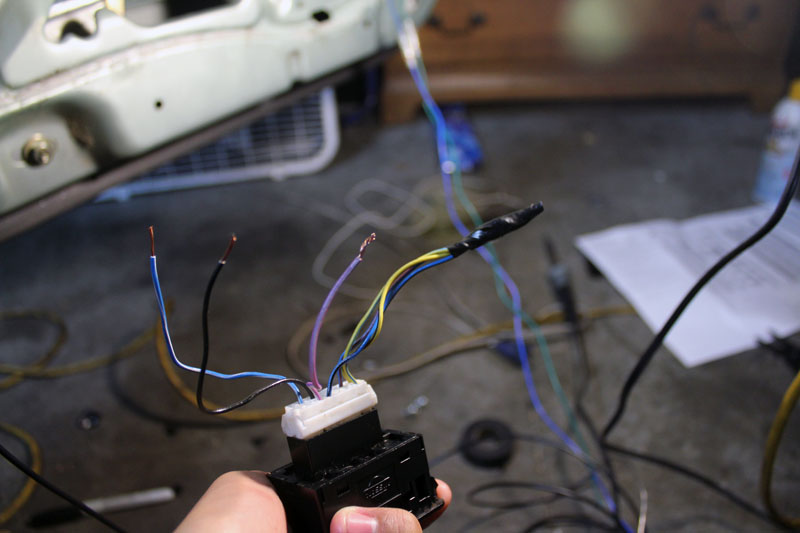 This is the power folding mirror switch, only three wires are used. The rest are taped up and tucked away. 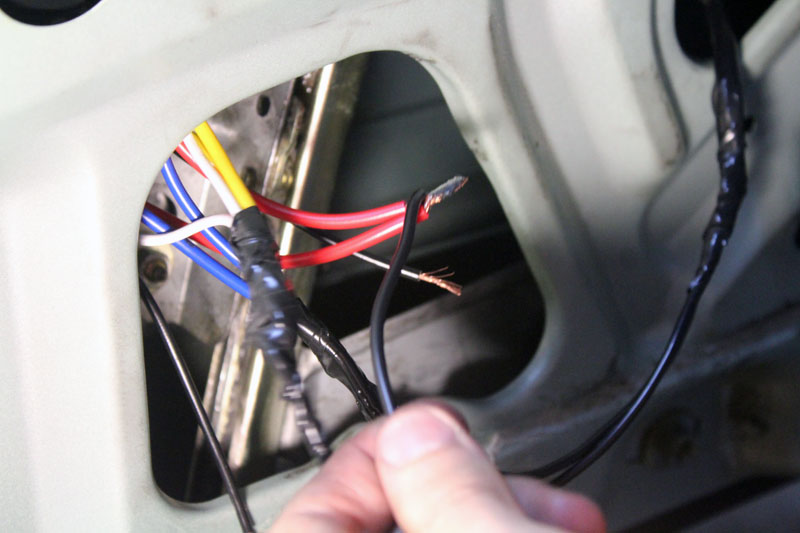  Here you can see the [87a] wires from both relays connected to a single ground wire which is grounded to the door. 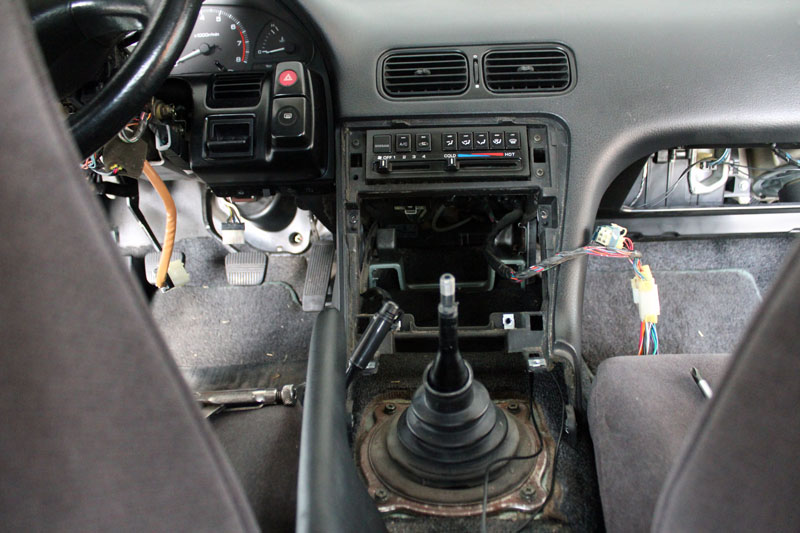 Center console and glove box removed. And the finished product... 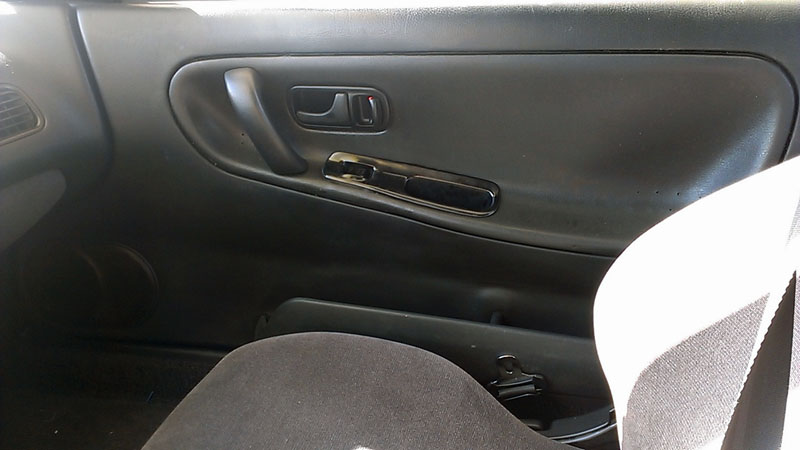 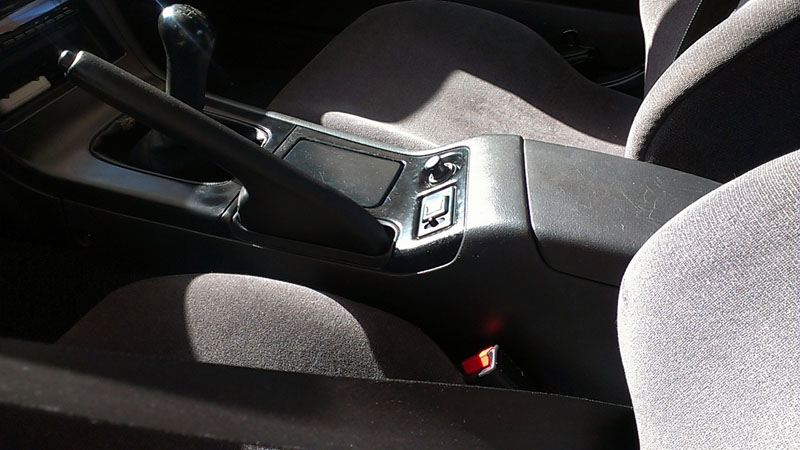 I'm sure there will be plenty of questions so don't hesitate to ask! Thanks for reading! 
__________________

Last edited by KiLLeR2001; 12-18-2012 at 06:38 PM.. |

|

|
| Sponsored Links |
|
12-18-2012, 11:19 AM
|
#5 | |
|
Post Whore!
|
Quote:
__________________
|
|
|
|
|
|
12-18-2012, 03:33 PM
|
#8 | |
|
Post Whore!
|
Quote:
__________________
|
|
|
|
|
|
12-18-2012, 01:08 PM
|
#11 | |
|
Zilvia FREAK!
 
|
Quote:
__________________

|
|
|
|
|
|
12-18-2012, 03:44 PM
|
#13 | |
|
Post Whore!
|
Quote:
__________________
|
|
|
|
|
|
12-18-2012, 05:52 PM
|
#15 |
|
Post Whore!
|
I expected a cleaner install than this Stephen... Yes, everyone may have their way of doing things, but that doesn't mean it's the right way. Radio shack sells heat shrink for christs sake. Eh, I guess you're tag says it all.
KiLLeR2001 Not A Single Fuck Was Given 
__________________
*My SR20VET* Does your VTC gear rattle in your S14/15 SR? PM me. |
|
|
|
|
12-18-2012, 06:33 PM
|
#16 | |
|
Post Whore!
|
Quote:
Most people won't do something like this, as you can easily switch to all power. But for some this is a viable option. If this guide helps just one person I'd be content. Thanks for the response!
__________________
|
|
|
|
|
|
12-18-2012, 06:38 PM
|
#17 | |
|
Post Whore!
|
Quote:
It does help those that are lazy and can't lean over though, I'll give ya that... 
__________________
*My SR20VET* Does your VTC gear rattle in your S14/15 SR? PM me. |
|
|
|
|
|
12-19-2012, 12:57 PM
|
#20 | |
|
Zilvia Addict
 Join Date: Jan 2011
Location: Clearwater, FL Level: Master Troll
Age: 33
Posts: 871
Trader Rating: (3)
  Feedback Score: 3 reviews
|
Quote:

__________________

|
|
|
|
|
|
12-19-2012, 01:36 PM
|
#22 | |
|
Zilvia Member
 
Join Date: Jan 2009
Location: 805, California
Age: 39
Posts: 203
Trader Rating: (11)
 Feedback Score: 11 reviews
|
Quote:
__________________
Friends don't let friends drive stock... |
|
|
|
|
|
12-19-2012, 03:00 PM
|
#23 | ||
|
Zilvia FREAK!

Join Date: Nov 2011
Location: SoCALiente
Posts: 1,144
Trader Rating: (13)
Feedback Score: 13 reviews
|
Quote:
I had been waiting for this since you posted in the interior thread Thanks for once OP was not a F___ 
__________________
Quote:
|
||
|
|
|
|
12-03-2015, 09:40 PM
|
#24 | |
|
Zilvia FREAK!
Join Date: Nov 2011
Location: SoCALiente
Posts: 1,144
Trader Rating: (13)
Feedback Score: 13 reviews
|
3yrs later I decided to finally do this. Here are some pictures to help out some of you do this mod.
First on 87a I didn't want to join the wires at the end since I think it looks ugly and adds unnecessary bulk. So I tapped into it mid way of one wire and soldered it. I think it's much better 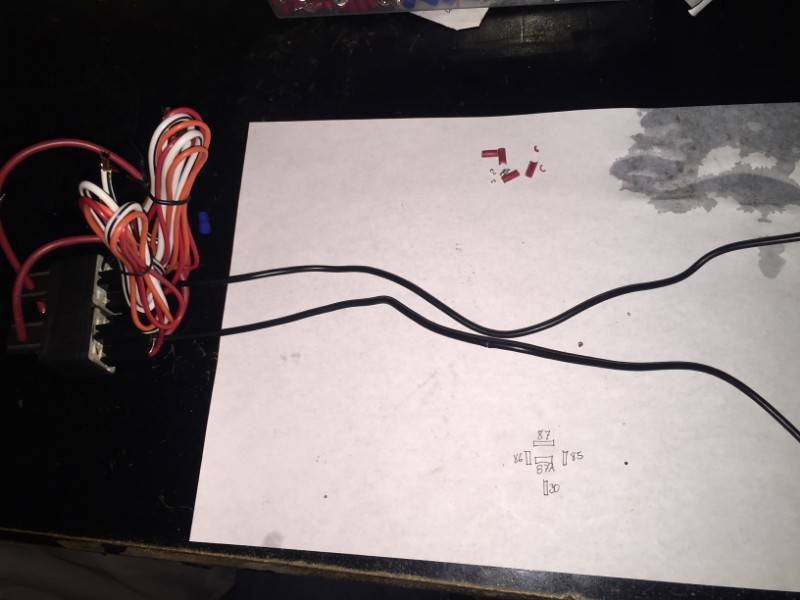 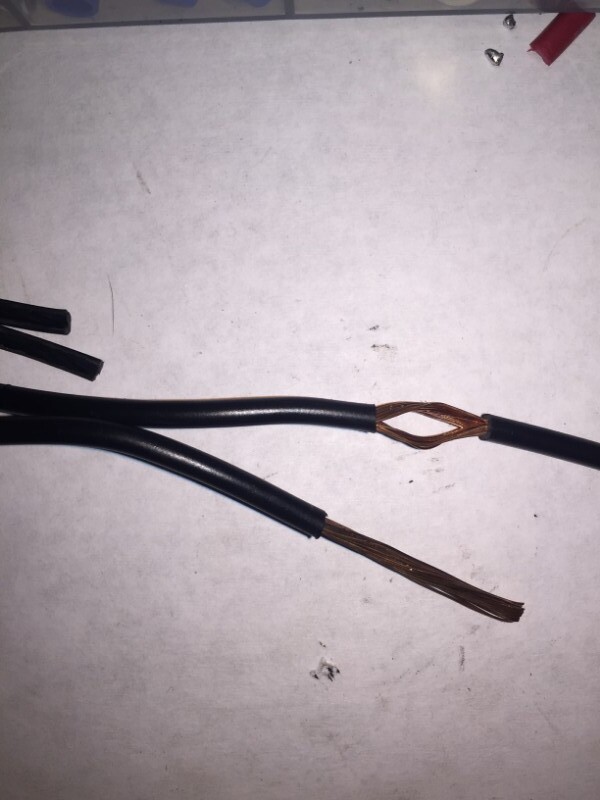 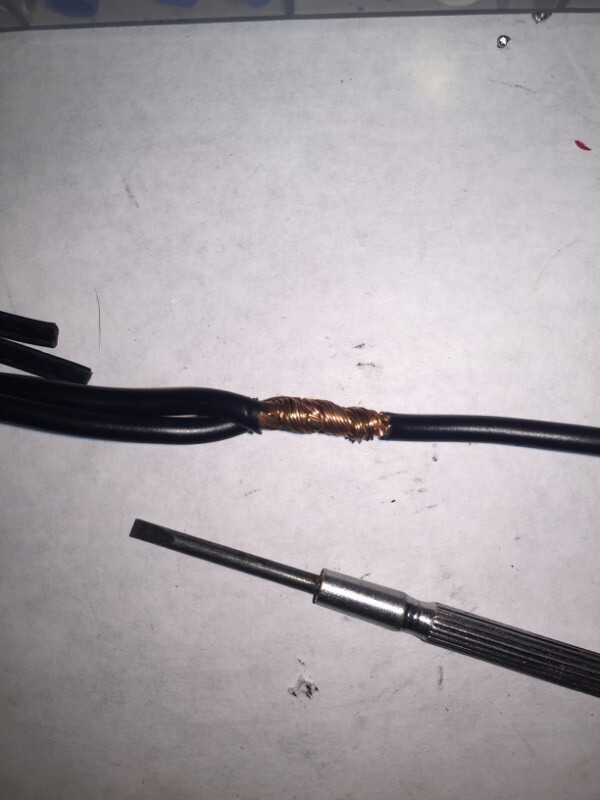 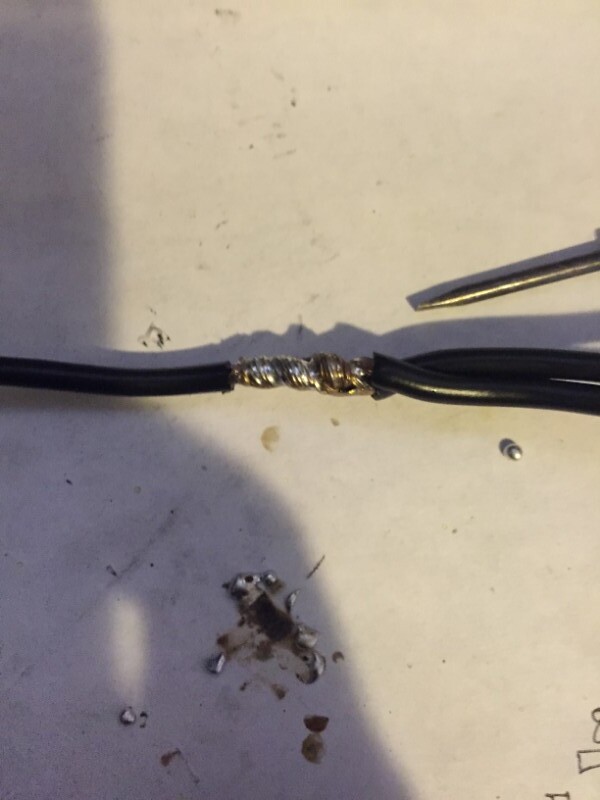 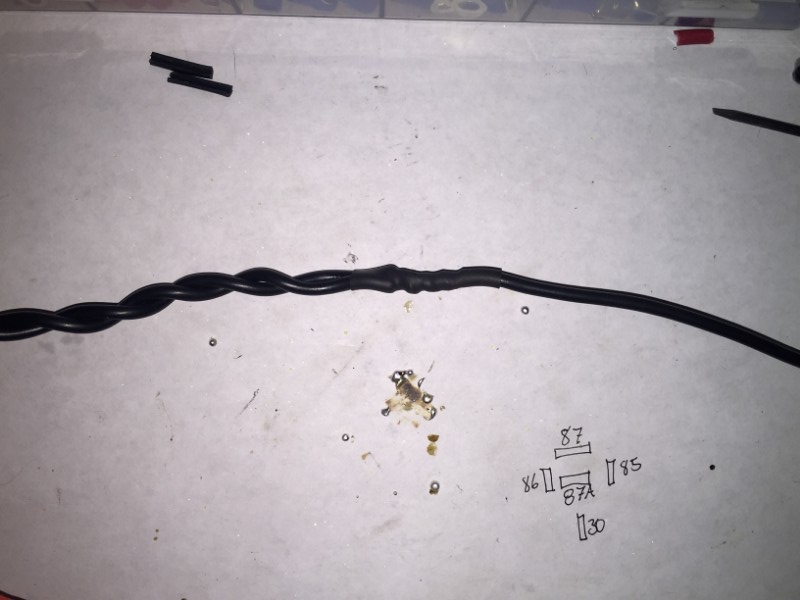 This comes in handy much better when joining 86 & 87 of both relays. Soldered it at different lengths (staggered) for less bulk. 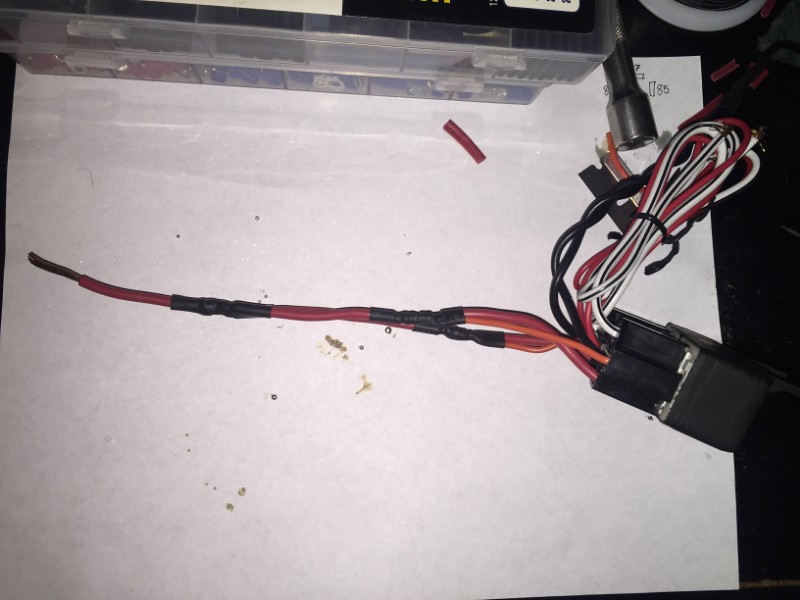 For the regulator I decided to keep the pigtail for practicality and it will make changing the regulator in the future if it ever goes bad. 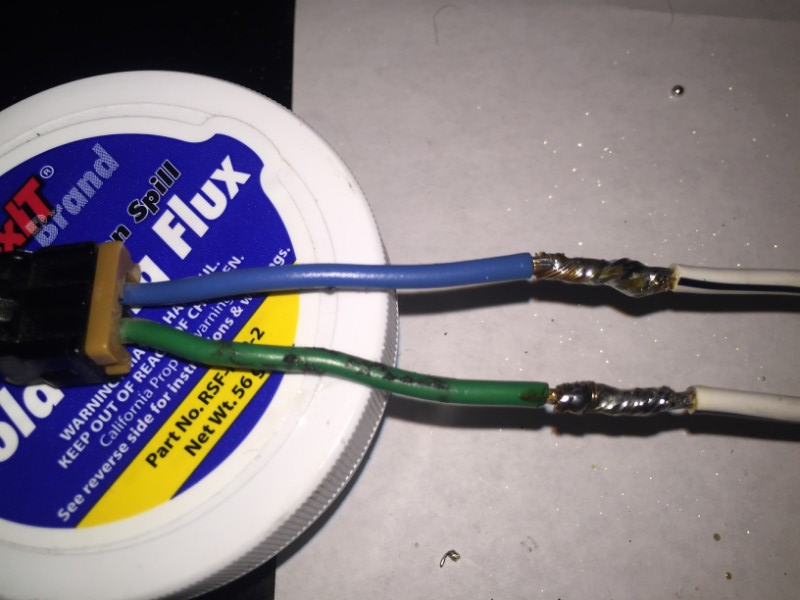 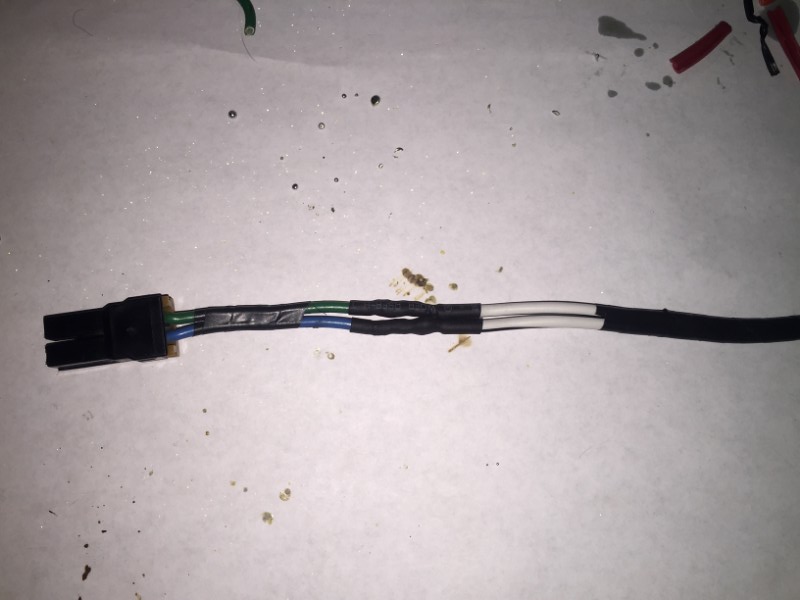 For the passenger switch I de-pinned the unused wires for a much cleaner look. 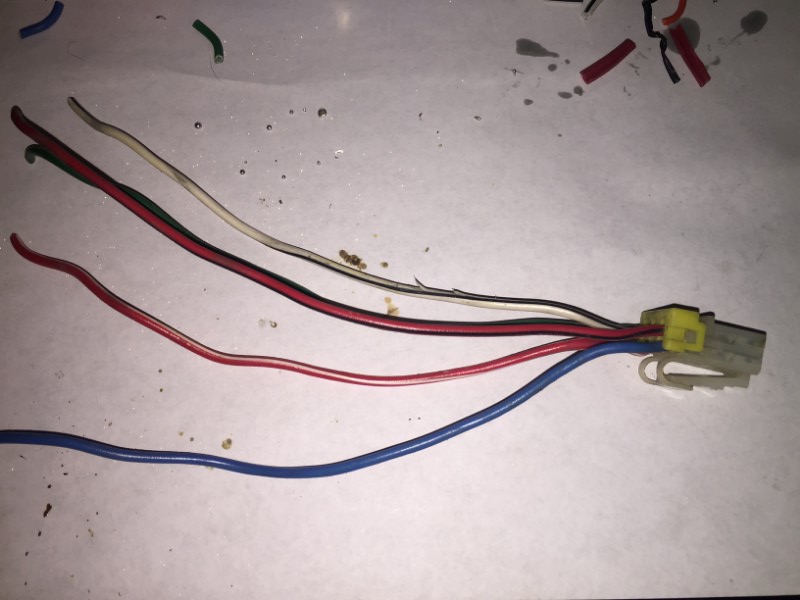 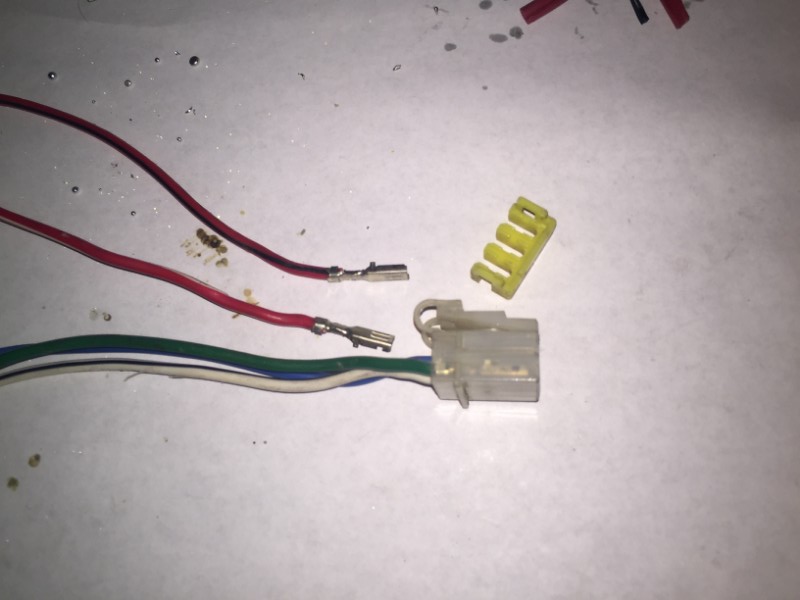 I don't like crimping connectors because I feel over time they can come loose. 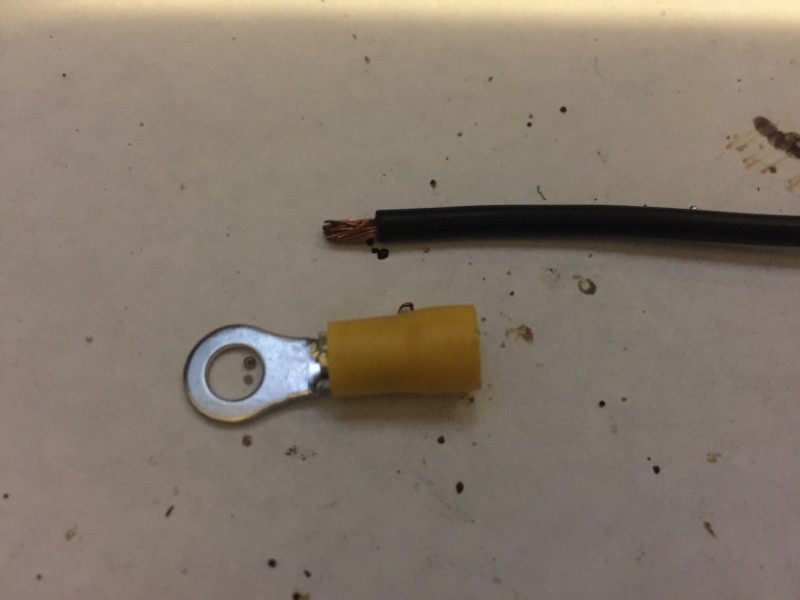 First step was taking off that plastic thingy. Then fold the wires out like and umbrella and pull them back for more contact. 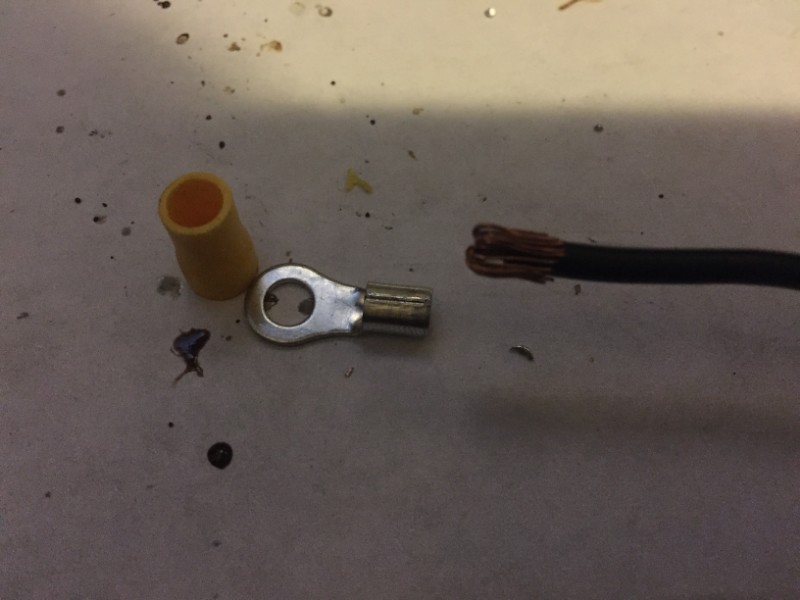 Then crimp and solder. Heat shrink to finish it. 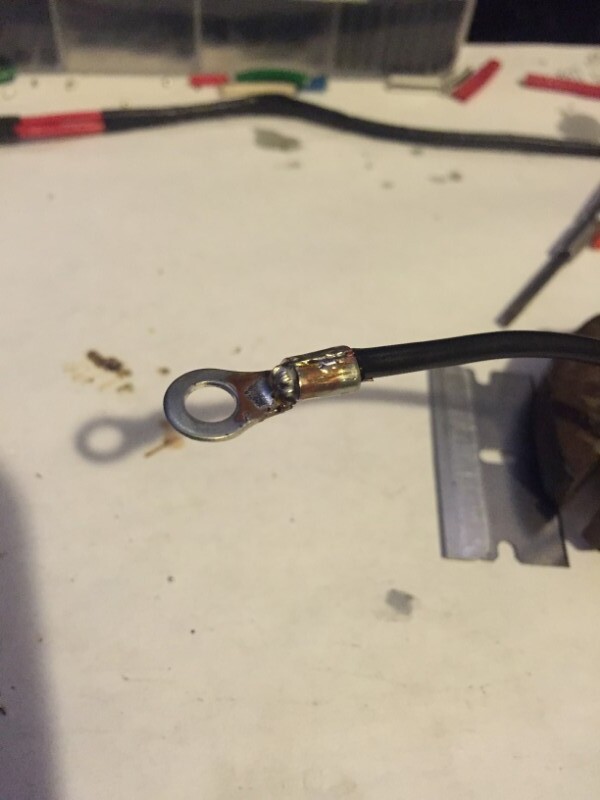 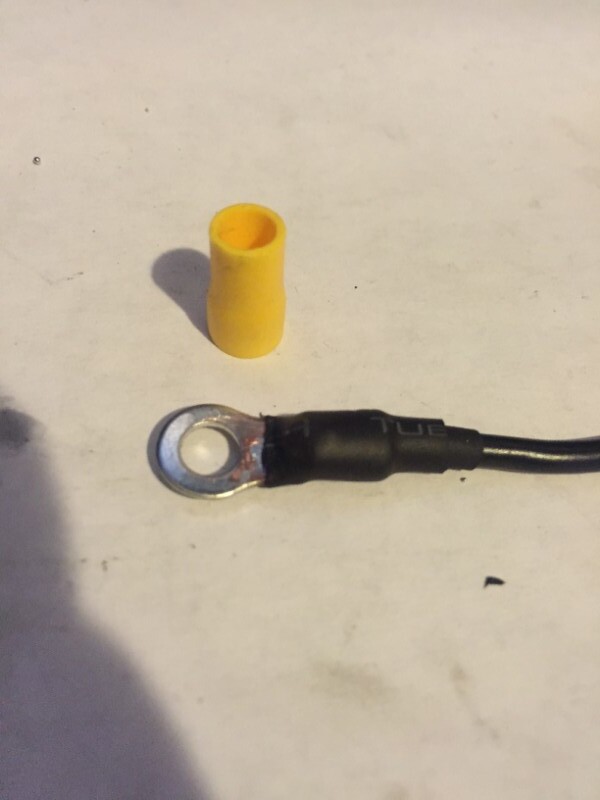 Here is pretty much the end result of the relay harness. Still needed to tap into the passenger switch with wire that leads to the center console for the power window switch part. 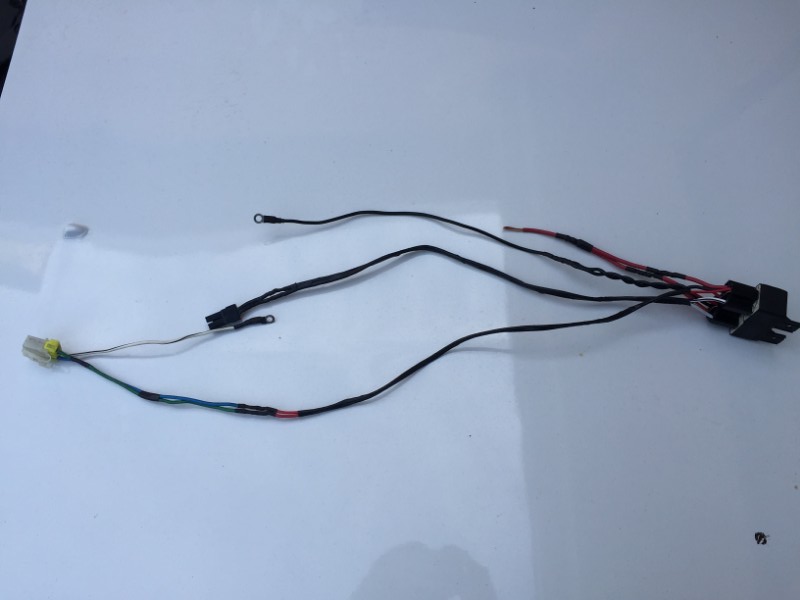 Decided to mount the relays here where the manual window crank use to be at. 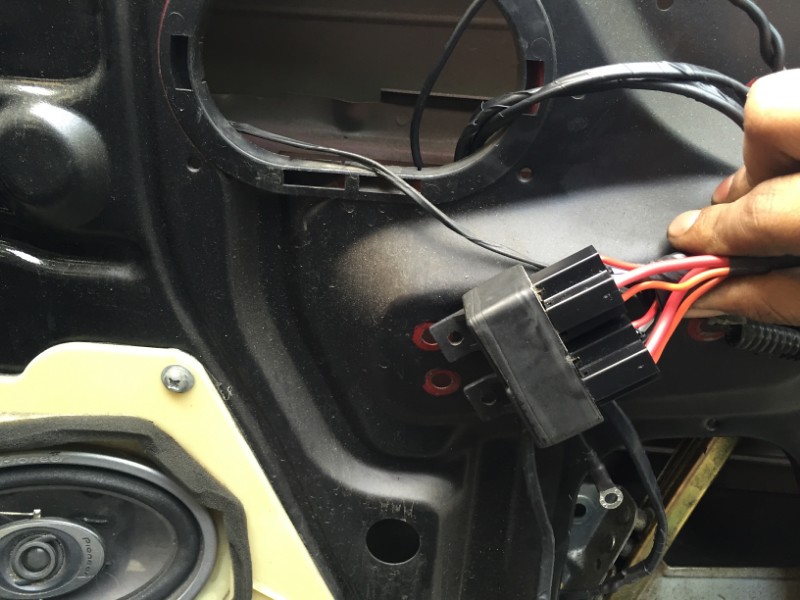  End result pretty much 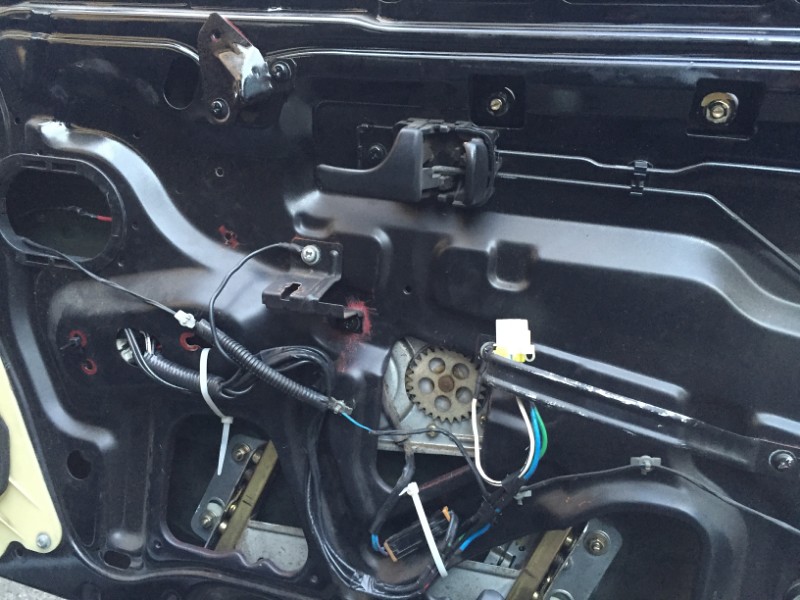
__________________
Quote:
|
|
|
|
|
|
12-03-2015, 10:09 PM
|
#26 |
|
Post Whore!
|
Good work, ghoti. 3 years later my power window still works just fine, no issues whatsoever.
In 2012 I was all about soldering + electrical tape, but these days I do everything with butt connectors and heat shrink.
__________________
|
|
|
|
|
| Bookmarks |
| Thread Tools | |
| Display Modes | |
|
|


 Hybrid Mode
