|
|||||||
| Chat General Discussion About The Nissan 240SX and Nissan Z Cars |
 |
|
|
Thread Tools | Display Modes |
 09-30-2008, 04:18 AM
|
#691 | |
|
Zilvia Junkie
 Join Date: Aug 2007
Location: Birmingham, AL
Posts: 423
Trader Rating: (6)
  Feedback Score: 6 reviews
|
Quote:
96Turbo - I will post up some pictures again soon, got the calipers finished in paint and powder and they are extremely unique, wiring is almost complete in the rear and the front should be done soon as well. Once I get some other parts in during the next few weeks I will have a rolling chasis and I will take some pictures of it then as well. Brian |
|

|
| Sponsored Links |
|
09-30-2008, 05:23 AM
|
#692 | |
|
Quote:
If you plan to come in Moscow, just let me know, here we got some interesting cars  Silvia S14a RB26 670hp for example. Silvia S14a RB26 670hp for example.Also i'm very interested how do you plan to solve the problem with the wheels. Because currently i've got 20 (!) inch rims (they are on foto) and 18 inch looks simply ridicilous on that bodykit. And another problrm is ET, my rear ET is -20 on 9,5 inch rim. And +16 ET on front with the 8,5 inch rim and maximum thread in pillow ball upper mounts with the NAMS arms. I can say that driving responce is not as on stock, it's much worse. Lots of excuses for my grammar and spelling English is not my native as i think you understand |
||
|
|
|
09-30-2008, 06:45 AM
|
#693 | |
|
Zilvia Junkie
Join Date: Aug 2007
Location: Birmingham, AL
Posts: 423
Trader Rating: (6)
Feedback Score: 6 reviews
|
Quote:
As for the wheels size set up, went with stock length on the NAMS arms and the wheels came out right at flushmaybe a little bit wider in the front (about 2mm) but I can adjust that out. As far as getting suspension geometery correct and handling squared away, I will have to wait until the car is running and maybe work it otu fromt here but I am pretty confident that everything will work out fine |
|
|
|
|
09-30-2008, 08:25 AM
|
#694 | |
|
Zilvia FREAK!
 
|
Quote:
 [/off topic] Props on this build OP. Some amazing work going in to this car!
__________________

|
|
|
|
|
09-30-2008, 10:58 AM
|
#695 | |
|
Zilvia FREAK!

Join Date: Nov 2007
Location: AZ
Age: 36
Posts: 1,315
Trader Rating: (11)
Feedback Score: 11 reviews
|
Quote:
can't wait to see your one of a kind calipers |
|
|
|
|
10-02-2008, 06:46 AM
|
#697 |
|
Zilvia Junkie
Join Date: Aug 2007
Location: Birmingham, AL
Posts: 423
Trader Rating: (6)
Feedback Score: 6 reviews
|
Got the calipers back from Tom (painter) and started wiring the rest of the rear harness. I know that I used a shitload of zip ties but it made the harness vary shapeable and it kept its form fairly well, which gave me the ability to makes sure everything was flowing well without having to mount clamps or anything just yet.
I like calipers which were inspired by the wheels. they match pretty well. To get the effect Scott over at S&H powdered them in chrome and then they werte done with a few coats of candy over at Toms Place (Cycle Haven). 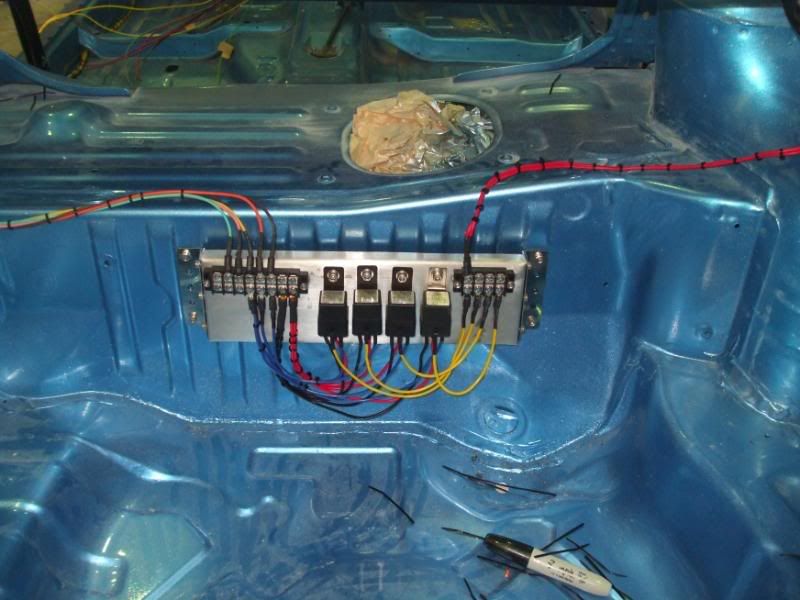 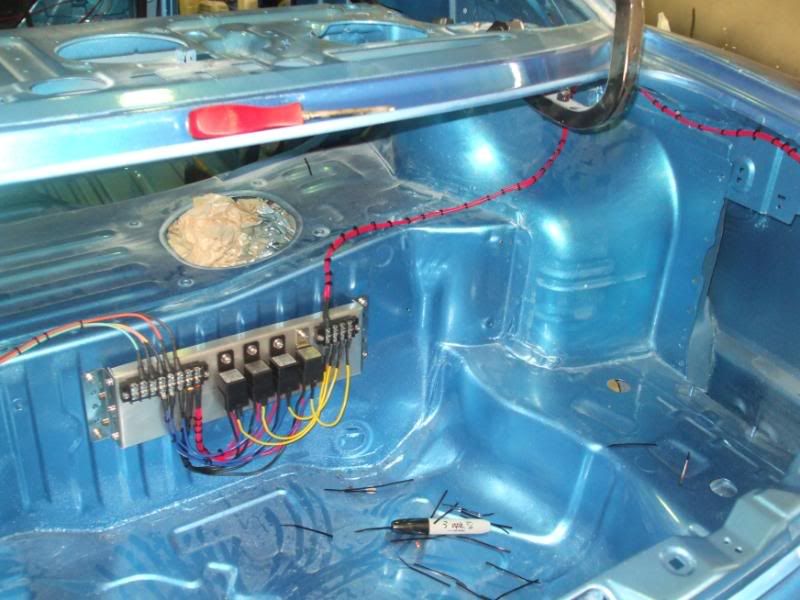 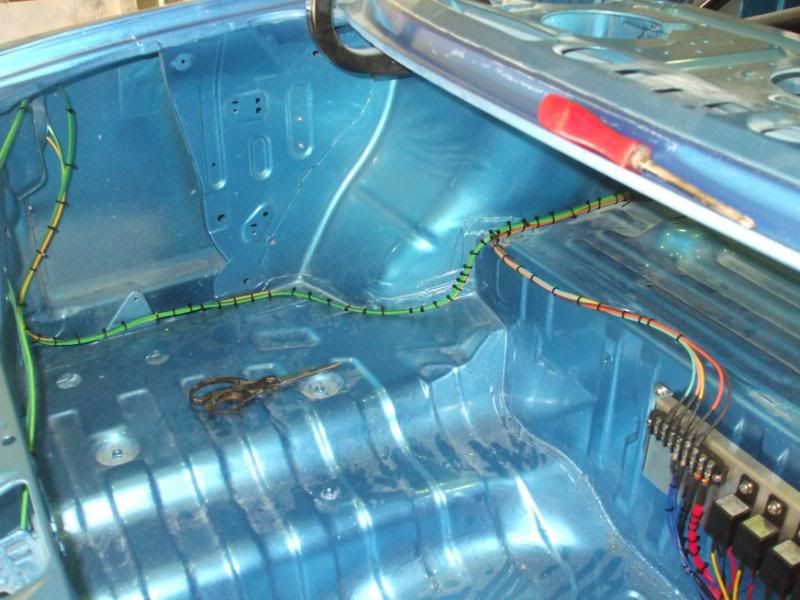 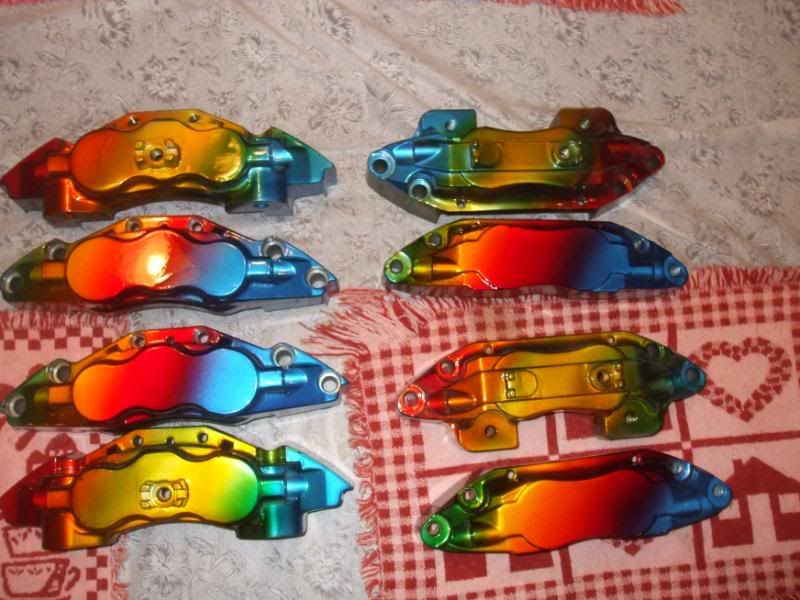 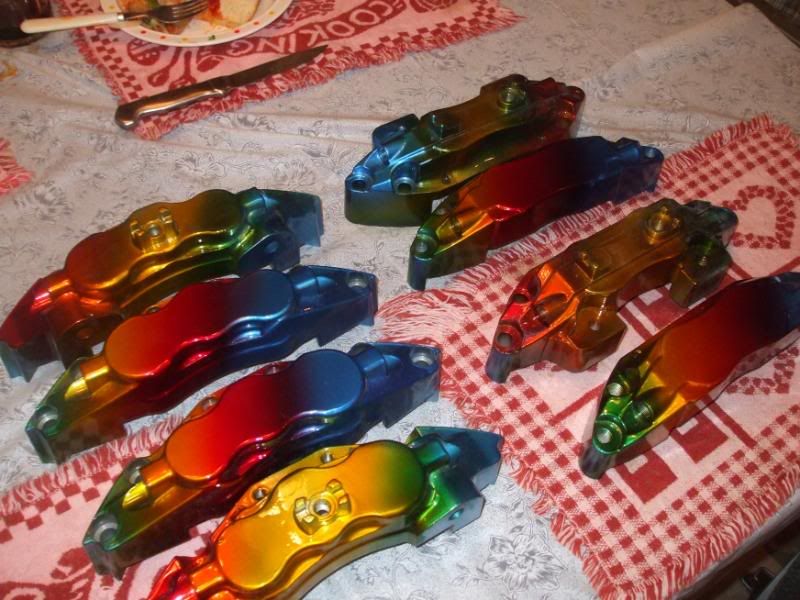 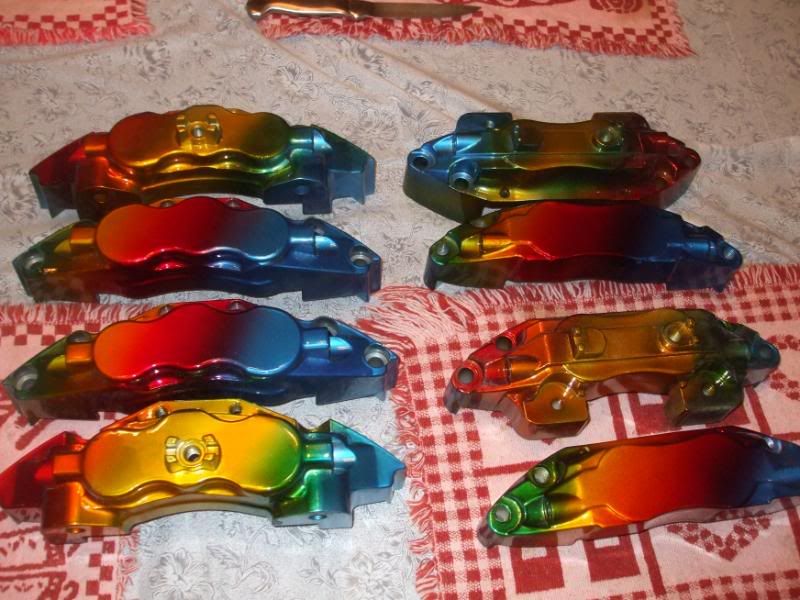 |
|
|
|
10-02-2008, 07:21 AM
|
#699 | |
|
Future Moderator
 
Join Date: Jun 2007
Location: Places
Age: 37
Posts: 12,908
Trader Rating: (17)
Feedback Score: 17 reviews
   |
That relay makes the wiring look so clean, and simple.
__________________
Quote:
|
|
|
|
|
10-02-2008, 10:23 AM
|
#701 |
|
Zilvia FREAK!

Join Date: Jul 2008
Location: Compton, CA
Posts: 1,153
Trader Rating: (41)
Feedback Score: 41 reviews
 |
holy shit, those are the most bad-assed calipers i've ever seen.
sick ass project, GL. Last edited by lightsource; 10-12-2008 at 02:19 AM.. Reason: looking like an idiot |
|
|
|
10-02-2008, 12:21 PM
|
#707 | |
|
Zilvia Addict
 |
Caliper covers FTW!!
jkjkjkjk, thats definately one oringinal paint scheme on those calipers. what brand are those? endless? grex?
__________________
1996 s14-RIP 1990 s13-SOLD 1995 s14-SOLD 1994 E36-Daily 1998 DC2- F.S Quote:
|
|
|
|
|
10-02-2008, 12:40 PM
|
#710 |
|
Post Whore!

Join Date: Sep 2004
Location: Granada Hills, CA
Age: 44
Posts: 6,992
Trader Rating: (15)
Feedback Score: 15 reviews
|
Hahaha a member from another board asked me if the calipers were going on a miata. I think these stickers would definitely set it off.
 then another sticker that says "J/K" at the end of the rainbow. I KEED, I KEED |
|
|
|
10-02-2008, 02:40 PM
|
#712 |
|
Zilvia Junkie
|
wow great build wish you would have left the car a satin blue but it looks good none the less. that intercooler.. wow i dont think i have ever seen one so big before. amazing choice in caliper color!!! they look sweet. as for your dash if i may ask you some ?'s, i dont get why you made a flat suface all the way across, all you really need is on your side, and would have been pretty cool if you made it more of a cockpit style with the dash kinda making a U shape towards you as you sit in the wheel so you can see everything clearly. all in all it looks FRECKING SWEET!!
|
|
|
|
10-02-2008, 02:47 PM
|
#713 |
|
Zilvia FREAK!

Join Date: Aug 2003
Location: Springfield, Mo
Posts: 1,519
Trader Rating: (2)
Feedback Score: 2 reviews
|
you could get the "i'm strait but not narrow" sticker. no confusion that way.. But IMO that your wheels with those calipers are ganna look frucking sweet.
__________________
89 240sx hatch #933-the hot rod 91 240sx coupe #131,603-the daily |
|
|
|
10-02-2008, 03:56 PM
|
#715 |
|
Zilvia Junkie
Join Date: Aug 2007
Location: Birmingham, AL
Posts: 423
Trader Rating: (6)
Feedback Score: 6 reviews
|
Thanks for the comments and even some of the criticism from some of you guys. So to answer the questions.
1. The dash was made how it was because it was a simple and effective design that did not take so much time that it became the center piece of the entire project. 2. The calipers do look a little out there, but I like them not only for originality but for the fact that once everything is completely assembled the car will not only look good but will be failry well coordinated color wise. 3. I figured I would catch some gay jokes on them and I did. But then againyou only build a car like this once, maybe twice ina life time so fuck it, I am going all out. 4. To answer the Brand Question one more time - THe Calipers are Rotora. Had I got Greddy Calipers I would have ordered the reflective gold ones and left them the hell alone, but these were used, a great deal frow hat they were and needed some TLC. Turbocarslut - The relay panels served only that purpose, keep everything clean, simpel and accessible. So now, I will never have to trace wires back through the harness again should there ever be a gremlin, there are two central point to go to and they are easily accesible for servicing a maintenance. |
|
|
|
10-02-2008, 05:51 PM
|
#717 | |
|
Zilvia Junkie
Join Date: Aug 2007
Location: Birmingham, AL
Posts: 423
Trader Rating: (6)
Feedback Score: 6 reviews
|
Quote:
|
|
|
|
|
10-02-2008, 06:00 PM
|
#718 |
|
Post Whore!
 Join Date: Aug 2005
Location: SoCal
Age: 35
Posts: 4,719
Trader Rating: (10)
Feedback Score: 10 reviews
|
I love the way you are running your wiring, looks allot like how i did it in my old S13, with the difference i put the relays and such under the dash because i was running no heater or ac. i love your attention to detail this is overall coming out excellent. glad to hear you will be wraping the wiring in some loom to make it all look apropiate. don't forget to runa ground to the Main Frame rail. ground the battery to the frame rail . and ofcourse another ground wire from your intake manifold / transmission to your frame rail. it's not absolutely nessesary but having multiple grounding points to one common area are nice. and the frame rail is really the best place to do it. without running all kinds of wires back to the battery. but over all looking very good. keep it up.
|
|
|
|
10-02-2008, 08:33 PM
|
#719 | |
|
Zilvia Junkie
Join Date: Aug 2007
Location: Birmingham, AL
Posts: 423
Trader Rating: (6)
Feedback Score: 6 reviews
|
Quote:
Dude, thanks for the input on the wiring. I have a plan on the grounds but maybe you can hear me out and tell what you think. I have Two 10 terminal brass grounbd strips that I intend on mounting in the trunk and in the Engine Bay. Each one will have a Chasis ground ran to the rails consisting of TWO 4 gauge Copper wires. The Relay Grounds Will be separate and will consiist of an 8 gauge ground wire to the chasis rails and the grounding point on the terminal strips and the Battery will get a 0 Gauge Ground to the Chasis. I will also ground the motor using 4 or 6 gauge copper wire as well as grounding straps get ate up over here quite quickly. Let me know what you think. I will post pictures of it as soon as I am done wiring all the positive wires. |
|
|
|
|
10-02-2008, 10:14 PM
|
#720 |
|
Zilvia FREAK!
Join Date: Nov 2007
Location: AZ
Age: 36
Posts: 1,315
Trader Rating: (11)
Feedback Score: 11 reviews
|
I've got (2) 4 Gauge amp wire for engine block grounds. Then i've got (2) 8 Gauge grounds on the head. One on the Intake manifold, and the other one bolts up to the head above the exhauts manifold.
it's overkill but i haven't had any wiring issues since i went to this config. Clean the ground contact on ur starter and it'll work flawlessly I've only got a 2 Gauge ground in the trunk, and that's all that's necessary. Now i just gotta fuse it........ |
|
|
|
| Bookmarks |
|
|


 Linear Mode

