|
|||||||
| Tech Talk Technical Discussion About The Nissan 240SX and Nissan Z Cars |
 |
|
|
Thread Tools | Display Modes |
 12-16-2011, 01:23 PM
|
#1 |
|
Leaky Injector
Join Date: Nov 2011
Location: Missouri
Age: 38
Posts: 58
Trader Rating: (1)
 Feedback Score: 1 reviews
|
S13 cleaning the gas tank help...
I've done a bunch of searching on this topic and haven't found enough definitive answers so I'll just start a new thread and ask myself.
So I just picked up a 91 coupe that wouldnt run. Has been siting for two years and the gas tank is orange with lots of sediment. The main problem was def the pump so I cleaned up the assembly and got the new pump on and she works. But I don't want to ruin the new pump with the condition of the tank so I dropped the tank. My main question is what/how do I clean the tank... I've read purple power works, or some sort of acid, some just flush with water, some don't even worry about getting the crud out and just run with injector cleaner. If you read up on other sights some people re coat the inside of the tank Also just to make sure the s13 tank is metal and the s14 tank is plastic? Thanks for the help |

|

|
| Sponsored Links |
|
12-30-2011, 07:01 PM
|
#3 | |
|
Zilvia Member
 
|
Clean it with a gas mask, dish washing gloves and acetone
__________________
Quote:
|
|
|
|
|
|
12-30-2011, 07:11 PM
|
#4 | |
|
Zilvia Addict
 |
flush it out with water but make sure it fully dries up... or flush it with fresh gas a lil more expensive or send it to a rad repair place to boil it out
__________________
Quote:
|
|
|
|
|
|
12-31-2011, 03:51 PM
|
#5 |
|
Leaky Injector
Join Date: Nov 2011
Location: Missouri
Age: 38
Posts: 58
Trader Rating: (1)
Feedback Score: 1 reviews
|
I picked up some pea gravel, put a bunch in and sloshes it around a few times with a friend. It took out some but I would have needed to repeat the process like twenty times before I'd be happy. I think I am going to go with A gas tank cleaner kit from kbs. Comes with two chemical cleaners and a sealant. It's 70 bucks but that's cheaper than a new gas tank
|
|
|
|
|
01-01-2012, 01:27 PM
|
#7 |
|
Zilvia Member
Join Date: Apr 2006
Location: Phila/Lancaster, PA
Age: 39
Posts: 291
Trader Rating: (6)
Feedback Score: 6 reviews
 |
Put some magnets on a string through the fuel sump hole. Drive around for a week, then take out magnets.
Laziest way to do it. Best way is to get a huge coffee filter and a bucket. Unbolt the tank and drain through the coffee filter. Get some bird shot or bb's in the tank and shake it up really well, then rinse with the filtered gasoline, filter and repeat until you're happy.
__________________

|
|
|
|
|
01-18-2012, 05:40 PM
|
#9 |
|
Leaky Injector
Join Date: Nov 2011
Location: Missouri
Age: 38
Posts: 58
Trader Rating: (1)
Feedback Score: 1 reviews
|
ok so all of the above suggestions were just not going to be enough for this tank. I just didnt want to risk ruining my new fuel pump with the condition the tank was in. So I went with the gas tank repair kit from kbscoatings.com and it worked pretty well. they have instructional videos on their site which helped so much. It took me and a buddy about 6 hours for the first two steps and then about 3 hours for the last. along with overnight drying between step 2 and 3 and a week of curing after step three.
the tank started out looking like this 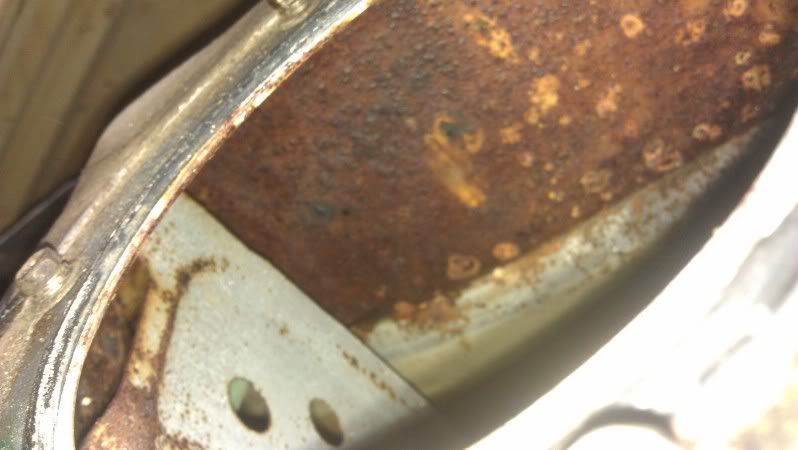 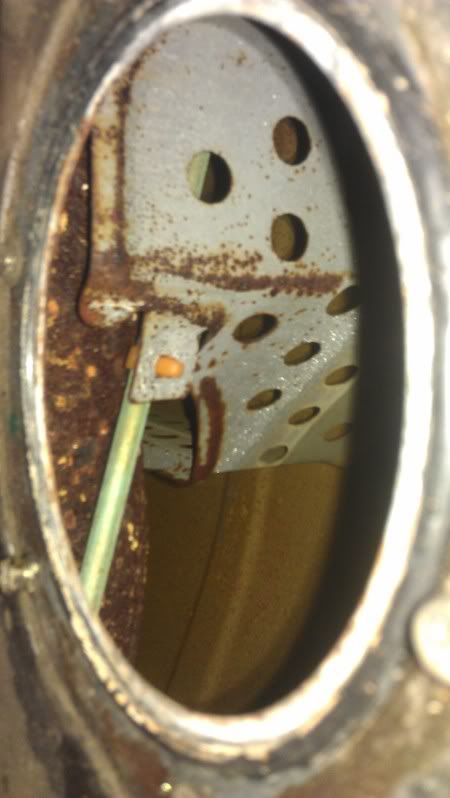 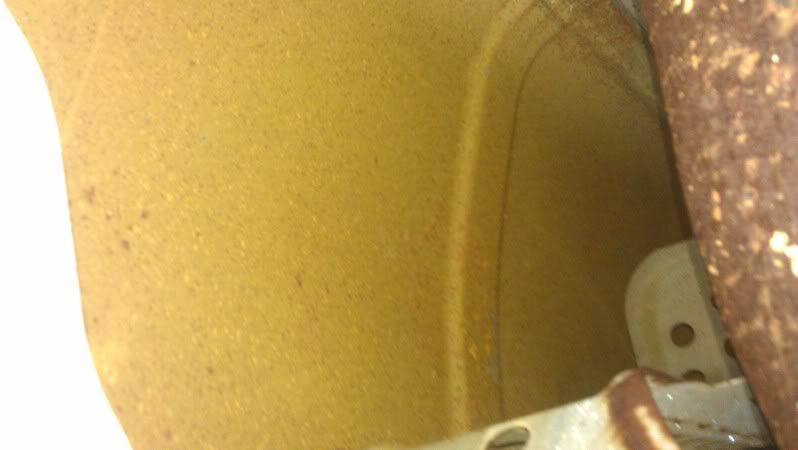 then the first step is a super strong degreaser and the second is a phosphorous solution that neutralizes the rust and etches the metal to prep for third step after step one and two 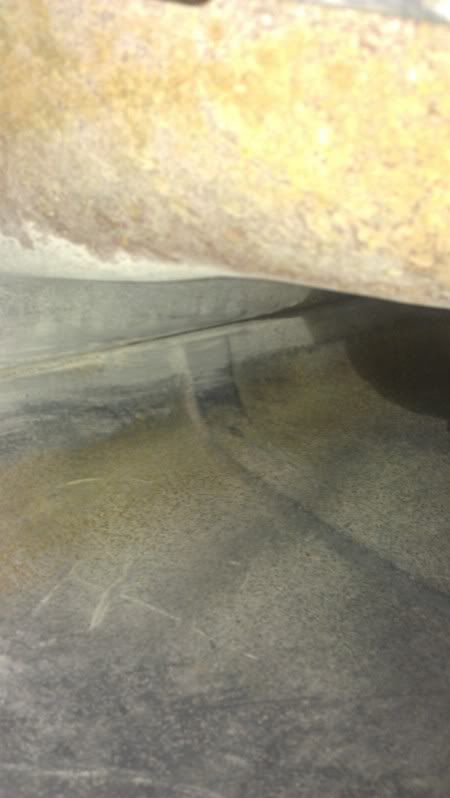  and this one dosen't look that good, but the color was mostly the flash it looked much more silver in person 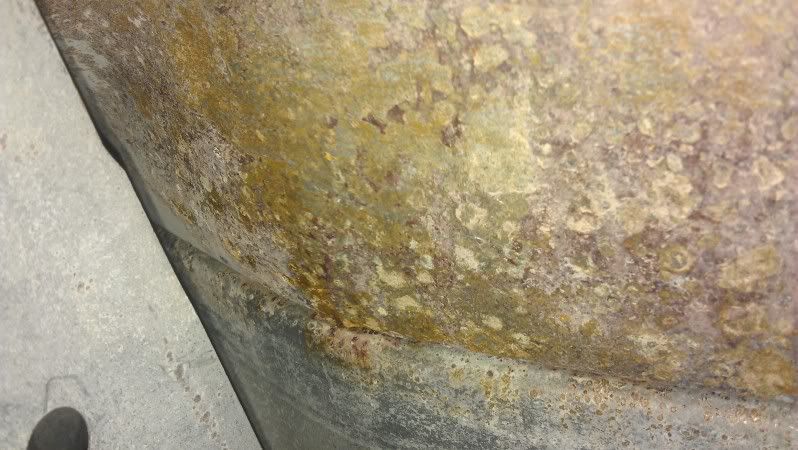 and then the third step is a polymer paint that coats everything... so this stuff sets pretty quickly and I couldn't get it to drain well so there was too much in the tank and I didn't notice till I took off the fuel pump blank plate and had a look. so I tried to scoop out as much as I could but it already started getting thick and wouldn't spread out well so thats why the one area is s****y looking, but I think there was enough there to seal it well 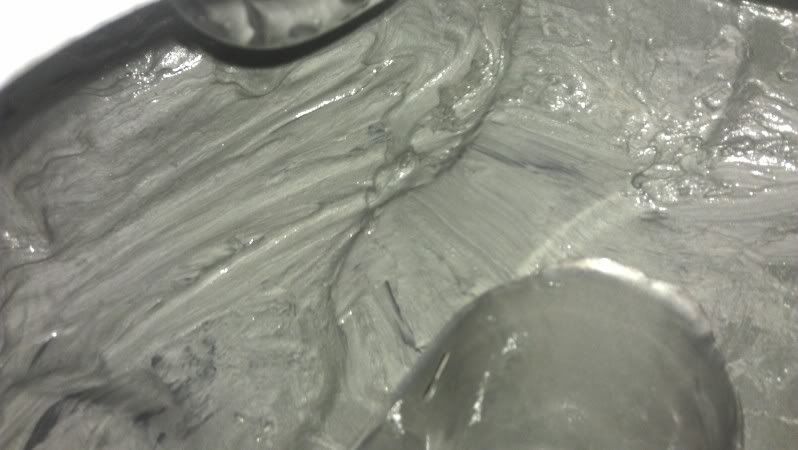 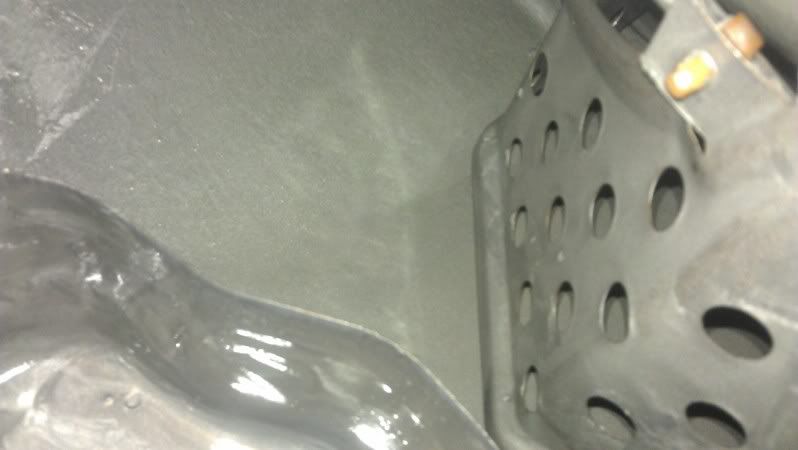  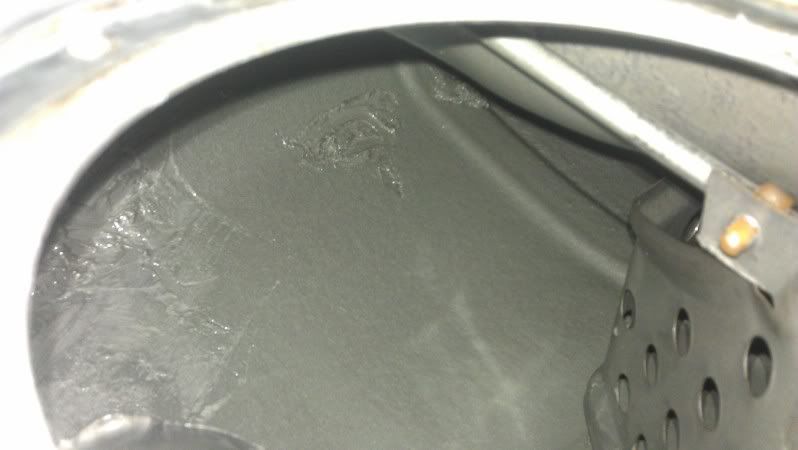 then I took some of the left over paint and touched up the seams and filler neck cause there was some surface rust 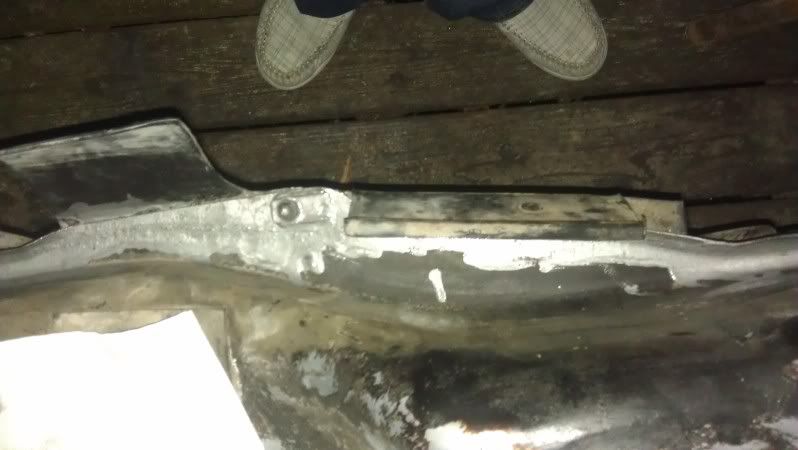 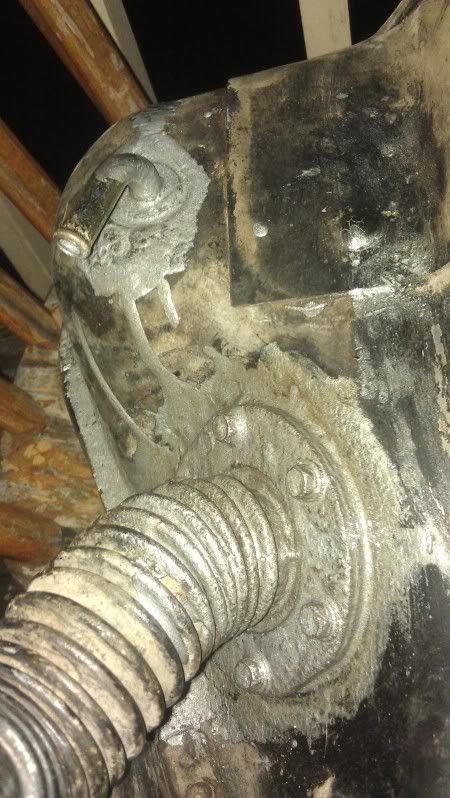 then let that dry and spray painted the whole tank with restolium. my only problem is I cant get the second tank strap tight enough to get the bolt back in its hole. I got the passenger side strap back and all the screws in the wheel well, but that other strap just wont reach. |
|
|
|
|
01-18-2012, 05:43 PM
|
#10 |
|
Leaky Injector
Join Date: Nov 2011
Location: Missouri
Age: 38
Posts: 58
Trader Rating: (1)
Feedback Score: 1 reviews
|
oh btw does anyone know what that plastic baffle looking thing that is attached to that metal shroud that surrounds the fuel puimp is? cause I kinda melted it while force drying the tank.
edit: this thing 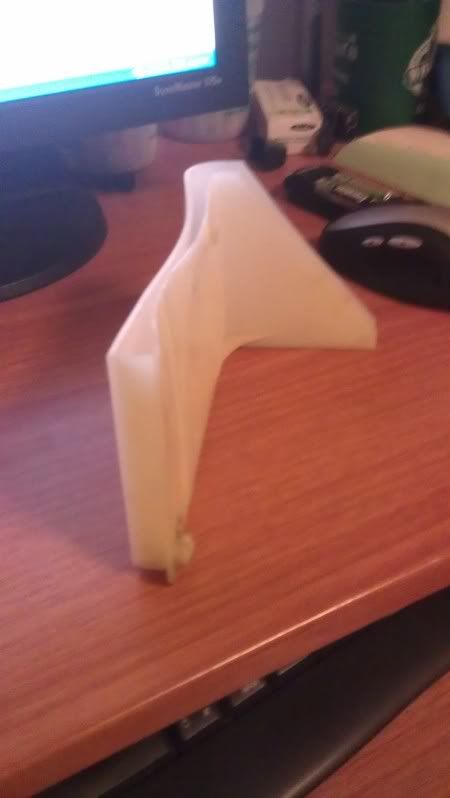 |
|
|
|
|
| Bookmarks |
|
|


 Linear Mode

