|
|||||||
| Tech Talk Technical Discussion About The Nissan 240SX and Nissan Z Cars |
|
|
Thread Tools | Display Modes |
 06-23-2007, 06:57 PM
|
#1 |
|
Zilvia Junkie
 
Join Date: Dec 2006
Location: San Diego
Age: 40
Posts: 448
Trader Rating: (0)
  Feedback Score: 0 reviews
 |
How To Weld An Open Differential
This will be my first attempt at welding a diff and giving instructions regarding the steps i took.
I am going to start by assuming you already took the diff off of your 240. 1. Start by removing the 8 (14mm) bolts holding the diff casing on. 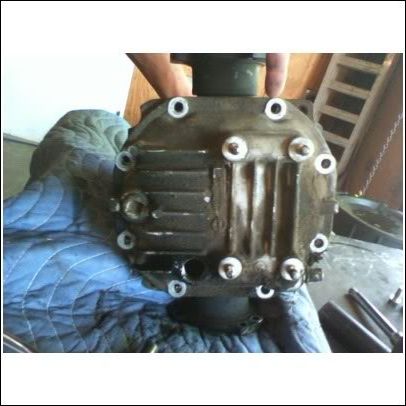 2. Remove the 4 (17mm) bolts holding the Ring gear/ Axle assembly down.  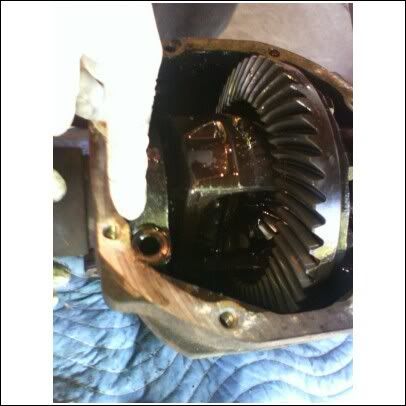 3. Next take a hammer and a block of wood and hit the axles out. Make sure to turn the axle after each hit to evenly take out the axle. 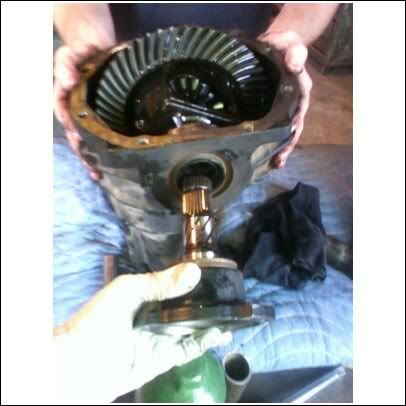 4. Pull the Axle/ Ring gear assembly out of the casing. There is a pressed on bearing that you need to reassemble when you put it back together. There is a spacer as well on the ring gear side. This is the way it goes. 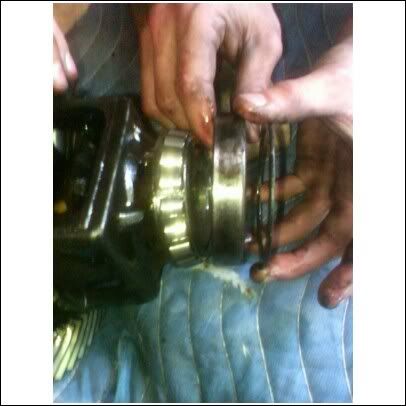 5. Next step is to take off the ring gear. Use a prybar to generate the resistance needed to break the bolts loose. 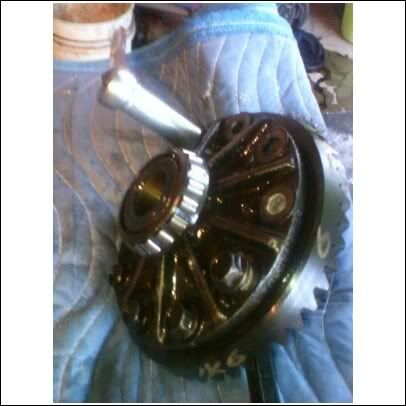 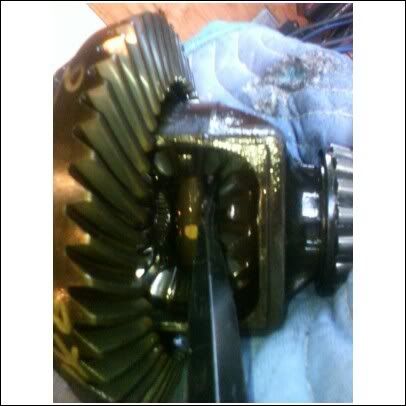 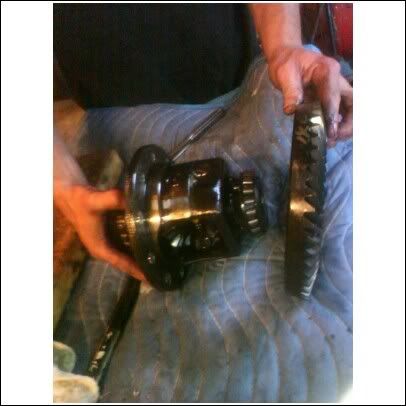 6. Completely rid the spider gears of any trace of oil. My choice was a couple cans of carb cleaner.  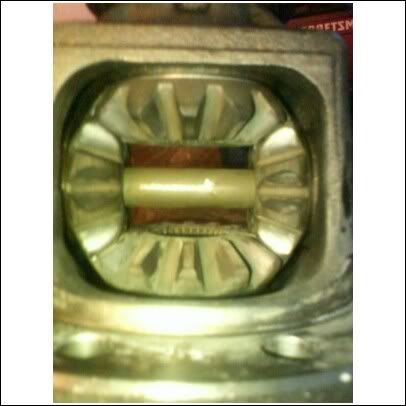 7. Next cover the pressed on bearing with something durable, My choice was a pair of leather gloves. 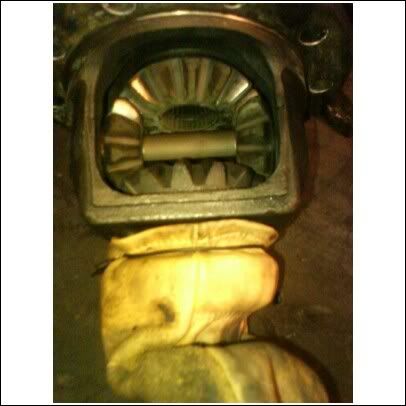 8. It is important to heat up the metal to get a good penetration for the weld. Use your torch / plasma cutter to heat it up. 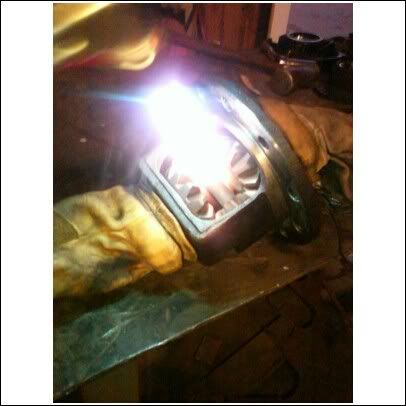 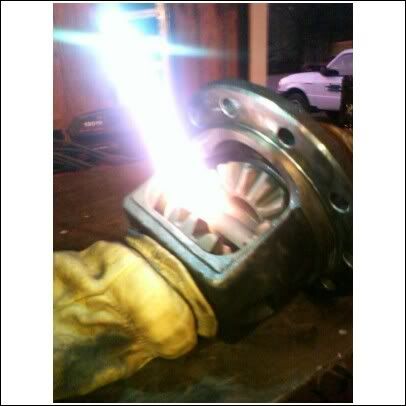 9. Commence welding. Some people prefer to use a bolt and jam it in there, But I didn't think that was good enough. I colpletely filled in the entire joint on all four sides and partially the middle *BE CAREFUL NOT TO RUIN THE THREADS THAT THE AXLES SLIDE INTO!* Turn it over and do the same thing to the other side of the joints. 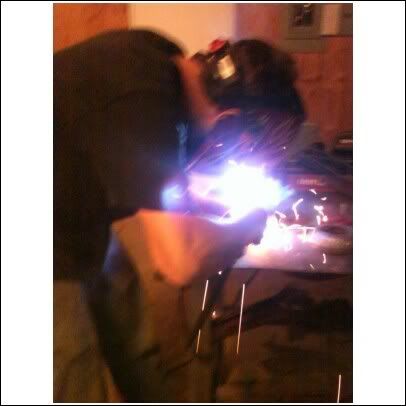 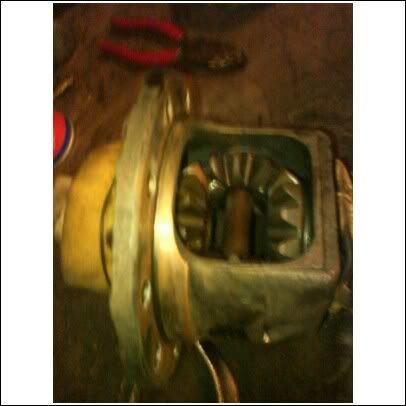 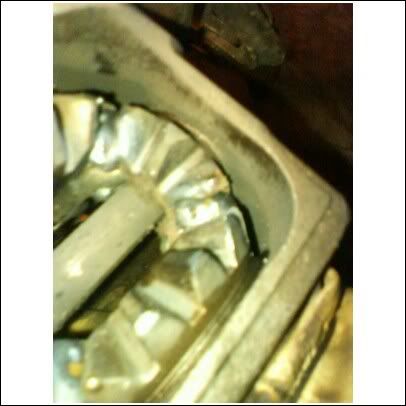 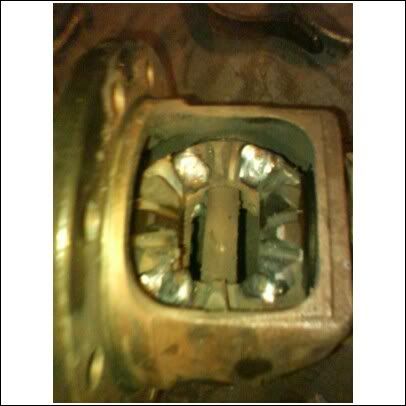 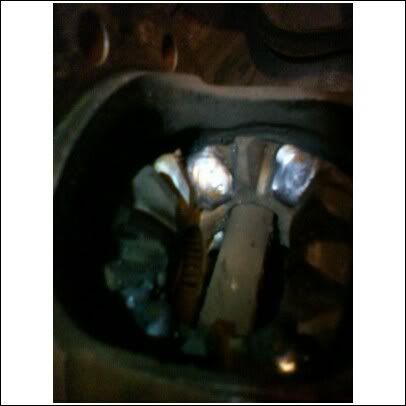 Some of those as you could probably tell are during pictures. Some of those as you could probably tell are during pictures.10. You need to get rid of all the little splatters in the assembly so they don't break loose and get in your bearings or between gears and mess something up. I reccommend getting it sand blasted. This is what it looks like after sand blasting. 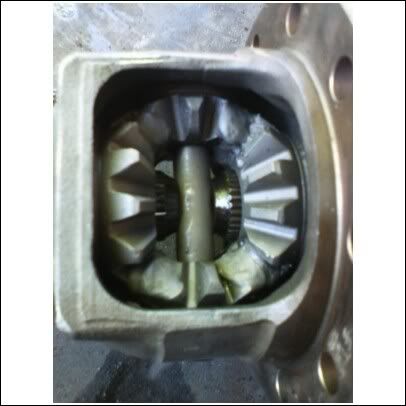 11. Assemble all of your parts, organize and clean them. 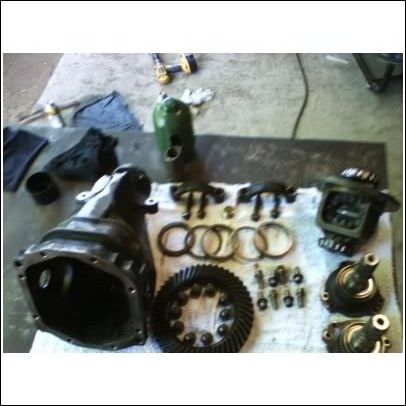 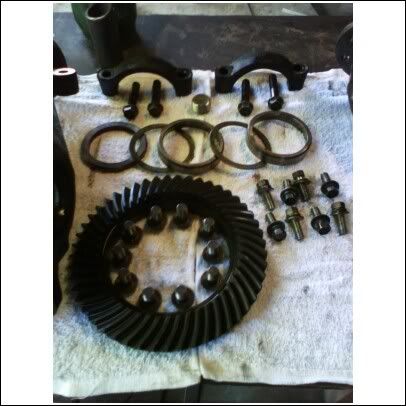 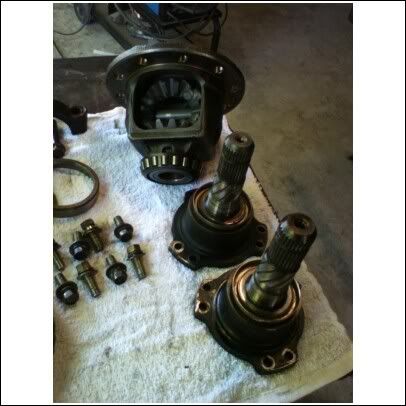 12. Follow the instruction backwards and put it all back together. You need to put medium grade loctite on your ring gear bolts and the 2 main bolts holding the assembly into place. Don't worry about lubing quite yet. 13. Follow the torque specs for putting it all back together. I called my local pepboys then went down and got a print out. 14. Make sure to stop by nissan and get a new gasket, and use your gasket sealer! 15. Finally, use 80-90 gear oil at least to refill your new welded diff. Everything is sealed and self lubricating so, fill and put the fill bolt back in and you're off! |

|

|
| Sponsored Links |
| Bookmarks |
|
|


 Threaded Mode